Casting with Ecoflex silicone and other questions....

I am also having a small bit of brain trauma over this LOL...i understand the concept of a 2 part mold...foaming the face and back seperatly....then what is a good adhesive to put the two together to make a core?....and is there a way possible to get the foam to "shrink" a little as the one inch clay layer between the foam core and the mothermold negative seems to be a bit too thick for the silicone to set into....maybe I am looking at this too logistically? Seems the head itself would be a bit bigger than normal? Also is 10NV a good silicone to use for things like masks/head props?

Hi birddog316! I'm going to make a few suggestions which have been very helpful for me in trying to learn.

SmoothOn has a customer service phone line or email you can use to ask the company questions about the best product for specific projects. They have been great in helping me pick the right options for what I am doing and can explain the pros/cons of different products. This has saved me a lot of frustration, time and money.

The Stan Winston School of Character Arts has online course videos you can purchase or watch with a subscription. There is a recent 3 video series covering Silicone mask molding and casting that is fantastic. There are also courses on platinum silicone painting and patching that were very helpful to me. I really appreciate how these videos take you through the process in real time so you can see how skilled people actually do the work rather than people just describing how they did something.
 
Alright please tell me how you got those Joker eyes in there so perfect? I've recently made the transition from resin busts to silicone and its such a different animal.
 
Alright please tell me how you got those Joker eyes in there so perfect? I've recently made the transition from resin busts to silicone and its such a different animal.

I didn’t think they were that good to be honest! I just cut the eye sockets out and popped the eyes in. Since that effort, I have learned how to place the eyes into the glove mold to get a perfect seal between eye and lid. It’s a bit tricky but the results are fantastic, I will post a pic tomorrow to show how I do it.
 
I didn’t think they were that good to be honest! I just cut the eye sockets out and popped the eyes in. Since that effort, I have learned how to place the eyes into the glove mold to get a perfect seal between eye and lid. It’s a bit tricky but the results are fantastic, I will post a pic tomorrow to show how I do it.

That would be awesome. Thanks
 
That would be awesome. Thanks

No problem!

First off, I made a glove mold so I didn't have to mess around with any flashing that is left from a two-piece mold. If you use a two-piece mold, then the eyes will be a LOT easier to place but of course, you won't get that nice, clean, flash-free cast :)

I cast with my mold balanced on a large, flat piece of foam with small and medium foam blocks to support and position the mold. This gives me great flexibility when moving the mold into the many angles I need when pouring silicone. So here are a couple of photos of the inside of my glove mold, I initially placed the eyes (Tech-Optics BTW) very carefully balanced in the curves of the reverse eyes of the mold and when I was 100% certain of the positioning, I proceeded to take a small mix of my silicone and scoop some onto a long mixing stick and reach into the area around the eyes and just drizzle the silicone around the eyes, not moving the mold at all - that is stationary on the foam base. Once that silicone sets, the eyes will not move.

IMG_1159.pngimage2.png

As you can see, after a few drizzling and setting sessions, I filled in the face of my mold and then went on to pour a panel into the side for the ears. I used to just slush around the silicone but not, I just pour it in blocks all around, creating a nice thick layer, panel-by-panel. A better method for me. The only irritating thing is the time it takes for the silicone to cure.

So, here are some images of a pull from the weekend, it's raw and untouched, so you can see how it came out.

IMG_1168.png
IMG_1169.png
IMG_1170.png
IMG_1177.png
IMG_1171.png

Compare this to one that I cut by hand, without placing the eyes into the mold...

IMG_1172.png
IMG_1173.png
IMG_1175.png
IMG_1176.png

The results speak for themselves!

IMG_1179.jpg

One other thing I picked up along the way, when applying the final coat of silicone inside the mold, before filling with foam, I layer cotton wool all the way on the wet silicone, before it dries. When the silicone is dry, I pull off all of the cotton wool I can, which leaves a great mechanical grab for the foam. Much better than the old method I used to use, which was cut pieces of towel.

It seems that I have had a real journey with learning what to do as it seems most people who do this kind of thing are very reluctant to share their "secrets".

If I can help in any way, please ask.
 
Last edited:
No problem!

First off, I made a glove mold so I didn't have to mess around with any flashing that is left from a two-piece mold. If you use a two-piece mold, then the eyes will be a LOT easier to place but of course, you won't get that nice, clean, flash-free cast :)

I cast with my mold balanced on a large, flat piece of foam with small and medium foam blocks to support and position the mold. This gives me great flexibility when moving the mold into the many angles I need when pouring silicone. So here are a couple of photos of the inside of my glove mold, I initially placed the eyes (Tech-Optics BTW) very carefully balanced in the curves of the reverse eyes of the mold and when I was 100% certain of the positioning, I proceeded to take a small mix of my silicone and scoop some onto a long mixing stick and reach into the area around the eyes and just drizzle the silicone around the eyes, not moving the mold at all - that is stationary on the foam base. Once that silicone sets, the eyes will not move.

View attachment 1329630View attachment 1329631

As you can see, after a few drizzling and setting sessions, I filled in the face of my mold and then went on to pour a panel into the side for the ears. I used to just slush around the silicone but not, I just pour it in blocks all around, creating a nice thick layer, panel-by-panel. A better method for me. The only irritating thing is the time it takes for the silicone to cure.

So, here are some images of a pull from the weekend, it's raw and untouched, so you can see how it came out.

View attachment 1329632
View attachment 1329640
View attachment 1329639
View attachment 1329638
View attachment 1329637

Compare this to one that I cut by hand, without placing the eyes into the mold...

View attachment 1329636
View attachment 1329635
View attachment 1329634
View attachment 1329633

The results speak for themselves!

View attachment 1329684

One other thing I picked up along the way, when applying the final coat of silicone inside the mold, before filling with foam, I layer cotton wool all the way on the wet silicone, before it dries. When the silicone is dry, I pull off all of the cotton wool I can, which leaves a great mechanical grab for the foam. Much better than the old method I used to use, which was cut pieces of towel.

It seems that I have had a real journey with learning what to do as it seems most people who do this kind of thing are very reluctant to share their "secrets".

If I can help in any way, please ask.

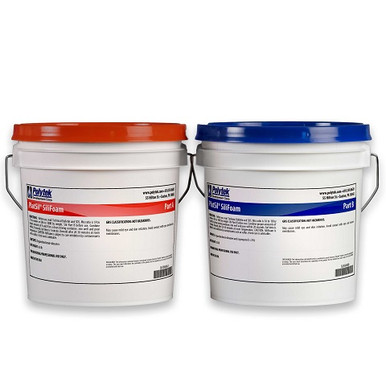
Wow!! Thanks for that. That was exactly what I was looking for. I did my first attempt at silicone casting on a Ben Affleck face but his eyes were closed. Instead of the cotton for the mechanical lock I used Polytek SiliFoam.


Since it was expanding foam made from silicone I didn’t need the cotton. It adheres perfect. My next attempt will be a Bale cast I printed from a scan. Ultimately I’d like to do my Harley Quinn in silicone

Adjustments.jpg


I really appreciate all the tips. Thank You so much
 
My pleasure, really glad to be of some help.

Your Harley is pretty cool, be ready for some challenges with eyebrows and eyelashes though, I am finding it really tough, even though I have had expert advice, I am finding it very hard, I have a shaky left hand which makes it near impossible to punch intricately.

I am definitely going to check out the SiliFoam, sounds like it could be a time saver for me. Do you think it would be okay with Dragon Skin silicone? I don't see why not, as it is also platinum silicone.

If it’s Platinum it’s fine. Yeah I think the scary parts of this whole endeavor is not the casting in silicone, but the hair punching. [emoji15][emoji15]
 
This thread is more than 3 years old.

Your message may be considered spam for the following reasons:

  1. This thread hasn't been active in some time. A new post in this thread might not contribute constructively to this discussion after so long.
If you wish to reply despite these issues, check the box below before replying.
Be aware that malicious compliance may result in more severe penalties.
Back
Top