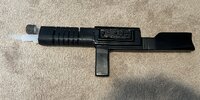
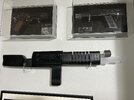
BSG TOS Cylon Rifle Build/Upgrade

Corellianexports

Sr Member
RPF PREMIUM MEMBER
Reference Photos:
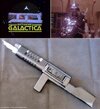
Battlestar-Galactica-Cylon-Rifle-1.jpg

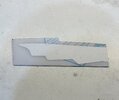
I bought this from an rpf member a few years ago. Unfortunately, the tip of the acrylic bayonet broke off during shipping:

IMG_5228.JPG

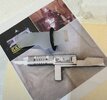
It was suggested that the bayonet was actually made of clear acrylic and then scratched up with a wire brush, so this maybe a good opportunity to swap out the old bayonet with a new, clear acrylic version. Fortunately, the assembly is only held in place with some black, electrical tape, so I simply pulled it out:


IMG_5227.JPG

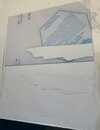
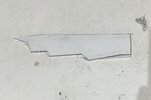
I traced the piece and then scaled up the best reference photo I could find to draw a template for a new one. This is how it looks so far:

IMG_5229.JPG
 
We're lucky enough to have a plastics shop not too far away, so I took some time out yesterday to look through their remnants and found some clear acrylic sheets that were about the right size (around 8" x 2"). The stuff is really low priced. I paid $2.25 for one pound of material.

I thought about something larger than 1/8" (Although the original piece is this thickness) since a typical bayonet is about 3/16" thick, but they taper to an edge and it doesn't look like that's how these were shaped. Also, the sword I just made is 1/8" thick aluminum, so it seems to make sense to stick with this thickness.

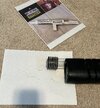
I took another look at my template and realized that it wasn't long enough, so I extended it to the edge of the sheet and marked where the piece extends into the rifle. The template was copied onto a label sheet and then cut out. Rather than just trace it, I simply attached it to the piece of acrylic:

IMG_5250.JPG

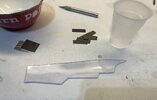
I used a hack saw to cut out the piece. I'll use a mill to cut out the fine details:

IMG_5251.JPG
 
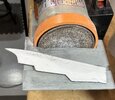
I removed the plastic from one side and then cleaned it up with an X-acto knife. I then took it to a belt sander to help create an arc near the tip:

IMG_5265.JPG

These circular areas are always tough to do.
I used some 220 and 600 grit sandpaper with water to smooth done all of the edges and remove any bumps, etc.:


IMG_5266.JPG
 
To give it an even appearance, I spent a few days polishing the part with some plastic polishing paste:
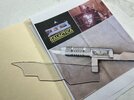
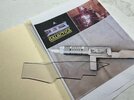
IMG_5268.JPG IMG_5269.JPG

I tried using steel wool on the clear acrylic, but it wasn't applying enough scratches to give it a frosted look, so I went back to using 220 and 600 grit with some water. That gave it the desired effect. I also poured through every reference photo I could find of the original prop, but unfortunately, I couldn't find a good close up of the bayonet, so I started going through the original episodes, including the movie. The best close up I found was in the episode, The Young Lords. Starbuck can be seen holding a "stolen" Cylon rifle in one scene. Dirk Benedict was kind enough to slowly rotate the rifle, giving us a nice look at it. It's probably the best reference I've seen so far. It does look like the bottom edges or points are slightly sharpened to help resemble a knife, which makes sense. There's an almost circular pattern near the very bottom, so I added a slight edge using my belt sander:
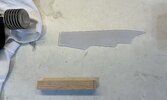

IMG_5273.JPG

Something that was also very interesting about The Young Lords, is that several of the rifles used were missing the bayonets. One actually had a broken bayonet that one of the child actors was brandishing. I think the idea may have been to differentiate the rifles used by the Cylons and the ones used by the rebel good guys. The same thing was done in the previous episode, Gun on Ice Planet Zero.

I was hoping to find a metal clamp of some sort to help keep the plastic bayonet in place, but I didn't find anything in a local hardware store, so after giving it some thought, I decided to use a piece of wood that it could be wedged into. I used a belt sender to angle the end of the bayonet. The wood was left over from my Cylon sword handle. I used a mill to cut a groove into the center of the wood. I started with an end mill that was close to 1/8" and then used a smaller end mill at the bottom of the groove that the plastic piece could wedge into:
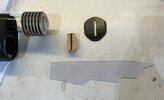
IMG_5274.JPG

Just like a real bayonet, I'm hoping this will be enough to help keep it in place, while having the option of removing it at some point for storage or future upgrades.
I used some contact cement to keep the wood in place. To help get the correct position, I pre-installed the bayonet:
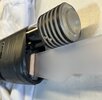
IMG_5275.JPG

Once dry, I'll simply remove the bayonet and then re-attach the black cap. I'm thinking about installing a bolt at the bottom to help keep the wood in place, but I'm going to wait and see how sturdy it is once the glue has dried:
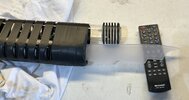
IMG_5276.JPG
 
I couldn't get the acrylic blade to wedge properly so I opted for some clear silicone to help keep it in place. This did the trick.

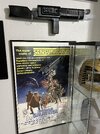
I used a combination of two different, clear acrylic hooks I found on eBay to finally get this prop on my wall. One set of hooks was for a sword and the other for a lightsaber. One of the hooks for the sword would have gone under the bayonet, but I wanted to avoid putting too much weight on it, so I replaced the hook with a hook meant for a lightsaber:

IMG_5326.JPG

IMG_5327.JPG

At some point, I may add some large, blue LEDS to the inside of the rifle because I would really like to see this lit up, but for now, I'm going to just enjoy it as is. :)
 

Your message may be considered spam for the following reasons:

If you wish to reply despite these issues, check the box below before replying.
Be aware that malicious compliance may result in more severe penalties.
Back
Top