Batman, functional '89 belt kit w.i.p.

JOATRASH FX

Master Member
RPF PREMIUM MEMBER
Hey gang,

In the midst of all other stuff I have going on this little project sneaked into the pile. I'm currently building up a Keaton batsuit (my THIRD actually) and I wanted to have a functional buckle. The beautiful all-metal "Henry Wayne" buckle is rare these days (I've owned two, lol) but is pretty heavy. When wearing it, the buckle would kind of "sag" outwards and shift due to the weight. I wanted a more lightweight solution.

So, I turned to my compatriot, the 3d printer, for some help. This actually one of those times when 3d printing the kit will be far superior to casting parts in resin. The parts are intricate and printed pl2000 nylon will hold up a lot better. To make the kit even stronger, I've modeled up the kit to assemble in several layers. The only metal parts in this kit will be a spring for the button and screws to assemble. Depending on how the prototype turns out, I may even print this kit in different materials.

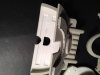
I'm currently waiting for prototype prints so in the meantime, here are some renders of the kit:

bucklerender3.jpg bucklerender2.jpg bucklerender1.jpg
 
I'm down for one!

I actually own a HW one as well.

It looks like you have more attention to detail as the back of your buckle is correct in terms of the original.A+ on that! I cannot tell by the pics you posted how far out your center button sticks. His was too short. It didn't stick out far enough.

Great job, man.
 
Last edited:
I'm down for one!

I actually own a HW one as well.

It looks like you have more attention to detail as the back of your buckle is correct in terms of the original.A+ on that! I cannot tell by the pics you posted how far out your center button sticks. His was too short. It didn't stick out far enough.

Great job, man.

Haha, don't say that until you know what they're gonna cost IF there's a limited run! ;)

But thanks guys.

I think my button sticks out maybe 1.5-2mm further than the HW version. (I don't have one to measure from any longer so I can't be sure.) Making the button stick out more is a very easy fix though so if you want to measure the one you have I can compare the two.

I'll do some measuring. I had a static buckle that was cast off a screen used. I could possibly get the measurements from that.
 
I have access to one of those as well.

I got some parts in yesterday but due to a couple mistakes I made with clearances I might need to have a couple things reprinted.

I'll do some measuring. I had a static buckle that was cast off a screen used. I could possibly get the measurements from that.
 
Working on the prototype a little today. I need to do a few tweaks but I THINK it just might work. Here are some photos.

Several layers to be glued together for strength.
bb1.jpg

Button mechanism (button, lower latch and guide piece. Screwed together.)
bb2.jpg

Everything is designed to slot together easily.
bb3.jpg

Test fitting the buckle closed.
bb4.jpg

A channel between the two layers will house a thin metal bar. Since all the strain of keeping the buckle closed is in this area I wanted to make sure it had extra strength.

All the parts laid out (except the button assembly, which I didn't want to disassemble again.)

Slot for the belt strap. Note the two pegs that will go THROUGH the strap to hold it in place.
bb6.jpg

bb7.jpg

More updates as I have them. This isn't top priority right now as I have to finish my Dredd build but since the parts came in I just couldn't resist playing around with them a bit.
 

Attachments

  • bb5.jpg
    bb5.jpg
    193.3 KB · Views: 178
Last edited:
THat's looking really nce. The spot for the metal bar is a great idea.

I've been dying for a functional 89 buckle ever since the Henrywayne buckles fell through. So heartbreaking.
 
If I remember correctly, several years ago HenryWayne had made a good run of functional metal buckles through a factory in China but when they arrived they had been packed with slightly wet paint and the finish was marred. He sent most of them back to be repainted and kept only a handful of acceptable buckles. The ones he sent back were never seen again and Henrywayne got discouraged and fell out of the hobby.

This is all from memory but it went something like that.

Only a dozen or so of Henrywayne's run of all metal buckles exist in the wild now. Rare stuff!

Pretty wild that I've managed to have two of his buckles in my possession, then. I remember him talking about doing a new run a couple years ago but it never happened.
 
Aaaaand update time!

Here's a video of the buckle prototype in action. Please excuse the half-finished paint job (the paint I used was spoiled). Also, a couple small details are off since first priority was to make it functional. Since the paint isn't done yet, I have not greased the mechanism, so the button sticks a little sometimes but that will go away when it's done. Currently you also need to hold the button when locking, so that's another thing that needs to be added.

(Note: looks like I will do a limited (10-15 or thereabouts) run of these as kits. They will not be inexpensive (or super-easy to build) as each piece needs to be a 3d printed master for it to hold, but when it happens I'll put up an interest thread in the JY.

Next step is to incorporate my tweaks into the master file and make another. Stay tuned!
 
Last edited by a moderator:

Your message may be considered spam for the following reasons:

If you wish to reply despite these issues, check the box below before replying.
Be aware that malicious compliance may result in more severe penalties.
Back
Top