DarkTime
New Member
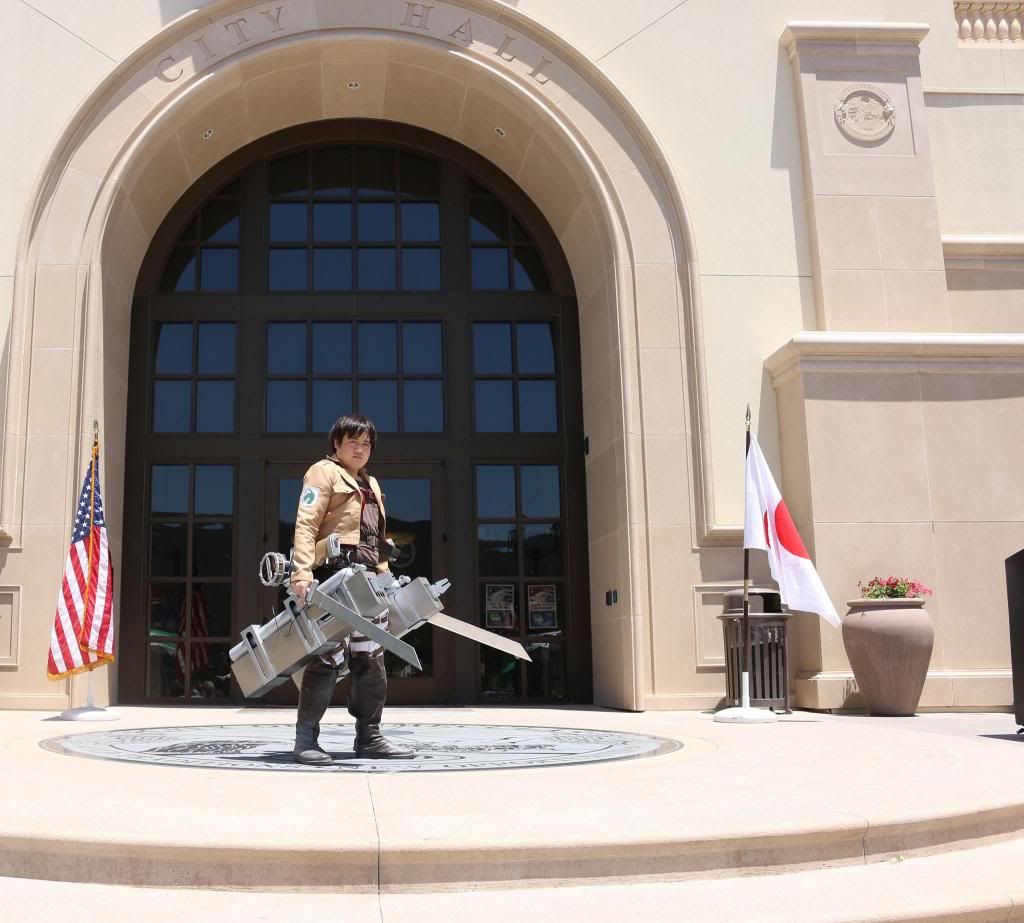
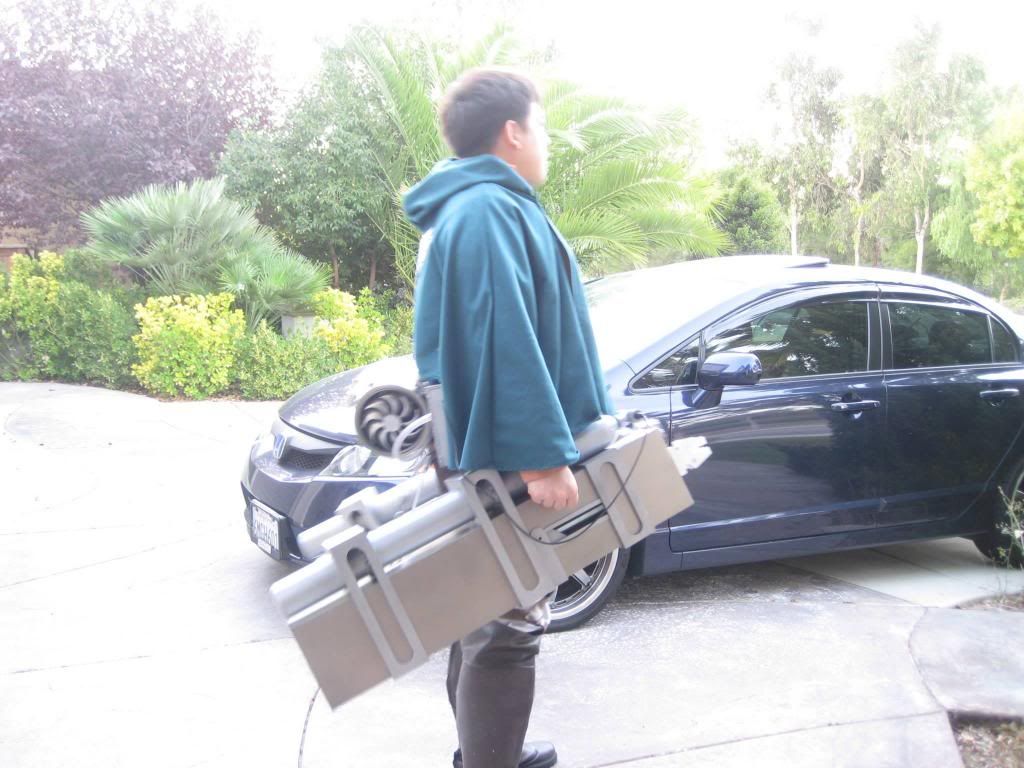
Update 5/22/2014: Posted high quality pic of me wearing it in its most recent version.
Update 5/23/2014: Posted more legible measurements in the parts kit pic.
So I noticed there isn't much AoT stuff here on therpf, and I need some motivation to keep myself working on this so I'm going to log my build here. Also, this is my first post.
A little disclaimer though: I'm still very new to prop making, and this is only the second prop set I've worked on. The very first one I made was actually the manga version of the gear. This will be the anime version build. I feel the need to say this since this forum is teeming with pros, and I'm only here to fill a gap. Also, to give back/for anyone who might learn/reference from it. I actually extensively googled this website to learn 90% of what I know, the rest from a bunch of other forums like 405th, mandalorian mercs, etc. So I'm super thankful for this site and its community for having so many resources and helpful members to give me a good jump start in prop making.
Update 5/22/2014: This is how awesome you should look when you're done with it!
With that said, here comes the log/build. I started around October and work on and off on it. I tend to make lots of progress right before conventions though :lol. Definitely can do it faster.
Checking the size. Proportions are a pain when making AoT stuffs because even the source material is inconsistent. I made my first set of gear with limited references (currently aired episodes back in April and coinciding manga chapters) as to avoid spoilers when searching for images online. As a result, it ended up looking a bit too tall.
Dimensions (I'm 5'6" for reference):
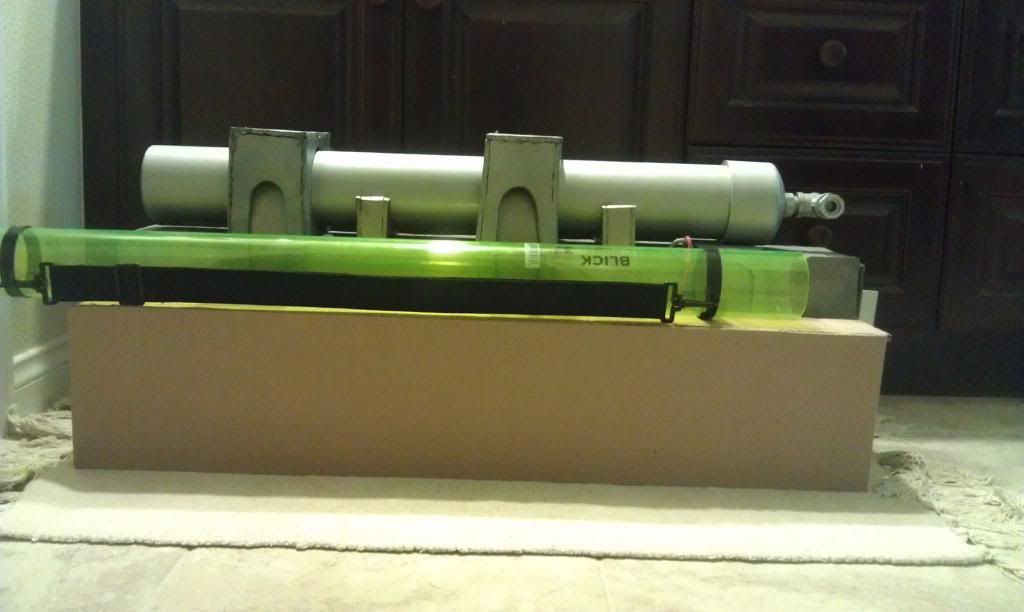
Box measurements (cardboard only, no sintra shell yet):
33.25" length
4.25" width
6.75" height
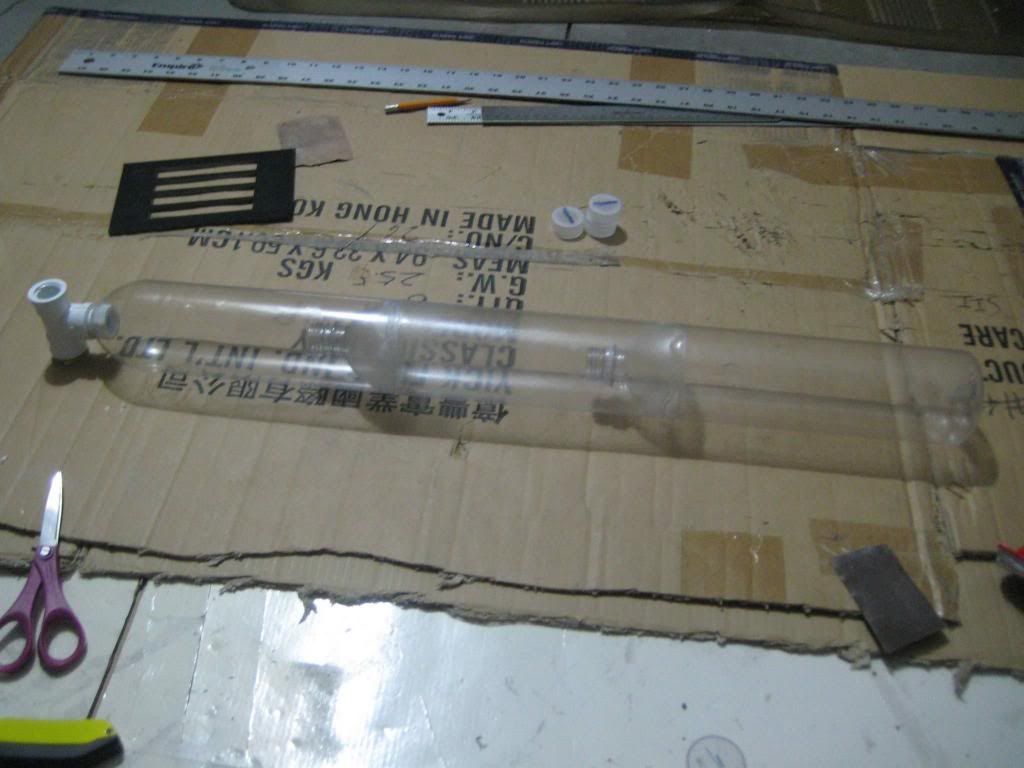
Gas tank measurements (poster tube only, no T valve yet):
2.8" diameter
31" length
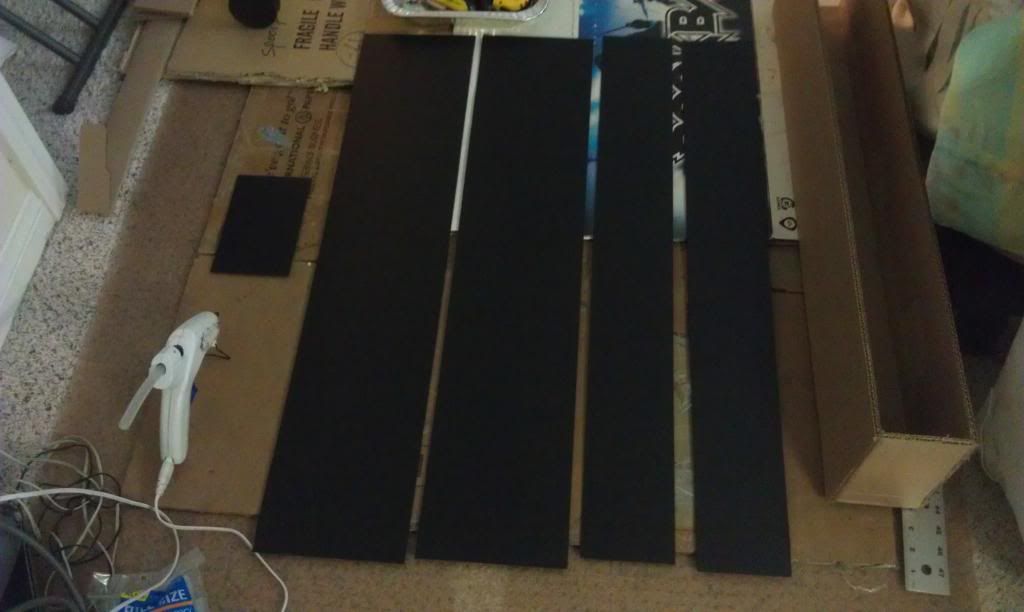
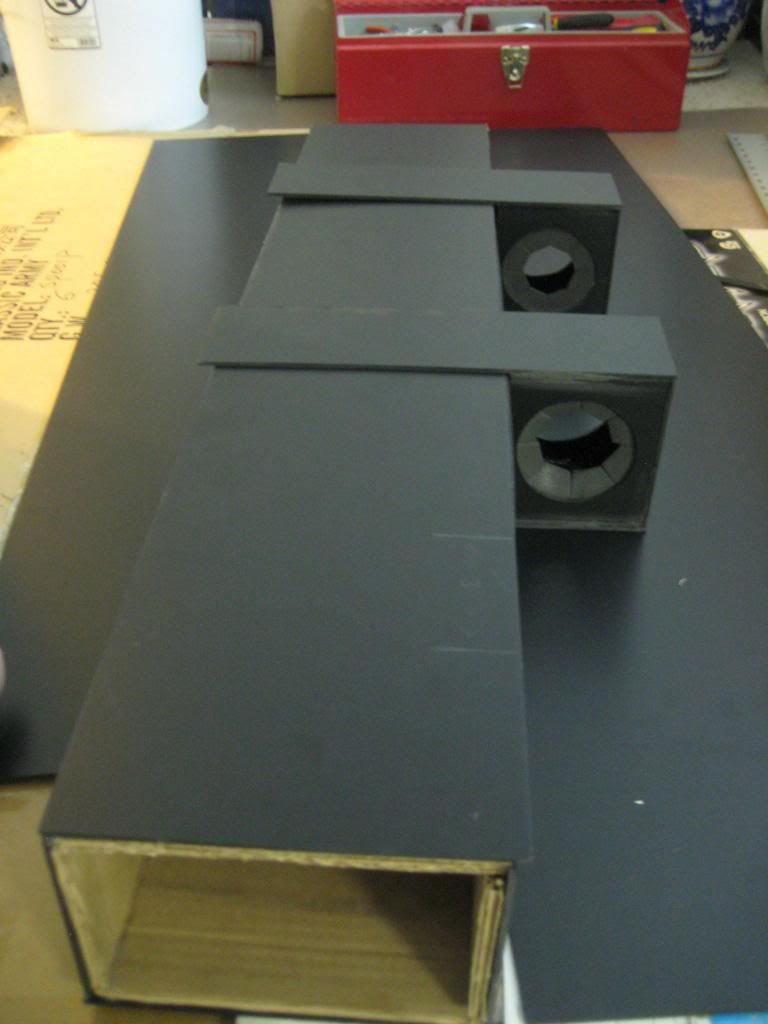
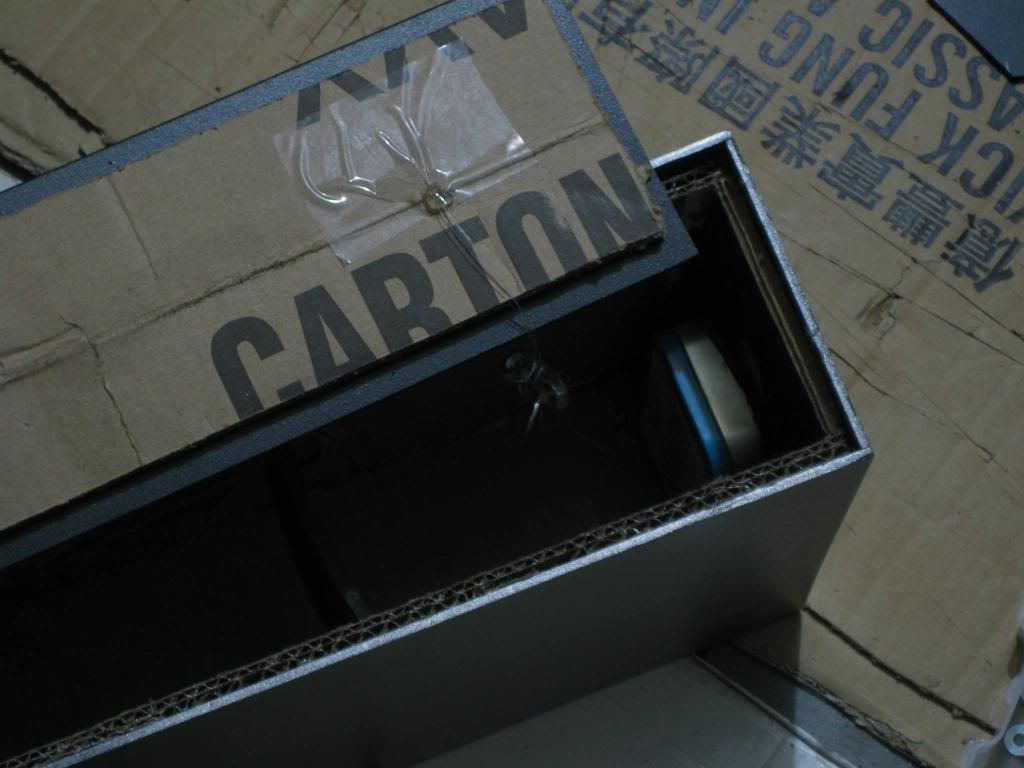
First time ever working with sintra.
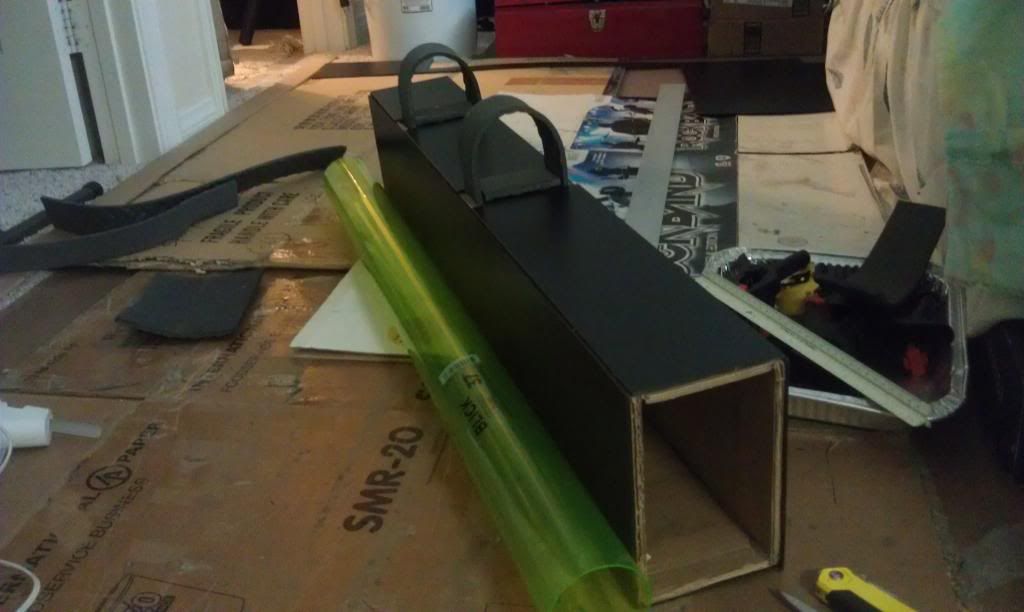
Leaving the top to be removable so I can mess with internals along the way, and seal it up for good when I'm sure I'm done with it.
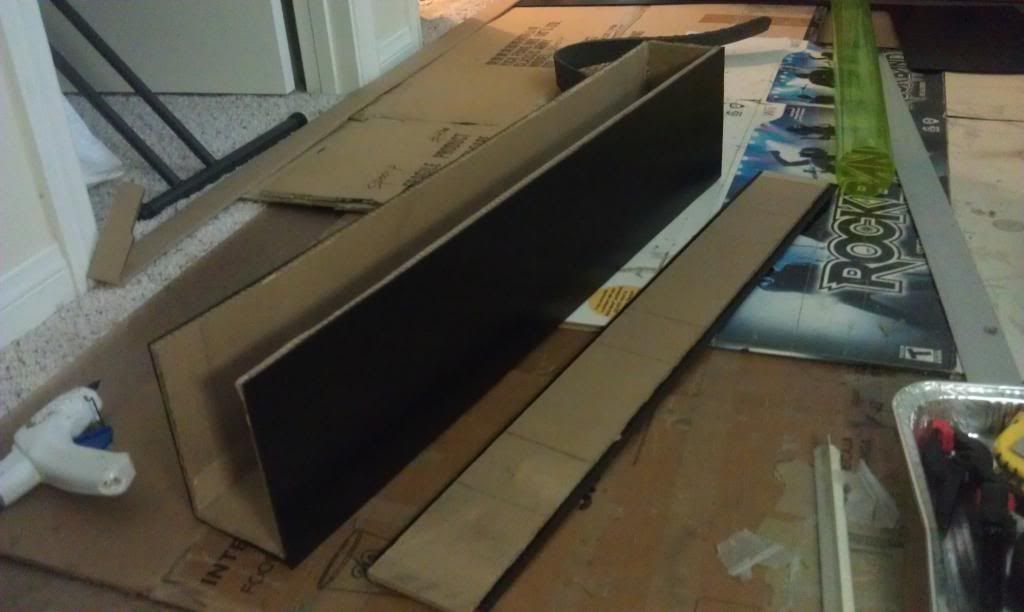
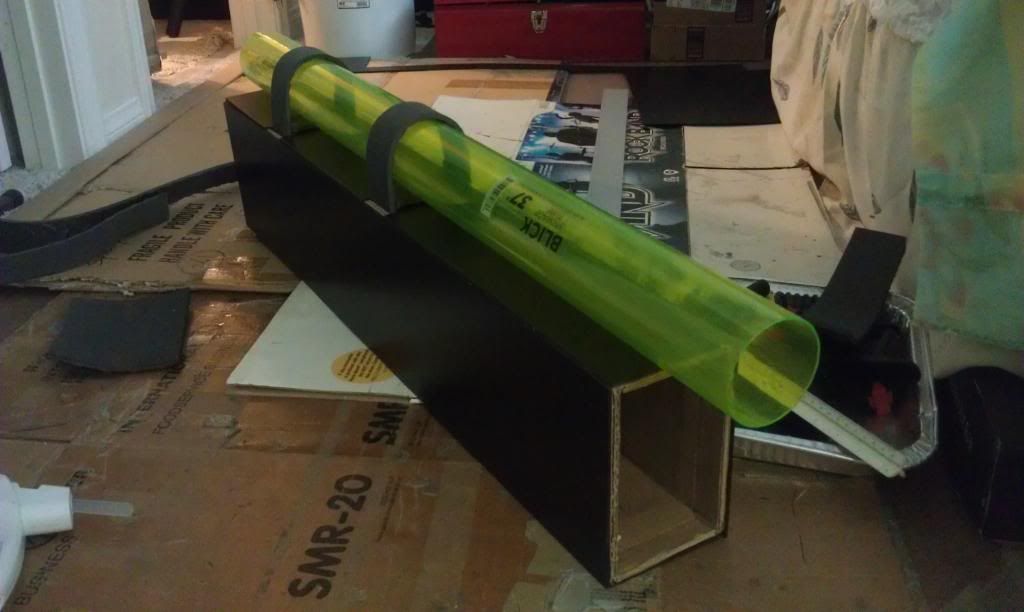
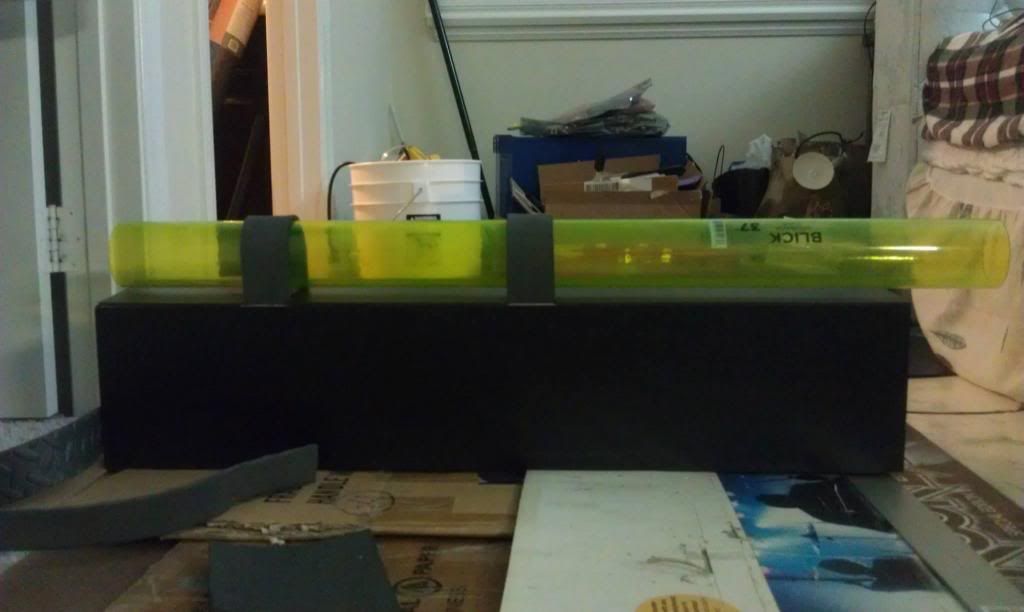
I was gonna use a similar way to put the gas tanks on from my previous gear i.e. slipping them through foam loops.
But then I figured the paint/finish would look different through the brackets, so I decided to can the idea and re-did the top. It looked fine in my previous one since it was all foam, but sintra/foam would look too noticeable I thought.
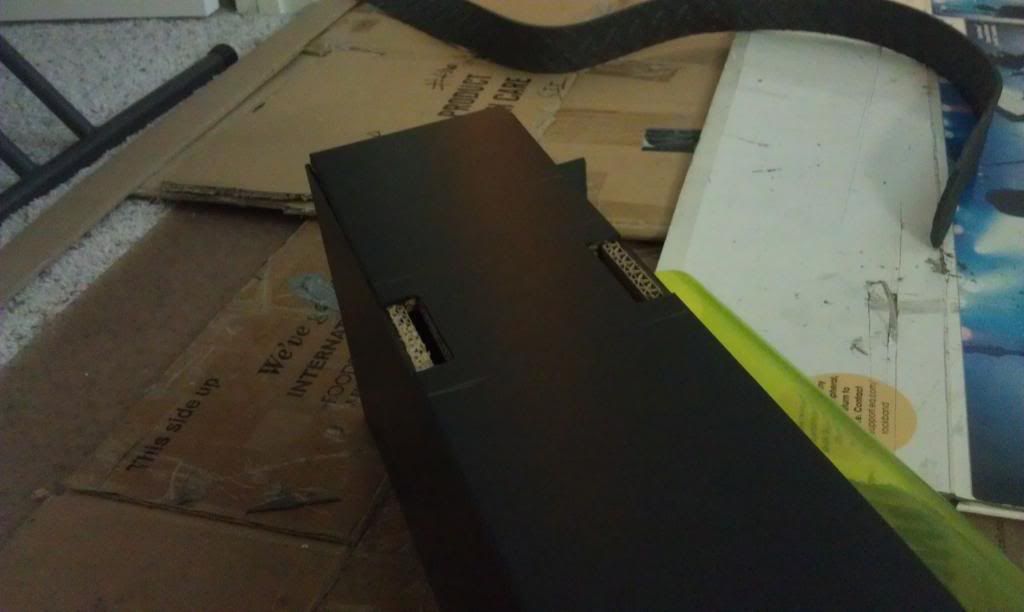
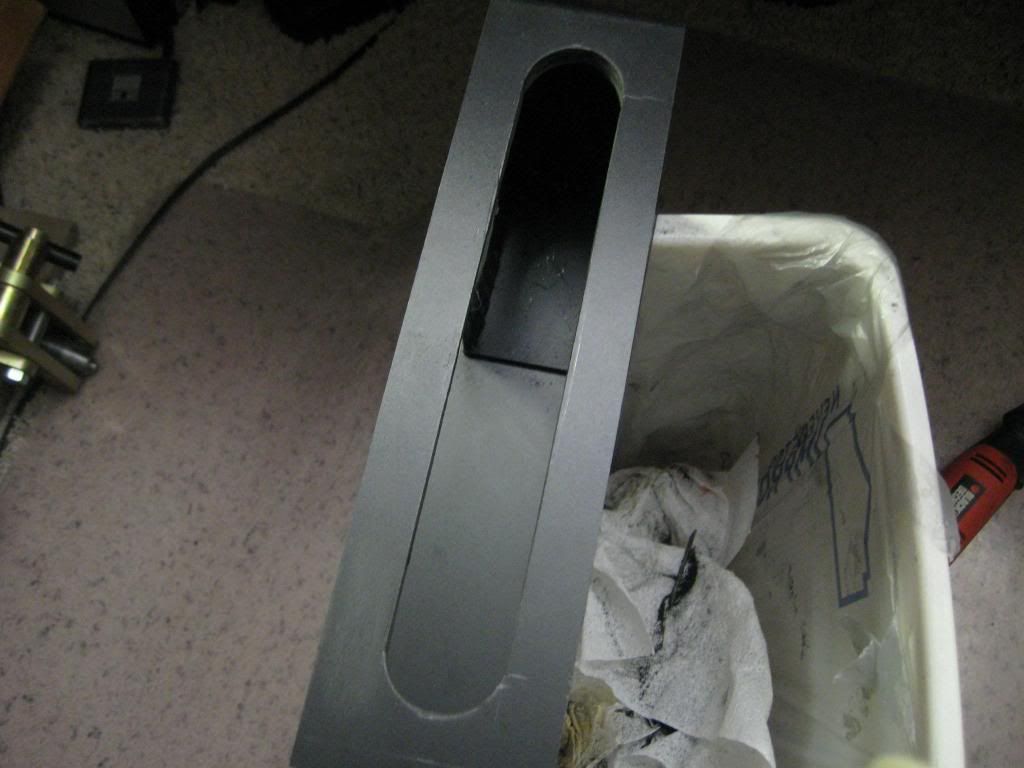
Side view. I suppose if you want to do this "band" style that I see some people do, there it is. I don't think it's accurate so I decided to can it, but it's durable, works, and easy.
Did a pizza-cut style hole. It was too long, and can be seen through the sides of the brackets, so I shortened it. Still visible, but not noticeable.
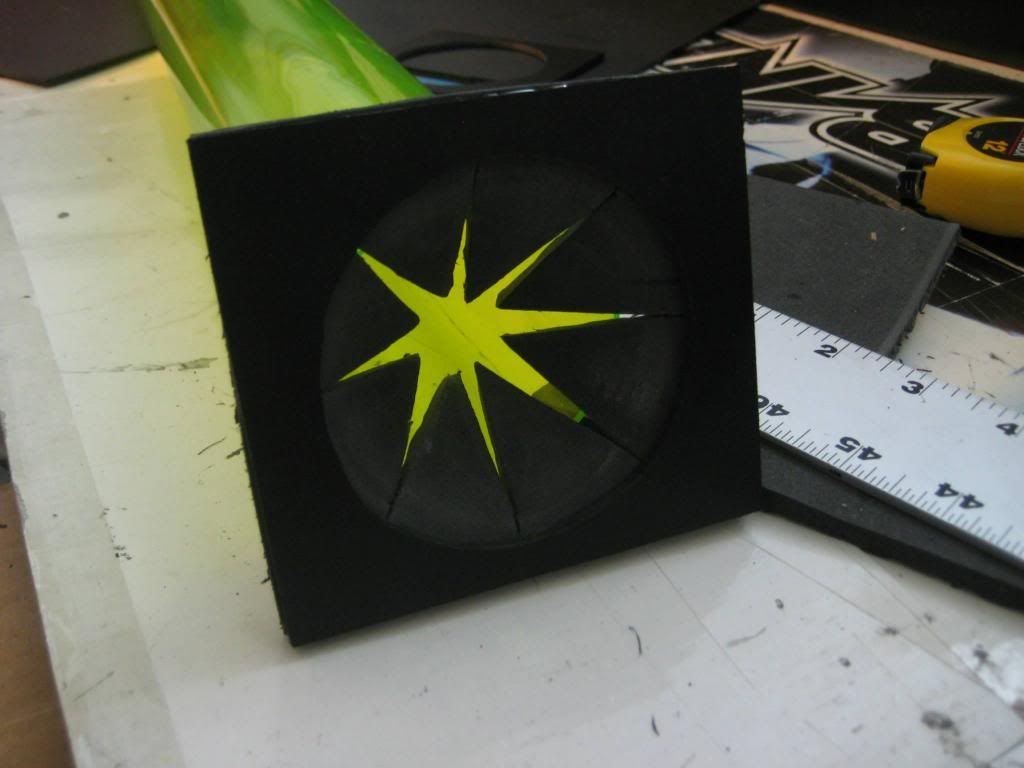
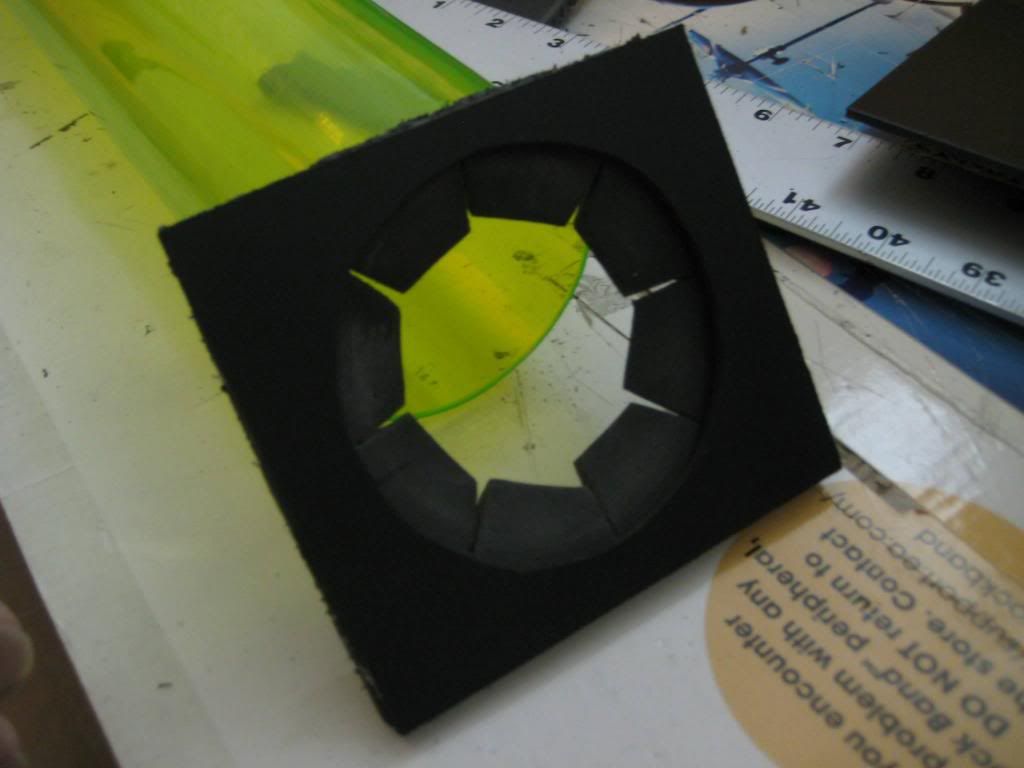
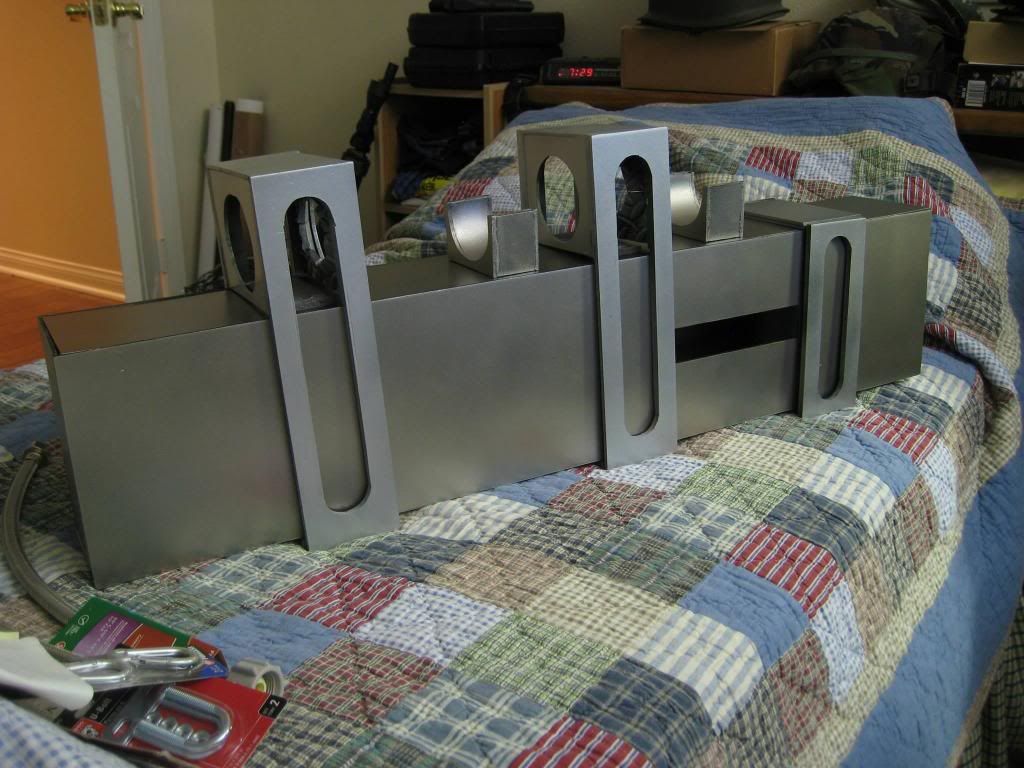
Test fitting. Slips on and off like the source (as far as I've seen).
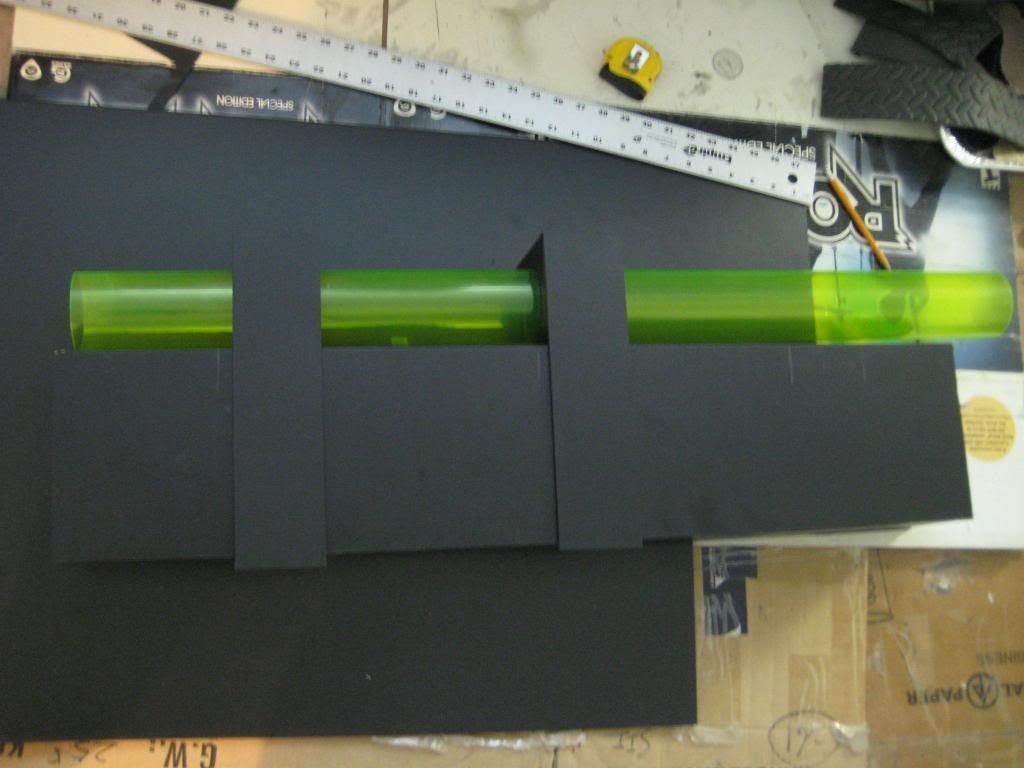
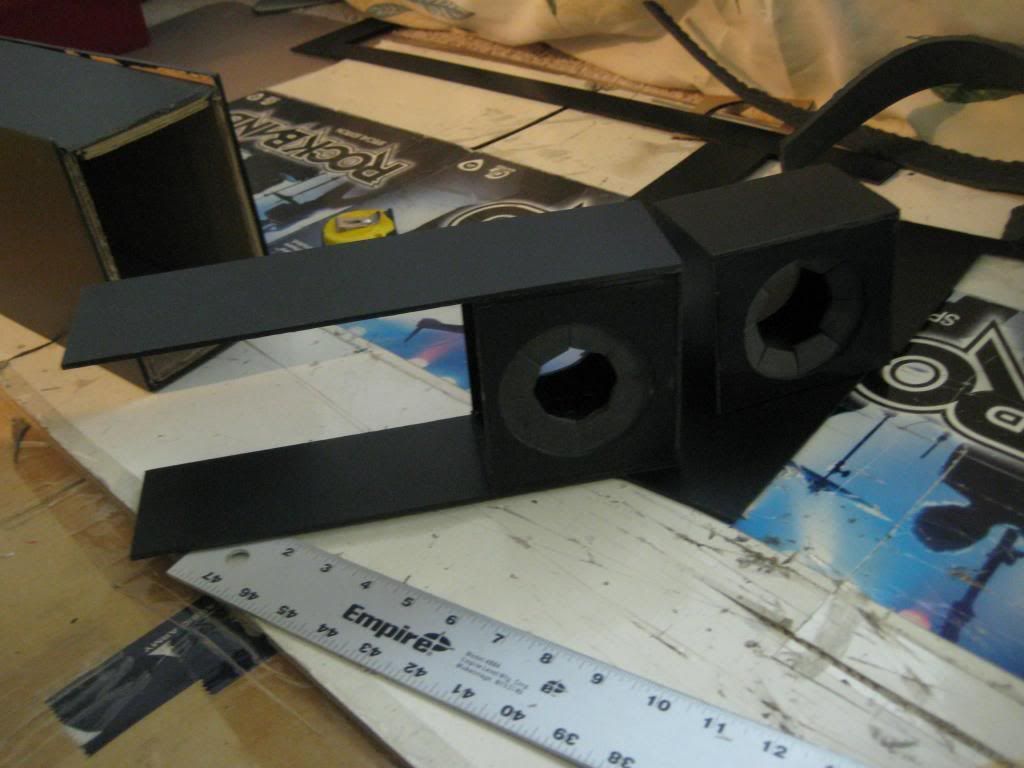
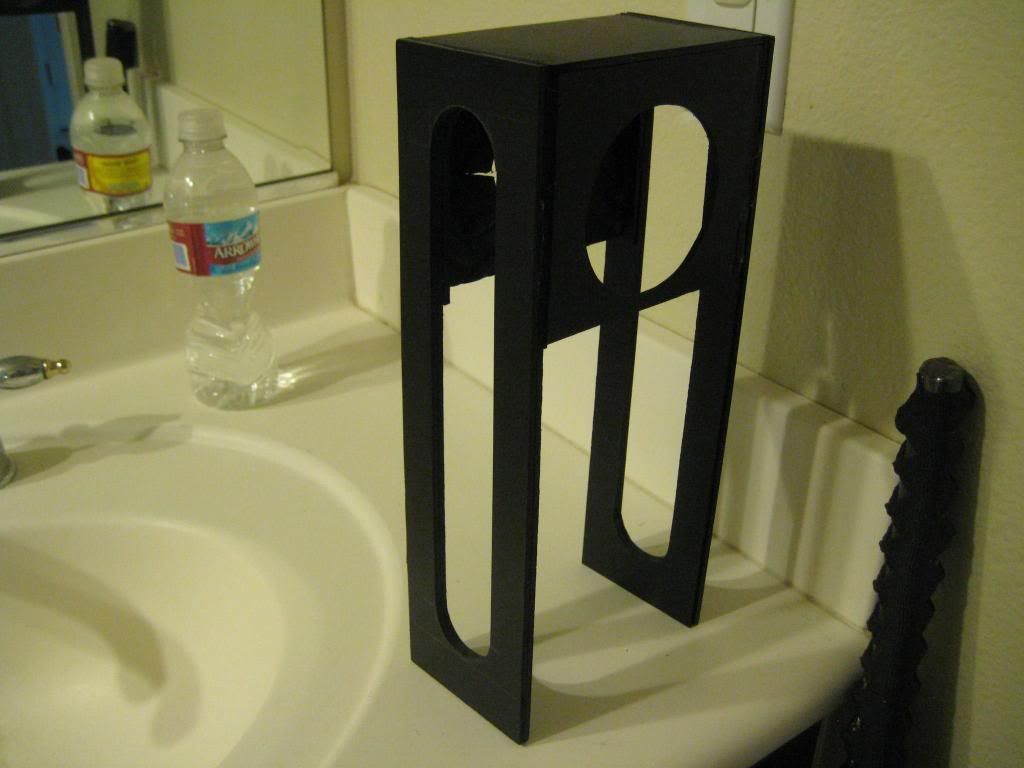
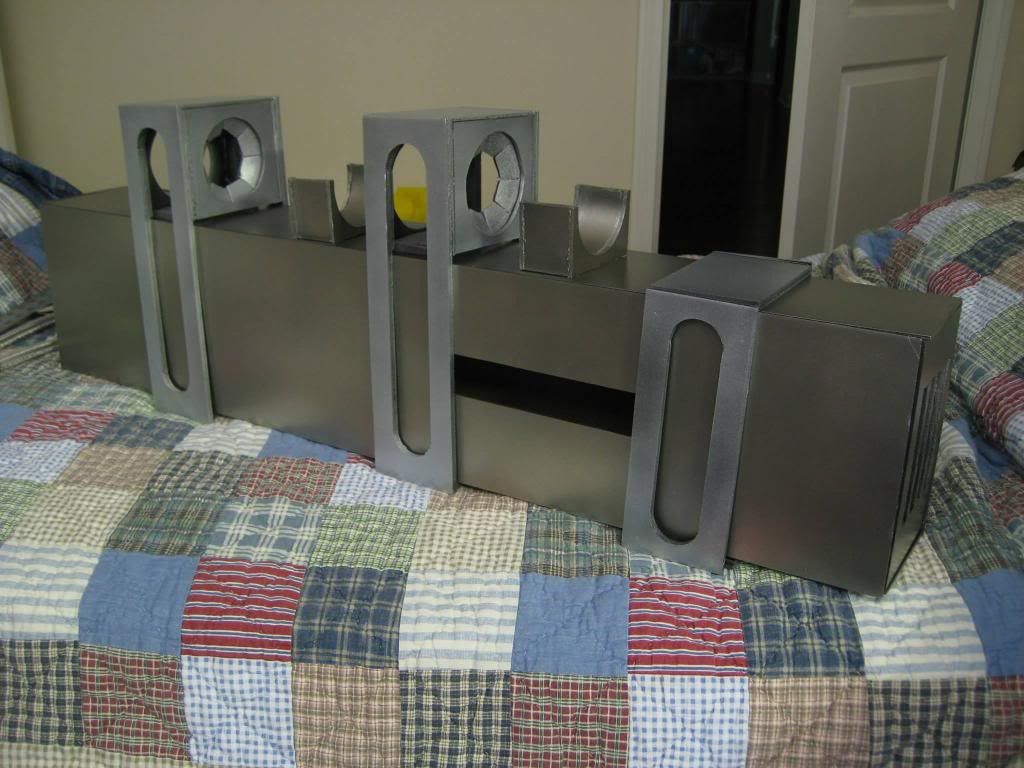
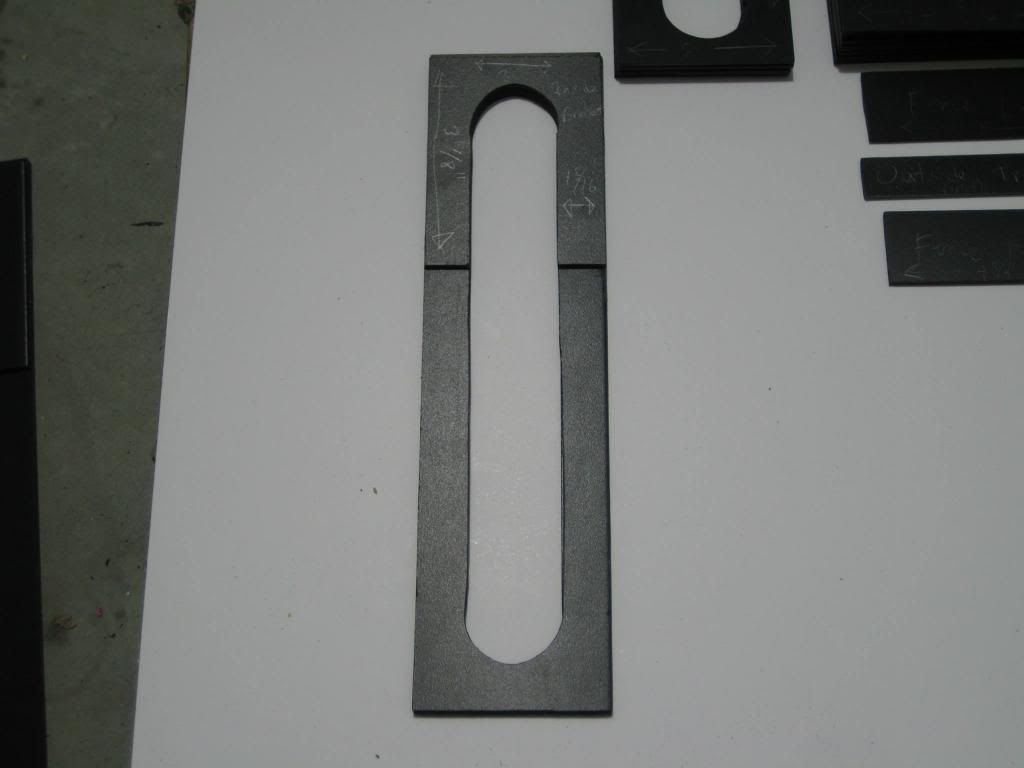
Brackets. All my sintra is 1/8" so I had to double up a lot. Next time I'd get some 1/4" also so I don't have to double up and get so many seam lines.
Cutting the bracket sides. I used the bottom of a small tylenol pill container to use as a radius.

Using the rotary tool to cut it out.
Finished bracket.
Painted the pieces and positioning them on/not glued yet.
Paint process is primer, 1-2 coats paint, 2-3 coats clear. I'm on a budget so yeah.
I change up primers since I'm always trying to try new ones. For this I used Krylon grey primer and Rustoleum 2x grey primer.
The silver is Duplicolor Starlight Silver Metallic (Honda).
The sandy metal is Duplicolor Drift Sand Metallic (GM).
I really like these auto paints since it gives it a nice, believable metallic sheen on sintra/pvc. I didn't want it looking flat painted.
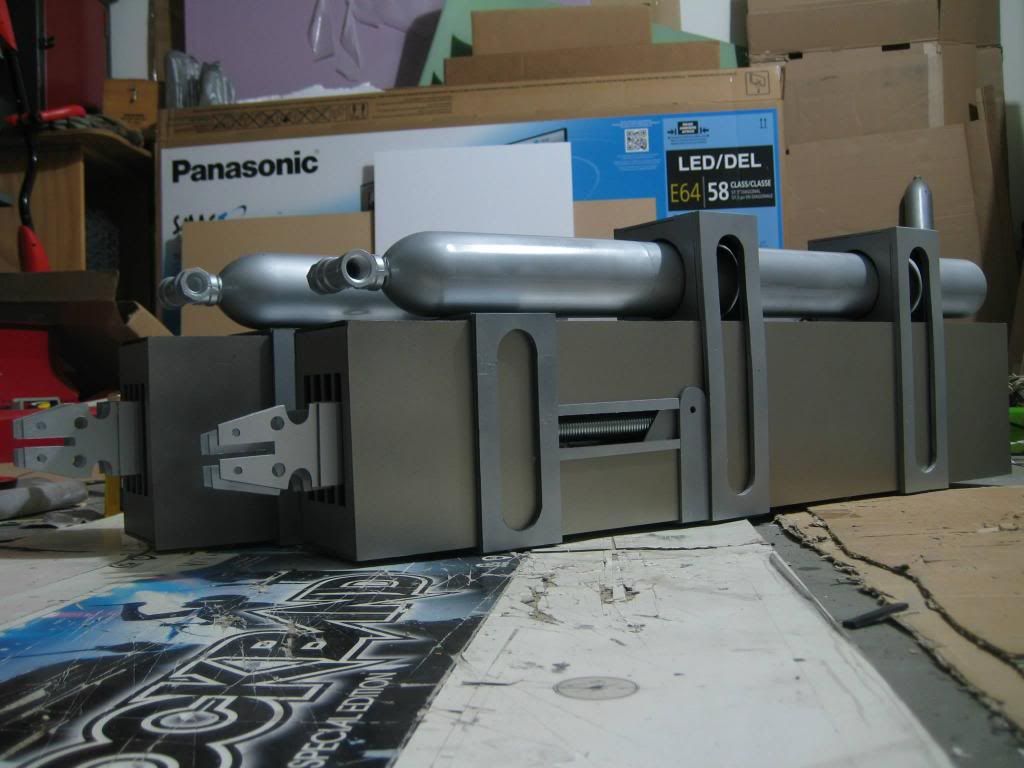
Decided to use water bottles instead of poster tubes for the gas tank.
3 Smart Water bottles (regular kind, not fat or sport nozzle kind) cut to ~31" total when glued together.
Cut off the threaded top with a PVC pipe cutter, replaced with a threaded PVC cap hot glued from the inside so it's "standard" with other threaded PVC stuff.
I kind of do a time skip here since I was in a hurry for a con.
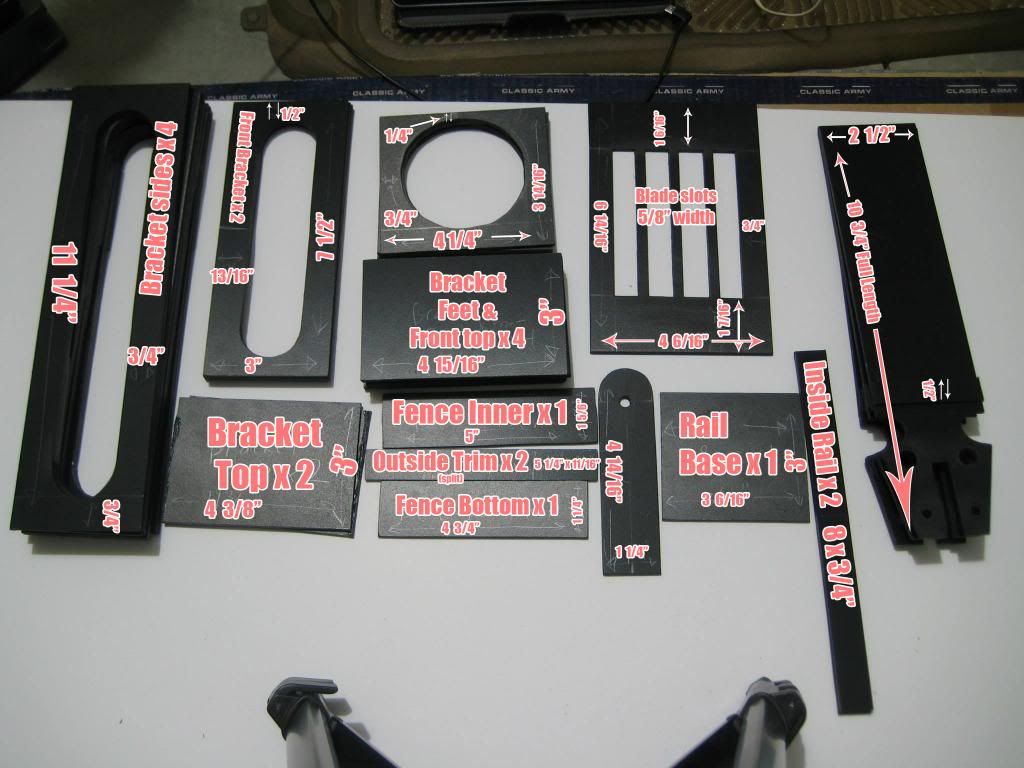
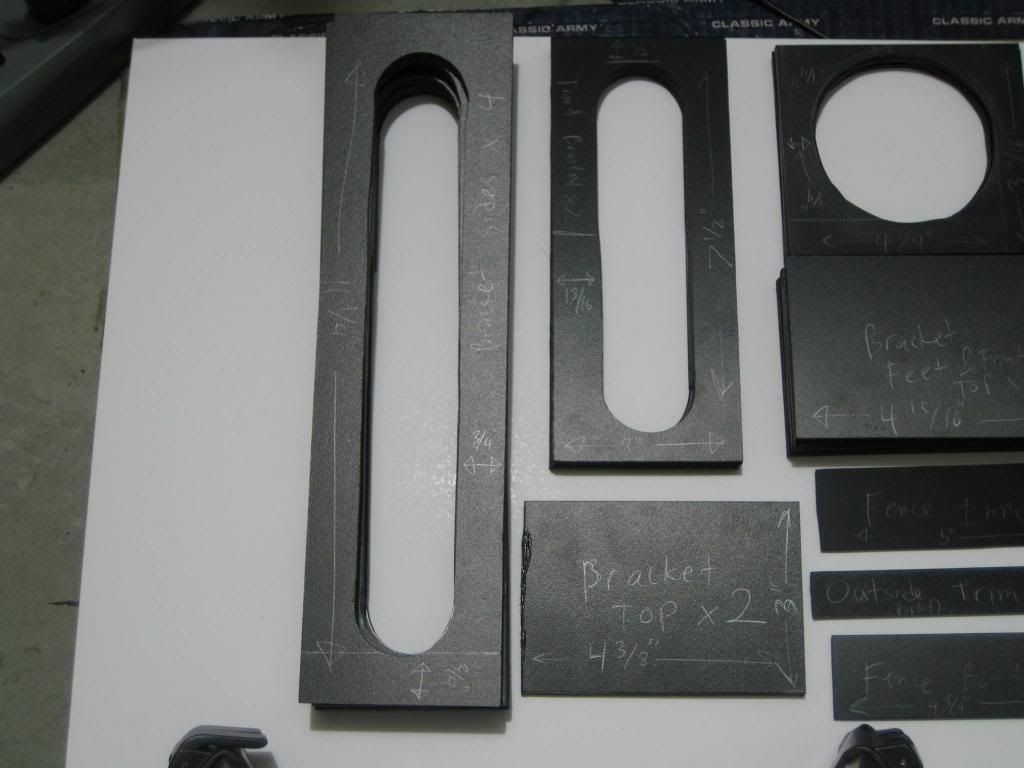
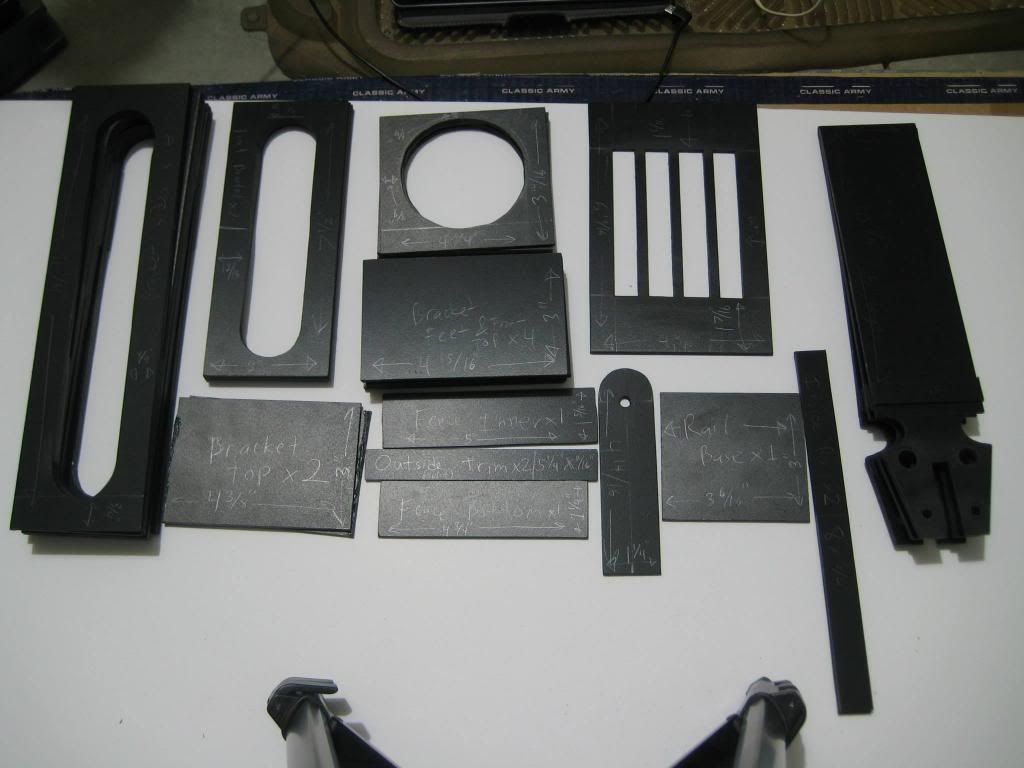
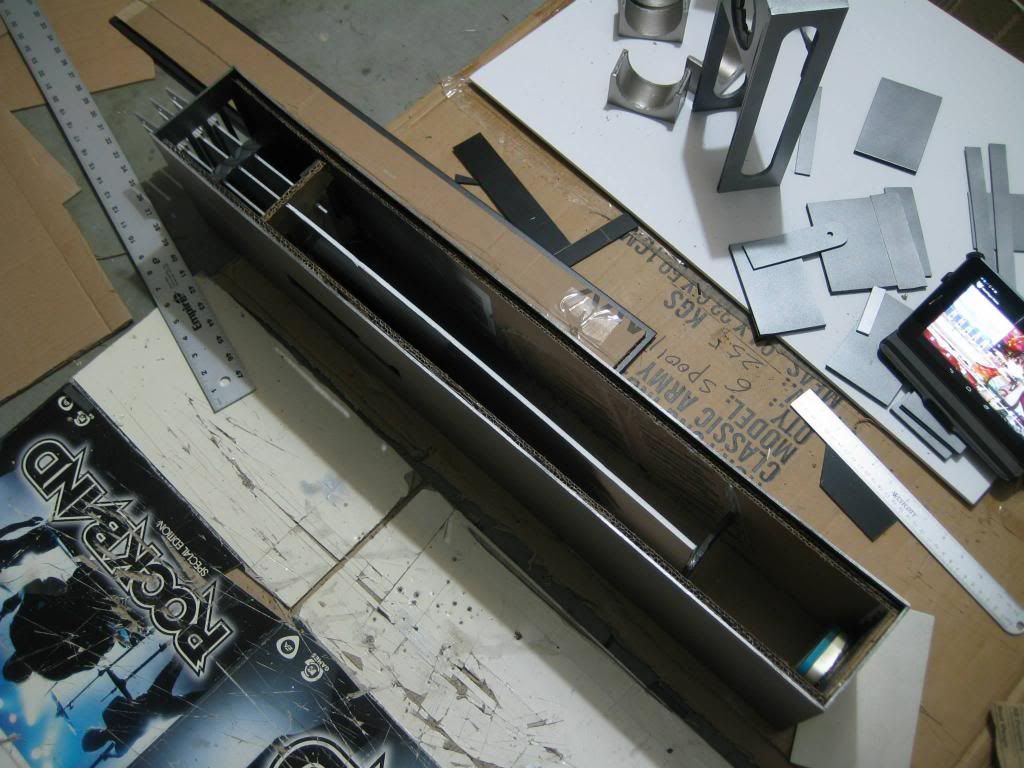
After finalizing the first box, I duplicated all the sintra pieces and basically have a parts kit.
Dimensions are written on them for reference for myself or anyone curious.
Update 5/23/2014: Posted more legible measurements in the parts kit pic.
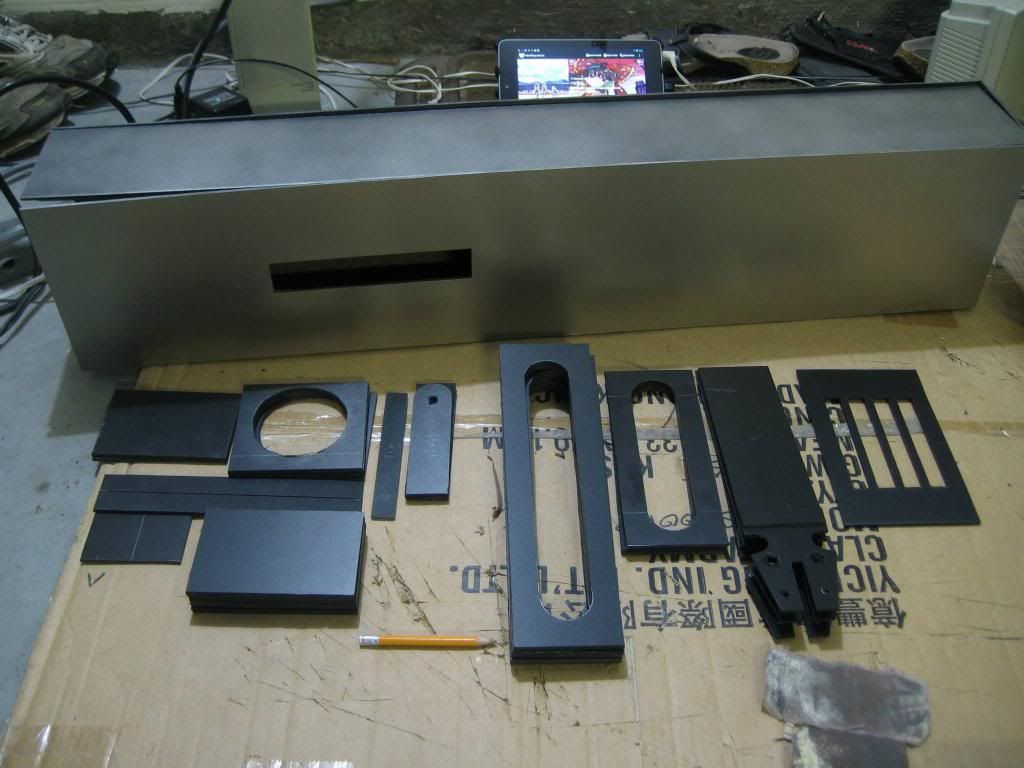

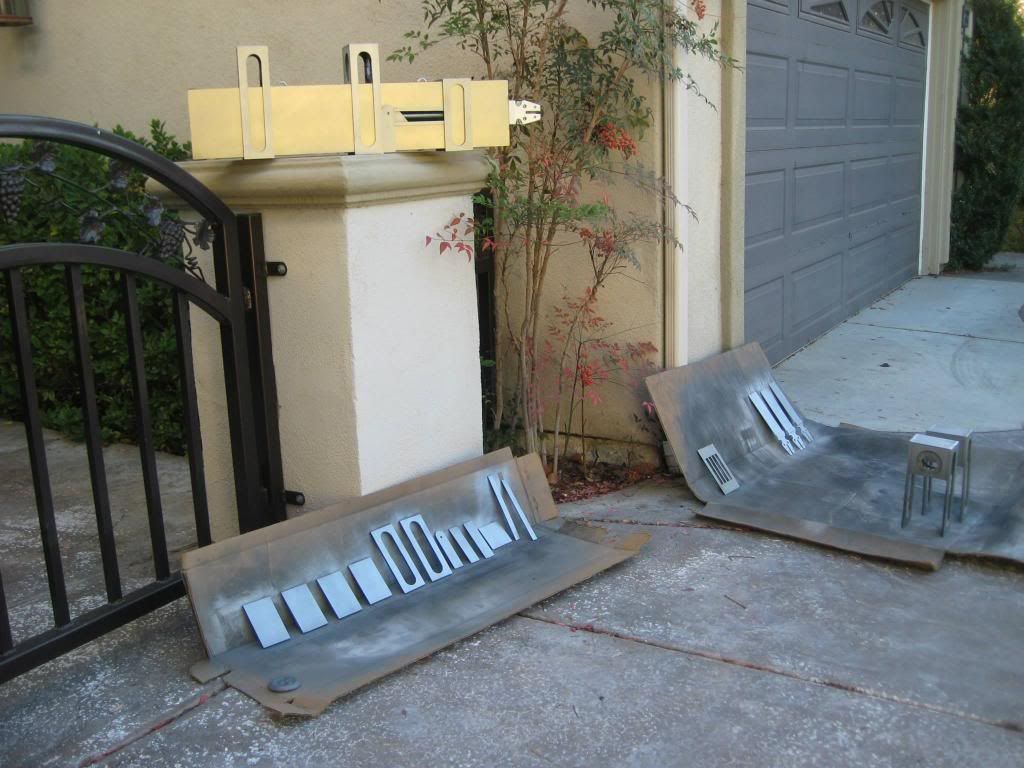
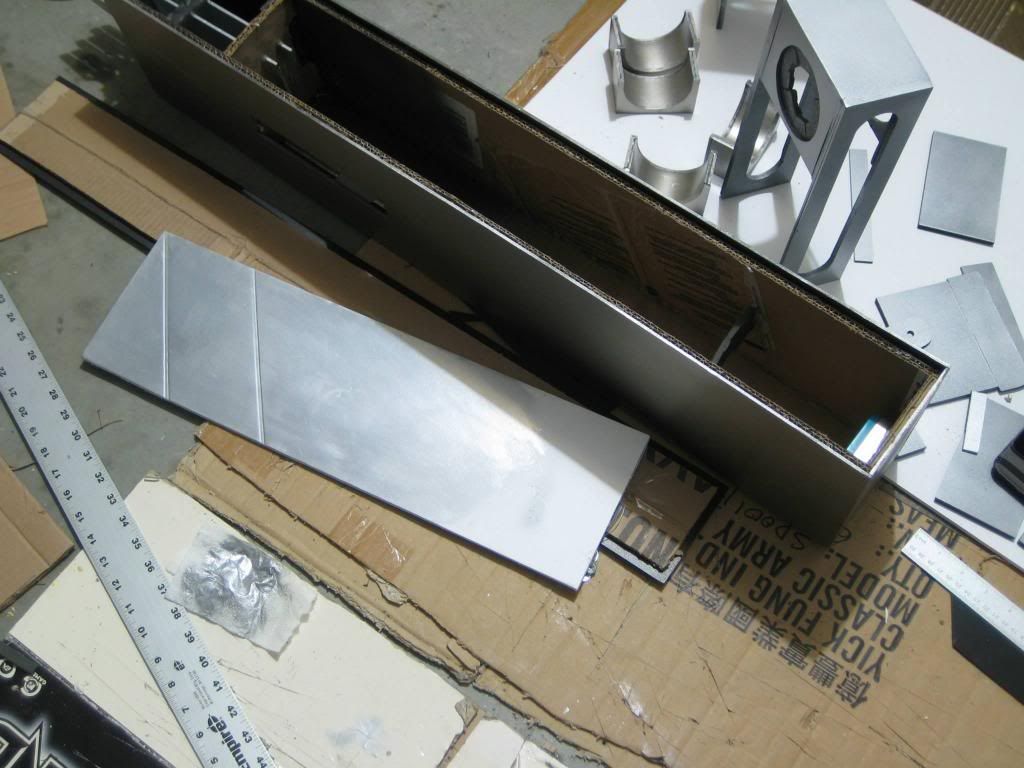
Painting second box pieces. Complete first box on top.
Finishing up innards so I can close them up. The piece of foam in the back is the blade stop so I don't sheath a detachable blade too far in.
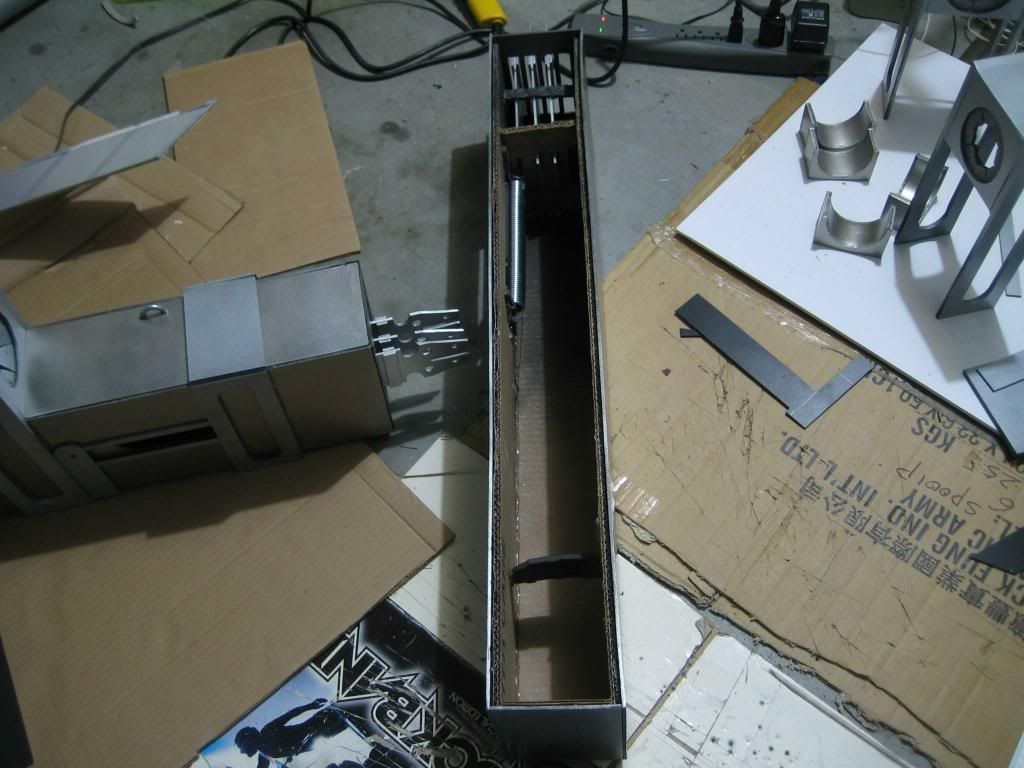
Close up of the front. The spring is a porch spring from Home Depot and comes in a 2-pack iirc. The Lowes ones were too too big or thin or expensive. The discreet piece of foam on top of the fake blades is hot glued on all the blades and into the side walls to keep the fake blades from wobbling around.
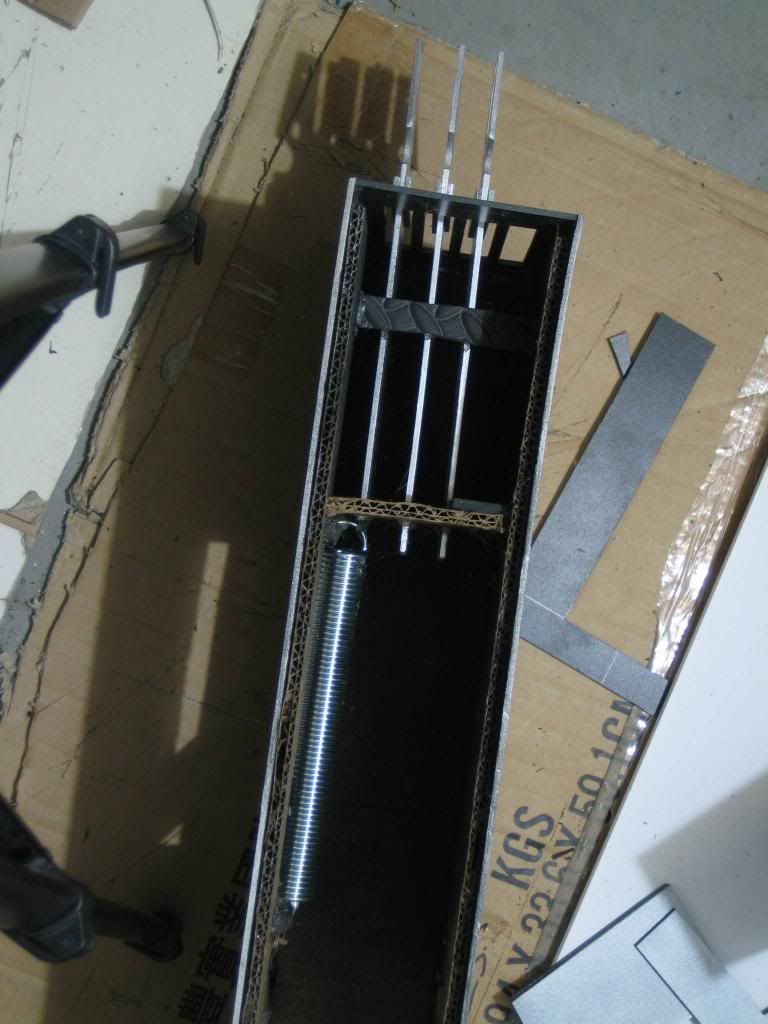
Didn't want just pitch black behind the spring window, so I rub and buffed a piece of foam board with dents to make it look like a spare blade and glued it behind the spring. The dents were made with the big ruler you see there.
Put behind the spring window.
Extra credit: Altoids tin in the back with a bunch of hanging washers and nuts. Results in the same sound heard in the anime when walking with it. Discovered it when I was carrying an Altoids tin in the same pocket as my car keys.
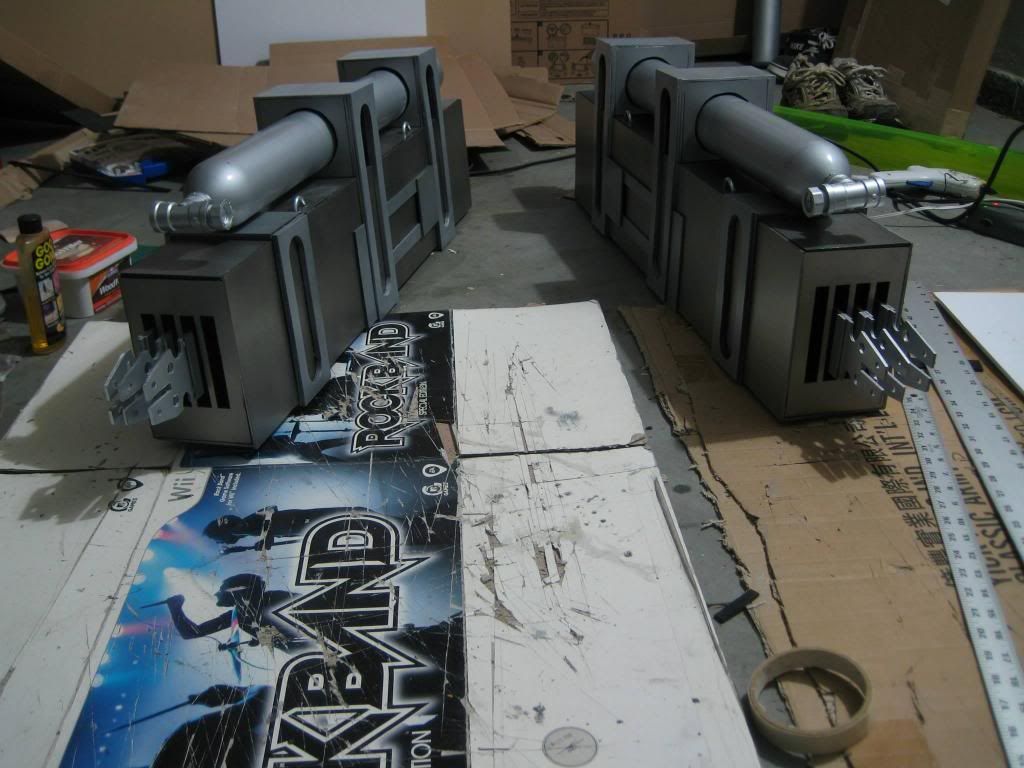
I couldn't use the mini brackets since I heat formed them too tight to the poster tube, while the water bottles were a millimeter or two wider. The fake blades on the right got nudged in the pic, but they're lined up otherwise.
The gas tank and PVC threaded tee were painted with Rustoleum 2x Aluminum, with 2-3 clear coats of Rustoleum 2x gloss clear.
The outer-facing threads don't have caps on them at the moment since I thread on wired ones that connect to the shooters when I put on the complete gear.
Boxes done.
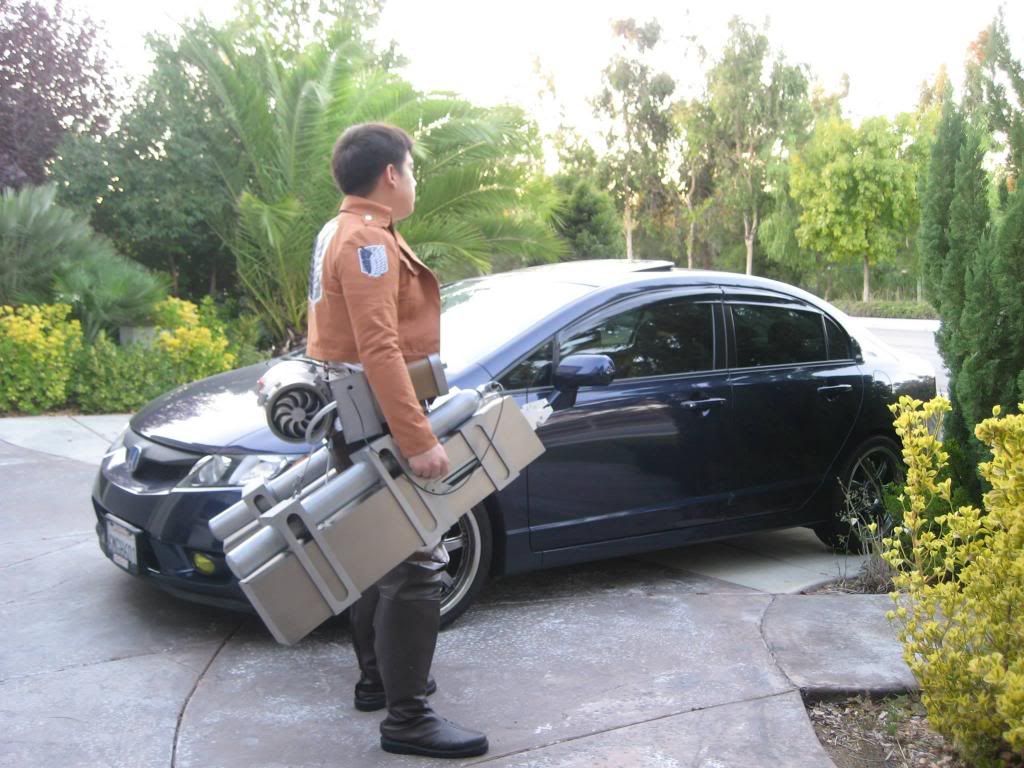
Test wear. Everything else is still manga version.
Have been working on the anime version of the rear core, will post that next. Hoping to finish that by this week for a con. Then finally, the hip shooters and the sword handles.
Update 5/23/2014: Posted more legible measurements in the parts kit pic.
So I noticed there isn't much AoT stuff here on therpf, and I need some motivation to keep myself working on this so I'm going to log my build here. Also, this is my first post.
A little disclaimer though: I'm still very new to prop making, and this is only the second prop set I've worked on. The very first one I made was actually the manga version of the gear. This will be the anime version build. I feel the need to say this since this forum is teeming with pros, and I'm only here to fill a gap. Also, to give back/for anyone who might learn/reference from it. I actually extensively googled this website to learn 90% of what I know, the rest from a bunch of other forums like 405th, mandalorian mercs, etc. So I'm super thankful for this site and its community for having so many resources and helpful members to give me a good jump start in prop making.
Update 5/22/2014: This is how awesome you should look when you're done with it!

With that said, here comes the log/build. I started around October and work on and off on it. I tend to make lots of progress right before conventions though :lol. Definitely can do it faster.
Checking the size. Proportions are a pain when making AoT stuffs because even the source material is inconsistent. I made my first set of gear with limited references (currently aired episodes back in April and coinciding manga chapters) as to avoid spoilers when searching for images online. As a result, it ended up looking a bit too tall.
Dimensions (I'm 5'6" for reference):
Box measurements (cardboard only, no sintra shell yet):
33.25" length
4.25" width
6.75" height
Gas tank measurements (poster tube only, no T valve yet):
2.8" diameter
31" length

First time ever working with sintra.

Leaving the top to be removable so I can mess with internals along the way, and seal it up for good when I'm sure I'm done with it.

I was gonna use a similar way to put the gas tanks on from my previous gear i.e. slipping them through foam loops.
But then I figured the paint/finish would look different through the brackets, so I decided to can the idea and re-did the top. It looked fine in my previous one since it was all foam, but sintra/foam would look too noticeable I thought.


Side view. I suppose if you want to do this "band" style that I see some people do, there it is. I don't think it's accurate so I decided to can it, but it's durable, works, and easy.

Did a pizza-cut style hole. It was too long, and can be seen through the sides of the brackets, so I shortened it. Still visible, but not noticeable.


Test fitting. Slips on and off like the source (as far as I've seen).

Brackets. All my sintra is 1/8" so I had to double up a lot. Next time I'd get some 1/4" also so I don't have to double up and get so many seam lines.


Cutting the bracket sides. I used the bottom of a small tylenol pill container to use as a radius.

Using the rotary tool to cut it out.

Finished bracket.

Painted the pieces and positioning them on/not glued yet.
Paint process is primer, 1-2 coats paint, 2-3 coats clear. I'm on a budget so yeah.
I change up primers since I'm always trying to try new ones. For this I used Krylon grey primer and Rustoleum 2x grey primer.
The silver is Duplicolor Starlight Silver Metallic (Honda).
The sandy metal is Duplicolor Drift Sand Metallic (GM).
I really like these auto paints since it gives it a nice, believable metallic sheen on sintra/pvc. I didn't want it looking flat painted.


Decided to use water bottles instead of poster tubes for the gas tank.
3 Smart Water bottles (regular kind, not fat or sport nozzle kind) cut to ~31" total when glued together.
Cut off the threaded top with a PVC pipe cutter, replaced with a threaded PVC cap hot glued from the inside so it's "standard" with other threaded PVC stuff.

I kind of do a time skip here since I was in a hurry for a con.
After finalizing the first box, I duplicated all the sintra pieces and basically have a parts kit.
Dimensions are written on them for reference for myself or anyone curious.
Update 5/23/2014: Posted more legible measurements in the parts kit pic.


Painting second box pieces. Complete first box on top.

Finishing up innards so I can close them up. The piece of foam in the back is the blade stop so I don't sheath a detachable blade too far in.

Close up of the front. The spring is a porch spring from Home Depot and comes in a 2-pack iirc. The Lowes ones were too too big or thin or expensive. The discreet piece of foam on top of the fake blades is hot glued on all the blades and into the side walls to keep the fake blades from wobbling around.

Didn't want just pitch black behind the spring window, so I rub and buffed a piece of foam board with dents to make it look like a spare blade and glued it behind the spring. The dents were made with the big ruler you see there.

Put behind the spring window.

Extra credit: Altoids tin in the back with a bunch of hanging washers and nuts. Results in the same sound heard in the anime when walking with it. Discovered it when I was carrying an Altoids tin in the same pocket as my car keys.

I couldn't use the mini brackets since I heat formed them too tight to the poster tube, while the water bottles were a millimeter or two wider. The fake blades on the right got nudged in the pic, but they're lined up otherwise.
The gas tank and PVC threaded tee were painted with Rustoleum 2x Aluminum, with 2-3 clear coats of Rustoleum 2x gloss clear.
The outer-facing threads don't have caps on them at the moment since I thread on wired ones that connect to the shooters when I put on the complete gear.

Boxes done.

Test wear. Everything else is still manga version.


Have been working on the anime version of the rear core, will post that next. Hoping to finish that by this week for a con. Then finally, the hip shooters and the sword handles.
Last edited:


