CadetTK2386
Sr Member
Or, "How I learned to Stop Worrying and Weather a Map."
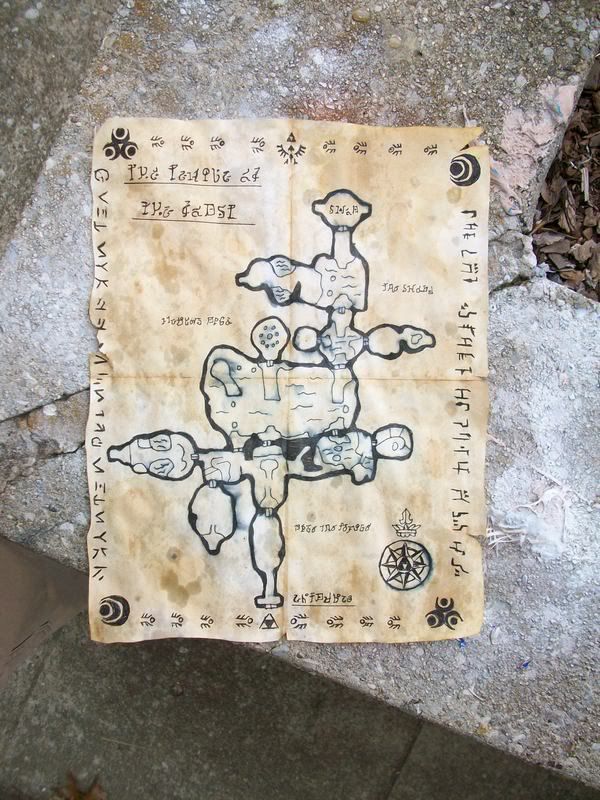
I saw an excellent tutorial on my 501st garrison's boards on how to age/weather documents/maps to make them look, well, old and weathered. So I decided to try my hand at it and recreate one of the maps from the Legend of Zelda games. This particular one is the Forest Temple from Twilight Princess.
So, here is my modified version of the tutorial I found on my garrison's boards:
Ingredients:
3 tea bags, dropped into a cup of boiling water and allowed to sit for 1 hour. (I got the smallest, cheapest box of tea bags I could find at Wal*Mart)
1 paint brush
1 Cookie Sheet
My document was hand drawn in permanent marker on piece of regular, plain old printer paper.
First thing I did was preheat my oven to around 200 degrees Fahrenheit. I actually was not sure becuase the stove in my apartment does not have numbers up until 350 becuase the lower numbers have been worn off.
I laid the map down and trimmed the edges of the paper uneveningly, making it look more worn. For my map I added a creases to the map, so it looked like it had been folded up either in a chest or in the hero's pocket.
I then laid the document down on the cookie sheet so it was face up:
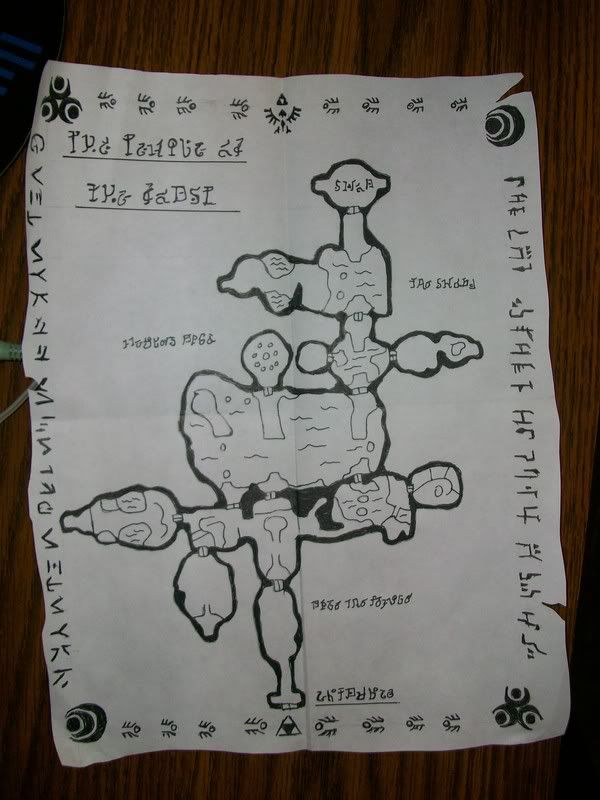
Then I took the paint brush and painted the tea into the creases and in random areas that stains would look good.I let the tea pool especially heavy in the crease. I did that becuase I read in the original tutorial that old documents look especially dark in the creases.
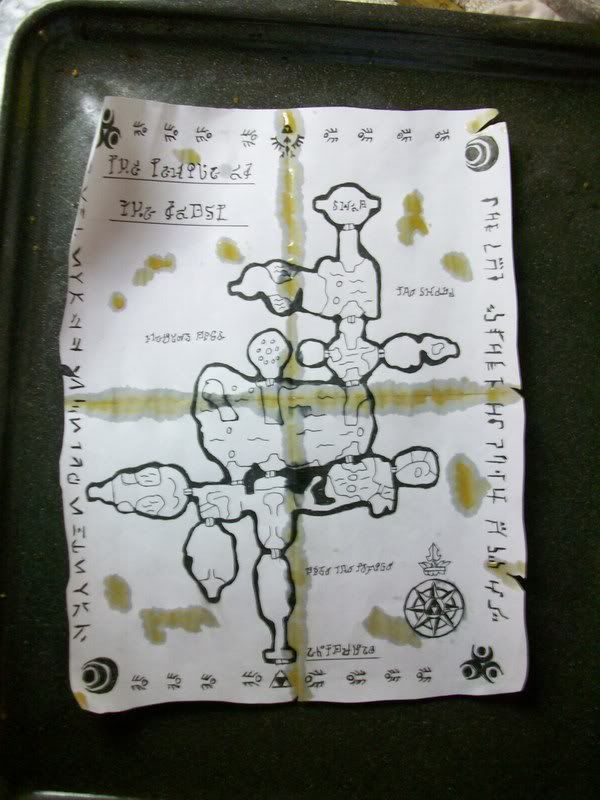
So then I put the cookie sheet with the document on it into the oven for around 5-10 minutes, checking to make sure the map was just dry enough for the tea to set in. Once the tea has dried, I pulled out the cookie sheet
Then came my favorite part
I used the tea bag saturate the whole document. I took the whole tea bag and dragged it across the map, coating the whole thing in a layer of tea until the paper was very saturated in some places was actually soaked through.
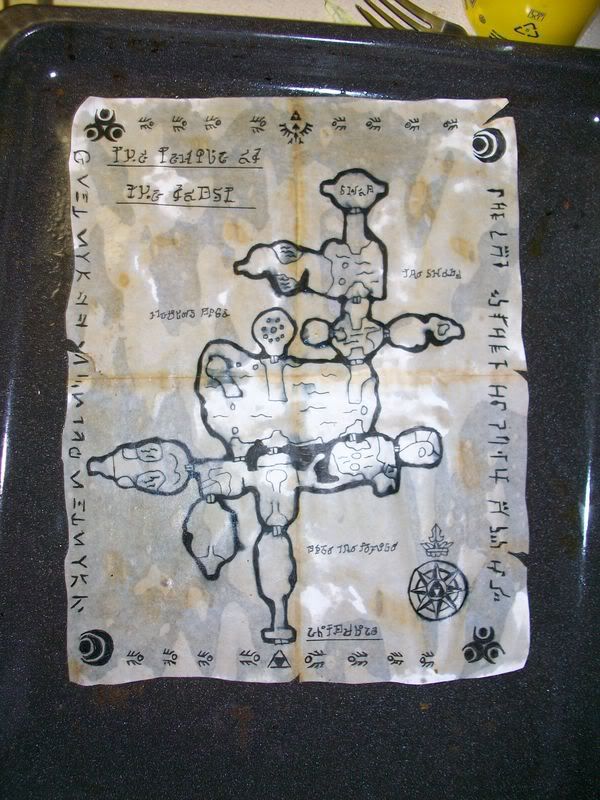
Once again I placed the cookie sheet in the oven and watched it carefully. After about 10 minutes the tea started to dry and the document got a yellow tint to it and got wrinkled
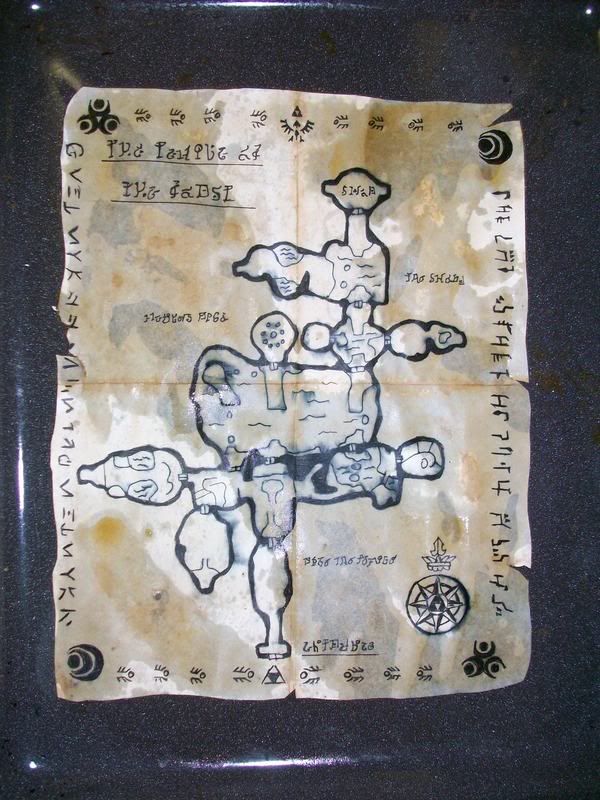
I again saturated the paper with the tea bag. This time I added pools of tea to the map, and put it in the oven for another 10-15 minutes and then took it out.
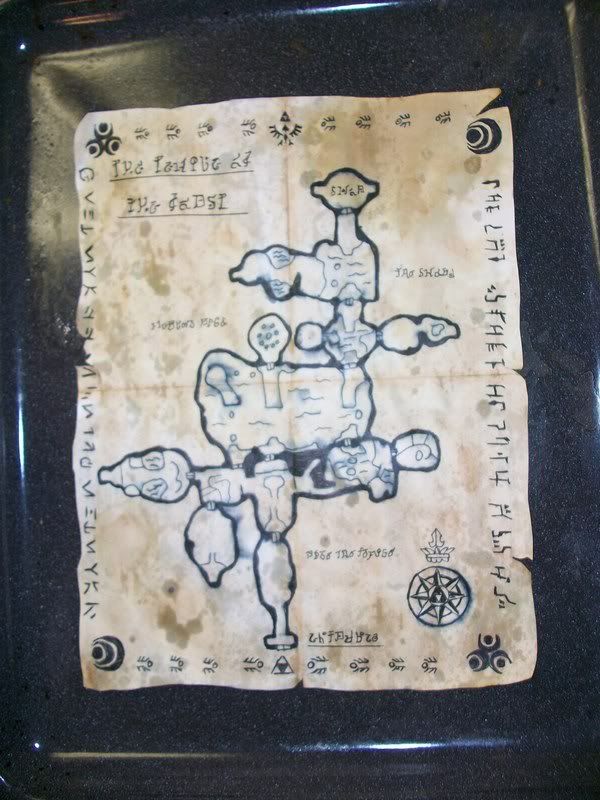
After it had dried for a bit, I was still not satisfied with how weathered it looked, so I re saturated it again, and put it in the oven. I then went and saturated the reverse side of the map, just to be sure, and dried it again.
I then set it on the counter to dry a final time, and it ended up looking like this:

I saw an excellent tutorial on my 501st garrison's boards on how to age/weather documents/maps to make them look, well, old and weathered. So I decided to try my hand at it and recreate one of the maps from the Legend of Zelda games. This particular one is the Forest Temple from Twilight Princess.
So, here is my modified version of the tutorial I found on my garrison's boards:
Ingredients:
3 tea bags, dropped into a cup of boiling water and allowed to sit for 1 hour. (I got the smallest, cheapest box of tea bags I could find at Wal*Mart)
1 paint brush
1 Cookie Sheet
My document was hand drawn in permanent marker on piece of regular, plain old printer paper.
First thing I did was preheat my oven to around 200 degrees Fahrenheit. I actually was not sure becuase the stove in my apartment does not have numbers up until 350 becuase the lower numbers have been worn off.
I laid the map down and trimmed the edges of the paper uneveningly, making it look more worn. For my map I added a creases to the map, so it looked like it had been folded up either in a chest or in the hero's pocket.
I then laid the document down on the cookie sheet so it was face up:

Then I took the paint brush and painted the tea into the creases and in random areas that stains would look good.I let the tea pool especially heavy in the crease. I did that becuase I read in the original tutorial that old documents look especially dark in the creases.

So then I put the cookie sheet with the document on it into the oven for around 5-10 minutes, checking to make sure the map was just dry enough for the tea to set in. Once the tea has dried, I pulled out the cookie sheet
Then came my favorite part
I used the tea bag saturate the whole document. I took the whole tea bag and dragged it across the map, coating the whole thing in a layer of tea until the paper was very saturated in some places was actually soaked through.

Once again I placed the cookie sheet in the oven and watched it carefully. After about 10 minutes the tea started to dry and the document got a yellow tint to it and got wrinkled

I again saturated the paper with the tea bag. This time I added pools of tea to the map, and put it in the oven for another 10-15 minutes and then took it out.

After it had dried for a bit, I was still not satisfied with how weathered it looked, so I re saturated it again, and put it in the oven. I then went and saturated the reverse side of the map, just to be sure, and dried it again.
I then set it on the counter to dry a final time, and it ended up looking like this:


