About two years ago a member here (I forget who, sorry) offered a very inexpensive Pulse Rifle kit & since I always thought it was a neat prop I said why not? As I dug through the parts in the kit I found some flaws and areas that would require some serious work to look close to correct. I started collecting upgrade parts, Metal vents & barrell cradle, metal pins, trigger etc. About then I saw a really nice kit on Monsters in Motion so I migrated all my metal upgrade parts and a hyperdyne electronics kit to a somewhat sturdier and easier to build Pulse Rifle Kit. I finished that one about six months ago. I was then left with a box of the original kit parts, the trigger, switches and pins from the Monsters in Motion kit & spare metal bits. So I decided to dig in and make the best of all these parts to build another Pulse Rifle. Having the MIM Kit made this much easier as it showed me how some assembles should come out.
So Time for some pics....
First the MIM PulseRifle:


This is the MIMKit - It has real metal trigger, switches, pins, magazine release, vents and stock. It has the full hyperdyne sound & light kit with an amplifier. The Spaz cage is from the airsoft cage in the cheaper kit. I liked it better than the resin one in the MIM kit
And here is my Frankenstein Pulse rifle from all the leftovers:


I had some trouble getting a perfect fit on the shroud & I mounted a switch for the LEDs in the rear of the magazine well.

So there is the finished product. It has a movable trigger (a difficult trick considering I started with a solid resin Thompson) It has light up LEDs (95 only) The magazine & everything else is static.
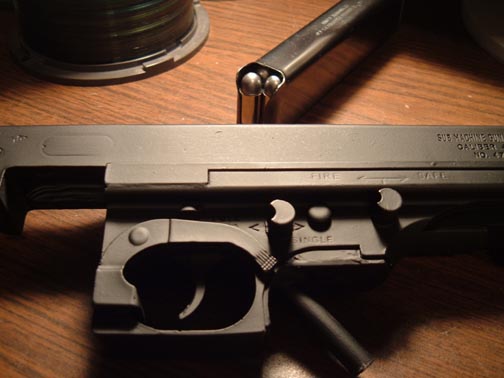
Here are some pics before the painting was done...

You can see the shrouds almost had to be completely built from scratch for the underside of the sight rail and the trigger well for the remington here.


Considering what I started with I'm pretty happy with how it turned out.It looks like a Pulse Rifle - It came out pretty sturdy, It has light up LEDs & a moving trigger. I'd like it better if I could have gotten the shroud a bit neater and I had to use two screws to secure the bottom of the Remington for use as a battery door.
So any comments?
So Time for some pics....
First the MIM PulseRifle:


This is the MIMKit - It has real metal trigger, switches, pins, magazine release, vents and stock. It has the full hyperdyne sound & light kit with an amplifier. The Spaz cage is from the airsoft cage in the cheaper kit. I liked it better than the resin one in the MIM kit
And here is my Frankenstein Pulse rifle from all the leftovers:


I had some trouble getting a perfect fit on the shroud & I mounted a switch for the LEDs in the rear of the magazine well.

So there is the finished product. It has a movable trigger (a difficult trick considering I started with a solid resin Thompson) It has light up LEDs (95 only) The magazine & everything else is static.
Here are some pics before the painting was done...

You can see the shrouds almost had to be completely built from scratch for the underside of the sight rail and the trigger well for the remington here.


Considering what I started with I'm pretty happy with how it turned out.It looks like a Pulse Rifle - It came out pretty sturdy, It has light up LEDs & a moving trigger. I'd like it better if I could have gotten the shroud a bit neater and I had to use two screws to secure the bottom of the Remington for use as a battery door.
So any comments?


