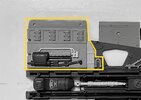
4' (AKA 5 foot) Falcon build

Ohh.. I did not know those were there. Thanks. It's odd that I don't see that little jagdtiger part on the 8RAD frame of the mandible box castings. Maybe that is something specific added to the Y-Wing and wasn't on the primary casting? Or they are there and I'm just blind.
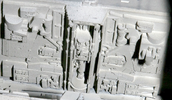
1754053834362.png

There is something under the pipe in the mechanical pit, but it's hard to tell with the thickness of the primer and the rough casting.
1754054202067.png

I do have a question about the two black Centurion parts. Should they be back where you have them, or forward where I have them?
All my photos are bad angles that makes things look squished together, but to me, it looks like those parts should be further forward.

1754053136634.png

thanks
 
Last edited:
Unfortunately, I don't have a photo that show the exact location of the parts of the black Centurion either. But as you said, I feel like my things are not in the right position.:unsure:

Img_6446.jpg


thanks
 
Oh! okay, great. There it is. I was looking in the wrong place I guess. For the centurion parts, I'm going to leave mine at the forward position. They seem to line up better that way. But it's just another example of the Bandai kit not getting things quite right.
 
Last edited:
A quick question for those that may know. Did ILM use brass rod or plastic rod for their pipes? Using heated plastic rod, I'm struggling to get some of the pipes with more intricate bends, or bends that need to be in exact locations to go around corners. So I'm wondering how ILM did this with plastic? Or if they just used brass which is easier to control.

thanks
I "think" the technical answer is that they used both. Telescoping brass for Y-Wing guns, for instance, and possibly some Y-Wing pipes, but I think most of the other bent/curved pipes are melted plastic -- there are tricks for this, such as a coiled "tube bender" tool, or filling the pipe with sand before heating it, and others, that work fairly well to avoid kinks or bends that are "too" sharp.
 
Great, thanks.

The issue I'm running into is not the quality of bend, it's that the rod or tube ends up bending in the wrong place. It's always a mm or two in-front or behind where I actually need the bend to be. I just think if I used brass I could be more precise, but ILM likely used styrene, so I'm a bit torn on how to go about doing some of these complicated pipes.

They were free. It was possible to place and move the parts to fit the bent pipe. However, we are not allowed that freedom.
It's easy if there's only one place to bend, but it's quite difficult if there's two. And if it becomes three, it won't succeed anymore. Compromise is necessary to finish this work that will last forever.
If it's too long, how about cutting the straight part and fine-tuning it? It is much easier to erase the traces of connecting the pipe. ;)
 
So, this is what I currently have for the back wall of the port lower mech pit.

When compared to the Bandai kit, you can see many changes. There are two parts found by Shamon. And the Hurricane wire harness no longer butts up against the large pipe. The horizontally positioned ME-109 gun doesn't strike me as the correct part but it does sort of match from certain angles.

On the far left, the large pipe no longer has that M577 console but rather just goes into the back wall. I don't know where Bandai got that detail from but I'm not convinced it was really there.

There are also a couple of items that are missing. Specifically the 'box' on the far right in the corner.

1754767554146.png
 
How do you think that sits within the pit?

A bit of a crude illustration but;

Option A. Do you think it sits directly on top of the Centurion deck (H6) and is only glued to the pit floor via the little pegs?
Option B. Or do you think there's a notch cut out to accommodate the Centurion deck (H6) and the rest sits flush on the pit floor?
Option C. A third way I've not thought of?

1754840564185.png


This is my existing part, just flipped upside down. I don't believe that the flat side of the girders face inboard though. This is a rough placement of Option A above.

1754840863810.png


Something else to note with Option A, is that the gap between the top of the girder and the top of the Centurion side panel (J8) is correct. But to do that, the girder is held to the pit floor with just two or three little pegs.

1754841050426.png


I'm leaning slightly towards option B. Both forward and rear 'gaps' around on J8 are there as well as there's no visible girder behind the semi-circular notch in it either. Where as there is a girder visible in that notch if you go with Option A.

1754843439067.png


I'm curious to know what people think.

thanks
 
Last edited:
Back
Top