Shotzy
Active Member
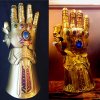
Hey everyone! I wanted to to share a little bit about the Infinity Gauntlet build that I'm currently finishing up, If you didn't see my original post here is the most current progress picture (obviously my build is on the left);

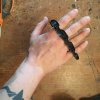
So I started by buying some 3D models from Do3D that were alright but they were missing a bunch of details, some shapes were wrong, and some pieces were un-printable due to bad geometry, so I ended up just using the models as a reference and whipped up some new ones (and modified a few existing ones) so that they were closer in accuracy to the the screen used one. After the models were to my liking I began working on the scale by printing a section of the palm piece at various sizes;


After I felt the sizing was close enough to the original I then started printing, assembling and organizing all of the pieces. Unfortunately lost an SD card with pictures from the early printing stage but here are some from half way through:


I printed everything in ABS plastic because I love being able to use an acetone/abs slurry to attach and smooth out pieces. After everything was printed I assembled the pieces, smoothed out the parts with the slurry mix, patched and holes or uneven spots using a 2 part epoxy clay, and then sanded everything down. When I got everything to my liking I moved onto the priming stages;


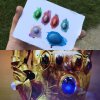
After Priming and sanding for what felt like an eternity everything was finally ready to get some paint, evrything except for the stones were painted in a metallic gold spray paint;


(Continued in Next Post)

So I started by buying some 3D models from Do3D that were alright but they were missing a bunch of details, some shapes were wrong, and some pieces were un-printable due to bad geometry, so I ended up just using the models as a reference and whipped up some new ones (and modified a few existing ones) so that they were closer in accuracy to the the screen used one. After the models were to my liking I began working on the scale by printing a section of the palm piece at various sizes;


After I felt the sizing was close enough to the original I then started printing, assembling and organizing all of the pieces. Unfortunately lost an SD card with pictures from the early printing stage but here are some from half way through:


I printed everything in ABS plastic because I love being able to use an acetone/abs slurry to attach and smooth out pieces. After everything was printed I assembled the pieces, smoothed out the parts with the slurry mix, patched and holes or uneven spots using a 2 part epoxy clay, and then sanded everything down. When I got everything to my liking I moved onto the priming stages;


After Priming and sanding for what felt like an eternity everything was finally ready to get some paint, evrything except for the stones were painted in a metallic gold spray paint;


(Continued in Next Post)


