1/3 Scale Star Wars Sandtrooper

I will try and rectify that on my new stormtrooper thanks ;)


Regarding the hand guards, the semi circle part at the wrist should be a lot bigger:

stormtrooperluke.jpg


p1010546h.jpg


Also, the hand guards are slanted, meaning thinner at the wrist, and thciker at the front

The slope towards the thumb is missing aswell.

Most of the sandtrooper had the standard hand guards; the "Cheese grater" was only seen on one or two.


But I can't wait to see yours built and painted!
 
I you need more pics or info, just contact me.

A good part of the troopers of the 501st can confirm that I know a little about ANH hand guards ;)
 
Last edited:
Instead of making progress on this build, I frittered away last weekend making edible stormtroopers (in almond bark) and chocolate Darth Vaders!

candy_zpsd7840549.jpg


Not my best work!

Okay, back to working on inedible troopers! :lol
 
The Easter holidays and visiting relatives from out of town kept me away from this project for the past few weeks. But I’ve managed to spend a bit of time with the sandtrooper backpack this weekend and thought I would post a short update.

If you recall, I elected to replace the resin frame with one made from aluminum rod bent to shape. This is certainly not an essential step for this model, but I thought it would add a nice touch of realism. As a consequence of this extra step, I needed to make straps for the frame onto which the various backpack elements will mount. I bent thin brass strip around the edges of the frame leaving plenty of extra strip bending back onto itself. It’s those double-thick areas on the brass strip where I’ll drive a small screw through to attach the backpack containers.

backpack1_zps38b6d7d1.jpg


Here you can see how I used the edge of a small scrap of plywood to get as tight a corner on the bent brass strip as possible.

backpack2_zps383b7d6f.jpg


Two straps per container with the straps secured to the aluminum frame using superglue.

backpack3_zps3555c3a5.jpg


I want the backpack to be removable so that it’s easier to pack up the sandtrooper for transport, so I epoxied two rare earth magnets to the back of the sandtrooper. There are strips of styrene between them to help make them more secure, plus these magnets really want to pull toward each other so the styrene strips hold them apart…

backpack4_zpsd13c4344.jpg


… and two more rare earth magnets (polarity carefully checked) also epoxied to the top container on the backpack. For the moment I’m just holding the containers onto the backpack frame using tape.

backpack5_zpse0450f2d.jpg


I am surprised at how strongly the rare earth magnets hold the backpack to the trooper. I was concerned that the backpack would be too heavy to mount it with magnets (it is mostly resin, after all) but no more! These magnets are working beautifully.

backpack6_zps721a980a.jpg


I also carefully checked that the trooper’s helmet would not interfere with the upper part of the backpack frame. Everything seems to check out okay.

backpack7_zps163b0355.jpg


You can see in the above photo that the bottom container will rest against the trooper’s belt. This is okay, I think but I’ll have to keep an eye on it in case something else on the backpack or belt starts to interfere.

So the next step is to finishing cleaning up the resin flash on the backpack containers and other elements, then start painting them and screw / glue it all together.
 
Really nice work !!!

By the way, i think that there is only 2 Sandtroopers kit letf.. if anybody is interested, please ask Rob (Judgedredd)

Alfredo
 
Last edited:
No updates. I frittered away the Memorial Day holiday here in the States working on my full-scale astromech R5-K6. Got legs started and installed. Obligatory Coca Cola bottle included in photo for scale. Need to install skins on his body next to give the whole assembly more torsional stability.

Back to sub-scale sandtroopers next week!

Legsinstalled_zpsb5d228bf.jpg
 

Attachments

  • Legsinstalled_zpsb5d228bf.jpg
    Legsinstalled_zpsb5d228bf.jpg
    537.1 KB · Views: 133
Man, you are really talented. The extra work you are putting in to make it more authentic is really paying off. Please, more updates.
 
That's very kind. Thank you.

I wish I could reliably find more time to spend on my various hobby projects. Life, work... you know how it goes. But it's easy to dive into the details on some of these projects when the subject material is as inspirational as this sandtrooper figure. Where else are you going to find something like this in 1/3 scale and have the opportunity to really go to town on details? I'm also looking forward to another project that Judge Dredd (on this forum) is currently working on. See thread here: http://www.therpf.com/f62/stormtrooper-new-sculpt-1-3-scale-wip-180925/ He has asked me to look into a possible diorama backdrop of the Death Star extender bridge from A New Hope. I have some raw materials to rough something out and am looking forward to seeing how it might come together. Just have to find the time... I'll post something here on RPF once I get the opportunity to look into it.

Man, you are really talented. The extra work you are putting in to make it more authentic is really paying off. Please, more updates.
 
HURRY UP LOL
:lol


That's very kind. Thank you.

I wish I could reliably find more time to spend on my various hobby projects. Life, work... you know how it goes. But it's easy to dive into the details on some of these projects when the subject material is as inspirational as this sandtrooper figure. Where else are you going to find something like this in 1/3 scale and have the opportunity to really go to town on details? I'm also looking forward to another project that Judge Dredd (on this forum) is currently working on. See thread here: http://www.therpf.com/f62/stormtrooper-new-sculpt-1-3-scale-wip-180925/ He has asked me to look into a possible diorama backdrop of the Death Star extender bridge from A New Hope. I have some raw materials to rough something out and am looking forward to seeing how it might come together. Just have to find the time... I'll post something here on RPF once I get the opportunity to look into it.
 
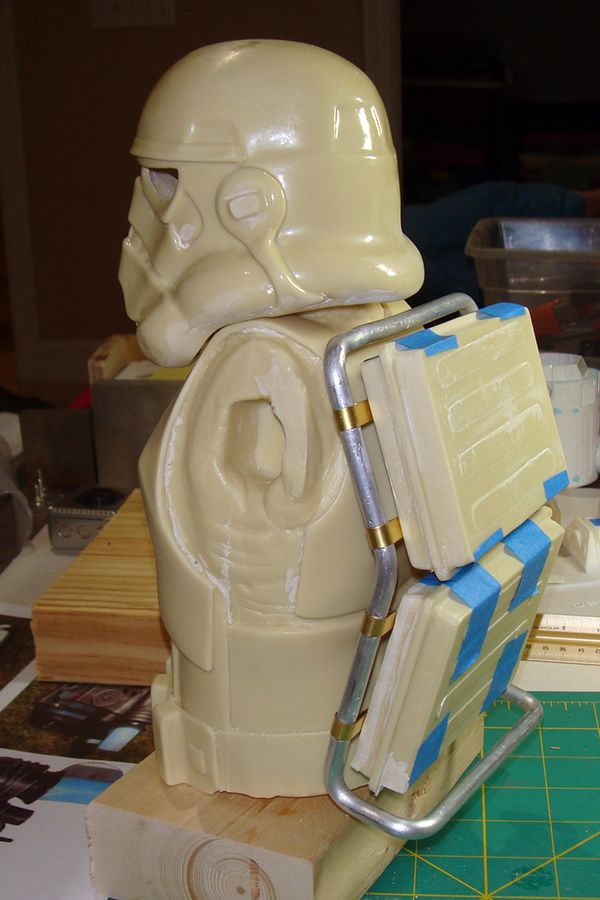
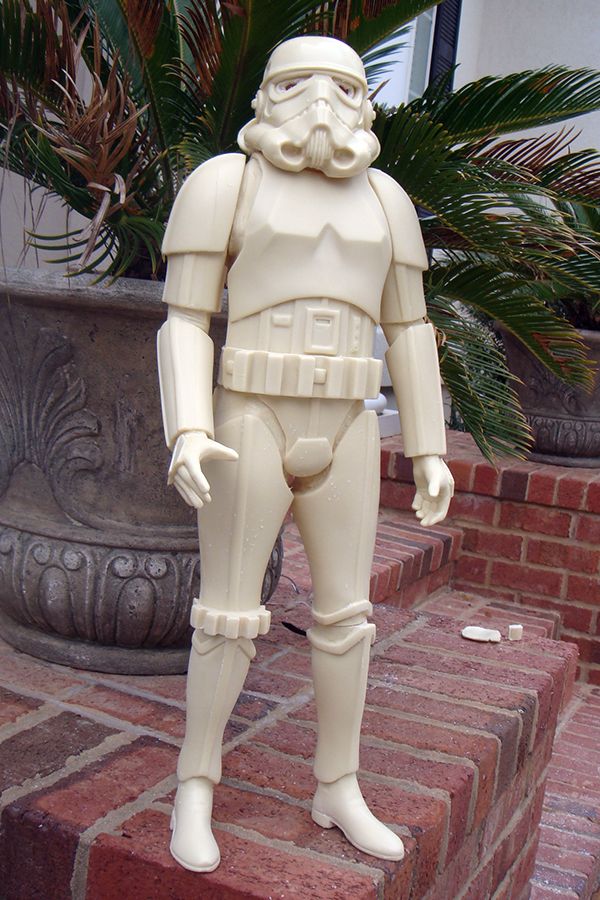
I’ve taken a break from the backpack because I can’t quite decide how to weather it. In the meantime I’ve been thinking about the pose of the sandtrooper. He almost seems… tired? Arms hanging at his sides, gun resting on the ground…

firstlook_zpsfdc6d4e8.jpg


I troop with the 501st and will often pose with my gun cradled in the crook of my arm. I can envision this sandtrooper holding his gun in a similar manner, perhaps as he takes a break from looking through his macrobinoculars. But do I really want to tear apart the arms on the model? I just got them primed and a good coat of gloss white applied.

Armpainted_zpsc70aca35.jpg


Yeah, I’ve thought about it long enough. I’ll do it! I took a deep breath (and a deep swig of beer), plugged in the Demel tool, and started carving apart the sandtrooper’s left arm at the elbow and wrist. Here you can see the parts separated and how I carved back into the area where the armor covers as well; when I sculpt a new elbow and wrist this will allow the armor to hang over the organic parts of the person under the armor and perhaps make the armor look a bit more as if it’s something being worn by a person underneath it.

Leftarmcutapart_zps38853ecc.jpg


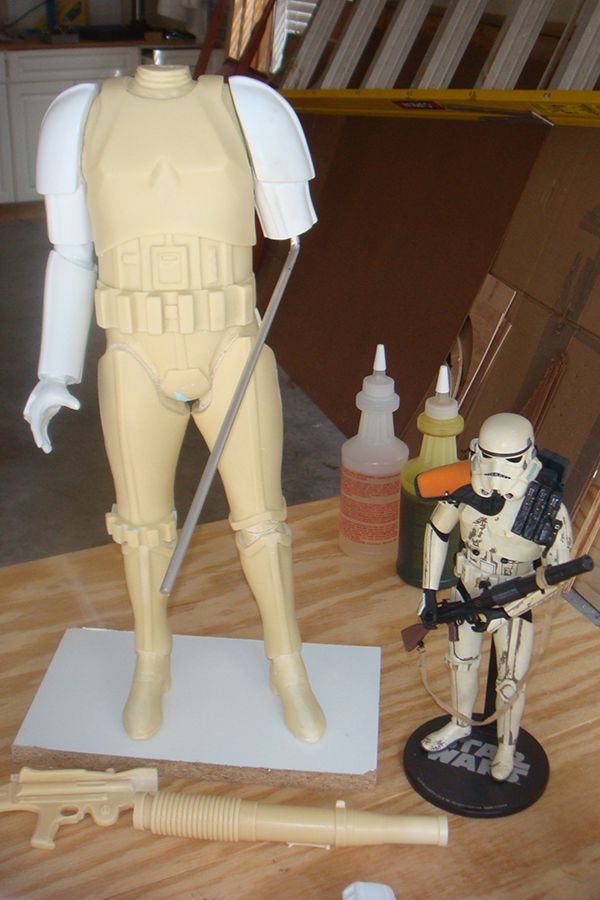
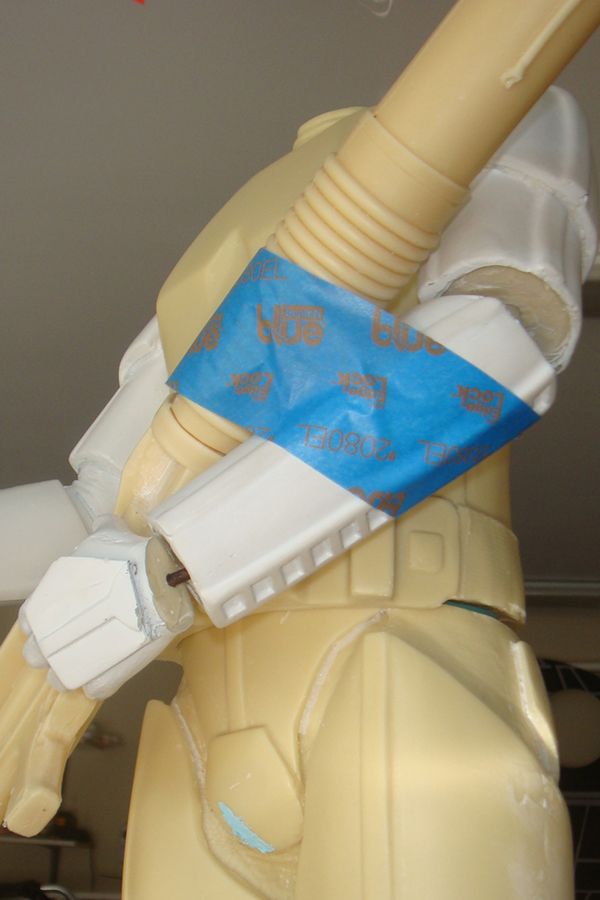
Here you can see the shoulder and bicep temporarily attached to the torso with a 1/4 inch aluminum rod inserted for the forearm to attach to. I have already bent the rod to approximately the angle I want the forearm to be placed to cradle the rifle. To the right of the 1/3 scale model you can see my 1/6 scale Sideshow sandtrooper which I used as a model for how to position the arm and hand.

AluminumRod_zpsf727ac53.jpg


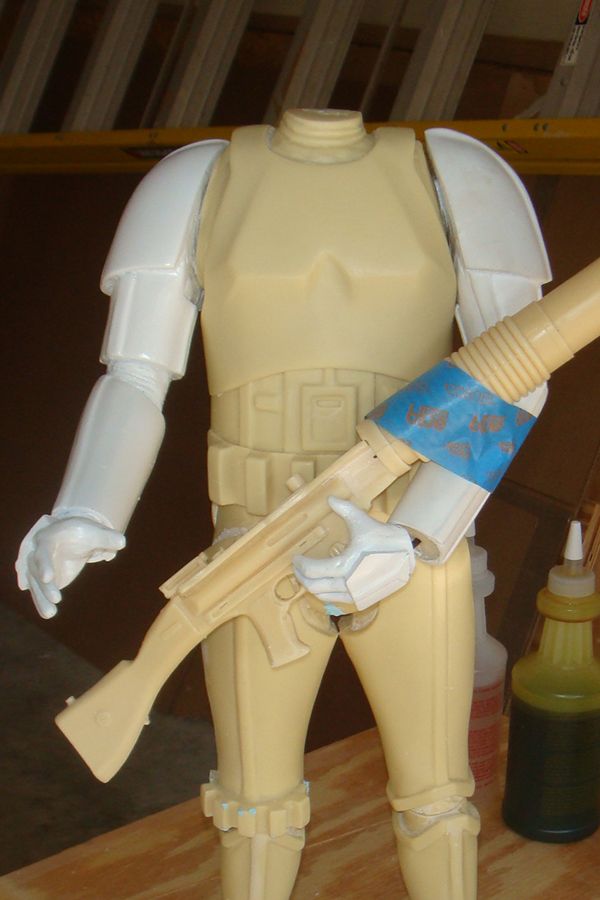
With the rod cut and the forearm now attached, I worked on the hand as well. In a similar fashion, I used part of a coat hangar to support the new position for the hand.

Armrepositioned1_zps2cf217f4.jpg


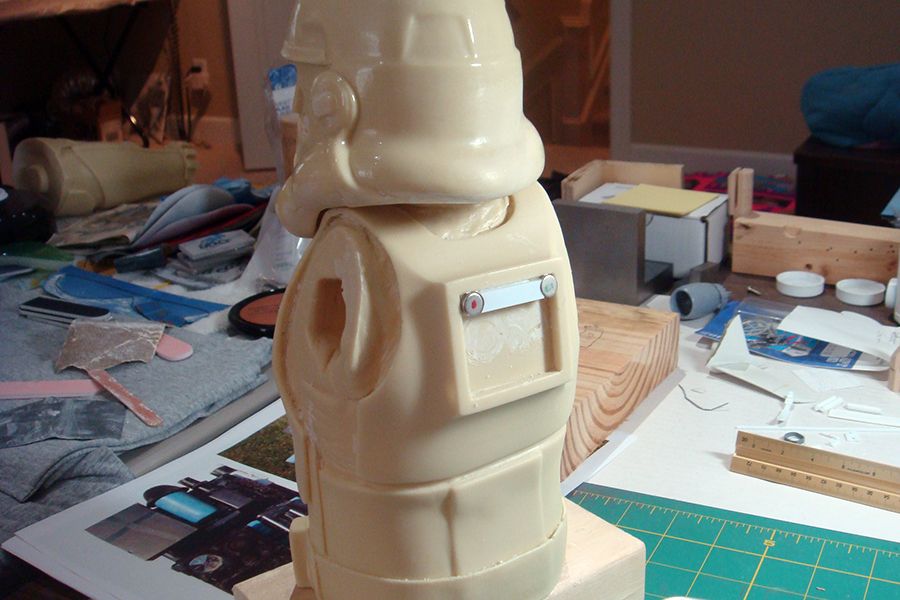
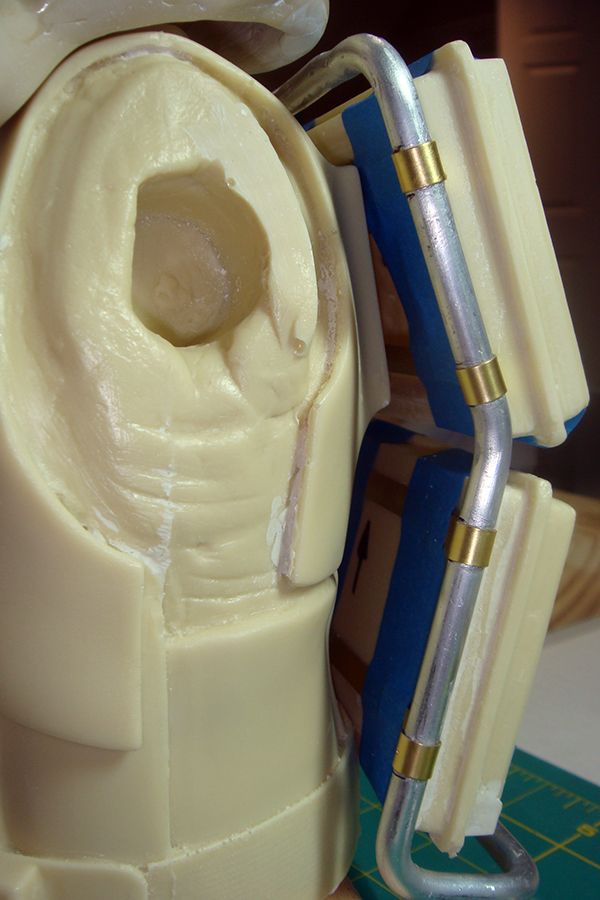
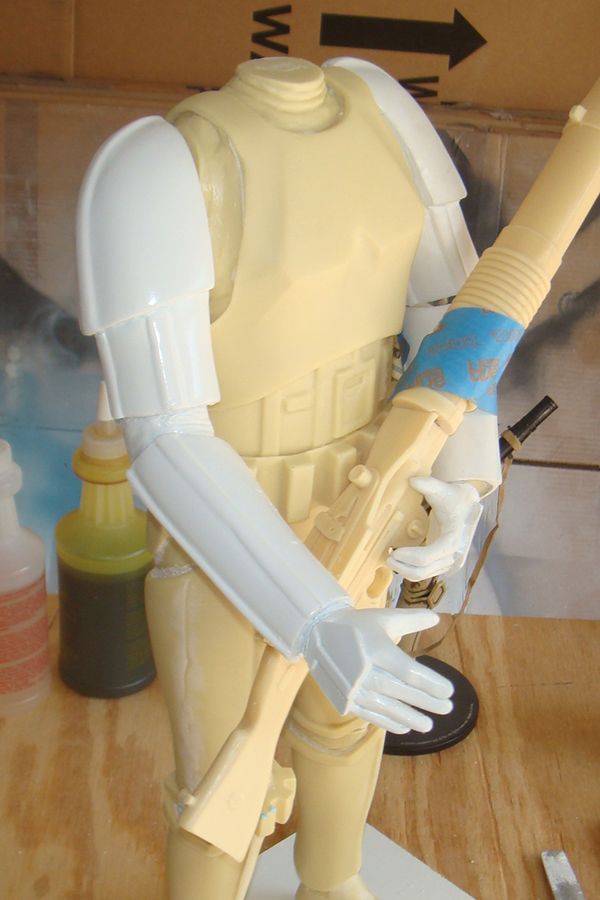
At a slightly different angle, you can see how I have also positioned the right arm forward and above the rifle. The right hand is, fortunately, already well-formed to hold the macrobinoculars so I don’t believe that I’ll have to reposition the thumb or fingers to hold the binocs. I’ll position the head later to be looking to the right, as if he has just lowered his right arm, macrobinoculars in hand, while he continues to look out at the horizon.

Armrepositioned2_zps77bf6af5.jpg


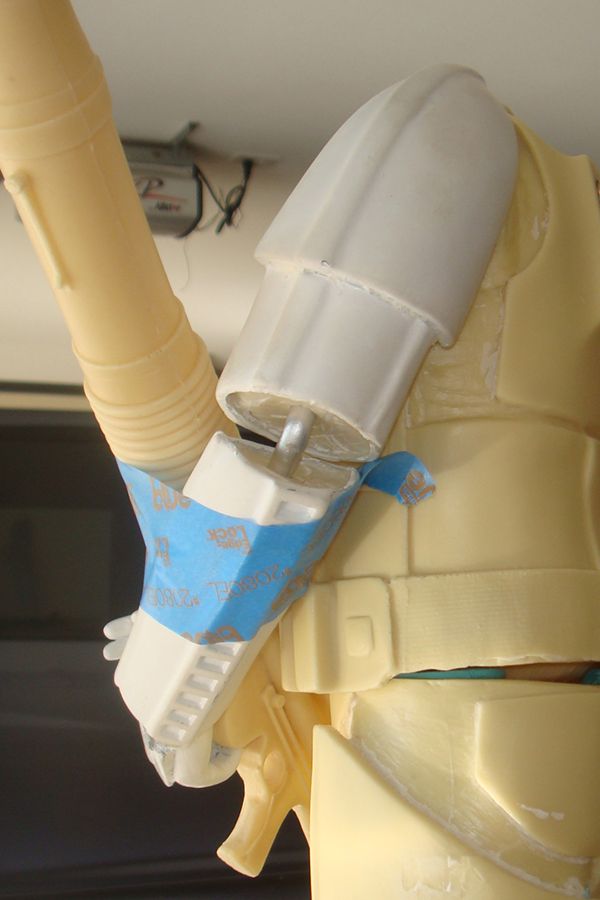
Here you can see a bit better the aluminum rod at the elbow.

Elbowrepositioned_zps9a480b25.jpg


And here you can see the coat hangar piece that holds the hand to the forearm.

Wristrepositioned_zpscee86a3a.jpg


The next step is to epoxy all the parts in place and get out the Milliput to sculpt a new left elbow and wrist. I’ll also have to fill in a bit at the shoulder-torso joint on both arms due to having rotated that joint forward just a bit on both arms. I sure hope I have enough Milliput for this!
 
Back
Top