You are using an out of date browser. It may not display this or other websites correctly.
You should upgrade or use an alternative browser.
You should upgrade or use an alternative browser.
1/144th Prometheus scratch build
- Thread starter TheNylonGag
- Start date
Thank you guys for the positive feedback, nice to have you all along for the ride,
Lot's to get to so hold on tight
Started to frame in the top section
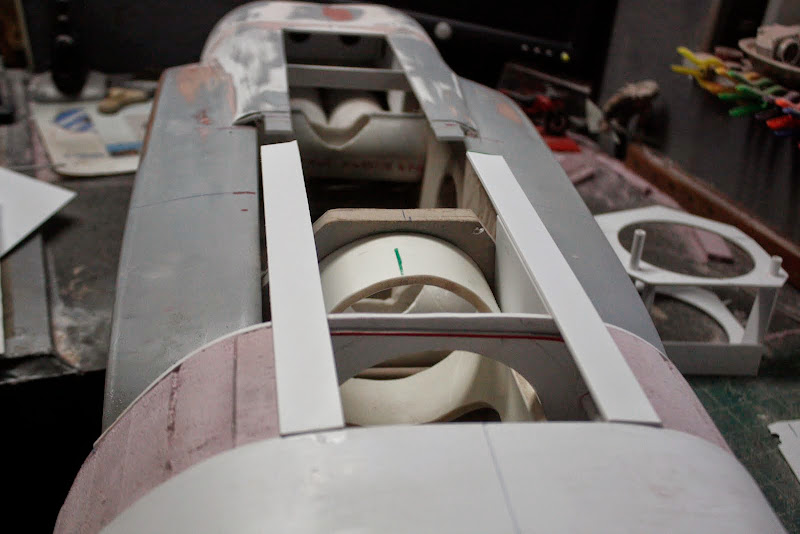
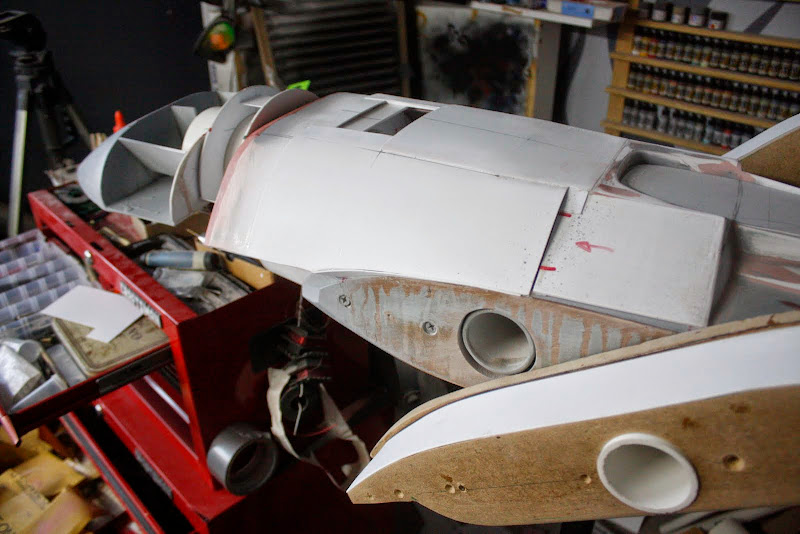
Cut out profile of the top intakes

More frame work

Cut out the back of the escape pod profile
And in position
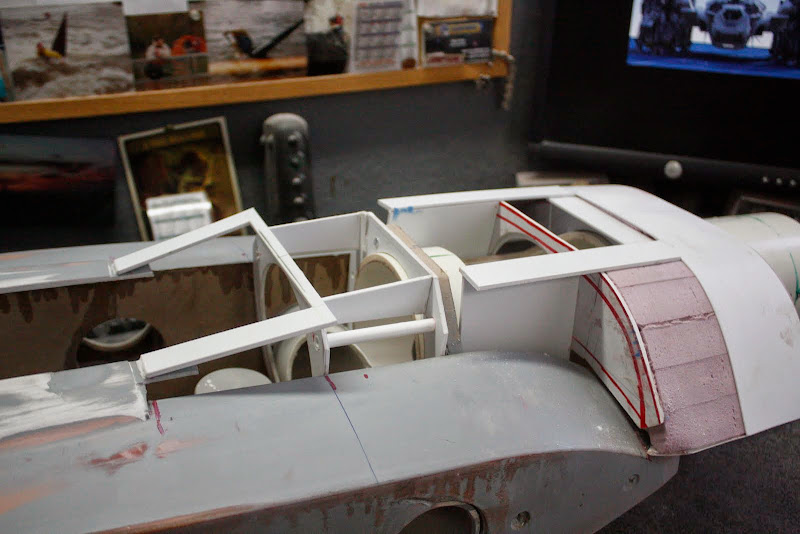
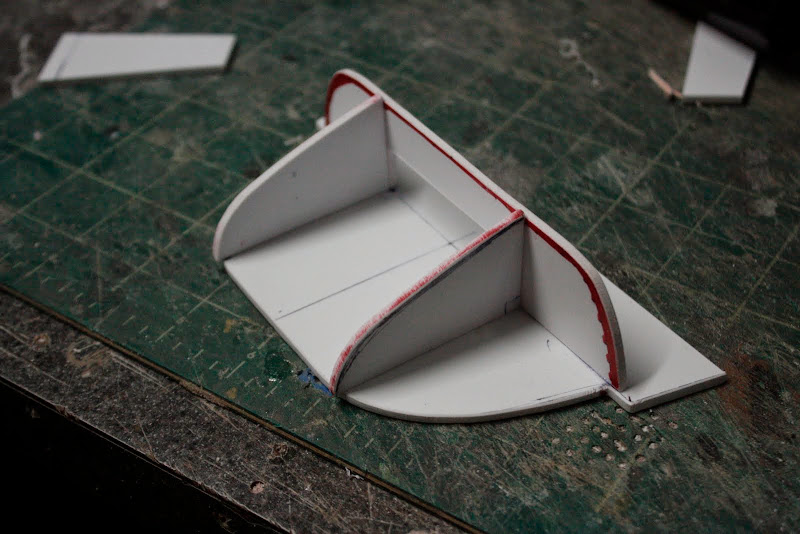
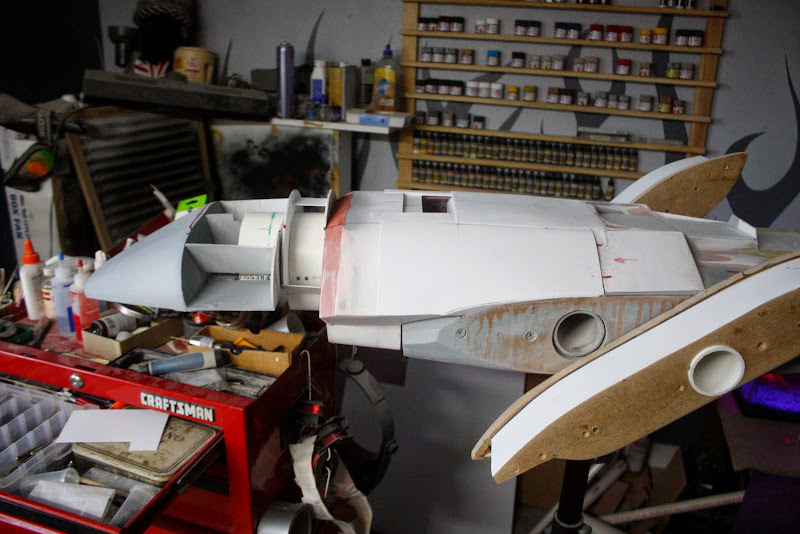
Next was the outer skin of the main body


Glued and taped
Profile cleaned
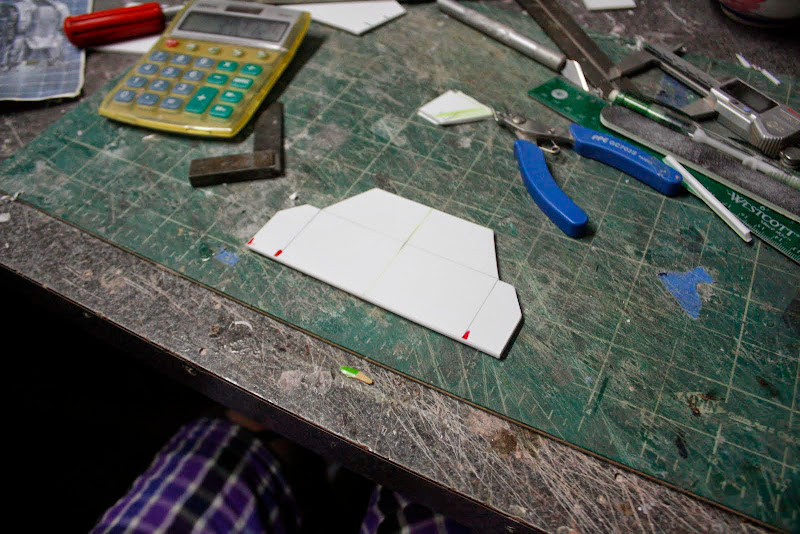
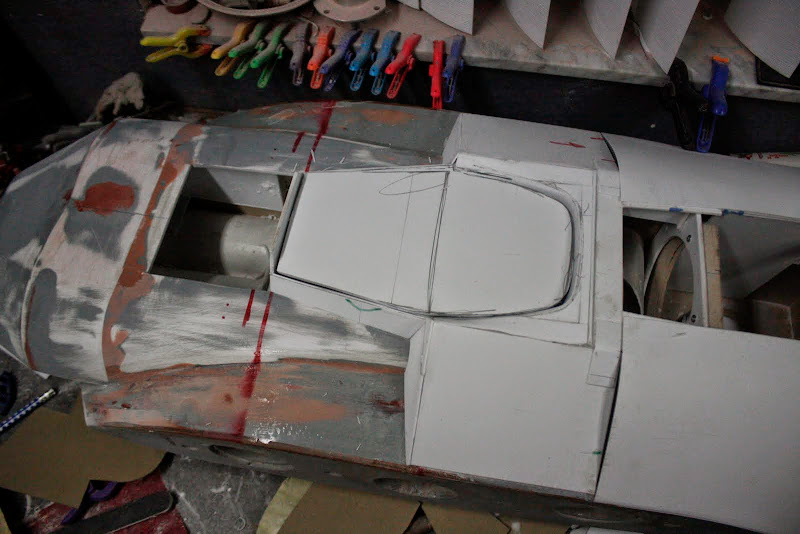
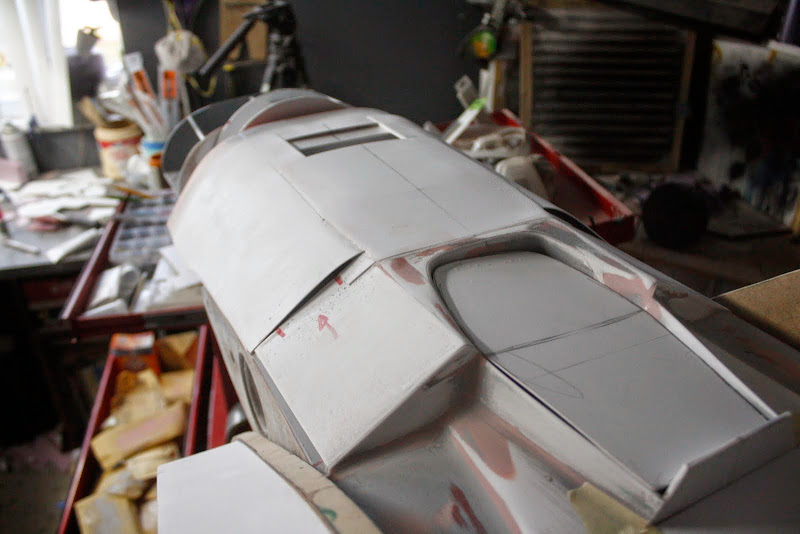
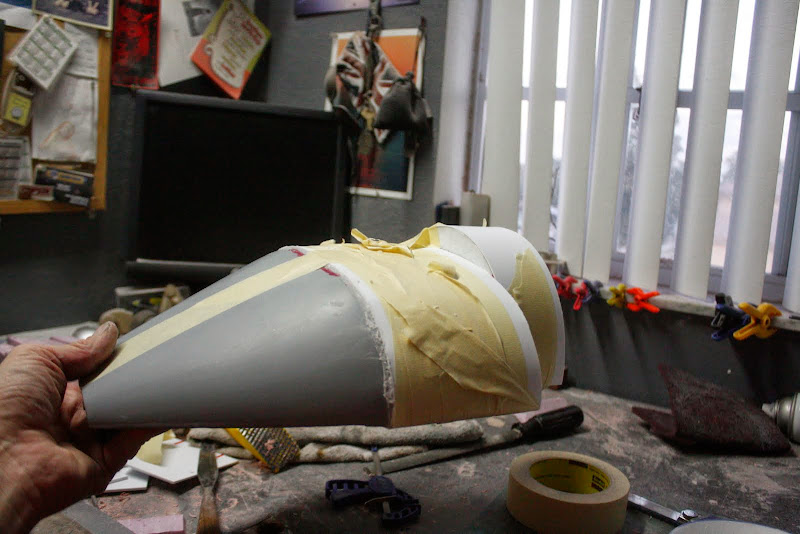
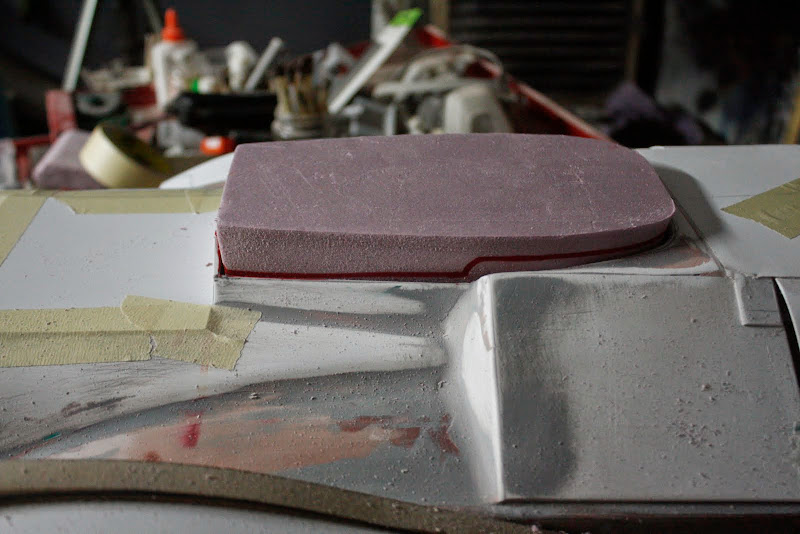
Moved on to the final nose section on the underside
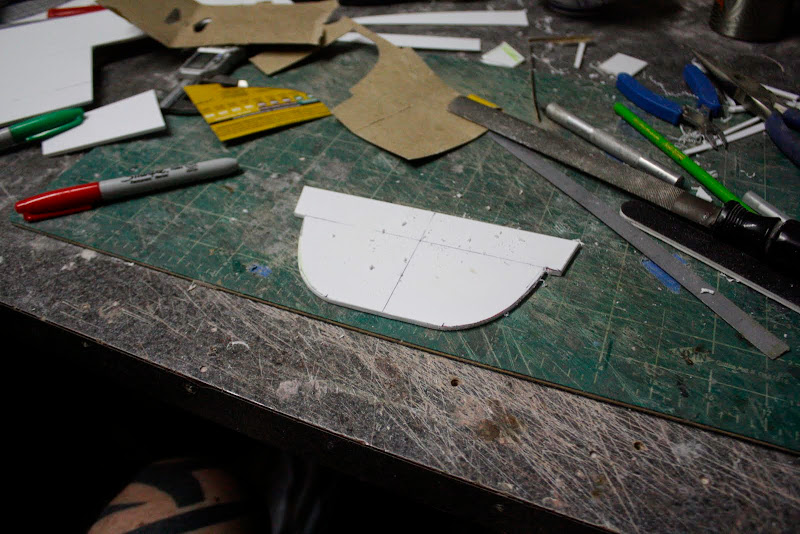
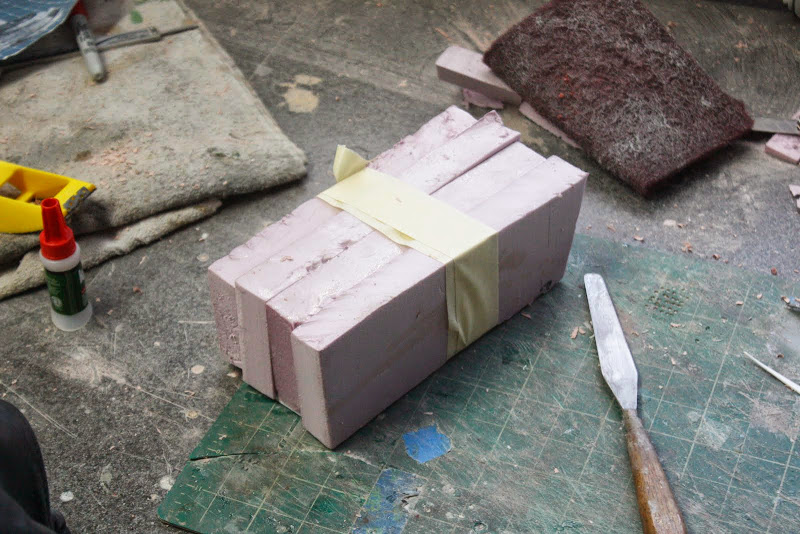
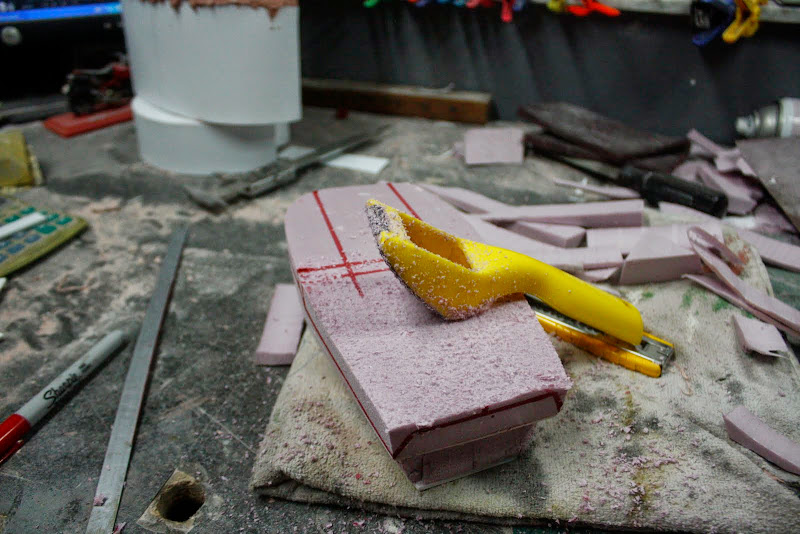
Foam

Shaped
Piece of 1mm styrene sheet

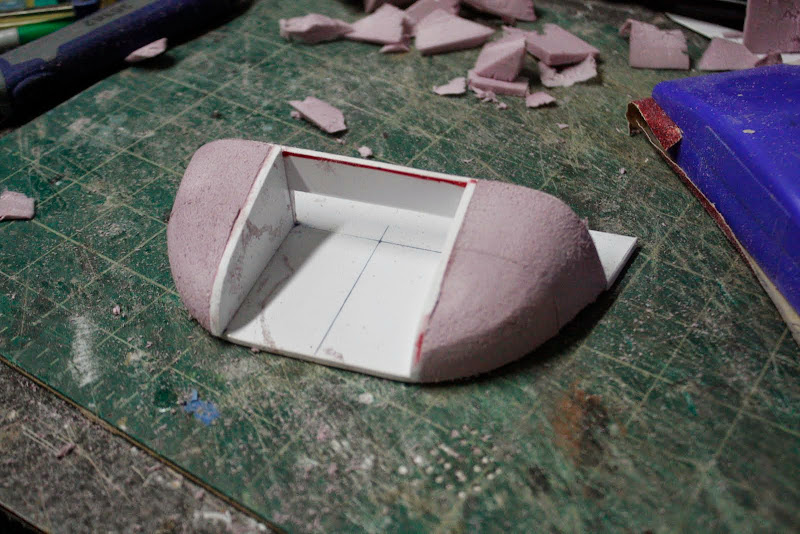
Heated with just friction from my hand and bent and glued to the form then clamped
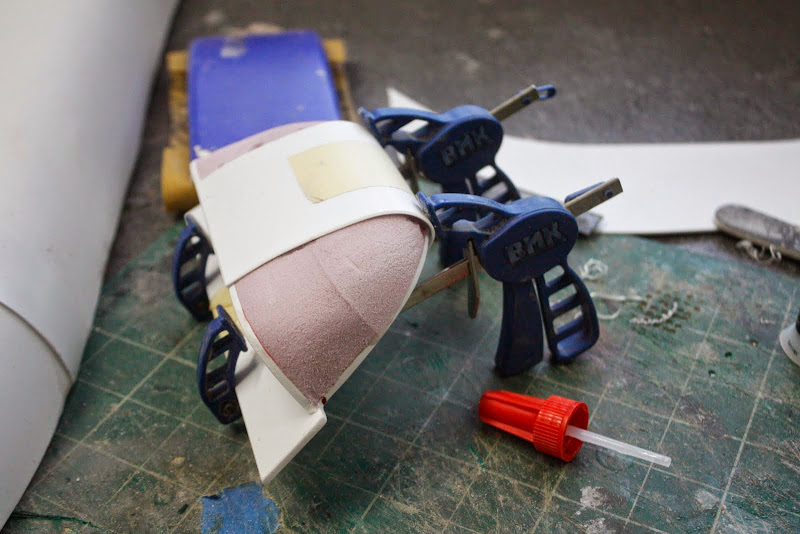
A coat of epoxy resin

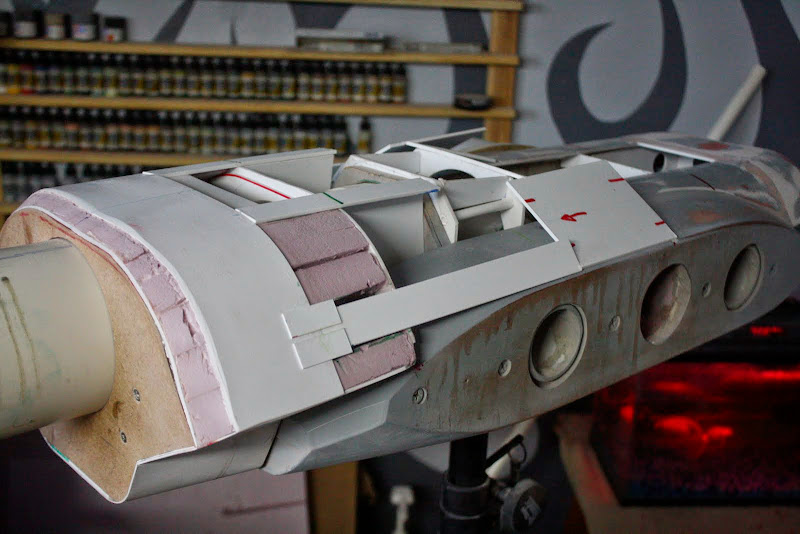
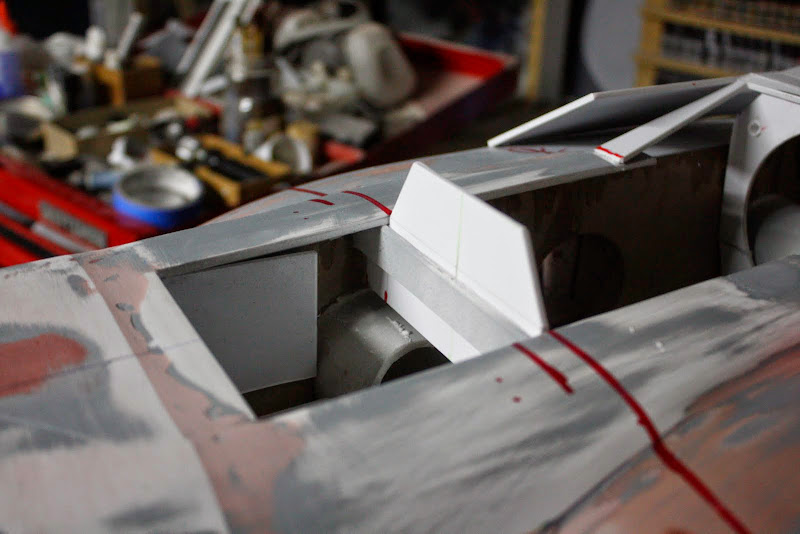
And for the main nose
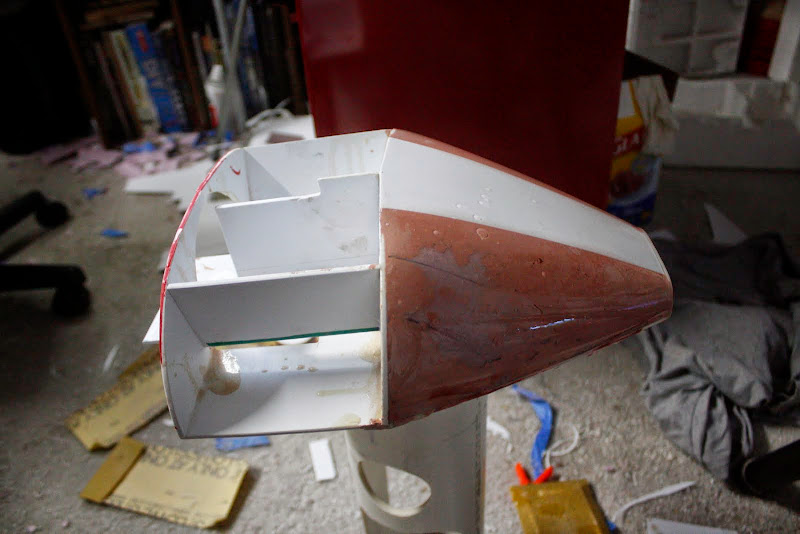
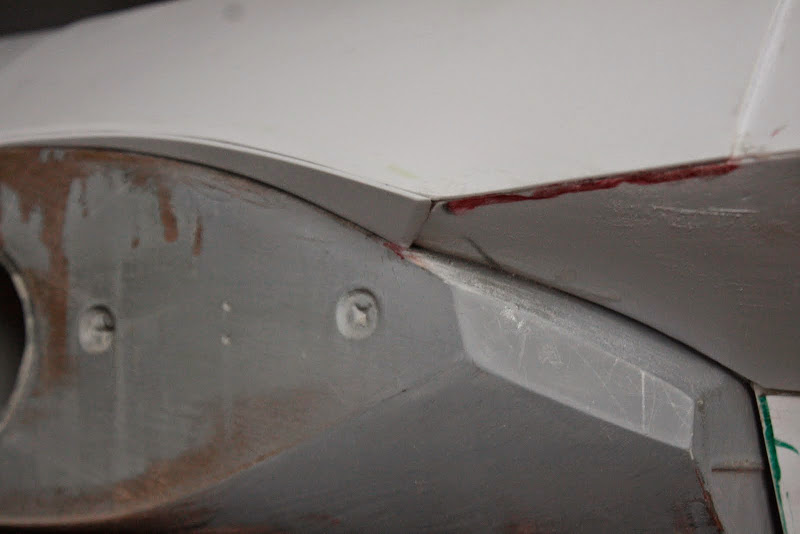
And the angle on the leading edge of the main body

Filled in another small detail surface
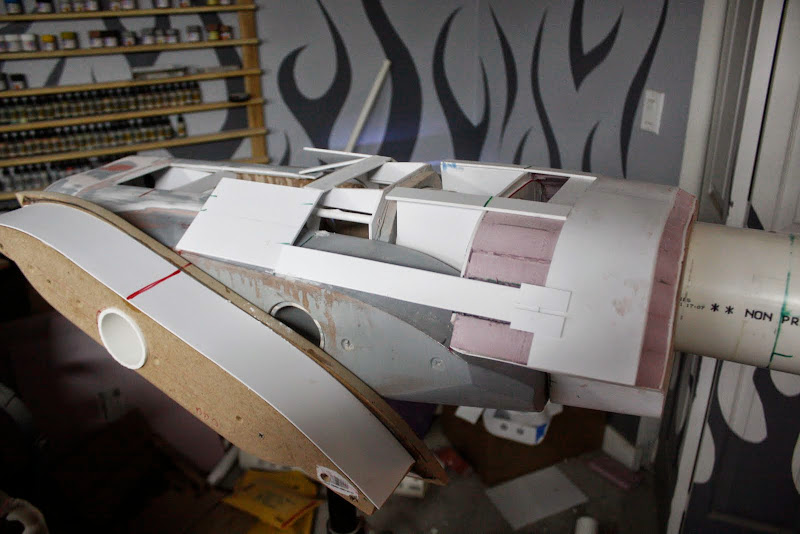
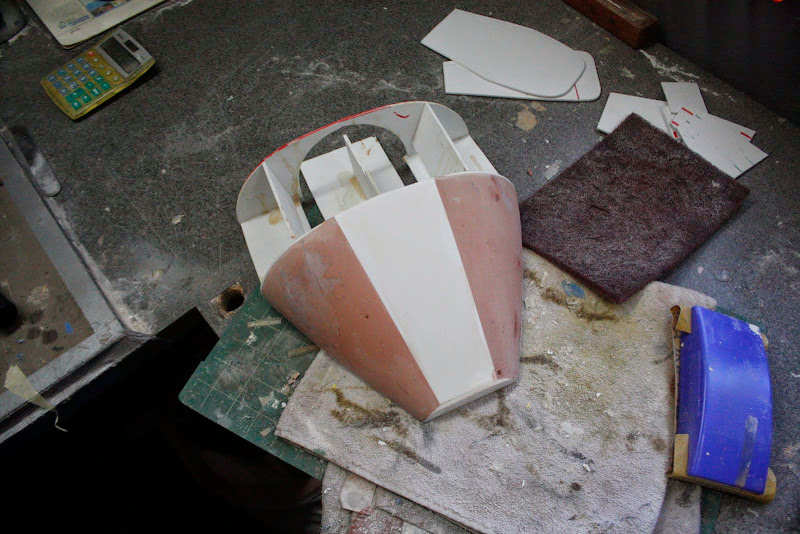
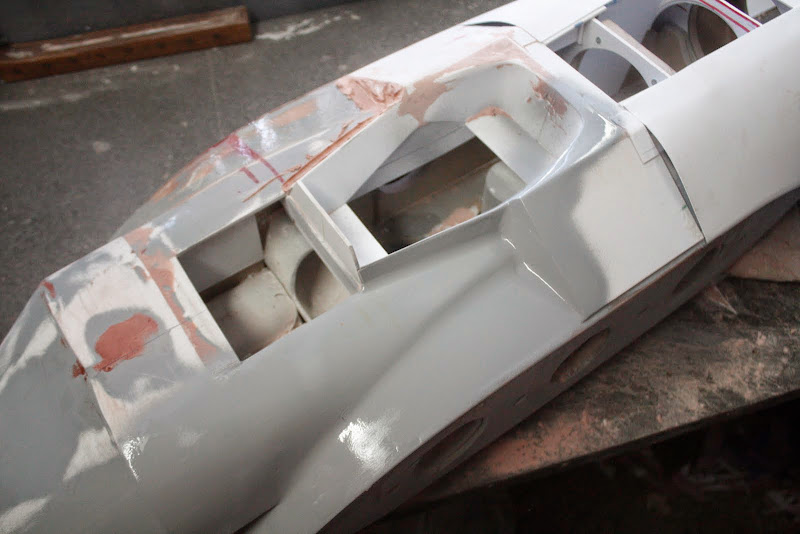
Then moved on to the back section and the escape pod detail
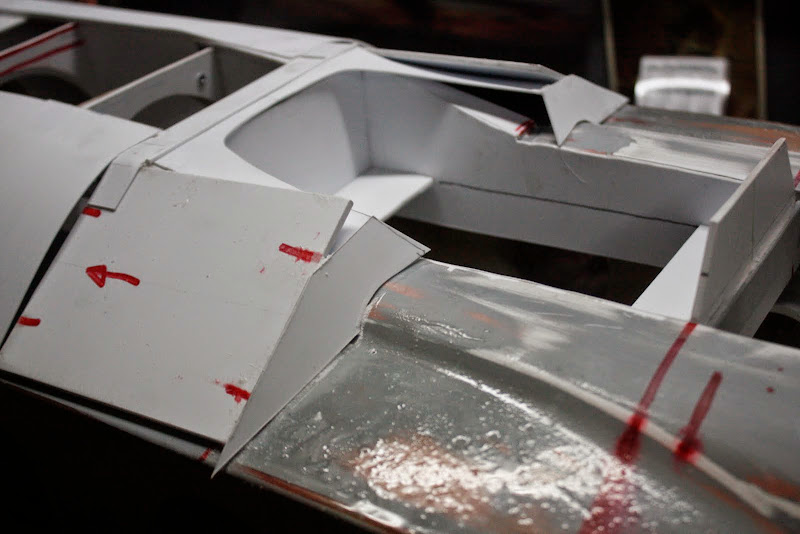

Made the mid point for the escape pod, i'm still not happy with this yet
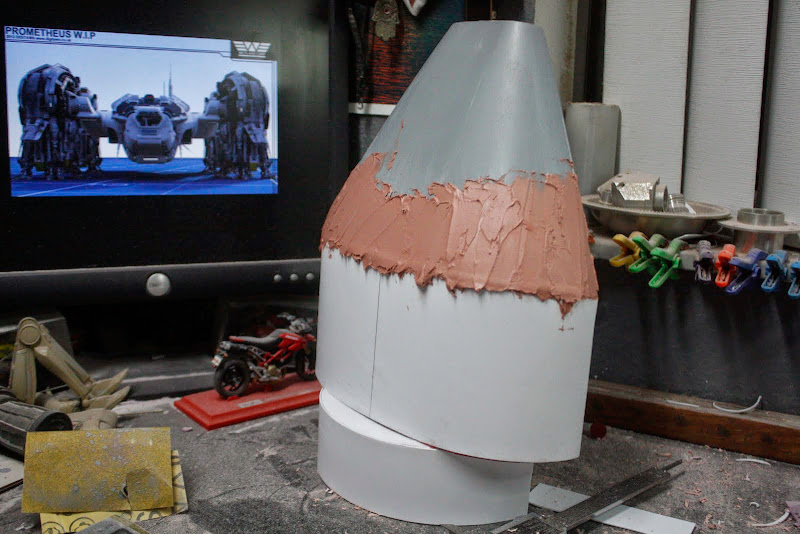
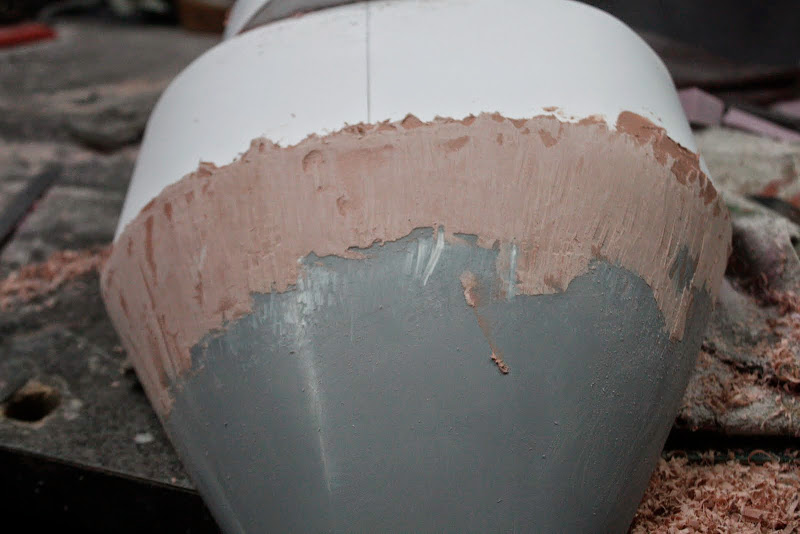
Slapped a bit off bondo on it

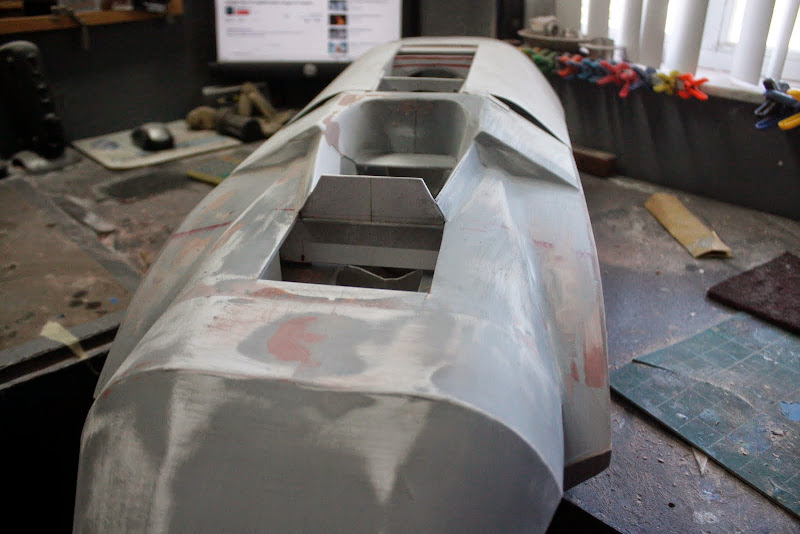
Gave the nose a final sand with 400
Then..............Mmmmmmmmmmmmmmm Primer
Did the little underside bit as well
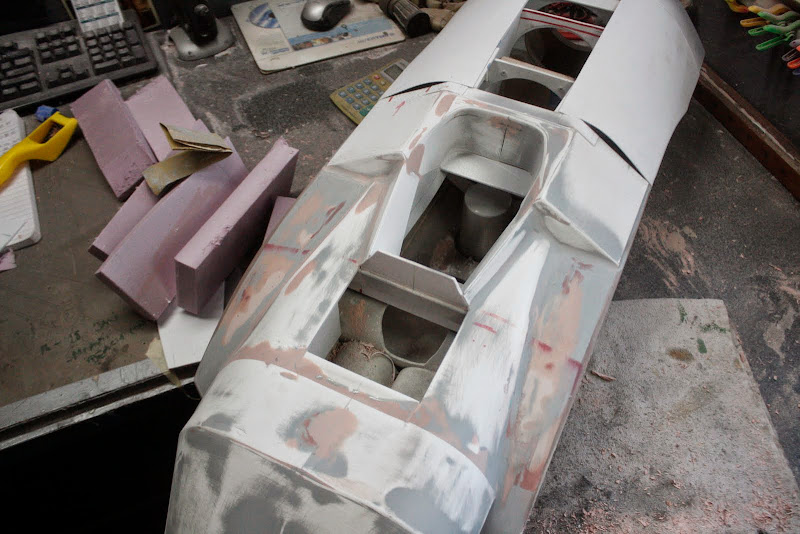
Top section sanded and primered
Both sides sanded back ready for another coat
But i've run out of primer, so it'll have to wait
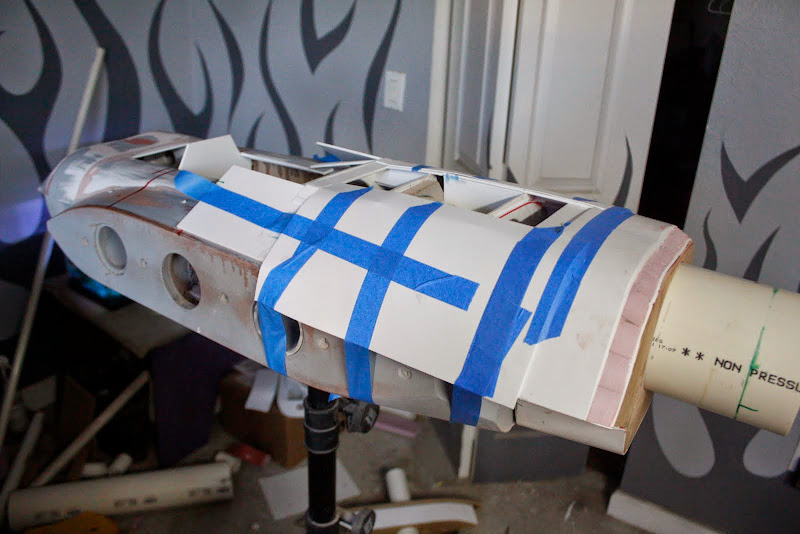
Moved forward to the front section
Covered with 1mm styrene sheet
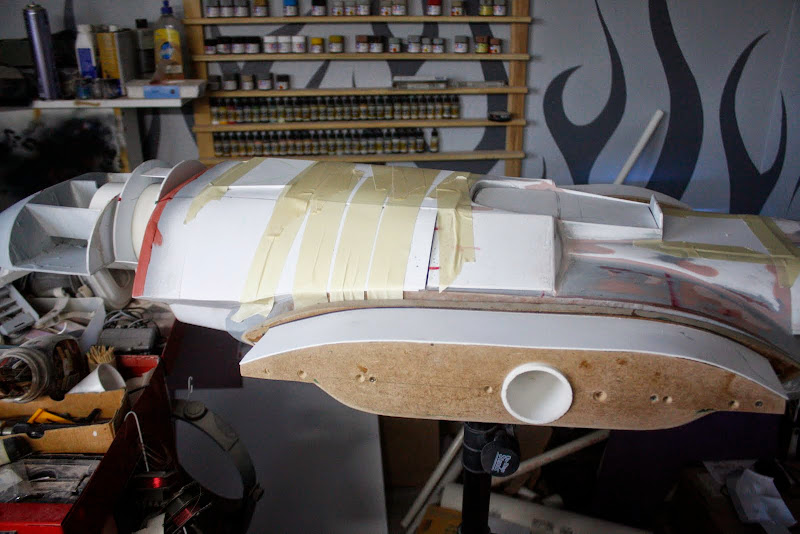
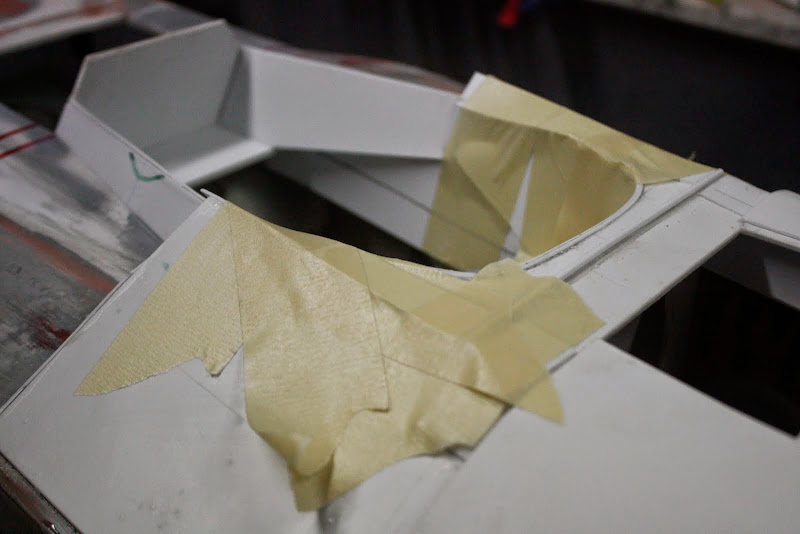
Tape off

And cleaned up
OK you can breath now, thats it
Got to get another tin of primer, then..........
Well you'll just have to wait and see
Till next time
Gag
OUT
Lot's to get to so hold on tight
Started to frame in the top section
Cut out profile of the top intakes
More frame work
Cut out the back of the escape pod profile
And in position
Next was the outer skin of the main body
Glued and taped
Profile cleaned
Moved on to the final nose section on the underside
Foam
Shaped
Piece of 1mm styrene sheet
Heated with just friction from my hand and bent and glued to the form then clamped
A coat of epoxy resin
And for the main nose
And the angle on the leading edge of the main body
Filled in another small detail surface
Then moved on to the back section and the escape pod detail
Made the mid point for the escape pod, i'm still not happy with this yet
Slapped a bit off bondo on it
Gave the nose a final sand with 400
Then..............Mmmmmmmmmmmmmmm Primer
Did the little underside bit as well
Top section sanded and primered
Both sides sanded back ready for another coat
But i've run out of primer, so it'll have to wait
Moved forward to the front section
Covered with 1mm styrene sheet
Tape off
And cleaned up
OK you can breath now, thats it
Got to get another tin of primer, then..........
Well you'll just have to wait and see
Till next time
Gag
OUT
brandomack
Sr Member
Your work never ceases to amaze me. That escape pod detail is gorgeous. :thumbsup
You've got some great control sculpting bonds over that styrene. Nice job!
Thanks for the support guys, much appreciated
Had a barney with the misses, in the dog house.
So lots of bench time lately ;D
On with the show
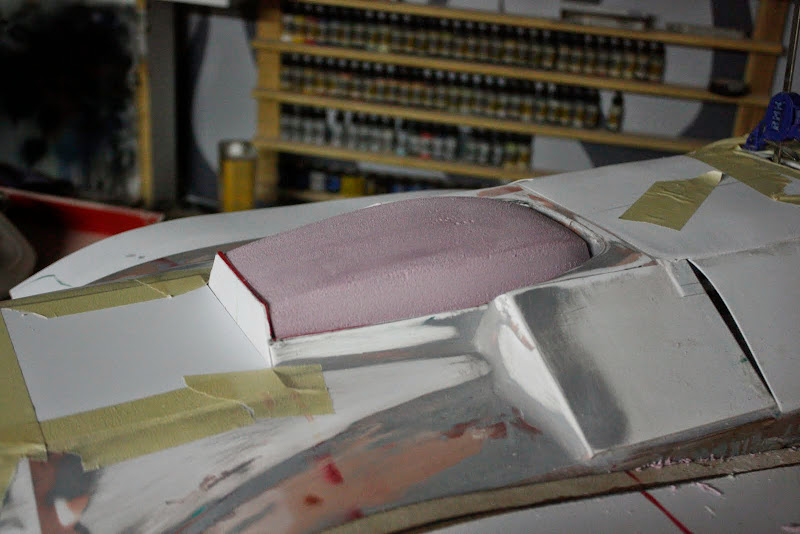
Stuck some foam to the escape pod piece
Glued the 'neck' to the 'head'

Skinned the neck and back of the head section
Shaped the bottom section of the escape pod foam
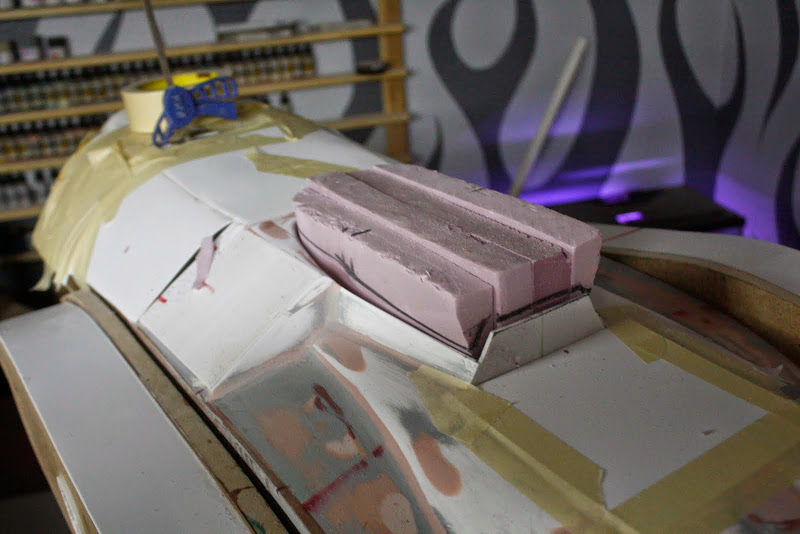
Reduced the thickness
Glued on the central separator
Then glued on an oversized top piece

Shaped the top piece
Sanded and in position
Bondo on the head
During clean up
Finished and in position
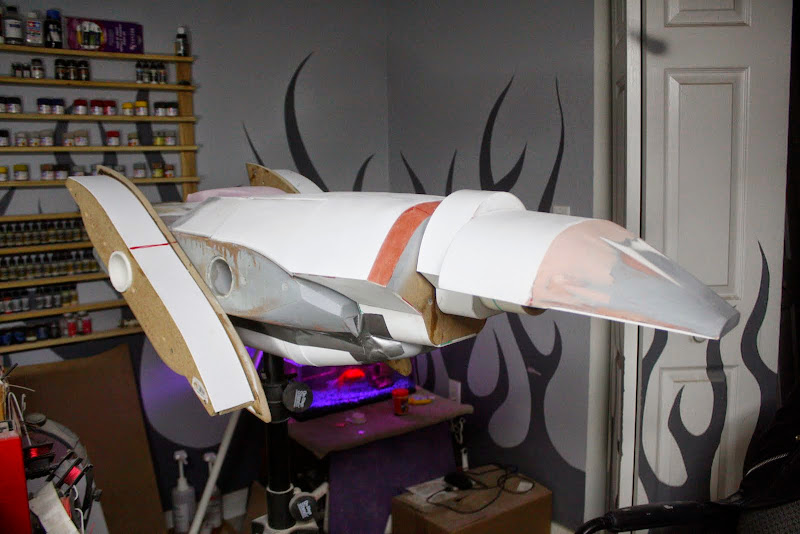
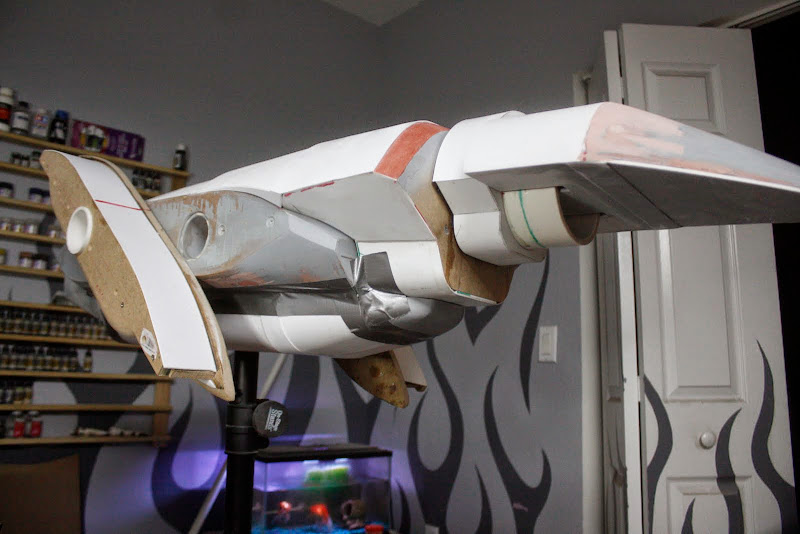
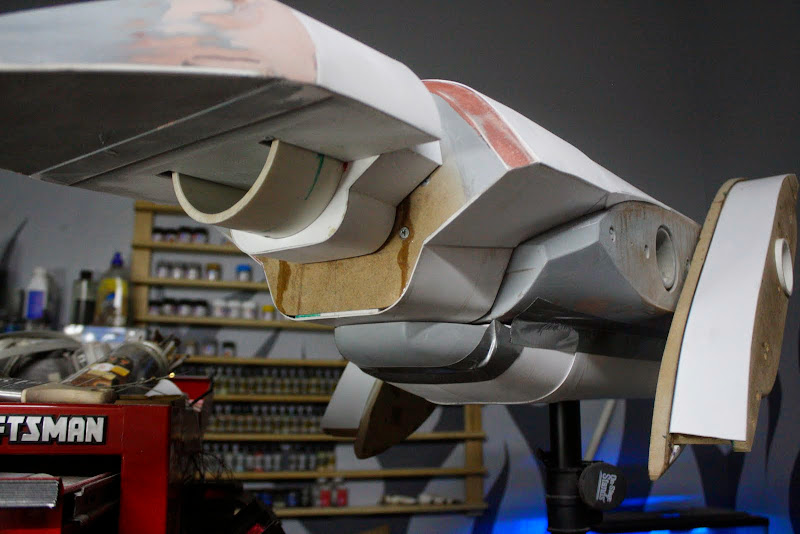
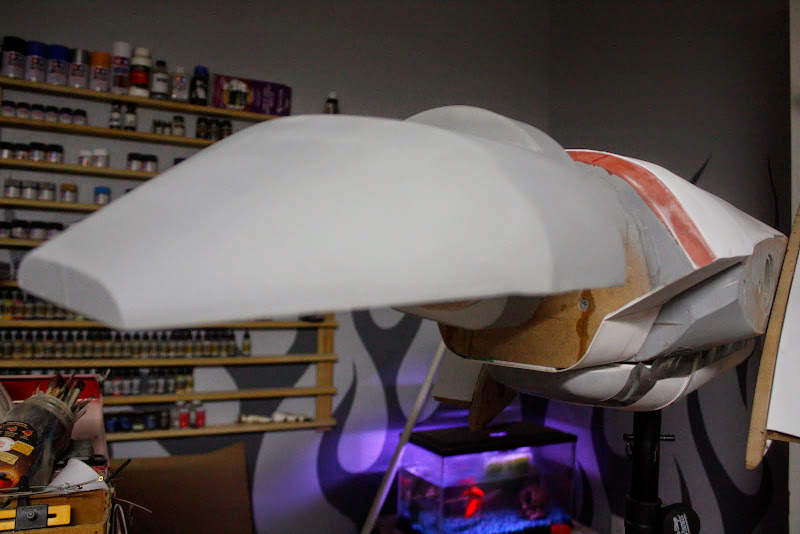
So, i do believe we are very close to primer time, but lets take a look at where we are so far


But, that will have to be next time
Cheers
Gag
Had a barney with the misses, in the dog house.
So lots of bench time lately ;D
On with the show
Stuck some foam to the escape pod piece
Glued the 'neck' to the 'head'
Skinned the neck and back of the head section
Shaped the bottom section of the escape pod foam
Reduced the thickness
Glued on the central separator
Then glued on an oversized top piece
Shaped the top piece
Sanded and in position
Bondo on the head
During clean up
Finished and in position
So, i do believe we are very close to primer time, but lets take a look at where we are so far
But, that will have to be next time
Cheers
Gag
wibble6996
New Member
Was trying to figure out how big this is. Obviously you've specified scale so it shouldnt be too tricky. I came up with 3.8 ft. based on a 560 ft. "Life"size. Reasonable estimate? http://up-ship.com/blog/?p=23385 if thats any use.. your work is an inspiration sir. May I ask if you'll be finishing your magneto skimmer?
All the best
All the best
IEDBOUNTYHUNTER
Sr Member
Looking. Great. Cant wait to get back on the betty. If it ever warms up out here
yuumi2891103
Master Member
Breath taking progress, my friend.
The shape is perfect!
katsu
The shape is perfect!
katsu
Afternoon Everyone,
Thanks for stopping by guys
Thank you so much Katsu-san
You are always welcome in Gagsterland
Hey Joe Mountain,
I have yes...........mmmmm, need alot i think.
Most stuff will be on the engine, but i think most will be hidden underneath the various vents on the body, the top intakes or the engine support arms.
I still have it in the budget to get maybe 4 or 6 Tamiya tanks or bikes or something, we shall see.
Hey Al,
Nice to hear from you Master
I hope your new job is going well mate and my book is finished before its too friggin late and i've finished this thing
Be i touch brother
Mr Wibble
I took the overall length to be 563 feet so in 1/144th that gives me an overall of 46.9173" x 32.49125". i compared the overall of the Fantastic plastic version which is 1/500 and ends up at 343.21mm x 237.68mm
The old MK2 might get finished one day, i think i will be inspired when the new F1 season starts in a few weeks
She just wants me to go away so i go to the Mancave, she's happy, i'm happy, result.
Danke mate, appreciate you always being along for the ride my friend
You again........friggin junkies :behave
LOL
Its a spray primer mate, basic car stuff, Rust-oleum 2 in 1 filler and sandable
24.4lbs so far, thats 11.09Kg for the Euro's out there.
I'm thinking of a sweep stake to guess the final weight and win a prize, an engine kit maybe,.........mmmmmmmmmm?
Welcome my friends,
Not much accomplished the last few days because of a very worrying pain in my right wrist.
It feels like bones are grating on bones, very painful, my hand can, at times, be useless.
Not good but i have an appointment to see a specialist tomorrow afternoon.
Enough negitivity
Would you like some cheese with that wine
the show MUST go on
To the man cave
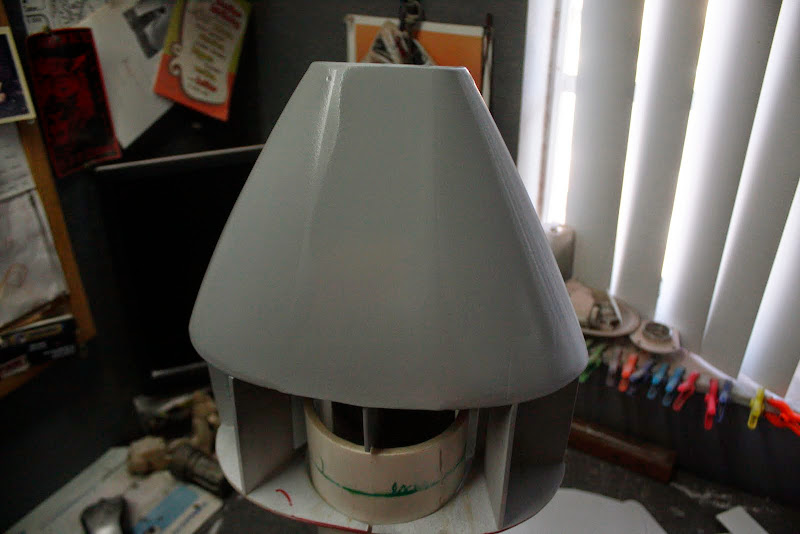
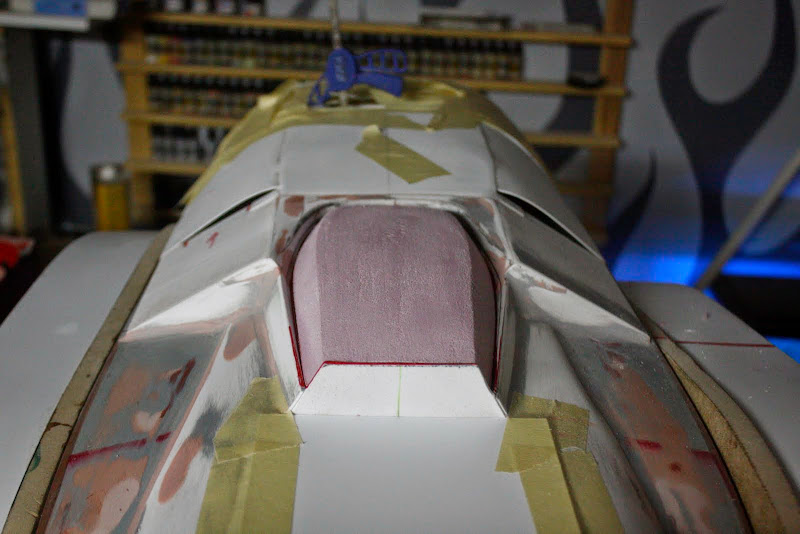
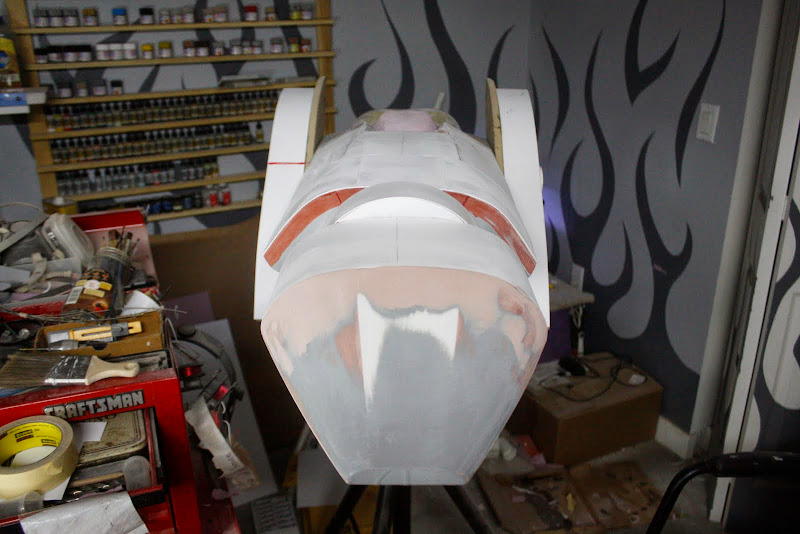
A wonderful out of focus shot of the head with primer
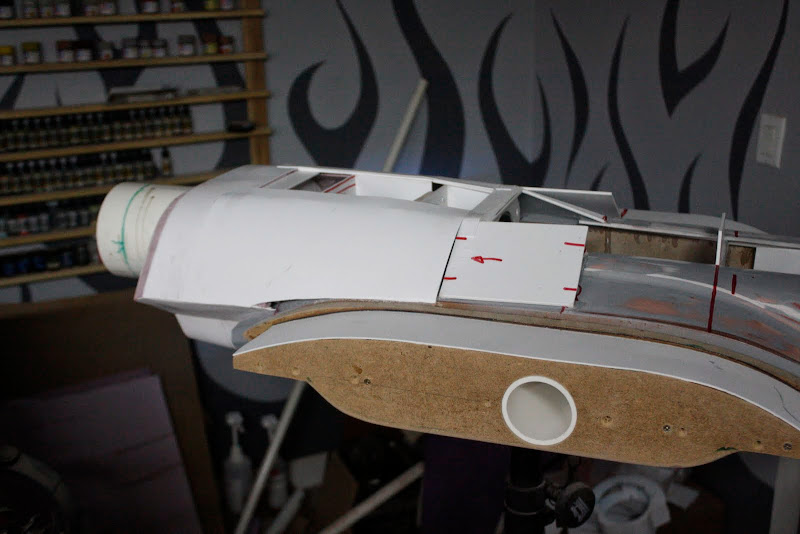
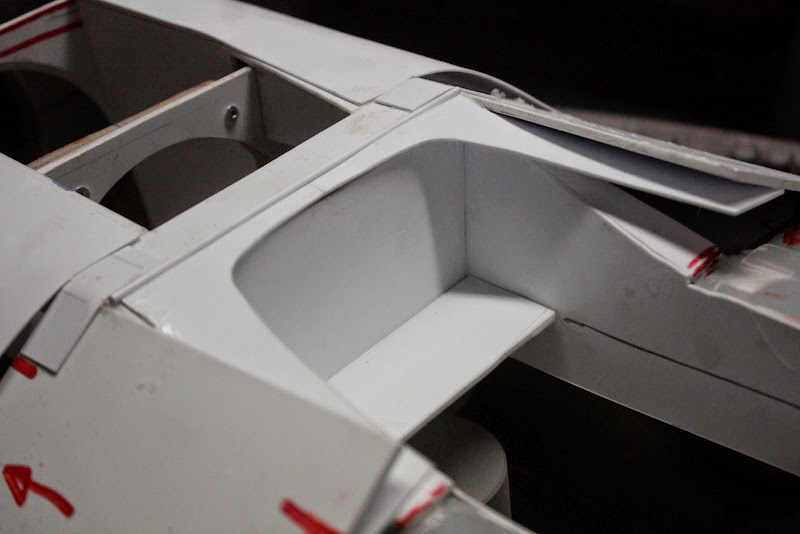
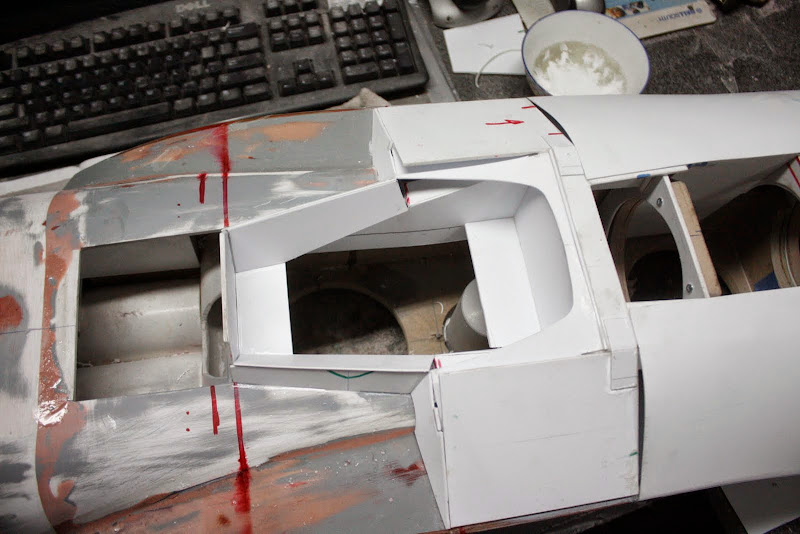
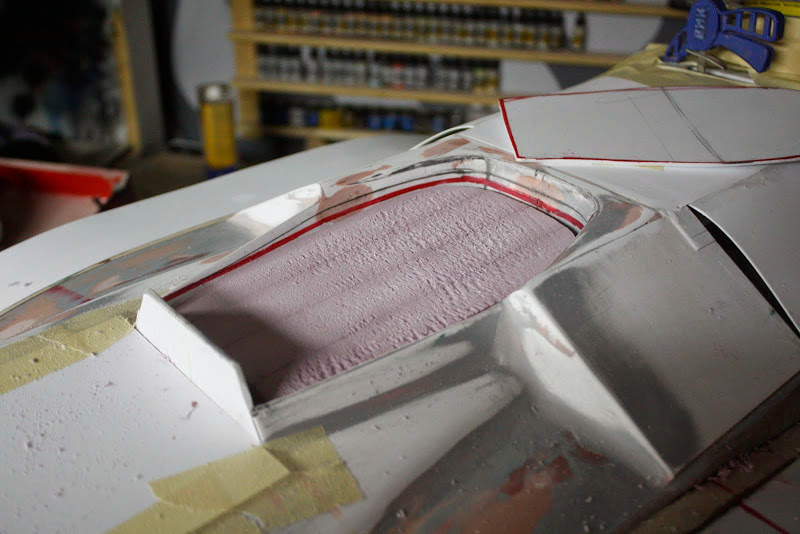
Decided to cut an access hole in the underside assembly
Maked out

And cut out with the dremel

Face the bulkhead with 1mm styrene sheet

Have run out of bonbo spot putty so used a bit of squadrom i had lying around, mmmm, not so good either
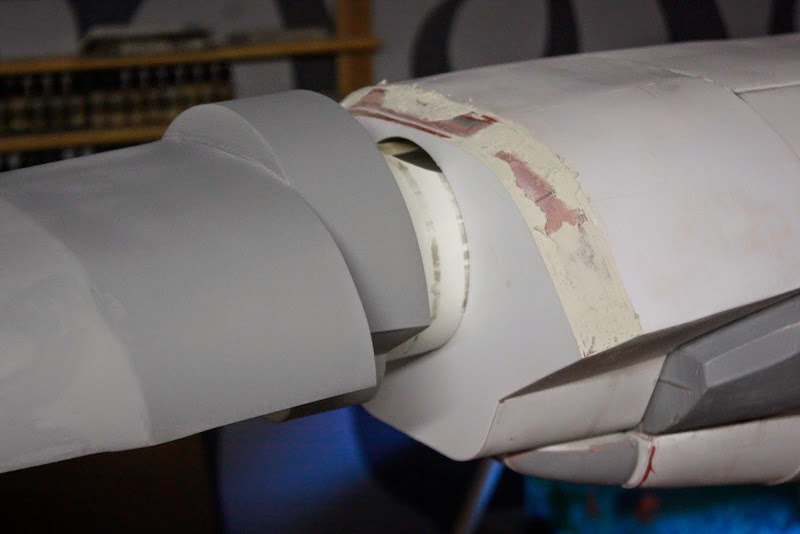
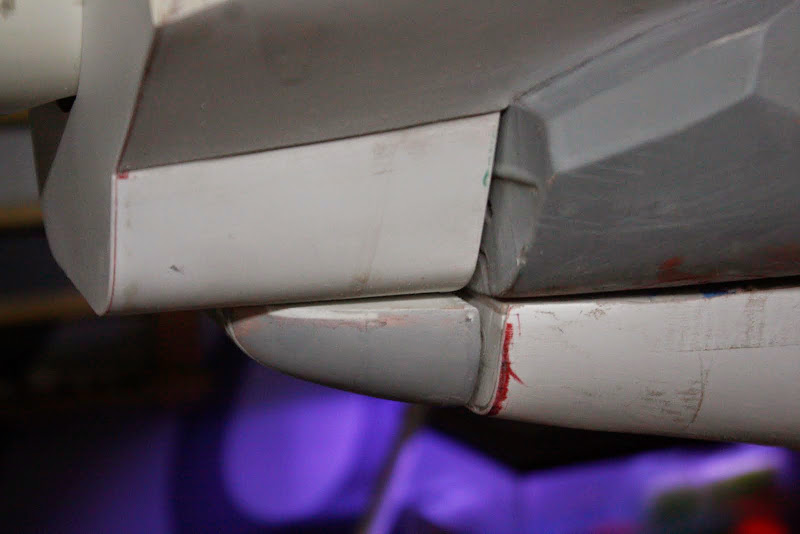
This whole join line has to be filled eventually but that will happen later
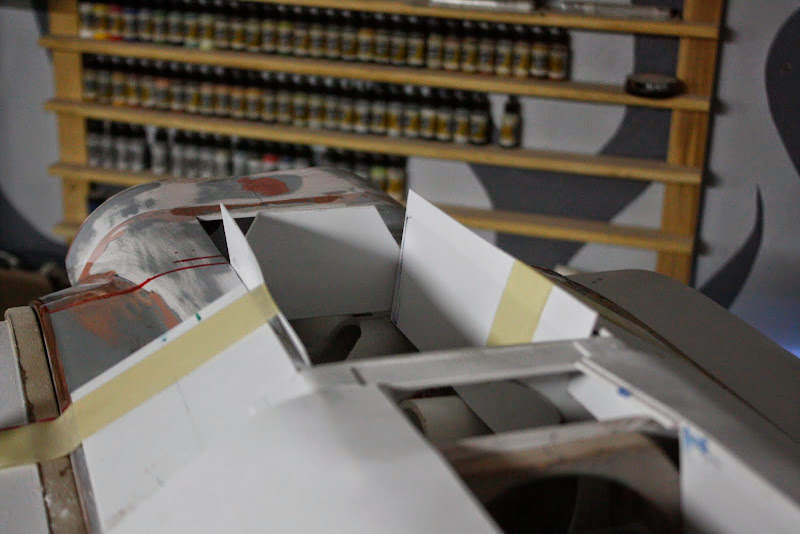
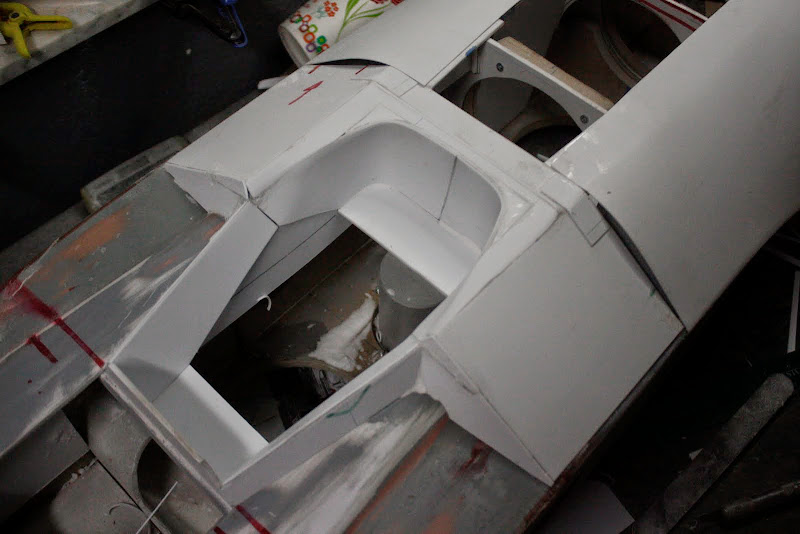
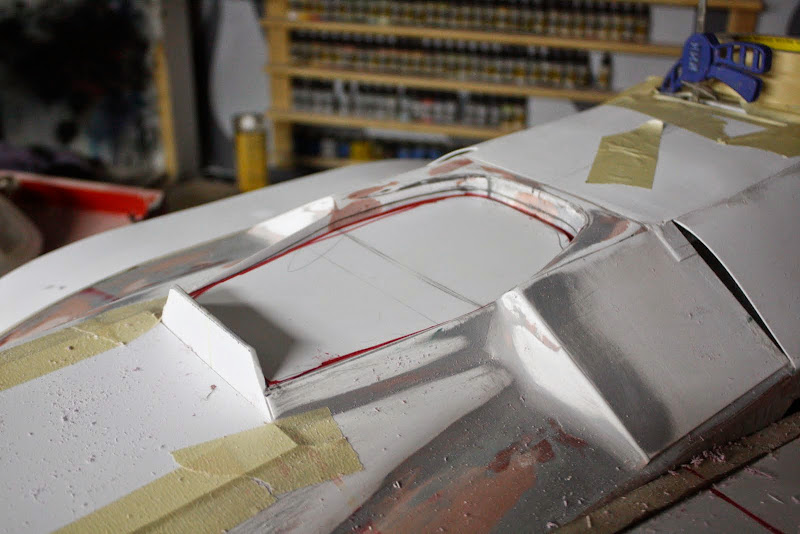
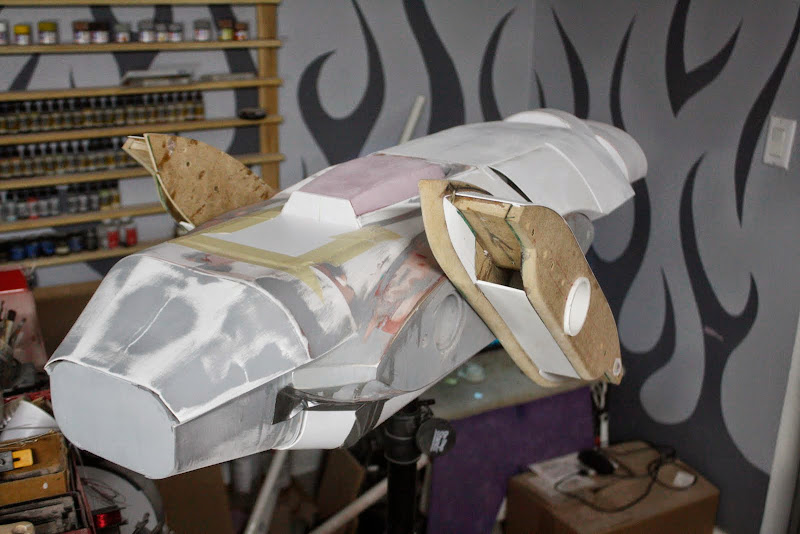
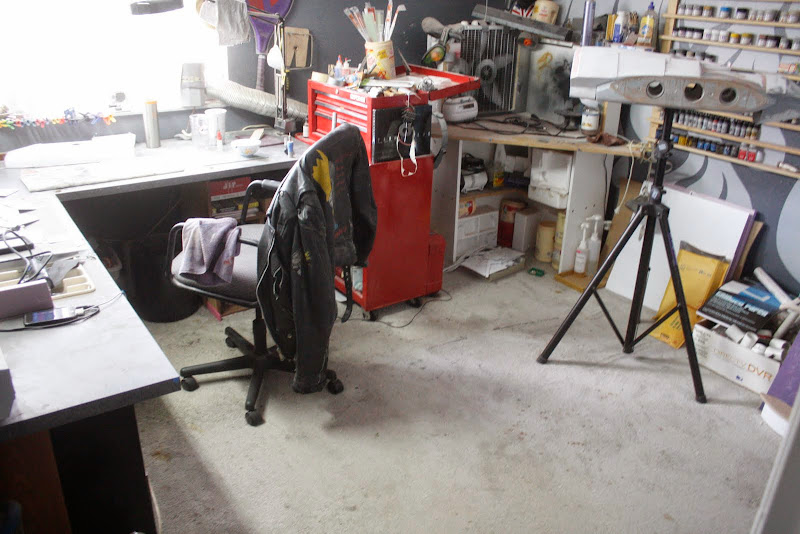
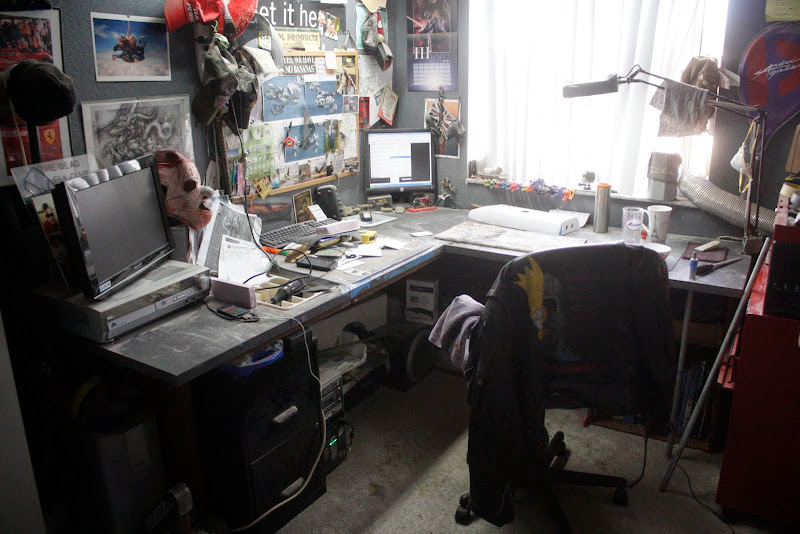
So i decided that it was time to clean the cave ready for final skinning and details,
So we went from this....

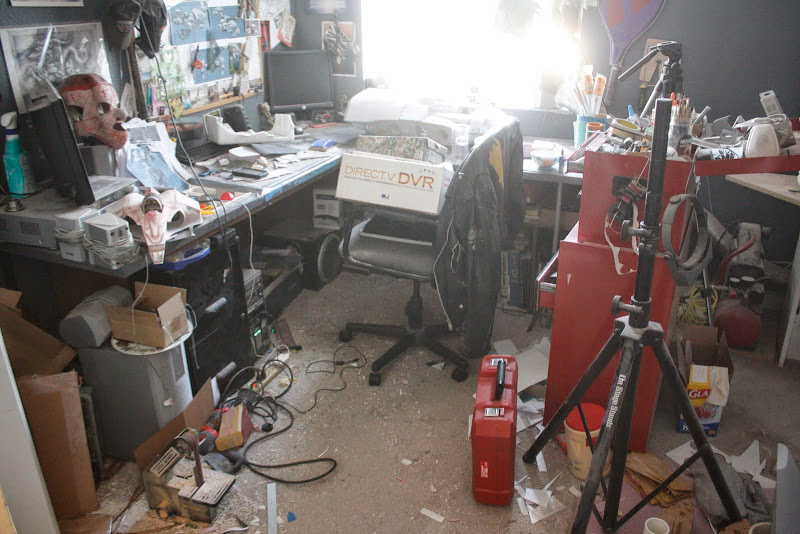


To this.....
The next stage of the build will be to make the engine plugs, for some parts silicon molds will be made and multiples cast. Now some people would make these on a 3D printer or machine them on a lathe and mill maybe but i don't have those things on hand.
I do have access to a machine shop but its called Work, and they don't like you making spaceships when you should be doing their jobs.
I am trying to make these i such a way so maybe i can make a few kits of just the engines to sell at a later date, but i make no promises. But if anyone can offer any tips to make this process easier for me as this will be my first time casting and molding then that would be great and much appreciated
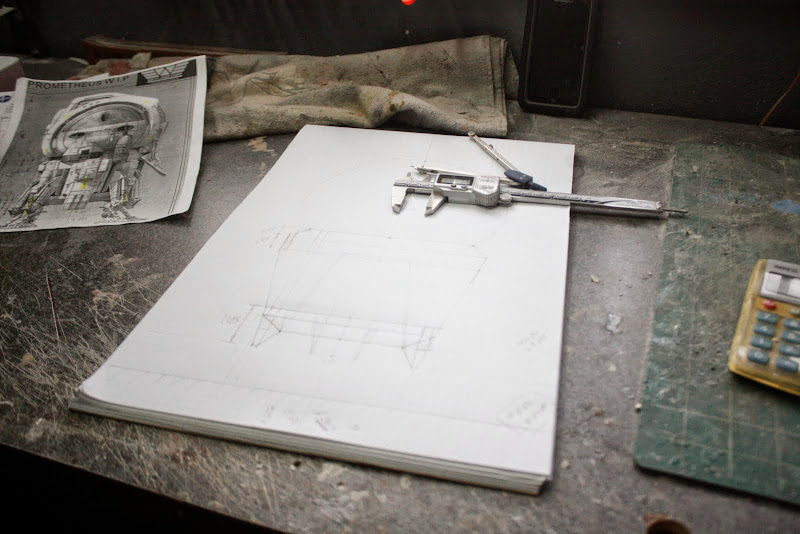
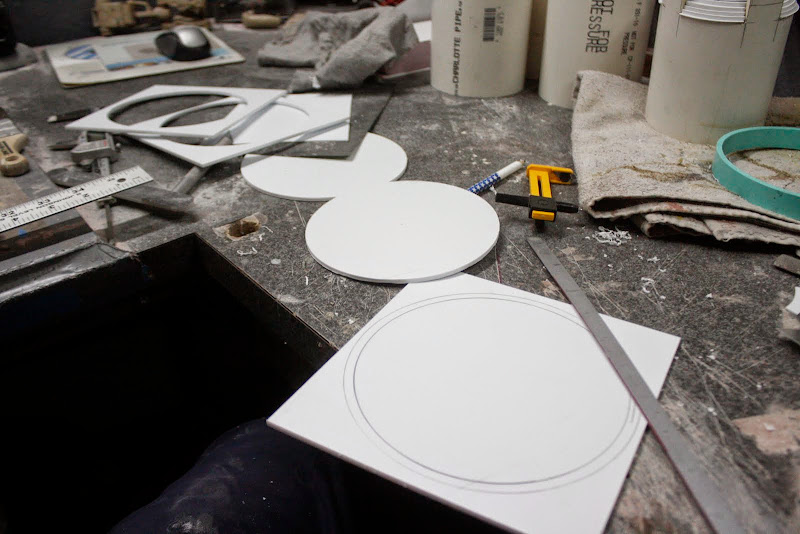
So the first thing i did was to make a scale drawing of the engine parts, everything scaled from Digitawn's computer rendering
4" diameter tubing from the local DIY store cut on my miter saw in the garage

Marked
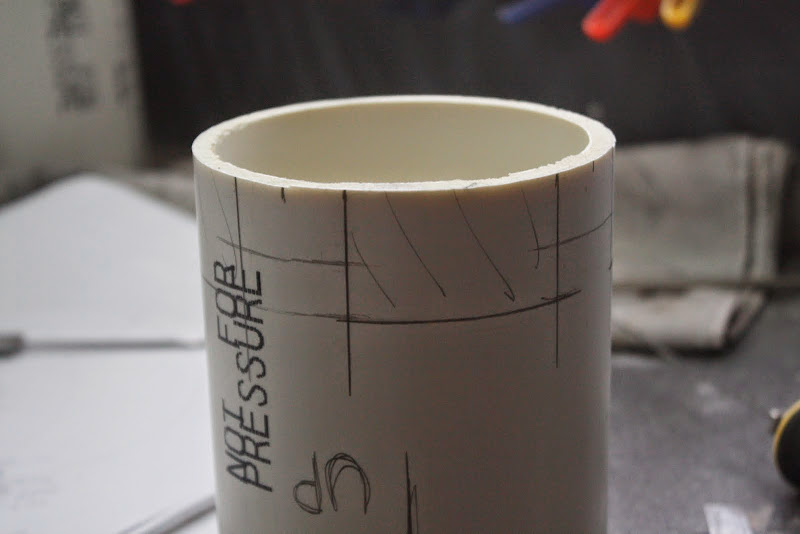
Cut
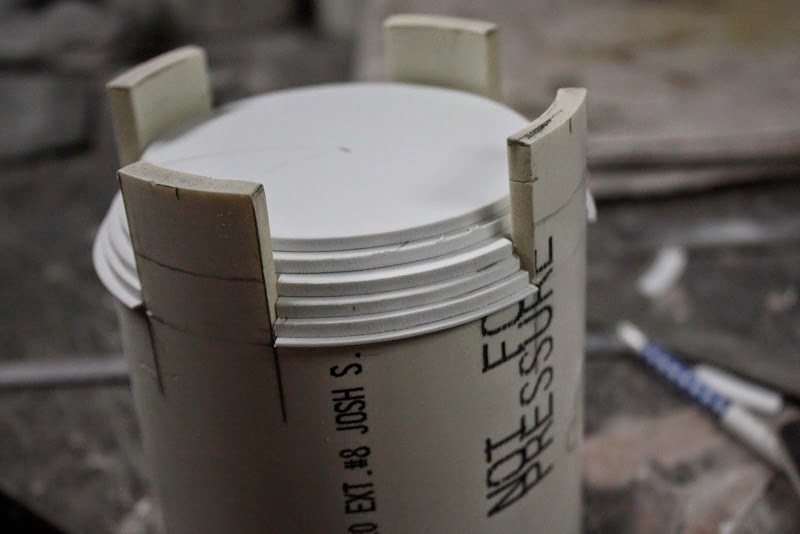
Then started to mark and cut out the different layers for my thruster nozzle from 1/8" and 0.040" styrene
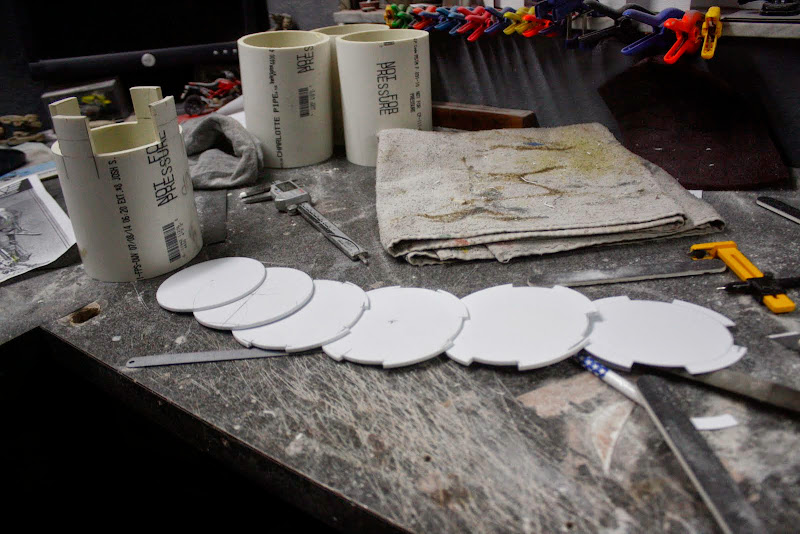
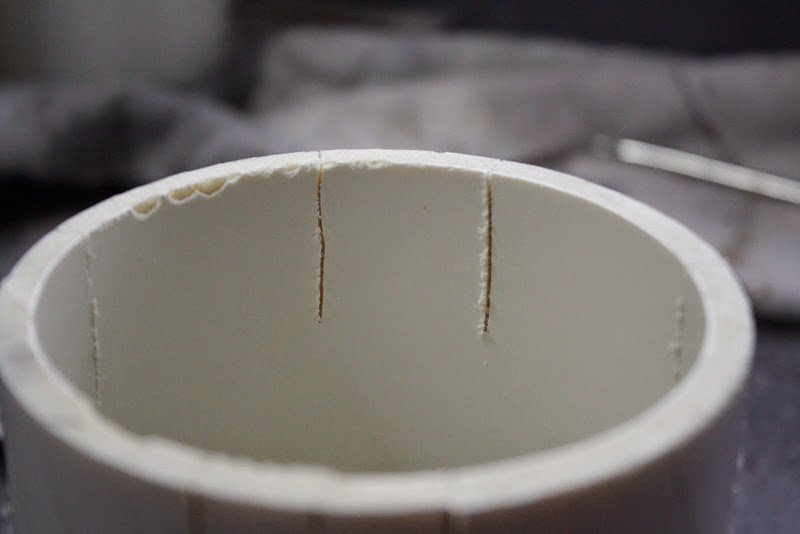
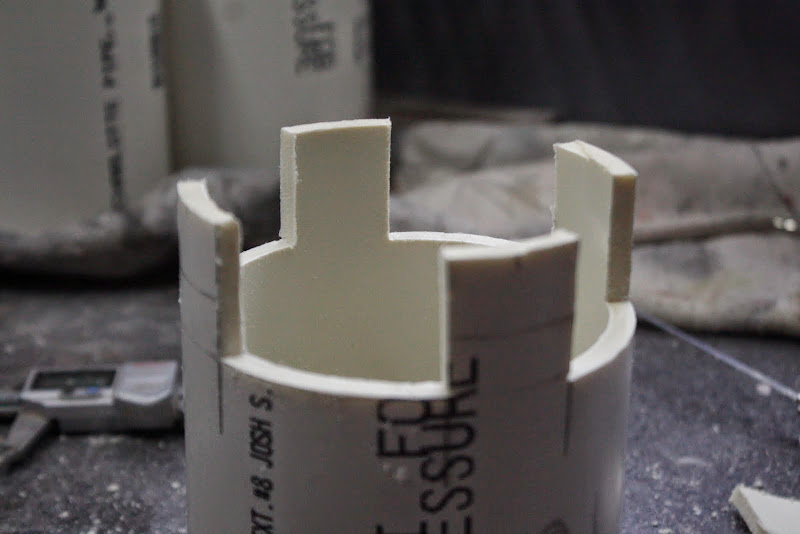
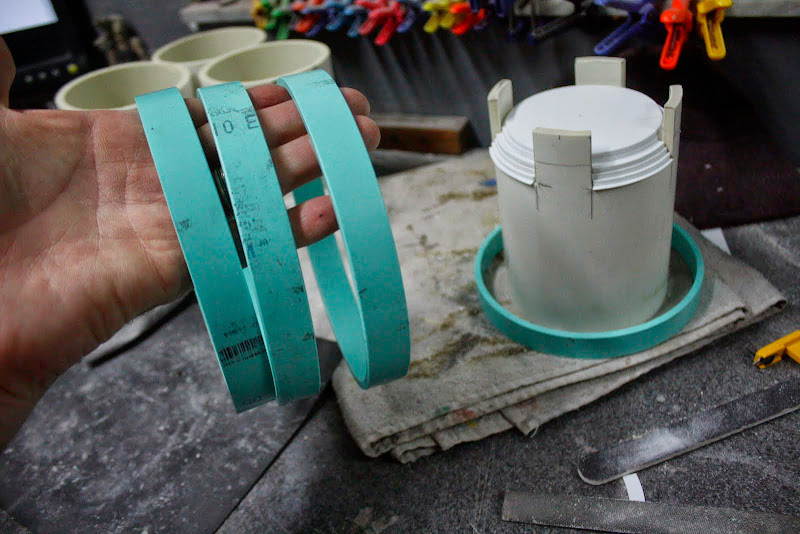
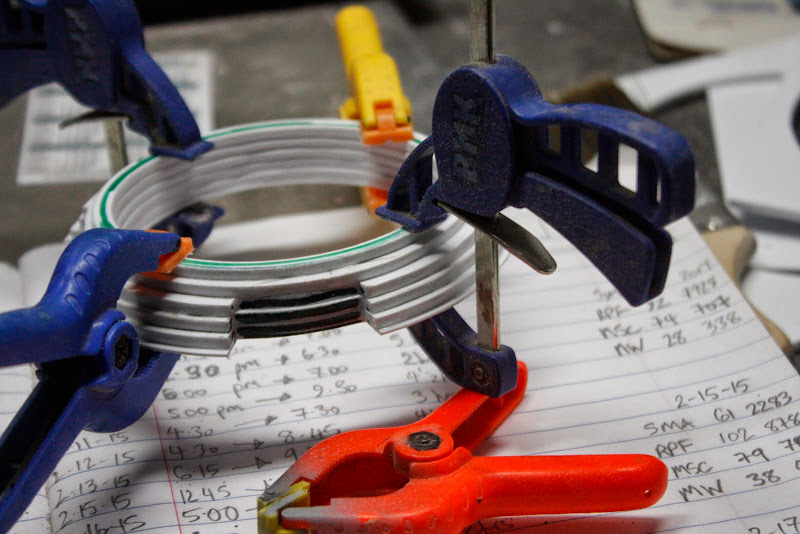
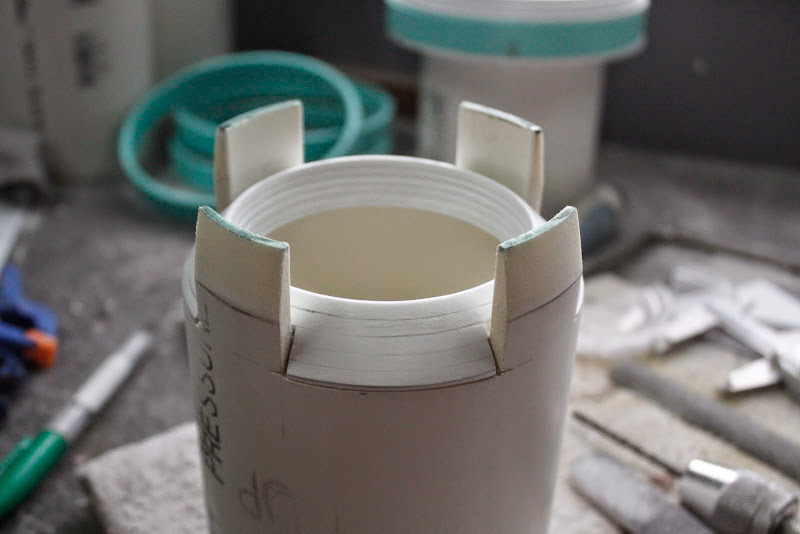
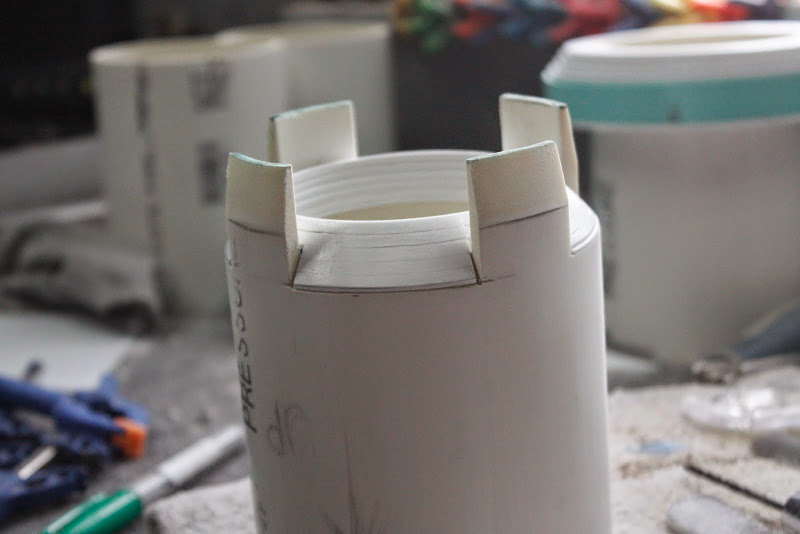
Cut and faced off 6" diameter PVC pipe into 3/4" wide rings
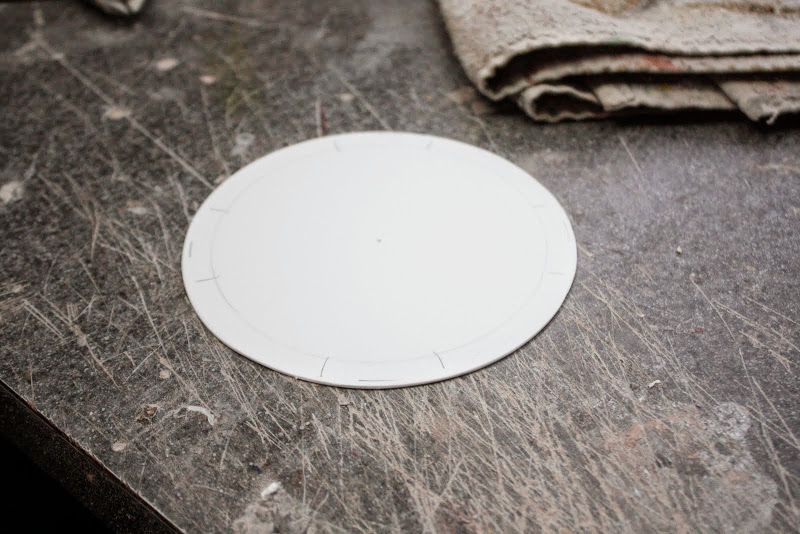
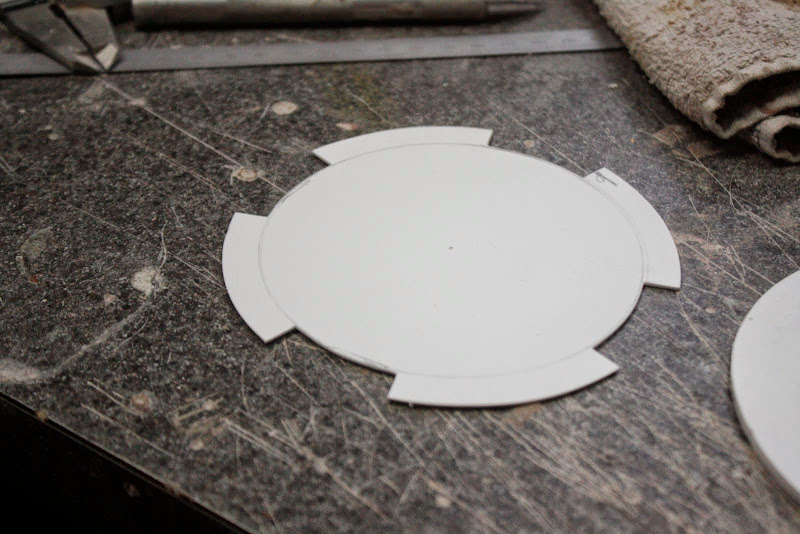
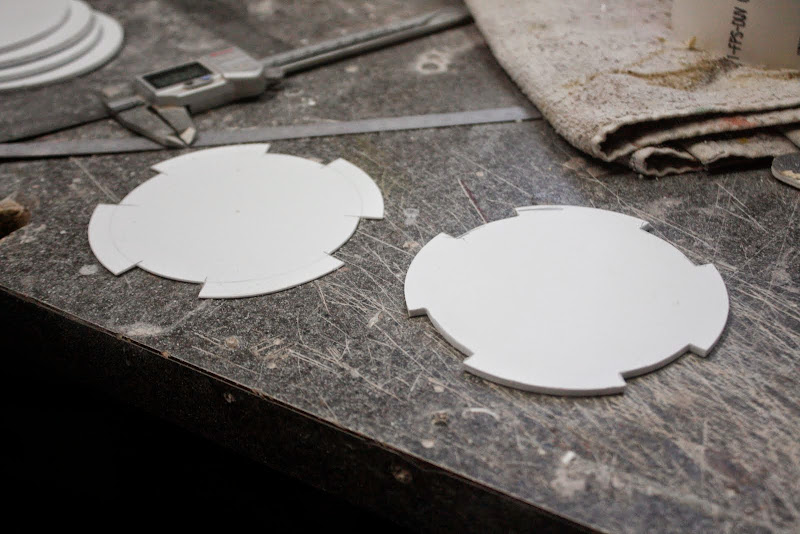
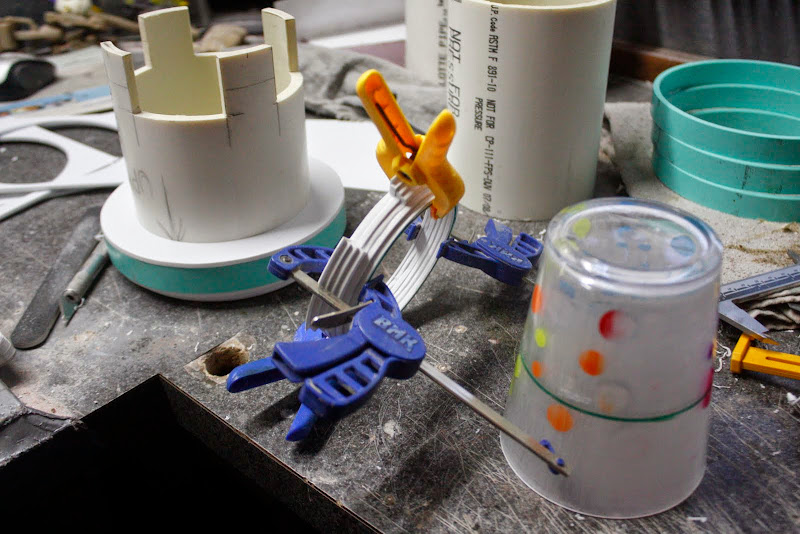
Marked and cut the layers fo the top of the engine nozzle from 1/8" styrene sheet


Made a hole through the middle and glued everything together
Was going to use one of these cups for the inside but after further analisis i think its to short so will get the taller ones next time i'm at the store
Started to shape the bottom nozzle first using the ******* half round file
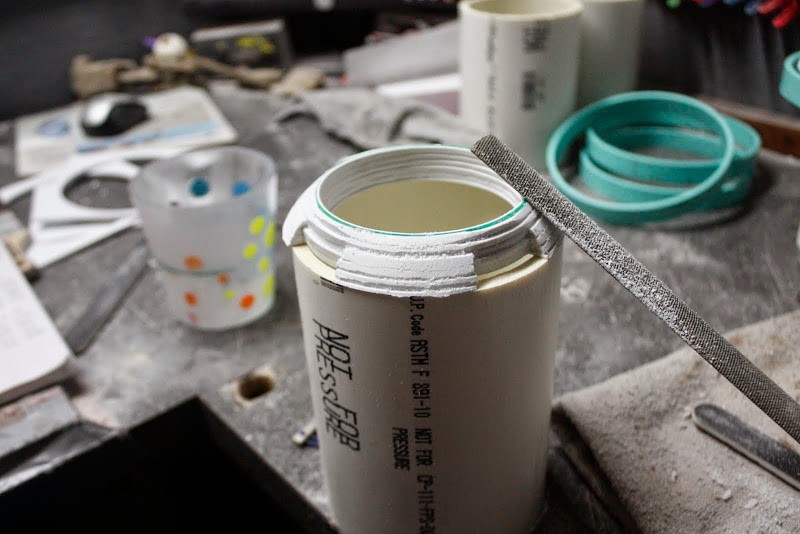
Creaned with a salon board
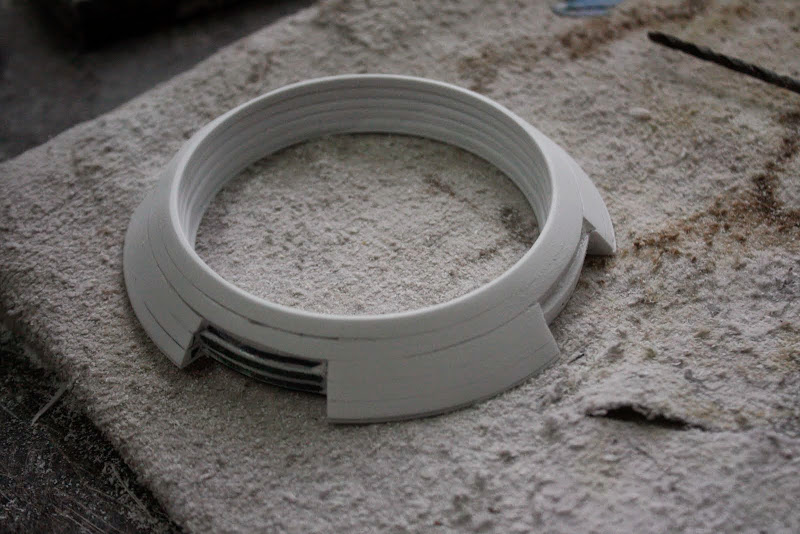
Tapered the end of the tube

And thats it so far
Stay tuned for more updates
Gagsterman
Thanks for stopping by guys
Breath taking progress, my friend.
The shape is perfect!
katsu
Thank you so much Katsu-san
You are always welcome in Gagsterland
Great updates; you can see the shape already. I know that you aren't there yet, but did you think about the greeblies on that baby
Hey Joe Mountain,
I have yes...........mmmmm, need alot i think.
Most stuff will be on the engine, but i think most will be hidden underneath the various vents on the body, the top intakes or the engine support arms.
I still have it in the budget to get maybe 4 or 6 Tamiya tanks or bikes or something, we shall see.
Looking. Great. Cant wait to get back on the betty. If it ever warms up out here
Hey Al,
Nice to hear from you Master
I hope your new job is going well mate and my book is finished before its too friggin late and i've finished this thing
Be i touch brother
Was trying to figure out how big this is. Obviously you've specified scale so it shouldnt be too tricky. I came up with 3.8 ft. based on a 560 ft. "Life"size. Reasonable estimate? http://up-ship.com/blog/?p=23385 if thats any use.. your work is an inspiration sir. May I ask if you'll be finishing your magneto skimmer?
All the best
Mr Wibble
I took the overall length to be 563 feet so in 1/144th that gives me an overall of 46.9173" x 32.49125". i compared the overall of the Fantastic plastic version which is 1/500 and ends up at 343.21mm x 237.68mm
The old MK2 might get finished one day, i think i will be inspired when the new F1 season starts in a few weeks
This is ridiculous. When I have a barney with the mrs, I sit in the bath and read a book about snooker.
She just wants me to go away so i go to the Mancave, she's happy, i'm happy, result.
Wahhhhhh.... that is SO cool...!!!!!
Danke mate, appreciate you always being along for the ride my friend
Looking great Gag!
couple questions , if I may...What type of brush on? Primer is that u use?
and What does she weigh in at now?.......The Prometheus not the spat winner....Hahaha
Cheers brother
You again........friggin junkies :behave
LOL
Its a spray primer mate, basic car stuff, Rust-oleum 2 in 1 filler and sandable
24.4lbs so far, thats 11.09Kg for the Euro's out there.
I'm thinking of a sweep stake to guess the final weight and win a prize, an engine kit maybe,.........mmmmmmmmmm?
Welcome my friends,
Not much accomplished the last few days because of a very worrying pain in my right wrist.
It feels like bones are grating on bones, very painful, my hand can, at times, be useless.
Not good but i have an appointment to see a specialist tomorrow afternoon.
Enough negitivity
Would you like some cheese with that wine
the show MUST go on
To the man cave
A wonderful out of focus shot of the head with primer
Decided to cut an access hole in the underside assembly
Maked out
And cut out with the dremel
Face the bulkhead with 1mm styrene sheet
Have run out of bonbo spot putty so used a bit of squadrom i had lying around, mmmm, not so good either
This whole join line has to be filled eventually but that will happen later
So i decided that it was time to clean the cave ready for final skinning and details,
So we went from this....
To this.....
The next stage of the build will be to make the engine plugs, for some parts silicon molds will be made and multiples cast. Now some people would make these on a 3D printer or machine them on a lathe and mill maybe but i don't have those things on hand.
I do have access to a machine shop but its called Work, and they don't like you making spaceships when you should be doing their jobs.
I am trying to make these i such a way so maybe i can make a few kits of just the engines to sell at a later date, but i make no promises. But if anyone can offer any tips to make this process easier for me as this will be my first time casting and molding then that would be great and much appreciated
So the first thing i did was to make a scale drawing of the engine parts, everything scaled from Digitawn's computer rendering
4" diameter tubing from the local DIY store cut on my miter saw in the garage
Marked
Cut
Then started to mark and cut out the different layers for my thruster nozzle from 1/8" and 0.040" styrene
Cut and faced off 6" diameter PVC pipe into 3/4" wide rings
Marked and cut the layers fo the top of the engine nozzle from 1/8" styrene sheet
Made a hole through the middle and glued everything together
Was going to use one of these cups for the inside but after further analisis i think its to short so will get the taller ones next time i'm at the store
Started to shape the bottom nozzle first using the ******* half round file
Creaned with a salon board
Tapered the end of the tube
And thats it so far
Stay tuned for more updates
Gagsterman
struschie
Well-Known Member
Always a pleasure to see your work, mate!
Fo rcasting maybe my hints written here translate good enough run through google translate:
http://www.phoxim.de/forum/index.php?topic=5589.0
All the best for your hand - you've to finish some jobs here
Fo rcasting maybe my hints written here translate good enough run through google translate:
http://www.phoxim.de/forum/index.php?topic=5589.0
All the best for your hand - you've to finish some jobs here