Portal Gun, Version 2 (so many pictures!)

Volpin

Sr Member
RPF PREMIUM MEMBER
One of my very first props I ever spent enough time to call "accurate" was my wife's Portal Gun, from Valve's 2007 release "Portal"

3576110813_112bffb392_o.jpg


I've recently had the chance to revisit this project, as some of you guys may have seen when I was asking for moldmaking advice with the main center barrel a few weeks ago.

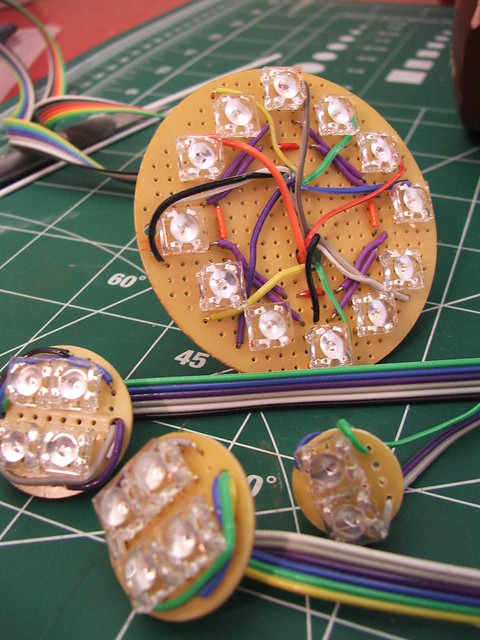
I figured I'd start a thread to show you some of the progress and keep tabs on the rest of the work going forward. The main differences between this piece and V1 is that V2 will have sound, brighter lights, a more accurate barrel, and is built entirely from cast parts. Its also about 4lbs heavier.

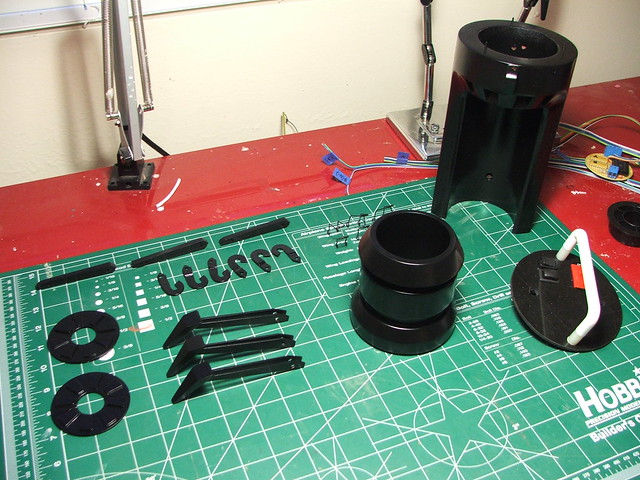
I started out by molding various parts from V1. These were decent molds that didn't require too much cleanup.

3965936929_c75aae0ddf_z.jpg

4006533365_1565084e62_z.jpg


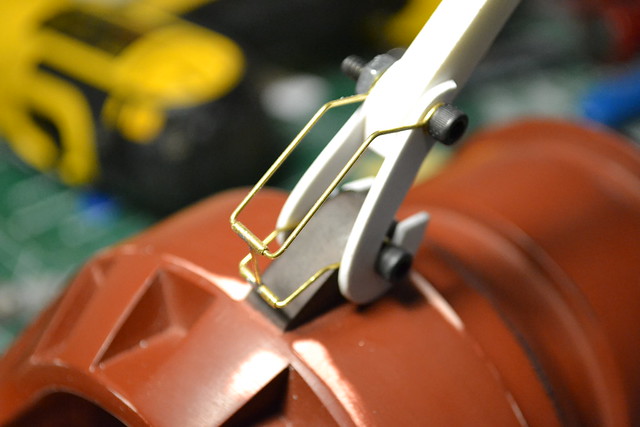
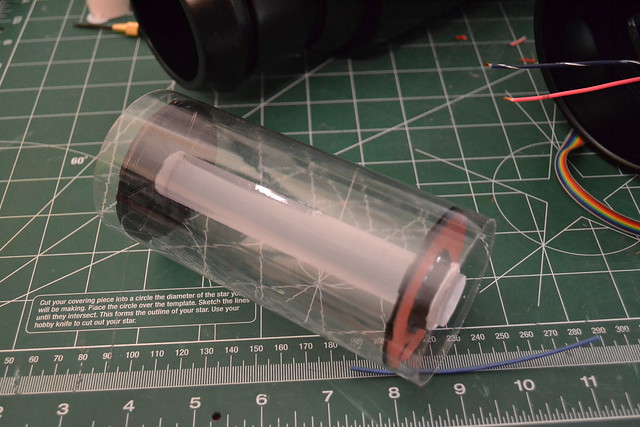
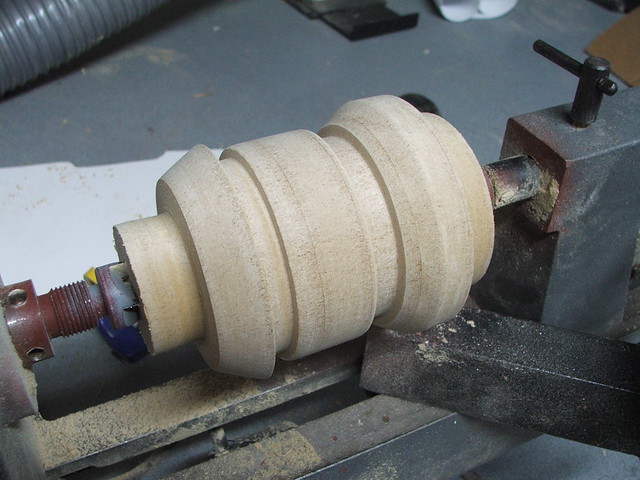
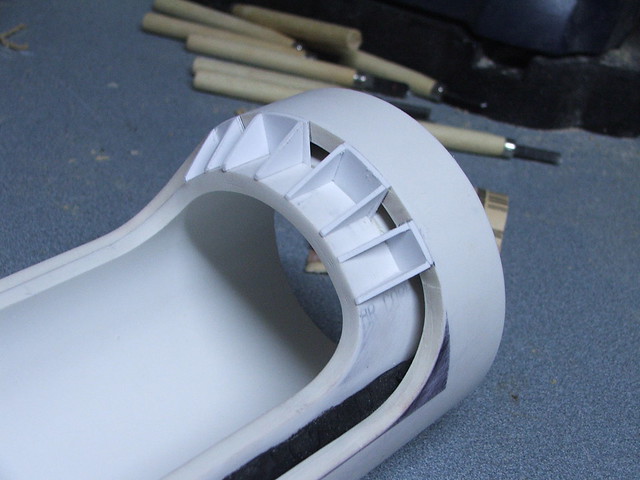
After trying, and failing, to mold the entire barrel section of V1, I remade the individual pieces of the barrel and molded those instead. The end portion is MDF turned on a lathe, the central and rear parts are PVC.

5014220661_7b6e6d5667_z.jpg

5014828166_4dee6ebfd4_z.jpg

5014828196_7db9b3bfc2_z.jpg

5074181274_8504f3009b_z.jpg


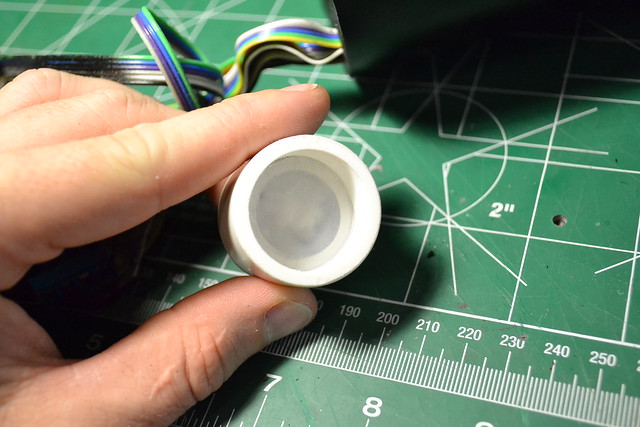
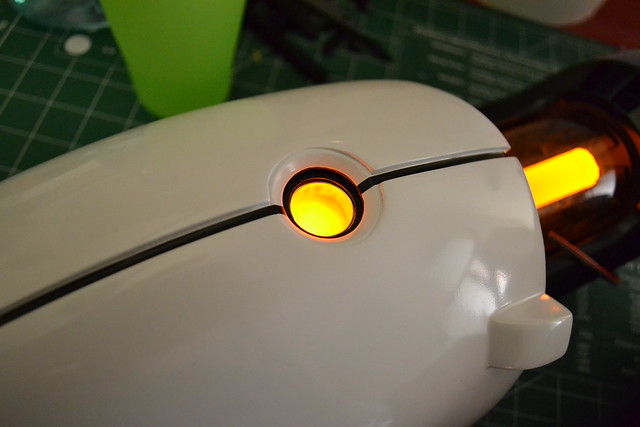
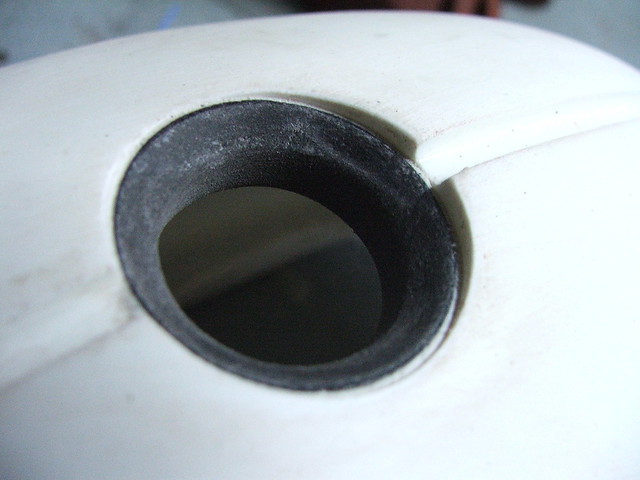
Since I have a lathe now, I modded the center light button on the casing to be a bit smoother and more uniform. Back when I built V1, all I had was a hand sander and a dremel tool.

5083928780_92893ea364_z.jpg


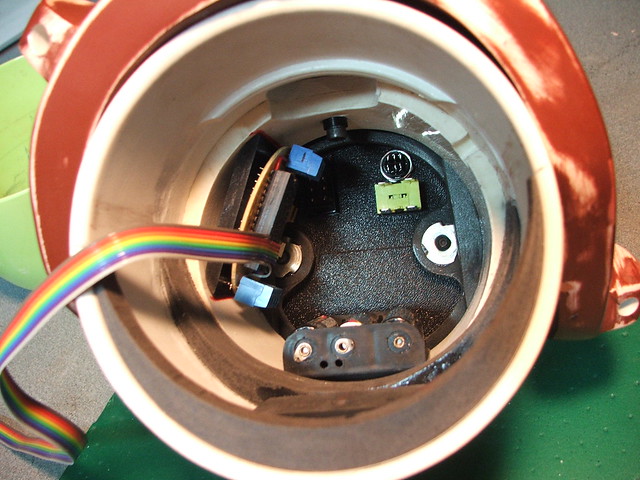
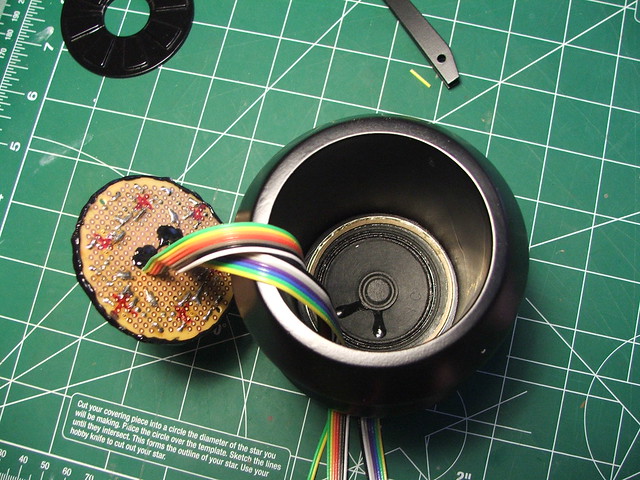
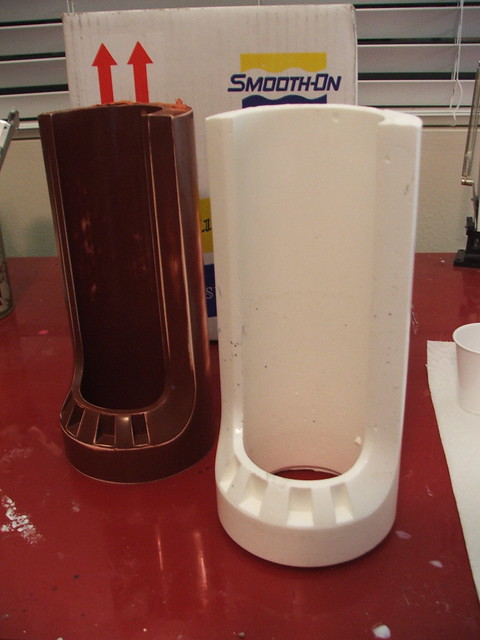
The center barrel was tricky... Thanks to the people here I was able to make a workable mold of it and pull some pretty good copies. Takes a lot of resin, but its much faster than making each one by hand.

5100895019_d51e8d3ea1_z.jpg


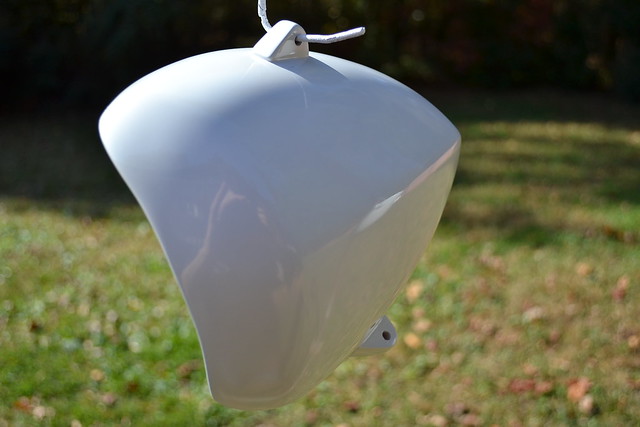
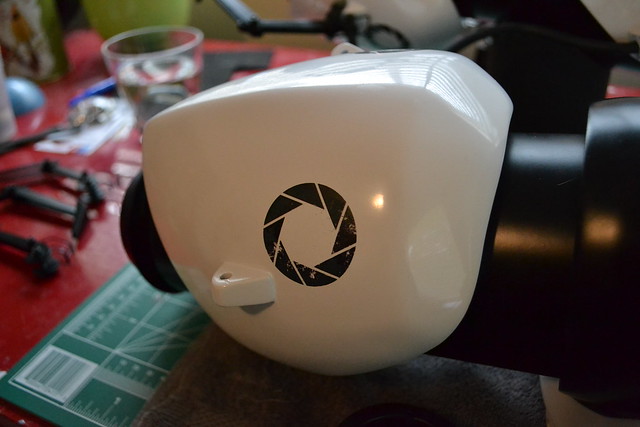
After a lot of time with spot filler, sanding, more filler, and more sanding, I had this:

5130194284_8252641e21_b.jpg


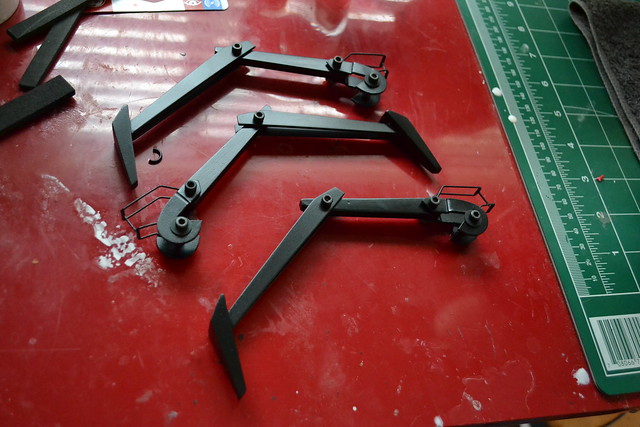
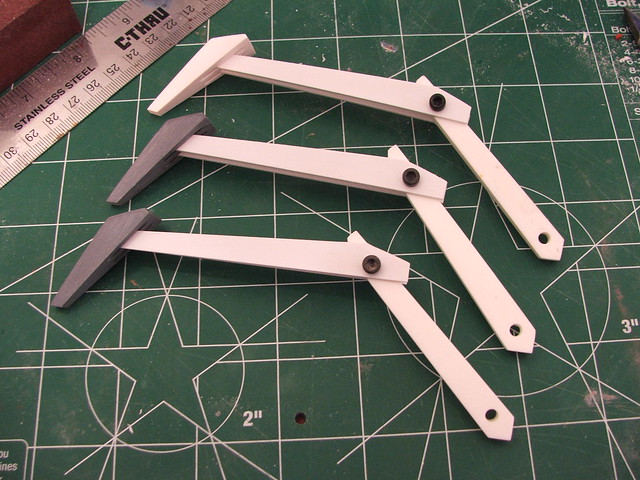
Lastly, I grabbed some styrene and made up the parts for the "claws"

5168853088_7759d7f9a4_z.jpg

5168853150_8cdf5ae16b_z.jpg

5168853538_034d50782e_b.jpg


I don't want to make this too long-winded, so I'll pause for a breath here and continue with the electronics side of things later on today.

Hope you guys enjoy the build! This piece is going to be auctioned off for charity at the Child's Play annual fundraiser dinner in December. Really looking forward to this event.
 
I've been watching this on my facebook, and I must admit your work ,as always, is astounding. I hope this goes for a very large amount at auction for the charity.
 
I've been watching this on Facebook as well. Can't wait to see the finished product.

Also, how long do you think you've spent on this so far, and how much longer do you think you have to go--roughly?
 
Wow, it looks cool. I've never played the game but I'm getting a kick reading about it now after googling it.

Good luck on the auction!
 
Fantastic! Your first build really inspired me to get off my butt and tackle this prop myself. So far I've just been figuring out measurements and gathering materials, but if it comes out just half as good as yours I will be very pleased.
 
Your first Portal Gun inspired me to make my own. Unfortunately, I have no where near the amount of talent that you do, so it wasn't as epic as yours. But I'm glad to see that you're updating your gun. Looks amazing, as always.
 
Awesome project, you really are da man, Volpin! If you don´t deserve some "respect" prop building wise, well then I don´t know ;)

Michael
 
Yeah, this thing looks AWESOME! Very sharp and clean! With just the right (very light) bit of weathering.

Very cool! Now if it could manipulate gravity!!! ;)
 
Saw you working on the electronics last night on UStream. Stupid chat box. LOL
Thanks for answering my question about the MDF.

Man, I soooo wanna make my own right now. It won't be as epic and beautiful as yours though. lol

Just curious, how long can you work with Apoxie Scuplt before it dries up?
 
Thanks for all the compliments guys! Here's hoping I can live up to the hype.

Also, how long do you think you've spent on this so far, and how much longer do you think you have to go--roughly?

Well, I have to finish it by the 20th, so... 3 days hopefully!

Just curious, how long can you work with Apoxie Scuplt before it dries up?

About 20 minutes or so before it starts getting rigid, which is actually the better time to get finer details in it. After that, about another 20 minutes before it starts acting like a rock.

So. Electronics.

Because I hate myself, I decided to make this Portal gun both illuminate AND play sounds form the game. I ordered a chip from www.replicaprops.com and had it loaded with the sounds for activation, deactivation, firing orange and firing blue. You can check out a video of the test firing HERE.

The blue and orange sound effects both play with their appropriate colors. This is all the result of some tricky dual-throw switchwork, but the result is intuitive and cool to play with.

5159852985_05ac0224ba_z.jpg


The gun has 22 LEDs in it - 11 of each color.

5148799094_689c10852f_z.jpg


The interior "chassis" here shown with the battery box and placement of the controller board.

5159852873_03d8b42449_z.jpg


The speaker sits behind the barrel LED board which acts as a sort of speaker grille. The barrel also makes a nice speaker box, and the sound output is pretty loud for such a little thing.

5183274885_227ac5beb0_z.jpg


Before I could wire it up, there were a few smaller things to build, like the little cages around the claws.

5168254471_f924be7baf_z.jpg


After this, it sent off to paint!

5175969157_e482afb3cd_z.jpg

5175621356_0a247d4f9d_z.jpg

5175621658_5deb0a29d6_z.jpg


The wires run through a 3/8" hole drilled lengthwise down the central barrel, then end... here. This took a little while to get right.

5183274953_767ab79295_z.jpg


Just last night I finished up the central chamber - a combination of a mail-order plastic tube, an acrylic plunger handle, and parts cast from V1. Looks the part!

5183873548_af3ebaf318_z.jpg


Testing blue and orange illumination...

5183275531_2336265797_b.jpg

5183275723_89e4a13771_b.jpg


More to come... and 3 days to go! YIKES!
 
plugging along...

Last night I worked for... well, too damn long it seems... on the upper "indicator" light on the top casing. I'm just making that term up, I have no idea what its actually called.

Rear casing after some detail work. I still need to buff the paint up a bit with some swirl remover.

5186534048_de58d9bacd_z.jpg


The upper indicator light assembly - some acrylic, some PVC, and a couple LEDs. I had to make these "Socketed" so they would slip on to the acrylic pieces that glow. The whole gun will be able to break back down into its component parts for any repairs needed in the future.

5185934139_0db78ef3b9_z.jpg


And the indicator all lit up.

5186534166_81acef5847_z.jpg

5186534326_118db3310f_z.jpg


Before I called it a night, I also made the foam rings that the central chamber will sit in. One forward and one aft ensure it stays centered.

5186534454_ea4efecb20_z.jpg


More to come tonight!

Oh, also, if people are interested I sometimes set up a live stream of my work on some of my projects. Planning on firing that up tonight for some more assembly and to do some Q&A on the build if anyone is curious. Will probably be starting around 7pm EST.

Volpin Props Shop Stream on USTREAM: Showing some of the processes I go through when I build my replicas. I guarantee its not as exciting as the finished p...
 
So the gun is sitting in the corner now, right next to its twin sister, all weathered and pretty. Those pics will have to wait a minute, though, since they need a *slight* bit of color correction before I'm going to toss them online.

Meantime, here's the final stages of assembly:

The switch plate was wired in at the rear of the gun, and all solder connections heat-shrinked (shrank?)

5189077708_8b3850910e_z.jpg


The front of the gun was similarly wired before sealing it up permanently.

5189077886_124588de9f_z.jpg


After painting all the hardware black, the claws were pieced together, ready for mounting

5192280266_11cd076971_z.jpg


I made the Aperture logo and the barcode in photoshop, then printed them out on laserjet water-slide decal paper.

5192280458_fa20ee5e0c_z.jpg

5192280092_60d35a6830_z.jpg


The tubes on the sides and top of the gun are made from windshield washer hose over armature wire.

5197569766_6a534b4c06_z.jpg


Lastly, the barrel insert was made from cutting down a paper spool hub. This took a LOT of shaping to get to fit just right, but the results are worth it.

5197570182_268833bab5_z.jpg


Finally, a short little vid of the gun in action!

YouTube - Portal Gun test fire

Final pics to come soon
 
This thread is more than 12 years old.

Your message may be considered spam for the following reasons:

  1. This thread hasn't been active in some time. A new post in this thread might not contribute constructively to this discussion after so long.
If you wish to reply despite these issues, check the box below before replying.
Be aware that malicious compliance may result in more severe penalties.
Back
Top