Yes it is. To resize apply the same factor you used for midsole. All patterns I will share are for US 8,5 (EU 42) without modify anything, just print in original scale (A4).
So based on what you said, I opened each file in Paint, then copied and pasted each part 1:1 into a new massive bitmap so that every part was not only at the same scale, but now on one bit-map to be imported into Sketch Up. Once I have traced all the parts (they will be blue when joined up correctly), I can then cut and paste them into my pattern file and scale them to fit the rest of the patterns.
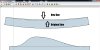
So what I have done here is mod the front of the mid-sole to thicken up the toe tip.
Feel free to leave comment about this. Your work is awesome, but this is the one part I think could be worked to be even better. The tip of the toe tappers down on the V2 and a few have attempted to correct this on our V2 mid-soles. If I am to go and make a new rubber part, I want to correct that mistake before I start any machined pattern work.