DrunkenMynock
Active Member
This build is also documented on my website MYNOCK'S DEN, but figured I would share it here as well.
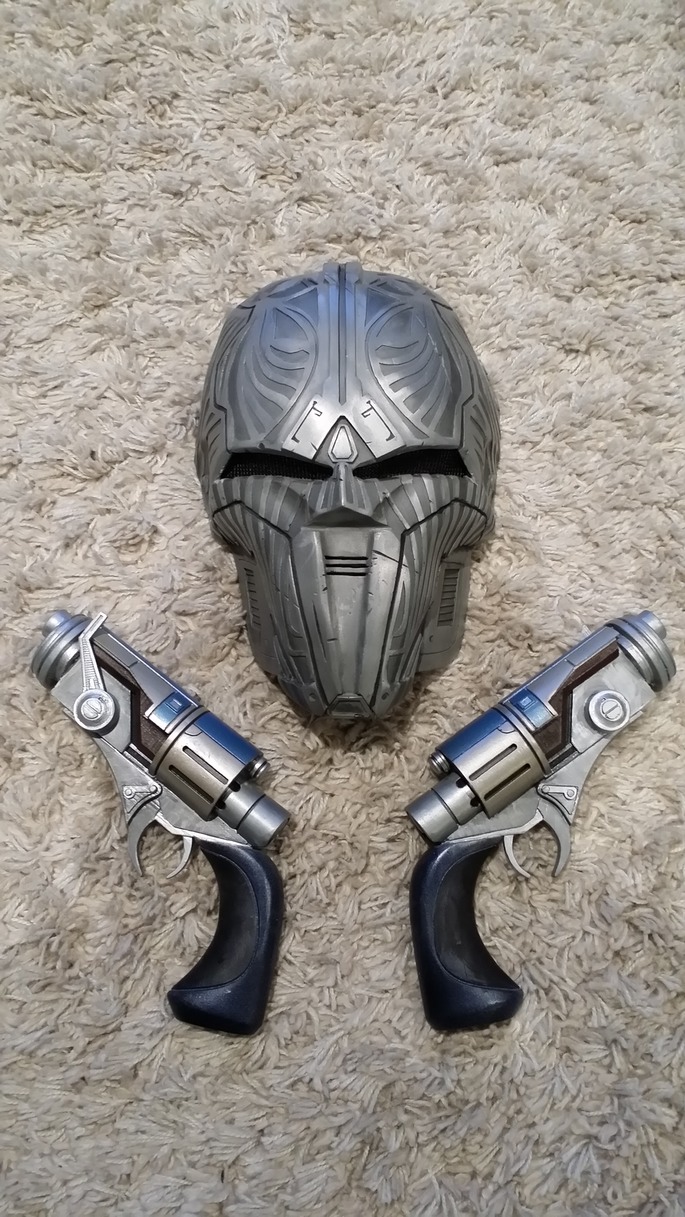
With my main character in Star Wars the Old Republic being an armed-to-the-teeth Bounty Hunter, I wanted to make myself something bounty hunter-ish. And, what better bounty hunter-ish thing to make than a blaster?
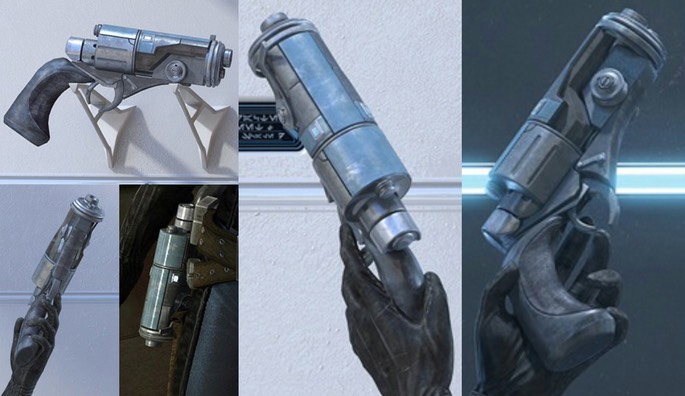
I've always liked the look of Eleena Daru, the Twi'lek in SWTOR trailer "Deceived"…. especially her nice pair of…
...blaster pistols (get your mind out of her lekku!). And now that I am rocking the same heaters in game, I figured I would try my hand at making this type of blaster.
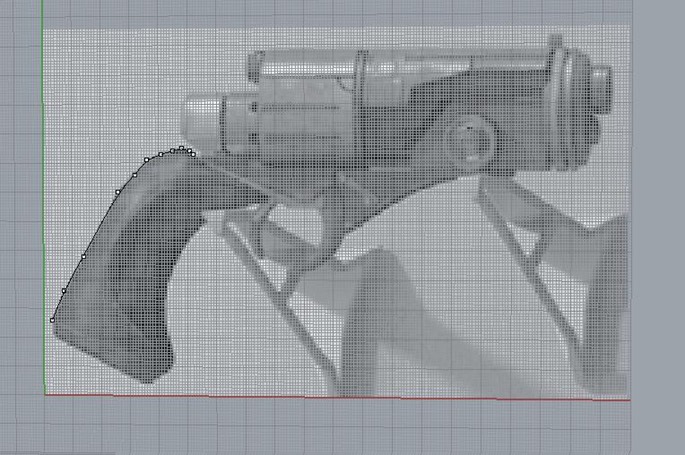
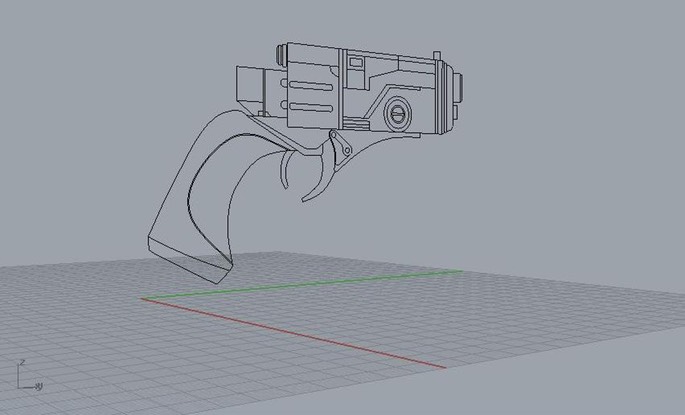
I started the build process by importing a photo of the blaster into my CAD program and tracing the outline.
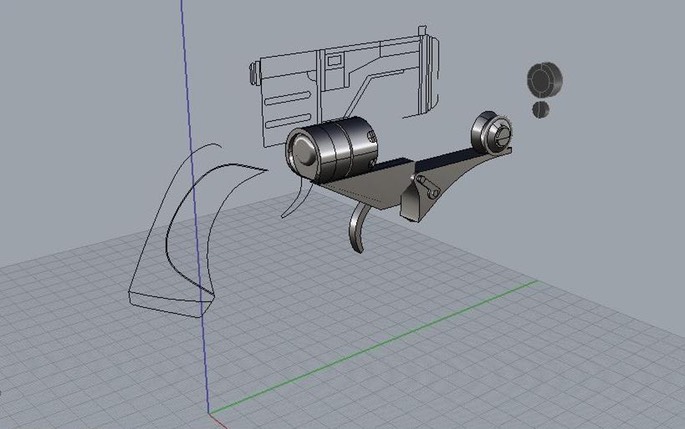
I then pulled the shapes of each major part out into 3D.
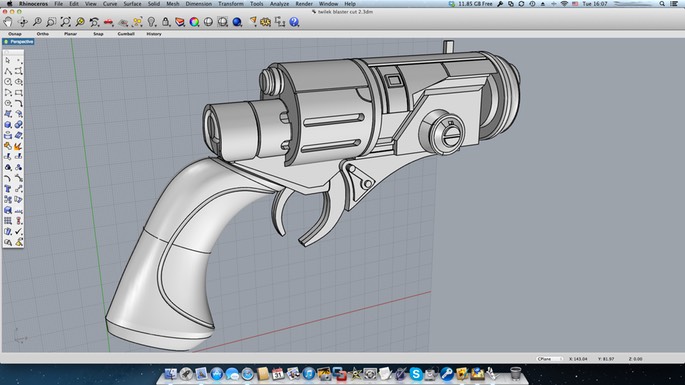
After about 40 hours of work (which included learning the program by following a course on Digital Tutors), I had completed my baster model.
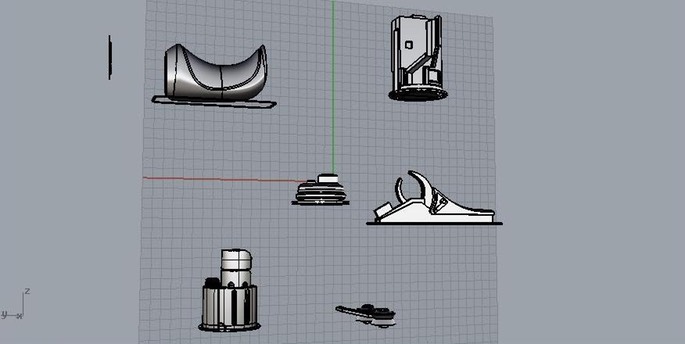
I knew the blaster would be too big and awkward to print all as one or even two pieces, so I split the model into all the major pieces, and created a separate STL file for each part.
In the above photo, you can see I built little 1mm high walls around each object to help with adhesion to the build plate; I was having a lot of issues with the plastic curling on the build plate for several of my test prints, which almost made me tear my hair out on a few separate occasions.
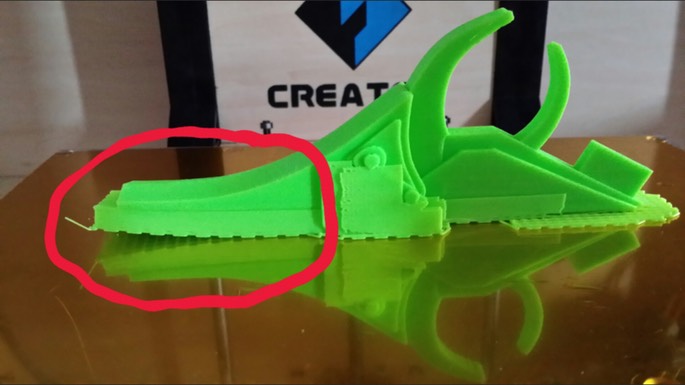
So, I figured I'd experiment a bit by creating a small short wall at some distance around the object, which would increase the surface area of the raft underneath; the idea was that if curling occurred, it would happen far away from the main object, and hopefully not reach the main print in the middle.
The wall approach proved to be unnecessary in the end, as I eliminated curling/lifting completely by enclosing my printer (FlashForge Creator Dual) in plexiglass, which reduced the temperature differential across the build plate. I also increased the density of the raft base layer to 0.9 (maximum), and made the raft 3 layers thick, which stuck to the build plate like glue!
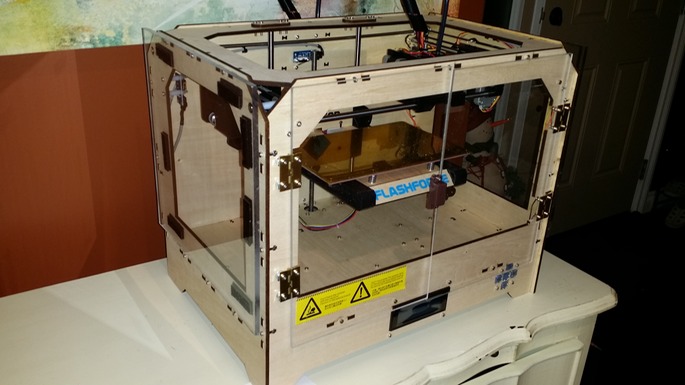
(The FlashForge Creator is based on the Makerbot Replicator 1 design, and despite the "Made in China" sticker, is an AWESOME, SOLID printer, by the way. The 92 overwhelmingly positive customer reviews and a 5/5 star rating on Amazon is what sold me on it despite me having my heart set on another machine that was twice the price. I do however baby the crap out of it, and keep my allen keys, and light-weight silicone oil close at hand. At the time of writing, I have 67 print hours on the little robot without a single hiccup that could be blamed on the printer itself. If I could change a few things about it though, I would do what I've already done - enclose 3 of the 4 sides to keep the inside nice and toasty; I would also add some LED lights like the original Replicator, to illuminate the build plate. Some have actually commented that the absence of LEDs on the Creator is an improvement over the original Replicator since LEDs in that model would sometimes short/fry the motherboard. I think I will add some battery operated LEDs in the corners of the casing, and mount a switch on the outside; I only really need the lights a few seconds at a time to check the progress of the build, so no point in hardwiring anything to the printer's own power supply).
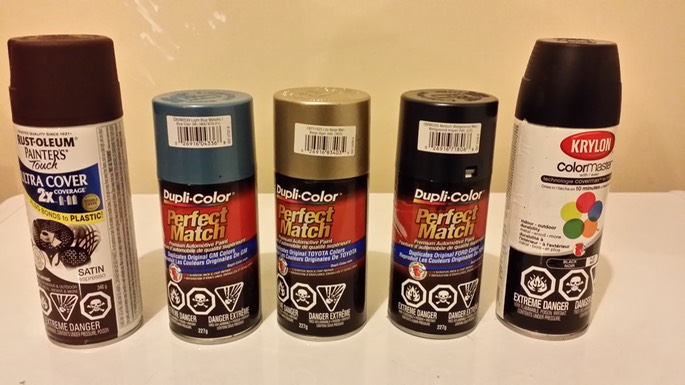
Prior to increasing the raft settings and enclosing the printer, I also tried using the ABS soup method (ABS + acetone + smearing on kapton tape), but found that this made the object stick to the surface so bloody hard, I was afraid I would break the build plate arms trying to pry the print off. Printing in ABS at 235C with a build plate temperature of 110C using a thick, dense raft in an enclosed system I found produces no lifting or curling of plastic whatsoever! No ABS slush or hairspray products necessary!
Printing of all pieces (not including the failed-due-to-lifting test prints) took a total of 23.38 hours.
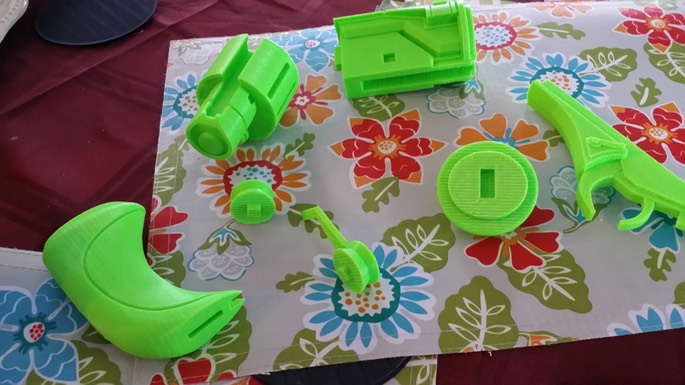
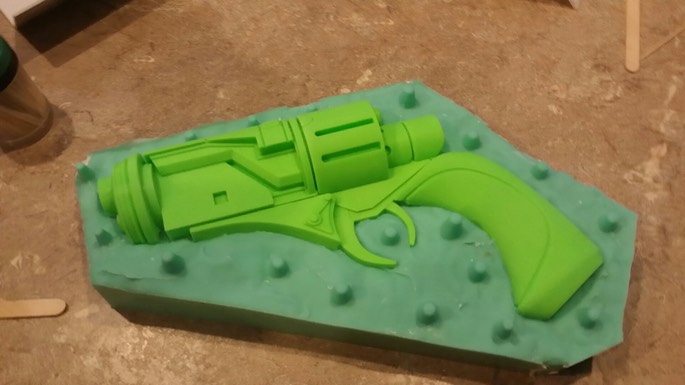
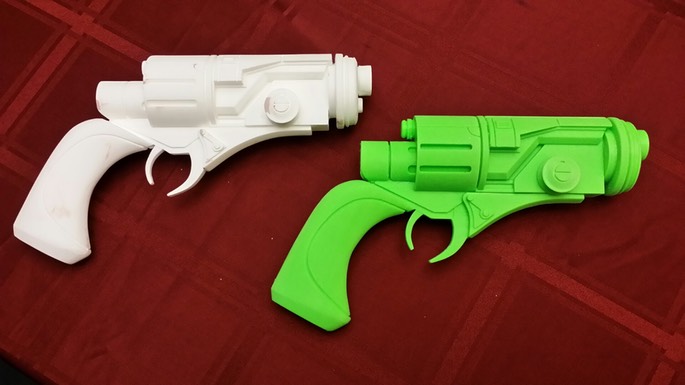
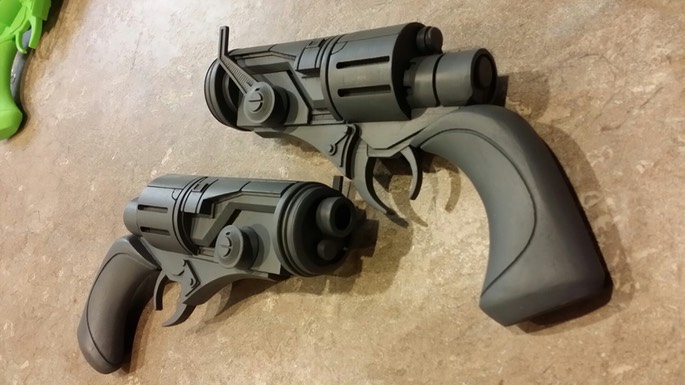
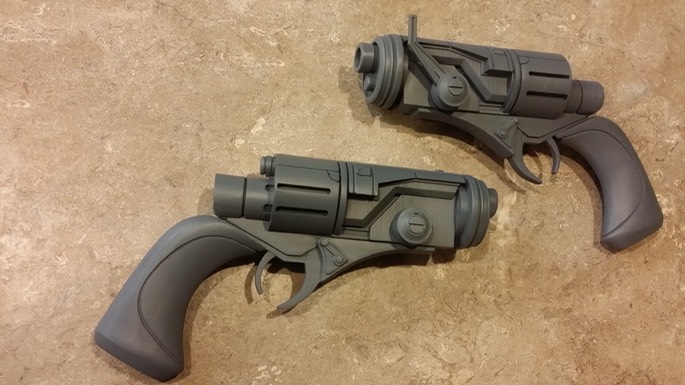
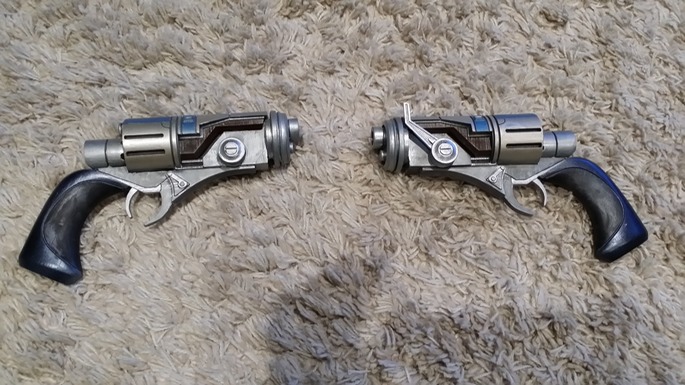
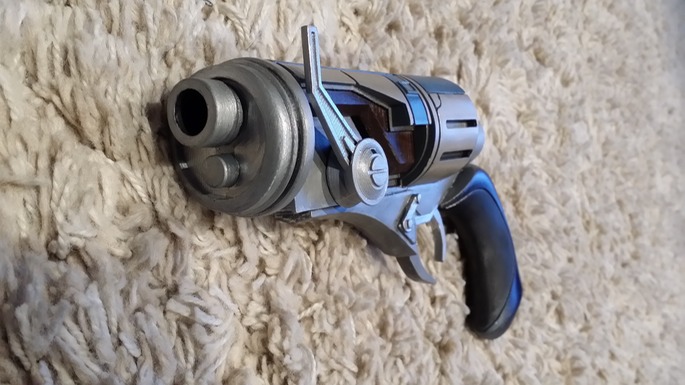
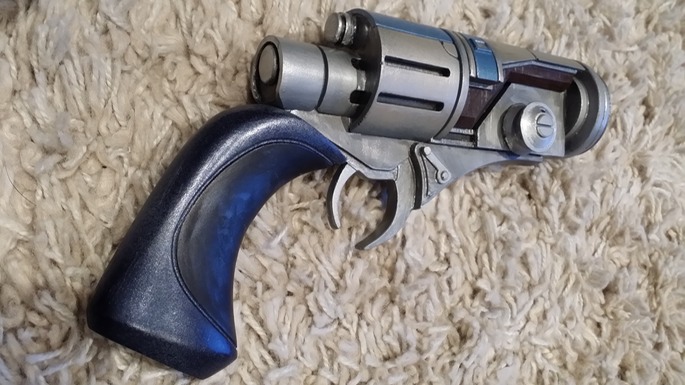
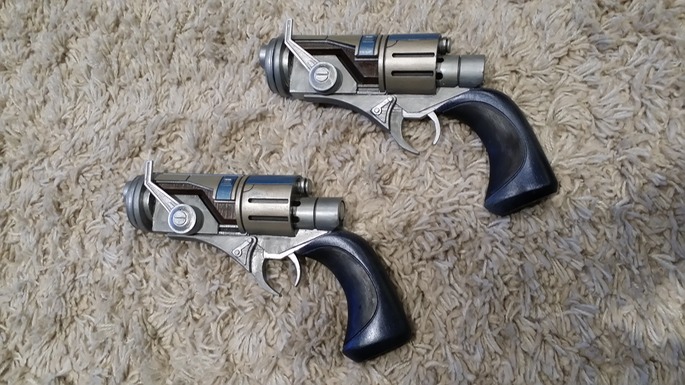
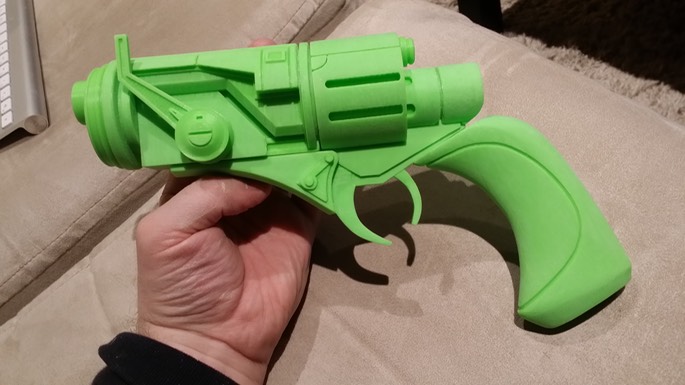
After everything was cleaned up and sanded, the assembled blaster took shape!
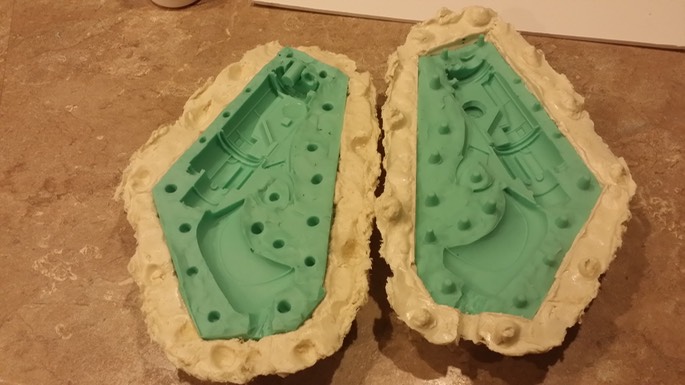
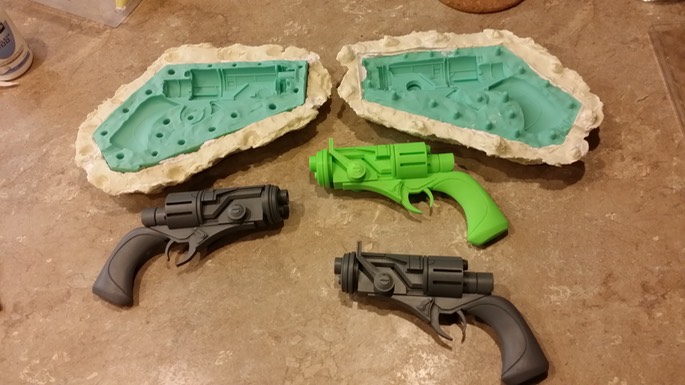
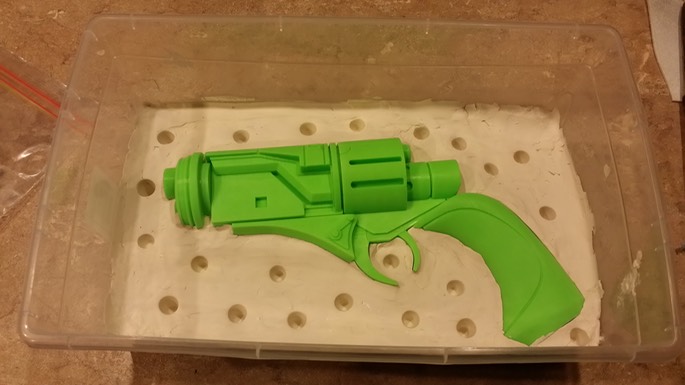
Next came the molding. I filled plastic container half way with plasticine, sprayed the blaster with mold release (plasticine can be a NIGHTMARE to clean off), smoothed out the surface, poked some registration holes with the blunt end of a sharpie, and sprayed the whole thing with more mold release.
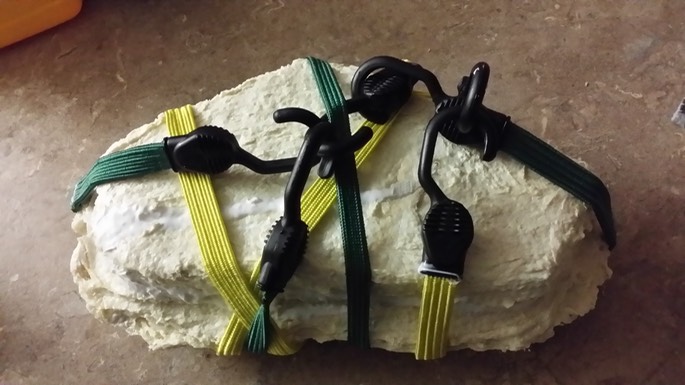
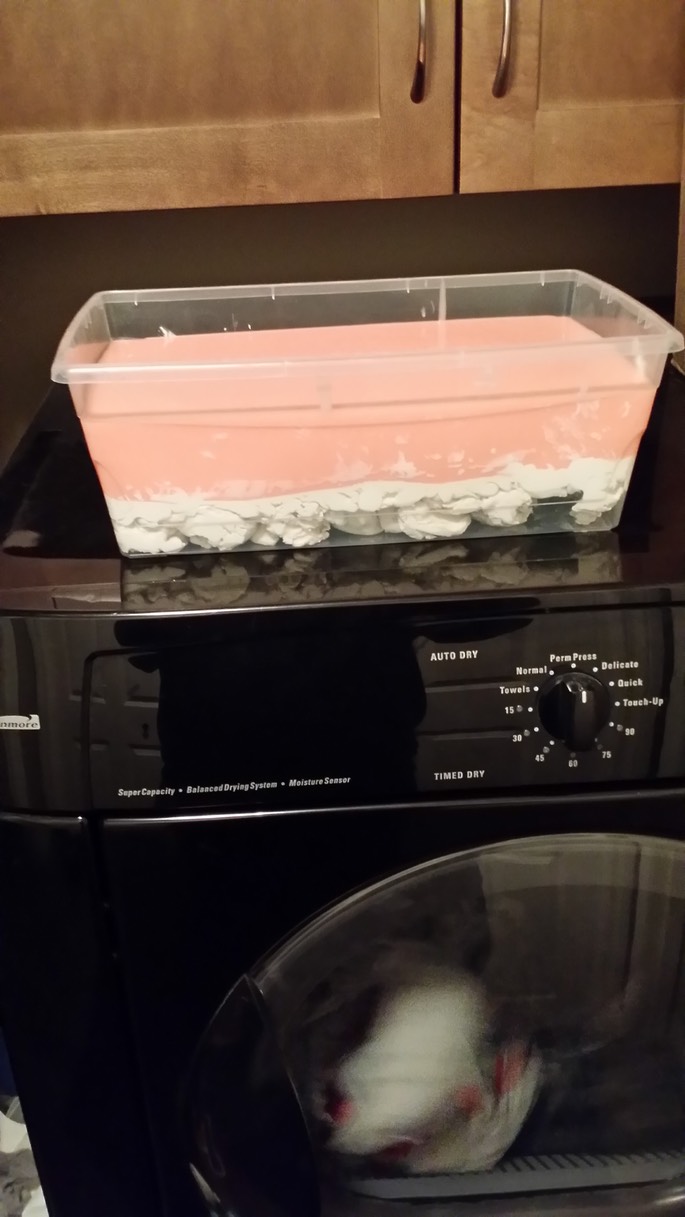
Since I did not have anything other than Rebound 25 silicone left, I took a chance and decided to give it a shot. Half way through the pour, I realized "uh, oh. I'm not gonna have enough for both sides!" DOH! I poured it in anyway, figuring I'll make one half now, and the other when I get another batch of silicone.
My wife was just finishing up laundry, so I tossed the tub onto the dryer, the shaking of which would help dislodge any bubbles trapped in the silicone.
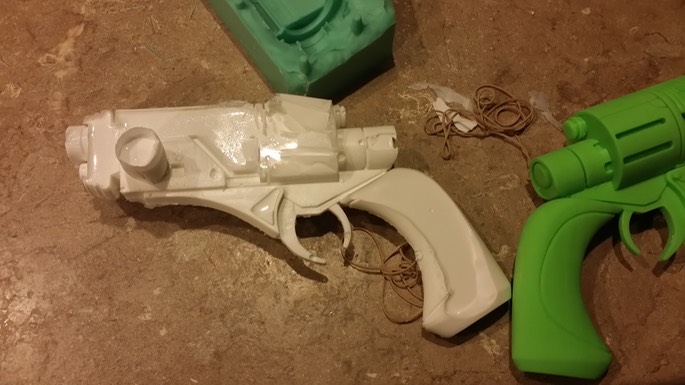
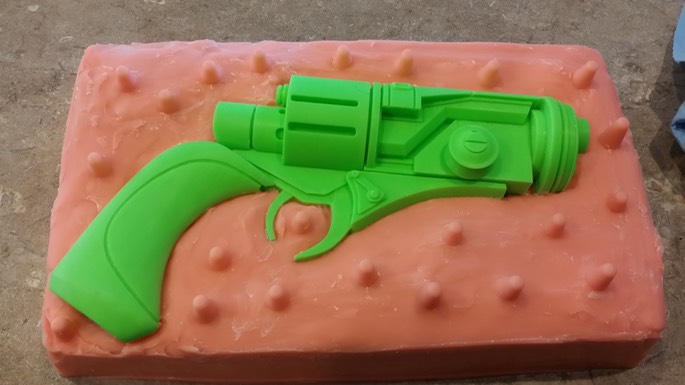
The next day, I peeled the mold out of the plastic container, cleaned off the plasticine, and viola: finished half mold….
You have come to the end of a section of the story, but not the end of the whole story itself! This tale shall continue once a fresh batch of silicone arrives (at some point next week), at which time I'll get into molding the second half, and finally, cold-casting the finished blaster pistol.
With my main character in Star Wars the Old Republic being an armed-to-the-teeth Bounty Hunter, I wanted to make myself something bounty hunter-ish. And, what better bounty hunter-ish thing to make than a blaster?
I've always liked the look of Eleena Daru, the Twi'lek in SWTOR trailer "Deceived"…. especially her nice pair of…
...blaster pistols (get your mind out of her lekku!). And now that I am rocking the same heaters in game, I figured I would try my hand at making this type of blaster.
I started the build process by importing a photo of the blaster into my CAD program and tracing the outline.
I then pulled the shapes of each major part out into 3D.
After about 40 hours of work (which included learning the program by following a course on Digital Tutors), I had completed my baster model.
I knew the blaster would be too big and awkward to print all as one or even two pieces, so I split the model into all the major pieces, and created a separate STL file for each part.
In the above photo, you can see I built little 1mm high walls around each object to help with adhesion to the build plate; I was having a lot of issues with the plastic curling on the build plate for several of my test prints, which almost made me tear my hair out on a few separate occasions.
So, I figured I'd experiment a bit by creating a small short wall at some distance around the object, which would increase the surface area of the raft underneath; the idea was that if curling occurred, it would happen far away from the main object, and hopefully not reach the main print in the middle.
The wall approach proved to be unnecessary in the end, as I eliminated curling/lifting completely by enclosing my printer (FlashForge Creator Dual) in plexiglass, which reduced the temperature differential across the build plate. I also increased the density of the raft base layer to 0.9 (maximum), and made the raft 3 layers thick, which stuck to the build plate like glue!
(The FlashForge Creator is based on the Makerbot Replicator 1 design, and despite the "Made in China" sticker, is an AWESOME, SOLID printer, by the way. The 92 overwhelmingly positive customer reviews and a 5/5 star rating on Amazon is what sold me on it despite me having my heart set on another machine that was twice the price. I do however baby the crap out of it, and keep my allen keys, and light-weight silicone oil close at hand. At the time of writing, I have 67 print hours on the little robot without a single hiccup that could be blamed on the printer itself. If I could change a few things about it though, I would do what I've already done - enclose 3 of the 4 sides to keep the inside nice and toasty; I would also add some LED lights like the original Replicator, to illuminate the build plate. Some have actually commented that the absence of LEDs on the Creator is an improvement over the original Replicator since LEDs in that model would sometimes short/fry the motherboard. I think I will add some battery operated LEDs in the corners of the casing, and mount a switch on the outside; I only really need the lights a few seconds at a time to check the progress of the build, so no point in hardwiring anything to the printer's own power supply).
Prior to increasing the raft settings and enclosing the printer, I also tried using the ABS soup method (ABS + acetone + smearing on kapton tape), but found that this made the object stick to the surface so bloody hard, I was afraid I would break the build plate arms trying to pry the print off. Printing in ABS at 235C with a build plate temperature of 110C using a thick, dense raft in an enclosed system I found produces no lifting or curling of plastic whatsoever! No ABS slush or hairspray products necessary!
Printing of all pieces (not including the failed-due-to-lifting test prints) took a total of 23.38 hours.
After everything was cleaned up and sanded, the assembled blaster took shape!
Next came the molding. I filled plastic container half way with plasticine, sprayed the blaster with mold release (plasticine can be a NIGHTMARE to clean off), smoothed out the surface, poked some registration holes with the blunt end of a sharpie, and sprayed the whole thing with more mold release.
Since I did not have anything other than Rebound 25 silicone left, I took a chance and decided to give it a shot. Half way through the pour, I realized "uh, oh. I'm not gonna have enough for both sides!" DOH! I poured it in anyway, figuring I'll make one half now, and the other when I get another batch of silicone.
My wife was just finishing up laundry, so I tossed the tub onto the dryer, the shaking of which would help dislodge any bubbles trapped in the silicone.
The next day, I peeled the mold out of the plastic container, cleaned off the plasticine, and viola: finished half mold….
You have come to the end of a section of the story, but not the end of the whole story itself! This tale shall continue once a fresh batch of silicone arrives (at some point next week), at which time I'll get into molding the second half, and finally, cold-casting the finished blaster pistol.
Last edited:
")