You are using an out of date browser. It may not display this or other websites correctly.
You should upgrade or use an alternative browser.
You should upgrade or use an alternative browser.
ANH * Death Star Laser Turret
- Thread starter wasili
- Start date
wasili
Sr Member
Hey guys,
Just a quick headsup that pics will be up tomorrow. Now neck deep in styrene, with both machines (yes, have two) machining like crazy. I also started my new job last monday, and i'm basically the go-to guy for cnc work at the shop. And 'my' cnc has a workarea of 8 x 4ft . Fast as hell, you can imagine my surprise when it cut 38mm thick MDF in one take....
Cheerioh..
Wasili
- - - Updated - - -
Oh, make that 11ft long... it's 320cm.
Just a quick headsup that pics will be up tomorrow. Now neck deep in styrene, with both machines (yes, have two) machining like crazy. I also started my new job last monday, and i'm basically the go-to guy for cnc work at the shop. And 'my' cnc has a workarea of 8 x 4ft
. Fast as hell, you can imagine my surprise when it cut 38mm thick MDF in one take....Cheerioh..
Wasili
- - - Updated - - -
Oh, make that 11ft long... it's 320cm.
wasili
Sr Member
Okidoki. By popular demand (you know who you are ), here's some more pics of the turret.
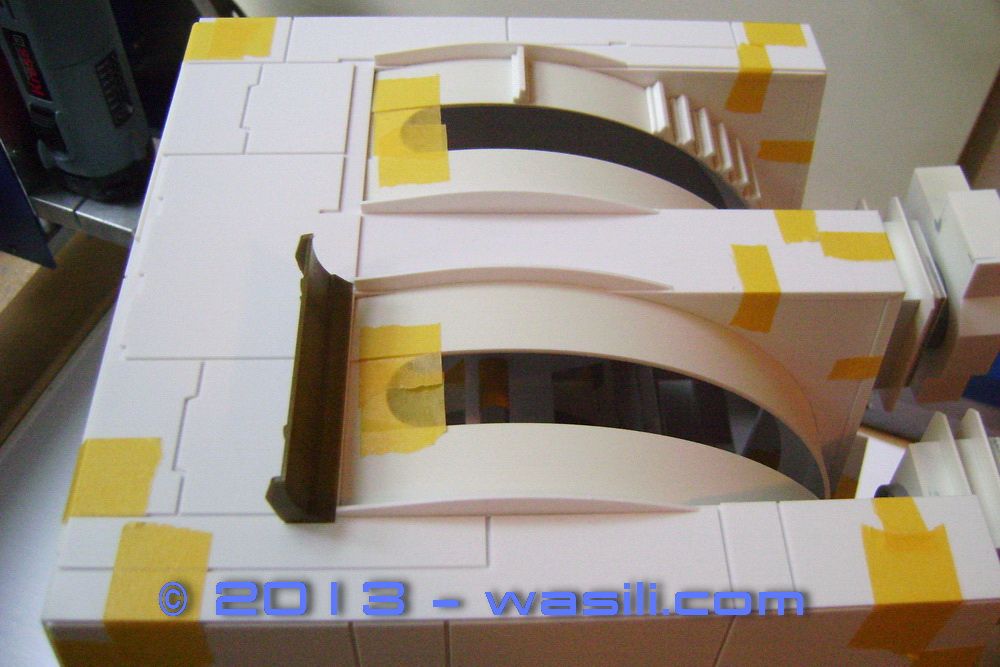
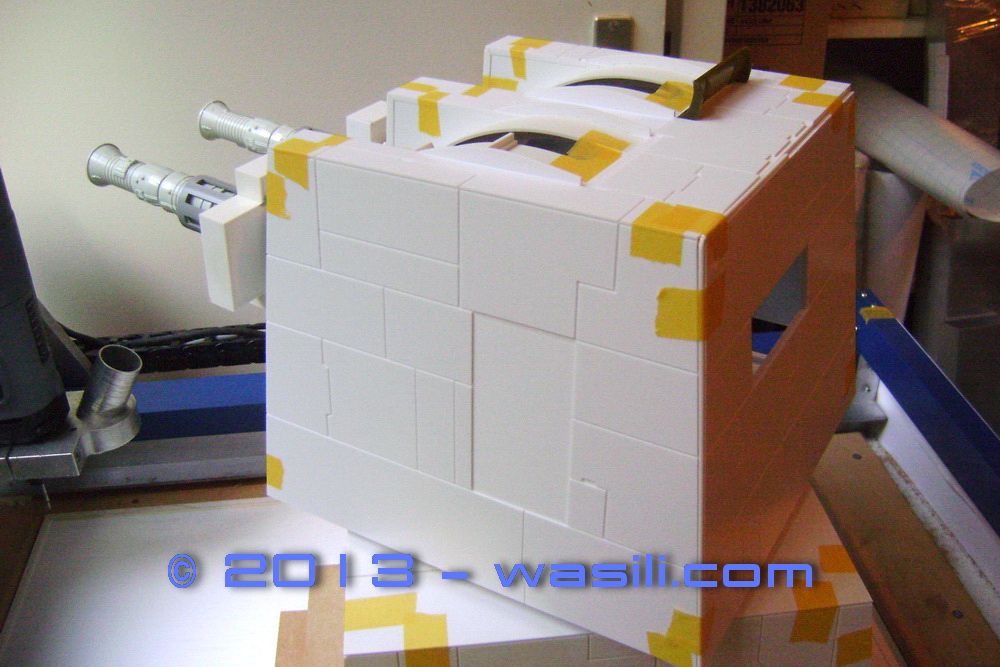
Overall view. And yes, the forward droop of the top turret is supposed to be there. Look at all the pics and screencaps. It was obviously nose-heavy, with them big-uns at the front.\/
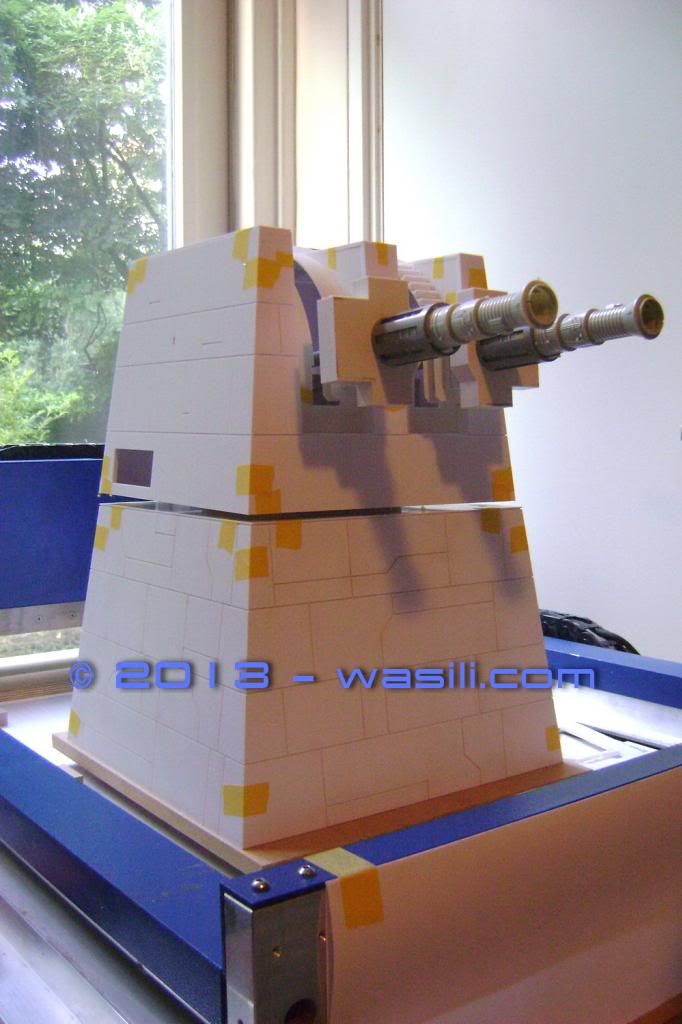
The droop is a tad under 1 degrees (0,94... in my book). "what, only one, then who cares ?". Well, we all do, as that 1 meager degree makes the rear go up for 4mm, and more importantly, it changes the whole look of the tower. Oh, and it sits a good 3,75mm to the rear as well. Not dead center either. Xist....
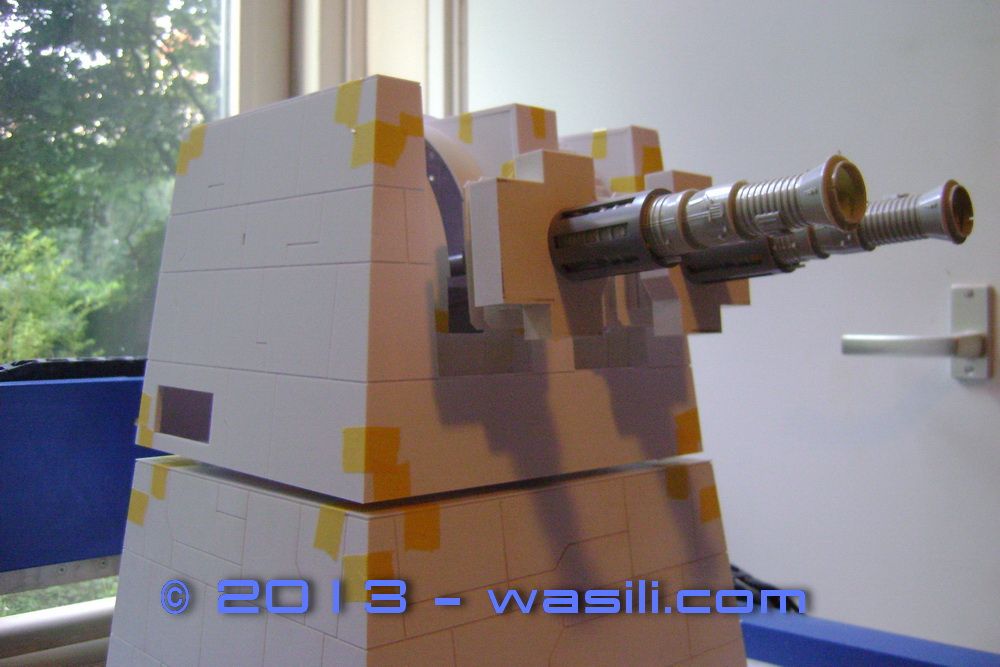
Anyhow, more closer. The hole in the panel on the left of the pic houses the Hummel vent.\/
The top. \/
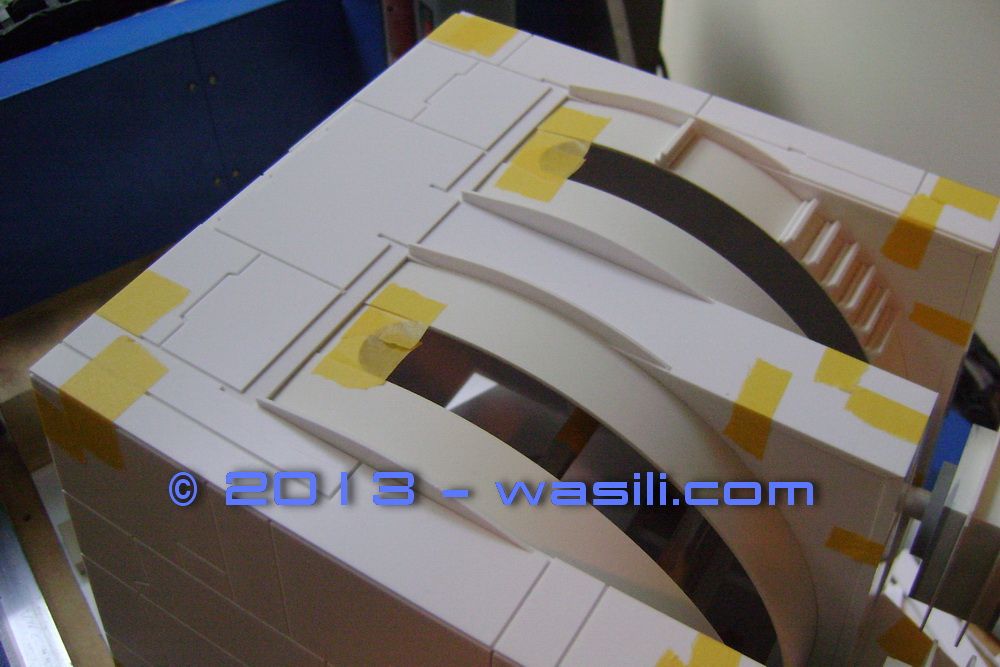
On the top rear deck, the M8 Munitions carrier scoop kitparts are actually embedded, in between the rest of the panels, hence the 1mm chambered contour. Same with the droidstrip, which is 1mill lower than the rest of the turret. Detail of M8 contour machined. \/
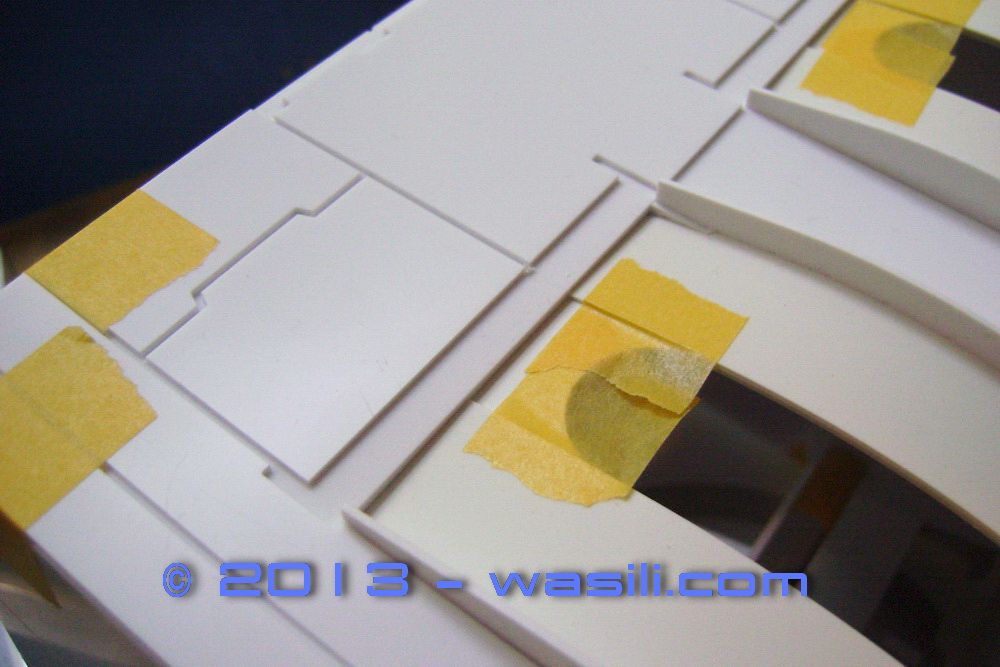
And with M8 part in place. When placed, it leaves a 0,5mm 'ledge' on the front. \/
Another one of the top deck. \/
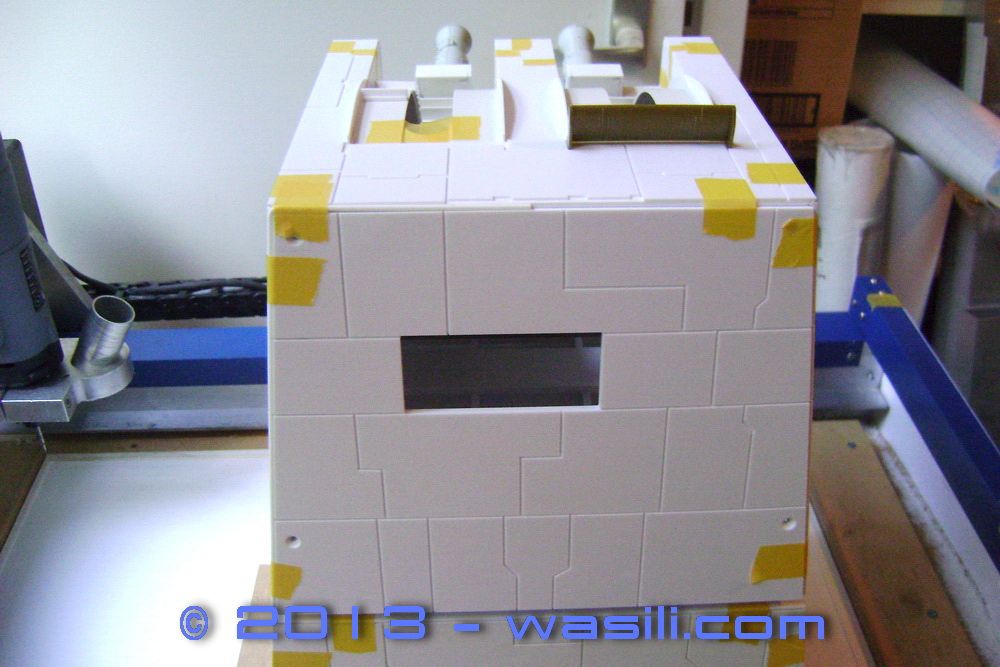
Now the rear panel is an interesting one. I struggled with it, as it's wonkyness-extreme on the real deal. Although my panellines are idealised to some degree, i added some wonkiness to this panel to make everything work. More interesting is the fact that this panel was removable on the studio model (note 4 screws in corners), so i machined it leaving 1 of the 4 chamfers that each panel has. It sits perfectly within the surrounding panels, but can be made removable by the builder. Just like the real deal. \/
I added the holes and (how do you call that in english, the taper of the hole ?) the 'taper'. The holes are offset from the side edges by exactly 7,5mm, but are positioned in wonki-mode, like the ILM one. They were obviously made by hand, in a hurry, on the studio model. Close-up. And yes, the panel sticks out by 2mm. That edge is for the 2mm dia brass rod that goes up the sides, and into that mystery kitpart that Jason scratchbuild for his kitcastingset. \/
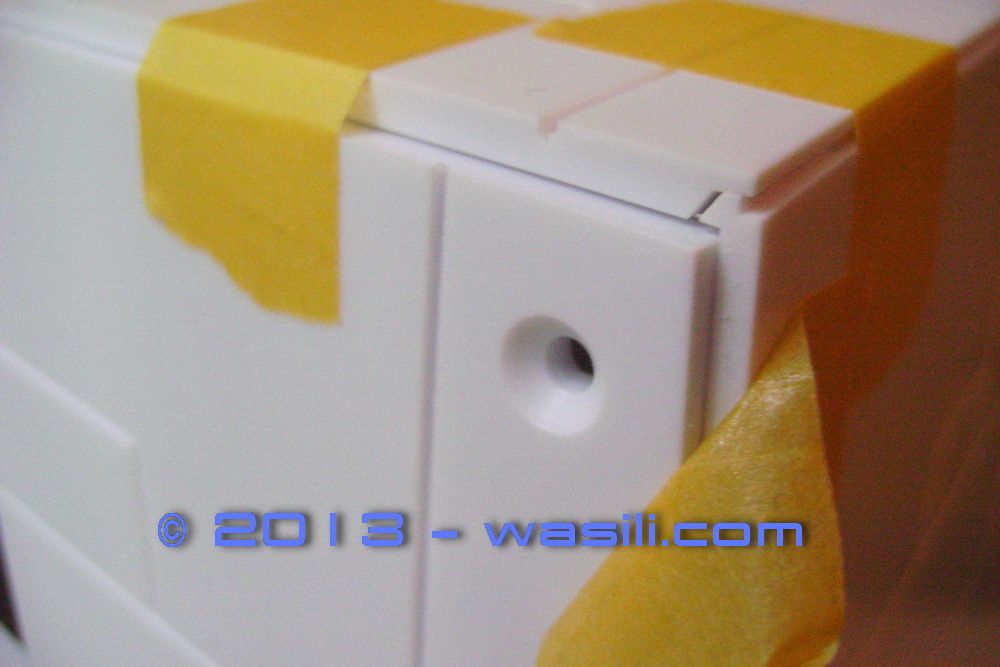
The screws used on the model had a head diameter of about 5.7mm, calculating back to about a 3mm or 1/8" woodscrew. The hole i machined is 3,0mm. I mention woodscrew, as the frame of the turret of the ILM model was made from wood, clad with thin styrene. I took pics of the bottom of the turret (as best as i could, given the incredibly poor lighting sit at the Brussels expo in 2008), and the wood is clearly visible, even when looking along the gun barrels in flashpics.
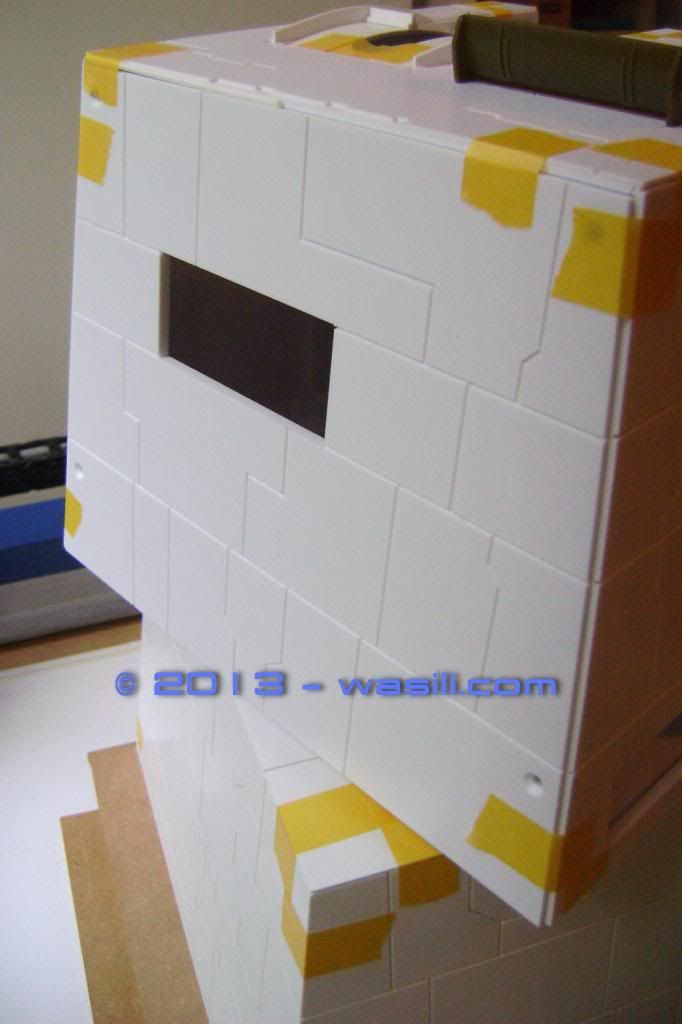
Rear panel. Hole is for the Hummel vent. The Hummel vent is weird in that it's half out, half in. And the hole is bigger, you can see all the way through, but that's the way it is.
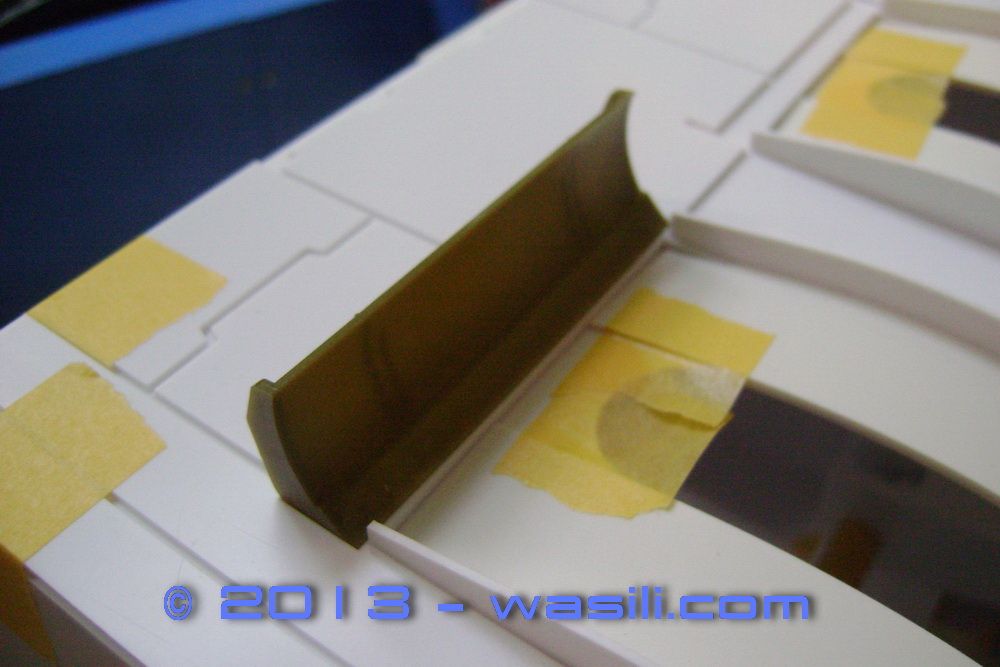
And here's the last panel. The Bandai Panther kitpart (under the walkway) sits on the turret, while the Jagdpanther kitpart (above the walkway) is embedded in that chambered rectangle. No holes here, them ILM-ers simply stuck it on, and build the panels up around it. \/
Missing from the pics are the cast blocks under the barrels, the small styrene rectangles, and the ring that fits inside the top turret (you'll know what i mean when i show it). Tomorrow will see more pics with those parts, but also a breakdown and more close ups of the insides of the parts.
Btw, my take on the ILM turret is this:
- The base is way nicer build than the top. The lines are straighter and line up all the way round. Either it was build by a different person that worked on the top, OR, it was build first until time ran out, leaving ample time to finish the top.
- The top turret is made from a simple wooden frame, with a big gaping hole in the bottom (will show pics). That bottom ring is 5-6mm thick wood. A frame instead of sheets, probably to lower the weight.
- That wooden frame was first clad in 1mm styrene (yes, only 1) to create the basic shape. Subsequently 1mm handcut panels were glued on that basic shape. Yes, they are really 1mm. Compare them with all the kitparts near the edges.
- The rearpanel is so thin (the aforementioned 2mm), and only attached by 4 screws, that it warps all over the place. The sidepanels are not straight either.
- Due to the weight of the barrels, and the fact that the top is positioned on the base by a single thin central axis, the top hangs forward.
- Early pics of the ILM turret, in the trench, show no ladder rungs.
- It's cool as hell.
Okay dudes. Daddy needs a nap. More tomorrow.
Cheers,
Wasili
), here's some more pics of the turret.Overall view. And yes, the forward droop of the top turret is supposed to be there. Look at all the pics and screencaps. It was obviously nose-heavy, with them big-uns at the front.\/
The droop is a tad under 1 degrees (0,94... in my book). "what, only one, then who cares ?". Well, we all do, as that 1 meager degree makes the rear go up for 4mm, and more importantly, it changes the whole look of the tower. Oh, and it sits a good 3,75mm to the rear as well. Not dead center either. Xist....
Anyhow, more closer. The hole in the panel on the left of the pic houses the Hummel vent.\/
The top. \/
On the top rear deck, the M8 Munitions carrier scoop kitparts are actually embedded, in between the rest of the panels, hence the 1mm chambered contour. Same with the droidstrip, which is 1mill lower than the rest of the turret. Detail of M8 contour machined. \/
And with M8 part in place. When placed, it leaves a 0,5mm 'ledge' on the front. \/
Another one of the top deck. \/
Now the rear panel is an interesting one. I struggled with it, as it's wonkyness-extreme on the real deal. Although my panellines are idealised to some degree, i added some wonkiness to this panel to make everything work. More interesting is the fact that this panel was removable on the studio model (note 4 screws in corners), so i machined it leaving 1 of the 4 chamfers that each panel has. It sits perfectly within the surrounding panels, but can be made removable by the builder. Just like the real deal. \/
I added the holes and (how do you call that in english, the taper of the hole ?) the 'taper'. The holes are offset from the side edges by exactly 7,5mm, but are positioned in wonki-mode, like the ILM one. They were obviously made by hand, in a hurry, on the studio model. Close-up. And yes, the panel sticks out by 2mm. That edge is for the 2mm dia brass rod that goes up the sides, and into that mystery kitpart that Jason scratchbuild for his kitcastingset. \/
The screws used on the model had a head diameter of about 5.7mm, calculating back to about a 3mm or 1/8" woodscrew. The hole i machined is 3,0mm. I mention woodscrew, as the frame of the turret of the ILM model was made from wood, clad with thin styrene. I took pics of the bottom of the turret (as best as i could, given the incredibly poor lighting sit at the Brussels expo in 2008), and the wood is clearly visible, even when looking along the gun barrels in flashpics.
Rear panel. Hole is for the Hummel vent. The Hummel vent is weird in that it's half out, half in. And the hole is bigger, you can see all the way through, but that's the way it is.
And here's the last panel. The Bandai Panther kitpart (under the walkway) sits on the turret, while the Jagdpanther kitpart (above the walkway) is embedded in that chambered rectangle. No holes here, them ILM-ers simply stuck it on, and build the panels up around it. \/
Missing from the pics are the cast blocks under the barrels, the small styrene rectangles, and the ring that fits inside the top turret (you'll know what i mean when i show it). Tomorrow will see more pics with those parts, but also a breakdown and more close ups of the insides of the parts.
Btw, my take on the ILM turret is this:
- The base is way nicer build than the top. The lines are straighter and line up all the way round. Either it was build by a different person that worked on the top, OR, it was build first until time ran out, leaving ample time to finish the top.
- The top turret is made from a simple wooden frame, with a big gaping hole in the bottom (will show pics). That bottom ring is 5-6mm thick wood. A frame instead of sheets, probably to lower the weight.
- That wooden frame was first clad in 1mm styrene (yes, only 1) to create the basic shape. Subsequently 1mm handcut panels were glued on that basic shape. Yes, they are really 1mm. Compare them with all the kitparts near the edges.
- The rearpanel is so thin (the aforementioned 2mm), and only attached by 4 screws, that it warps all over the place. The sidepanels are not straight either.
- Due to the weight of the barrels, and the fact that the top is positioned on the base by a single thin central axis, the top hangs forward.
- Early pics of the ILM turret, in the trench, show no ladder rungs.
- It's cool as hell.
Okay dudes. Daddy needs a nap. More tomorrow.
Cheers,
Wasili
MonsieurTox
Master Member
That's ******* amazing Wasili !!! Im blown away !
The word you want is "countersunk holes".
Awesome job !
The word you want is "countersunk holes".
Awesome job !
shadowlova
Well-Known Member
That is some real talent there. All it needs is Porkins going into a thousand pieces hanging above it.
Captain Needa
New Member
This is the first thread I check when I get on here and I'm never disappointed! Great work!
Amazing work Wasili. I love your documentation of it all. Great to follow along here at home!
wasili
Sr Member
Guys, Thanx a lot for the kind words. Means a lot....
I've been using all my free hours to machine parts and sets. And i noticed i haven't updated the JY thread with pics of the top. I think i can do that tomorrow evening (wednesday).
After that i'll start a build of my own. I'm collecting parts that go wrong for whatever reason (wrong depth setting, or a broken corner, that kind of stuff) for use in that buildup. Also Jason will start his within days. Can't wait to see what magic he'll bring to the table.
Cheers,
Wasili
wasili
Sr Member
Hi guys,
Maybe quiet in this thread, but not on my machines at home, which are running fulltime. I've made a siginificant change to the base (well, if you can call 3mm a significant change....), and have remade the first three bases (for kit#1, 2, and 3). I'll spend some time this weekend adding pics and posting stuff.
Ta.
Cheers,
Wasili
wasili
Sr Member
Looking forward to getting the parts!
I'm looking forward to that as well.
Similar threads
- Replies
- 4
- Views
- 605