WIP Proton Pack - Pepakura build

If it helps I've done everything so far in my basement. What I did was instead of going the regular fiberglass resin route which require outside use(and the smell can last on your parts for a while) I used epoxamite 100 & 101 that stealth had suggested in a video.

I have wee ones so the smell would not have gone over well. With the epoxamite I can resin in my basement in any weather, as long as the ambient temp is close to 70°C. It has literally no odor. It's a laminating resin so it is pretty thick and when used with fiberglass mat on the inside its pretty strong(2 layers of fiberglass/resin and it can withstand alot)
 
UPDATE

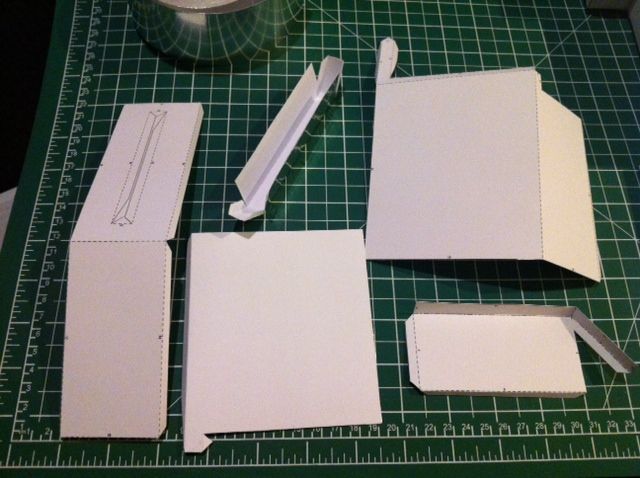
I finished cutting out and adding tape to the PPD Box 2

I also cut out and foiled the Power Cell
photo16_zps7efb313e.jpg


Spent my Saturday night in front of the tv gluing my fingers together assembling some parts
Sometimes I think I need a life lol

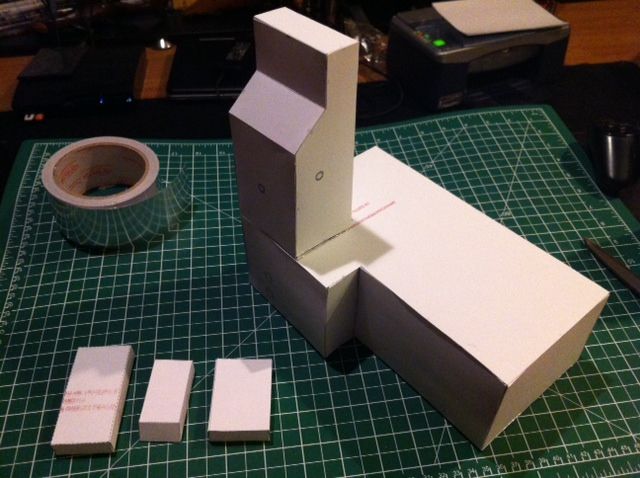
I manage to get the Ion arm, PPD Box 2 and the smaller bits assembled (smaller bits were the Bottom spacer, injector tube receiving module and power cell underplate)

photo15-1_zps62582557.jpg


Love seeing it already coming together
Just having the Ion Arm sitting on the PPD box makes me smile at the thought of having a Proton Pack!!

"Let's show this prehistoric b*tch how we do things downtown"
 
For the spacer plates
does everyone recommend to add thin cardboard inside the plates??

I just got my hands on a ton of really thin, good quality cardboard from a printer. I thought it would be perfect since Ive seen plenty of pictures of people adding cardboard to it
 
Ok I see what you are talking about...

regarding that picture, If that is Alan's what he did was print out the spacer wall files onto 8x11 sticker sheet, cut them out, and apply them to the cardboard. The cardboard was cut out and then had to be notched where there are bends in the spacer. This gave the wall strength but in the end when it came time to fiberglass the inside of the pack, he had to remove all of the cardboard before he could.

It's is up to you how you want to proceed.

An alternative method(the one I used) is to pep the spacer like normal with cardstock and AADT(aluminum air conditioning duct tape) and leave the back off. Then print out the wall files on sticker paper and apply them to the cardboard, this will become a easy removable skeleton and save your hours or removal. You'll just have to cut and shape it to fit and then tack it down with a tiny bit of hot glue. I left my back off of the spacer through out the process

img0625na.jpg


I did the same for the Cyclotron but I did put the back on that after creating the cardboard skeleton
img0484np.jpg
 
Basically you just build a removable skeleton out of thick card to keep everything braced while you paint the resin on the outside of the shell. It's best to make it removable cos if you glue it in place then it will be a biatch to remove when you go to fibreglass the inside :)
 
Basically you just build a removable skeleton out of thick card to keep everything braced while you paint the resin on the outside of the shell. It's best to make it removable cos if you glue it in place then it will be a biatch to remove when you go to fibreglass the inside :)

Indeed, that's why i used a couple taps of hot glue just to hold the skeleton in place and after I was done resining the outside, I just heated those points up and pulled the glue and cardboard out
 
awesome, so you don't fiberglass the cyclotron or to ion arm right?

and after your fiberglassed the spacer did you put a back on it?
 
awesome, so you don't fiberglass the cyclotron or to ion arm right?

and after your fiberglassed the spacer did you put a back on it?

You will need to fiberglass the inside of the cyclotron along with the rest of the inside of the pack once you have your front and back resined. It will require you to cut through the spacer into the cyclotron and remove the card board. then you'll lay your fiberglass mat on the inside of your "shell" and apply resin to that.( repeat the fiberglass and resin again for strength). Once you have the inside fiber glassed you'll want to leave it open since your "back" will be the motherboard that it attaches to onto the lc-1 frame

The ion arm is a little different. After you resin the outside you have two choices. Try to lay fiberglass mat on the inside(difficult but doable) or use the "Rondo" method.

You'll want to make sure everything is glued flush and holds together tight before you resin the outside. If there are gaps between parts you can always cover those with bondo after you finish resining the strengthening you pack
 
so leave the back of the spacer off for all of it? dont bother with the back of the spacer?

Correct. The card board skeleton will give strength to your side walls and act as a pseudo back when you are pressing on the spacer with the resin. It's also one less part you have to dremel when you get ready for fiberglass
 
thank you guys for your help and putting up with my millions of questions lol
I assure you there will be many more

I want this done right.

If I can focus tonight i'm going to try and get the power cell put together, and cut out, foil and maybe put together the PPD Box 1 (maybe the thrower main box if i have the energy)
 
Any time. I'm going to pick up my thread i started last September and post my work as I go along, since this is your thread and pictures of your work are important:)

Any questions you have I'm happy to help with since this is my first pep and proton pack. You are braver than I for pepping the thrower. I opted for a resin kit since I know I will drop mine and from constant use.

If you get a chance try to source some 1/8" styrene or pvc foam board. They will be your plates on the outside of the spacer, your ribs for the ion arm...etc, and other parts
 
I have a stack of foam board that I get from the dollar store

dont know if thatll be good enough but trial and error will sort me out lol
 
I didn't have a decent pep file for the thrower so I used steffans plans to build one from scratch. I was not impressed when I realised I'd got the curve of the gun body on the wrong side! Version 2 turned out pretty nice though... I should really get round to starting a thread
 
I can't afford the thrower kit right now. So i'll build the thrower body and if down the line I want a better one ill save for the kit
 
This thread is more than 10 years old.

Your message may be considered spam for the following reasons:

  1. This thread hasn't been active in some time. A new post in this thread might not contribute constructively to this discussion after so long.
If you wish to reply despite these issues, check the box below before replying.
Be aware that malicious compliance may result in more severe penalties.
Back
Top