I'm going to keep an eye on this thread for sure. I need another disk though so i can do the 2 sides that look good. I'm hoping that we see some tutorials on the ways that work (the LEDS). I wish the EL kits would have worked as i really liked how they worked. Please note i'm an idiot as i just found blackfeathers' tutorial. Has anyone thought about making the audio louder on the disc as it seems very quiet to me.
You are using an out of date browser. It may not display this or other websites correctly.
You should upgrade or use an alternative browser.
You should upgrade or use an alternative browser.
Tron Legacy Deluxe Identity Disc mods?
- Thread starter torsoboy
- Start date
-
- Tags
- tron legacy
blackfeathers
Active Member
i've gotten some questions about the mod i did in the tron costume planning thread.
instead of hijacking the subject matter in that thread with further explanations (and to have the info in one place), i'm re-posting it here. hopefully this will clarify a few things.
here goes (quote from other thread):
just to add a bit more to what was said, here's where i soldered it:
IMG_3037 - mod version 1 | Flickr - Photo Sharing!
soldering those eight points on the circuitboard to a ground wire or circuit trace is what's needed for the basic conversion. diagram:
tron disc mod 3 variant. simple battery mod | Flickr - Photo Sharing!
for reference of the unmodified toy, i made a dissection photoset here:
tron deluxe identity disc dissection - a set on Flickr
since my mod includes a switch, it ultimately gets routed to the battery's ground terminal. for the basic mod, the eight solder points get connected to the ground terminal in the inner ring as seen here:
IMG_1948 - mod version 3 | Flickr - Photo Sharing!
i know it might get confusing. when going over my photos and diagrams, make sure to check out the notes and captions to see where things get soldered. one of the diagrams has a parts list and other details in the caption below it. since there's three different overall mods going on, all the info isn't on one page.
hope this helps.
instead of hijacking the subject matter in that thread with further explanations (and to have the info in one place), i'm re-posting it here. hopefully this will clarify a few things.
here goes (quote from other thread):
Do we have any pics of the internals of the discs, to show where the pads are and what lines need to be soldered to them in order to force the disc to remain ON with a switch throw??
just to add a bit more to what was said, here's where i soldered it:
IMG_3037 - mod version 1 | Flickr - Photo Sharing!
soldering those eight points on the circuitboard to a ground wire or circuit trace is what's needed for the basic conversion. diagram:
tron disc mod 3 variant. simple battery mod | Flickr - Photo Sharing!
for reference of the unmodified toy, i made a dissection photoset here:
tron deluxe identity disc dissection - a set on Flickr
since my mod includes a switch, it ultimately gets routed to the battery's ground terminal. for the basic mod, the eight solder points get connected to the ground terminal in the inner ring as seen here:
IMG_1948 - mod version 3 | Flickr - Photo Sharing!
i know it might get confusing. when going over my photos and diagrams, make sure to check out the notes and captions to see where things get soldered. one of the diagrams has a parts list and other details in the caption below it. since there's three different overall mods going on, all the info isn't on one page.
hope this helps.
Last edited:
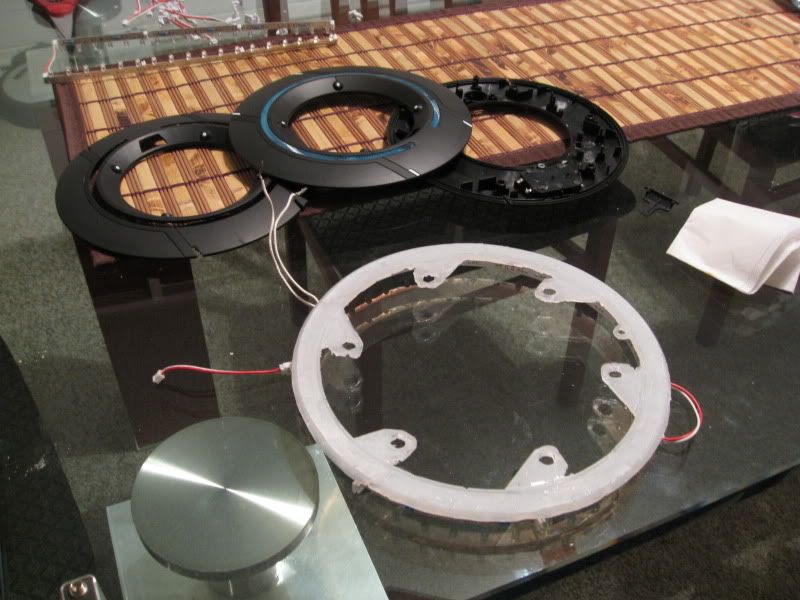
I've got my first pull of the outer ring in white. It's a bit rough, but I think my next few will come out much more clean.
Looks really good. I wonder why they made the discs glow blue when they're white in the game though. Maybe the figured it looked better or is cheaper.
slightly off topic: I have several sizes of rare earth magnets laying around if anyone is interested i'll donate a few. I have to see what sizes (I got okay and man that's tiny) as i bought a ton from online when i thought i'd use them alot in figures plus its cheaper to get bulk.
slightly off topic: I have several sizes of rare earth magnets laying around if anyone is interested i'll donate a few. I have to see what sizes (I got okay and man that's tiny) as i bought a ton from online when i thought i'd use them alot in figures plus its cheaper to get bulk.
Last edited:
cannibal869
Well-Known Member
Good stuff Soulinertia!
Did you use thermoplastic for that or some other method?
I think I used to have some thermoplastic that had glow-in-the dark properties - might be interesting to have it lit up white with the LEDs on and then have for instance the center ring glow blue when the lights are off...
hmmmm....
-C
Did you use thermoplastic for that or some other method?
I think I used to have some thermoplastic that had glow-in-the dark properties - might be interesting to have it lit up white with the LEDs on and then have for instance the center ring glow blue when the lights are off...
hmmmm....
-C
Good stuff Soulinertia!
Did you use thermoplastic for that or some other method?
I think I used to have some thermoplastic that had glow-in-the dark properties - might be interesting to have it lit up white with the LEDs on and then have for instance the center ring glow blue when the lights are off...
hmmmm....
-C
Yes, I used EvilFX's method. (Thank you!)
Liking your glow in the dark idea. I'm debating weather or not to make the center "C" ring have a slightly more bluish tone to it while illuminated as well.
Last edited:
Annisse
Sr Member
Looks really good. I wonder why they made the discs glow blue when they're white in the game though. Maybe the figured it looked better or is cheaper.
slightly off topic: I have several sizes of rare earth magnets laying around if anyone is interested i'll donate a few. I have to see what sizes (I got okay and man that's tiny) as i bought a ton from online when i thought i'd use them alot in figures plus its cheaper to get bulk.
I would love to have a couple of your rare earth magnets if you have any left please. Thank you!
Annisse
Sr Member
Another good source for EL wire is Cool Neon (Funhouse Productions):
Cool Neon
They'll even do custom lengths and prep all of the parts. Their drivers are small too, some even use AAA batteries.
Cool Neon Wire
Drivers
I've used them for years. :thumbsup Bright enough to be seen indoors!
I agree. www.coolneon.com is the best source and quality in the US I have come across for your El Wire needs. I have been ordering from them for years and they have fast shipping too. All their packages are mailed FEX EX and come in about 2-3 days in the USA.
morrisart85
New Member
Yes, I used EvilFX's method. (Thank you!)
Liking your glow in the dark idea.I'm debating weather or not to make the center "C" ring have a slightly more bluish tone to it while illuminated as well.
I say stick with white. I think it would look for authentic. Just my opinion. But amazing work!!
blackfeathers
Active Member
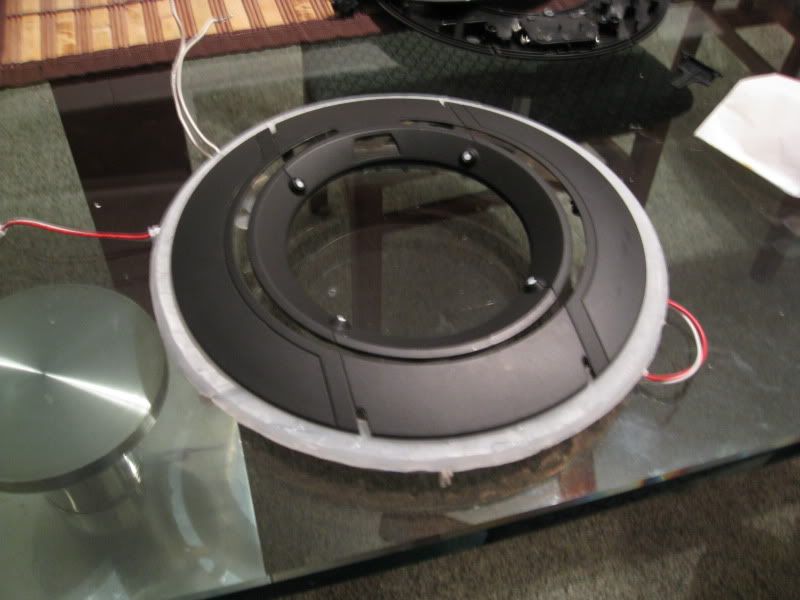
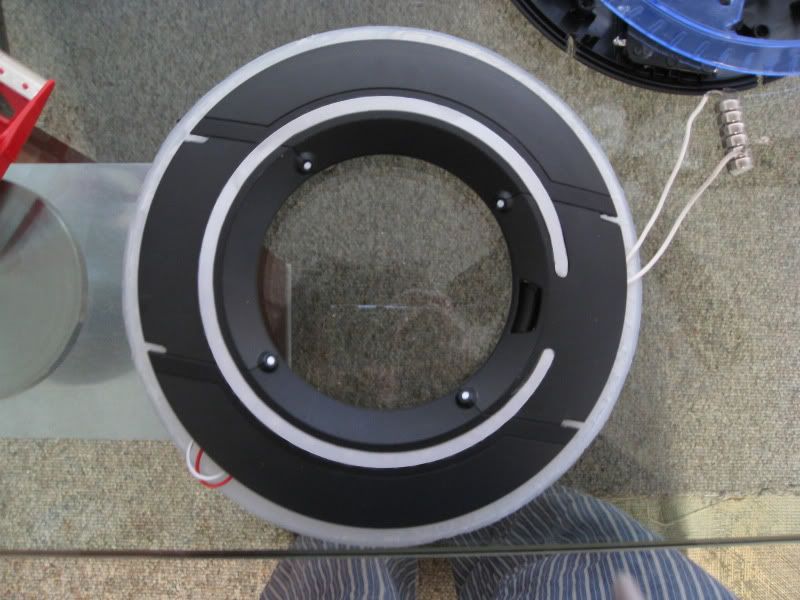
after a brief conversation with obishawn last week at the tron popup shop about the identity disc, i'm reminded about a small detail: there's two blank spots on the 'c' filter where leds were supposed to go. if you're doing the led mods, you can fill those in with a couple leds of similar size. so that would make four spots on the 'c' filter where you can stick in leds.
blackfeathers
Active Member
soulinertia:
great job with the mod. have you done any testing with how long the 9v battery will last?
great job with the mod. have you done any testing with how long the 9v battery will last?
Looks really good. I wonder why they made the discs glow blue when they're white in the game though. Maybe the figured it looked better or is cheaper.
slightly off topic: I have several sizes of rare earth magnets laying around if anyone is interested i'll donate a few. I have to see what sizes (I got okay and man that's tiny) as i bought a ton from online when i thought i'd use them alot in figures plus its cheaper to get bulk.
I'm new here but I would be grateful

Thanks guys!
I used a spare MR Vader board that I had lying around.
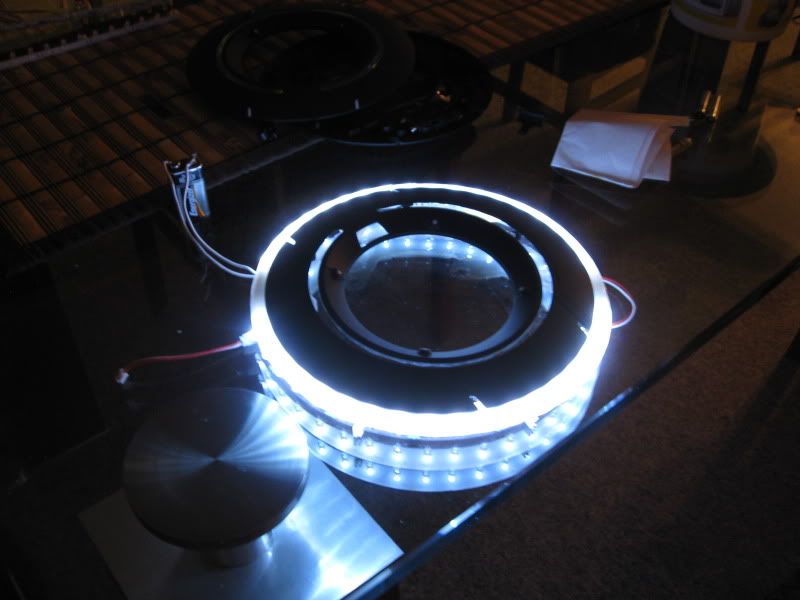
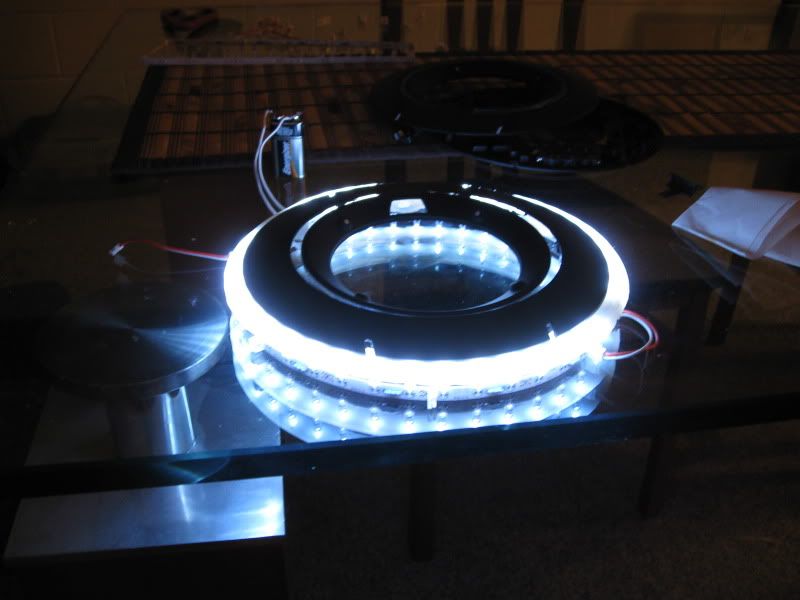
The ignition sequence is pretty cool... this coming from a sabersmith that usually only makes 3 or 5watt LED sabers (this is the first successful LED ladder-type light that I've ever made). I'm waiting for some JB weld to dry in a switch, but I'll post up pics and a video tonight once the JB sets.
I have basically 3 circuits going at the same time -
so there is a master kill key/recharge port. When you remove the kill key, the inner ring lights up (since I was planning on using this in a costume and it seems like when the disc is mounted on the back of the costume, only the inner ring is lit up). I'm estimating that the inner ring will eat up about 400 mA per hour. Then when you take it off to use the ring, you turn on the MR board switch, and the outer ring lights up in an ignition sequence. This particular build doesn't have the "burst" ignition - rather, it lights up around the ring like in the original teaser trailer. The third circuit is the OEM Tron soundboard. I already removed all the stock LEDs, so maybe I'll leave it in the next version to give an interesting effect.
I'm waiting for some 10440 Li-ion batteries to come in the mail... that's the last step, then I can really close up everything and everything will be internal. I'll be using 4 of these batteries, all wired in parallel, so it *should* function like a 3.7V 2000mA pack. I'll do a demo video tonight with a sample (external) battery.
-C
edit: movie link here:
TRON LEGACY MODS :: ignition video by cannibal869 - Photobucket
Time to start translating that to my only slight experience with electronics, really wish I payed more attention in my physics labs
. If you have time could you drop a general parts list and point me to somewhere that I could read up on setting up the wiring for this? Looks awesome.I think most of us are going to have to settle for blue unless we can find clear white plastic to use to replace the c ring and the outer ring as well. I just realized how much i forgot from electronics class. I still wish there was a way to get El wire to work. Can it be run on the coin type batteries? I need to get reading and figure out how to do this. I'm not sure how i want it to light. I like how it does it in the clip where it just comes on without all the flashing and such but i have to watch more closely to see how it does it. Sadly I don't have any lightsaber parts to reuse and no clue what a MR saber is anyhow lol. i have some spare cash next week and am trying to make a parts list so i can make an order up.
I say stick with white. I think it would look for authentic. Just my opinion. But amazing work!!
This little clip shows the "C" ring blue, but in so many other scenes and all the promo material it's white like the outer ring. I think I'm leaning more towards the white.

soulinertia:
great job with the mod. have you done any testing with how long the 9v battery will last?
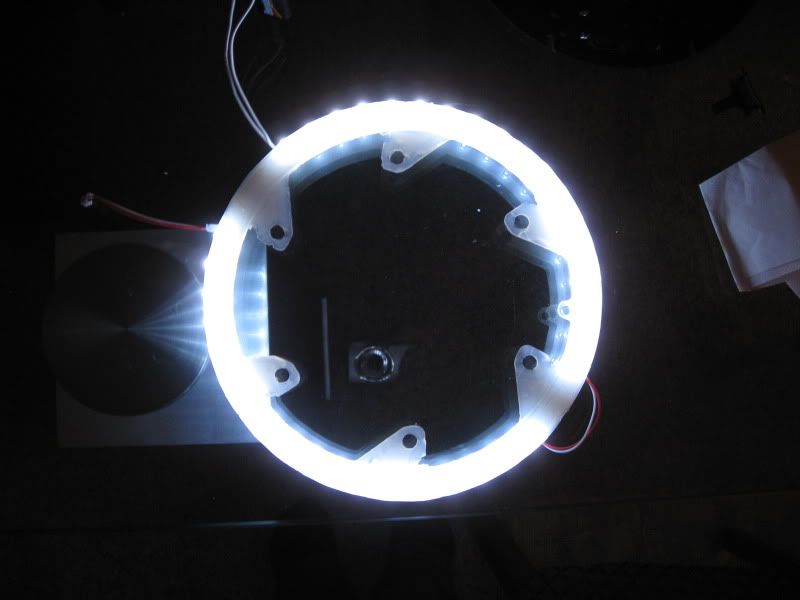
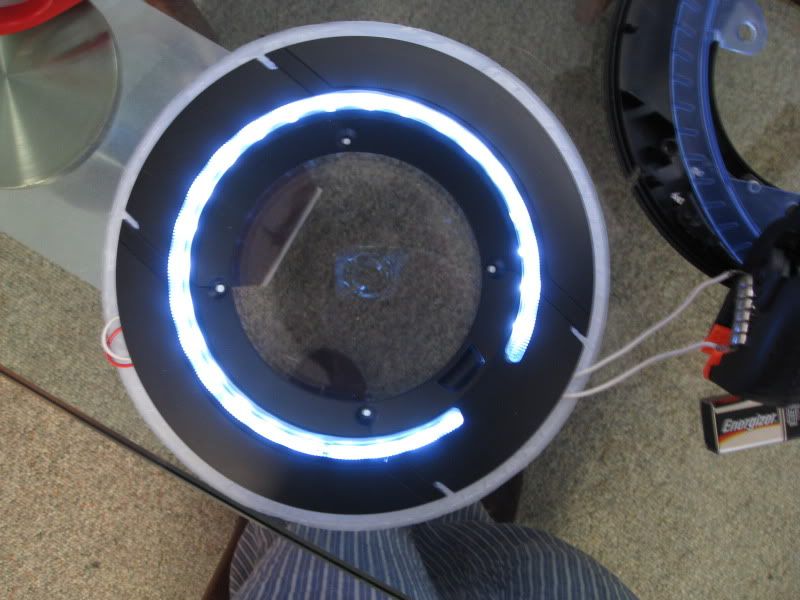
I actually have my whole system working on the original batteries that came with the disc now (still = 9volts). I was just using the 9v batt for testing purposes since it's easier, but it's really too big to fit in the disc. The 6 little button batteries light the whole thing up just as bright and they fit inside with room to spare! Not sure exactly how long they will last just yet.
You can see the button batts in these pics:
cannibal869
Well-Known Member
I actually have my whole system working on the original batteries that came with the disc now (still = 9volts). I was just using the 9v batt for testing purposes since it's easier, but it's really too big to fit in the disc. The 6 little button batteries light the whole thing up just as bright and they fit inside with room to spare! Not sure exactly how long they will last just yet.
You can see the button batts in these pics:
Uh... Soulinertia? I could be wrong, but I believe the original battery solution was 6 small coin type batteries - each 1.5V. But they were run in parallel sets of 3 each (so total 4.5V, just better mAh).
edit: I see by the pics that you really are using 9V - I would just say double check on your LEDs to make sure you're giving the right amount of driving voltage, cause if it's too high you may start burning out your LEDs.
-C
I'm powering approx. 62-66 LEDs and there is a built in resistor every 3rd LED.
Specs are as follows:
Φ5 high intensity LEDs
each LED is spaced 16mm apart
beaming angle is approx 120°
resistors built for an input voltage of 12V DC and I'm only using 9V, so I should be ok. :thumbsup
Specs are as follows:
Φ5 high intensity LEDs
each LED is spaced 16mm apart
beaming angle is approx 120°
resistors built for an input voltage of 12V DC and I'm only using 9V, so I should be ok. :thumbsup
cannibal869
Well-Known Member
I'm powering approx. 62-66 LEDs and there is a built in resistor every 3rd LED.
Specs are as follows:
Φ5 high intensity LEDs
each LED is spaced 16mm apart
beaming angle is approx 120°
resistors built for an input voltage of 12V DC and I'm only using 9V, so I should be ok. :thumbsup
Ahhh I see - did you go the route of buying some SMD strips then?
correct!
Similar threads
- Replies
- 1
- Views
- 1,188
- Replies
- 1
- Views
- 1,250
- Replies
- 0
- Views
- 1,040