There has to be something better - TOS Shuttlecraft build

feek61

Sr Member
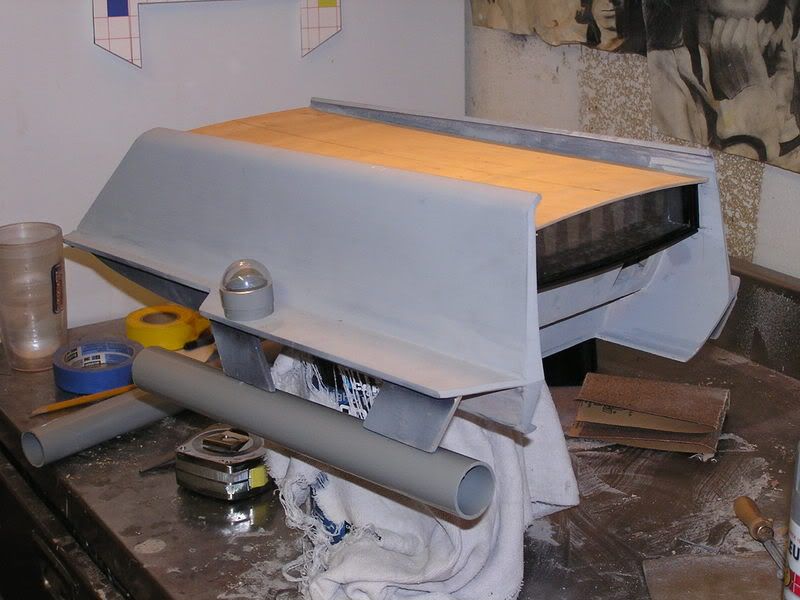
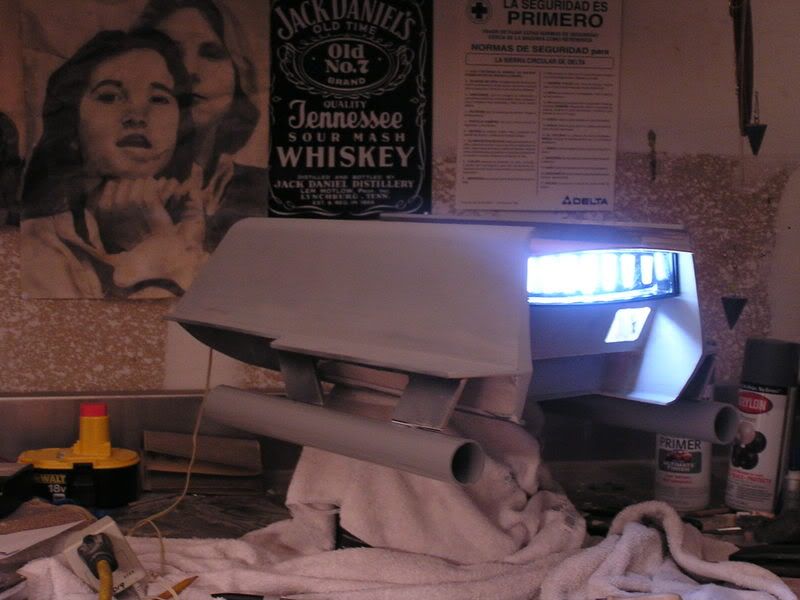
I have been working on a studio scale TOS shuttlecraft for a while now. I had to take about a year break but now I’m back to work on it. I am trying to finish the hull and get rid of all of the blemishes but the only thing I’ve been using is Bondo. There has to be something better for detail work. What is best for filling small holes and contour variations? The work here on the RPF is really quite stunning and the detail some of you guys are getting is incredible. What are you using to get the smooth lines you are achieving? Here are a few pictures of what I've done. Keep in mind that I'm an amateur so don't be too harsh :lol

I know there has to be a better way to do this but I just did the best I could. I made a tool from aluminum and brass and imprinted it into . . .you guessed it bondo at the top and I tried epoxy at the bottom.
DSC00513.jpg


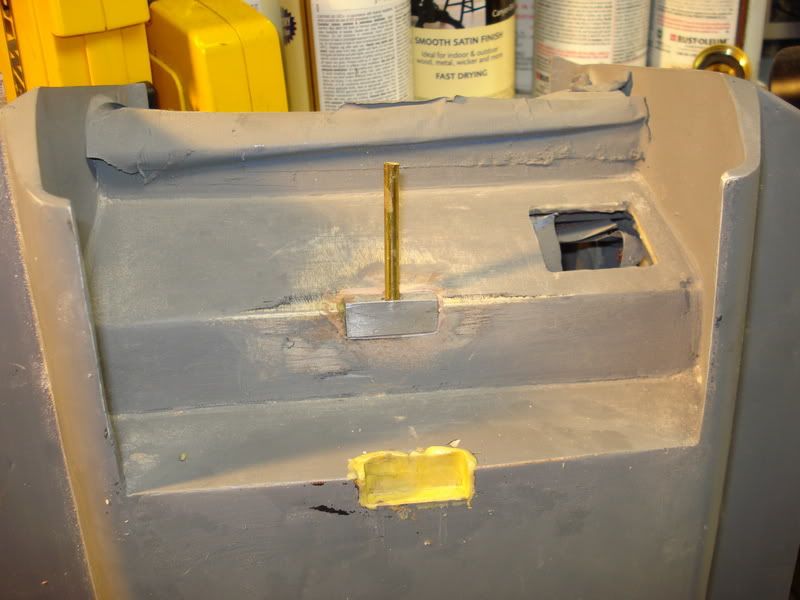
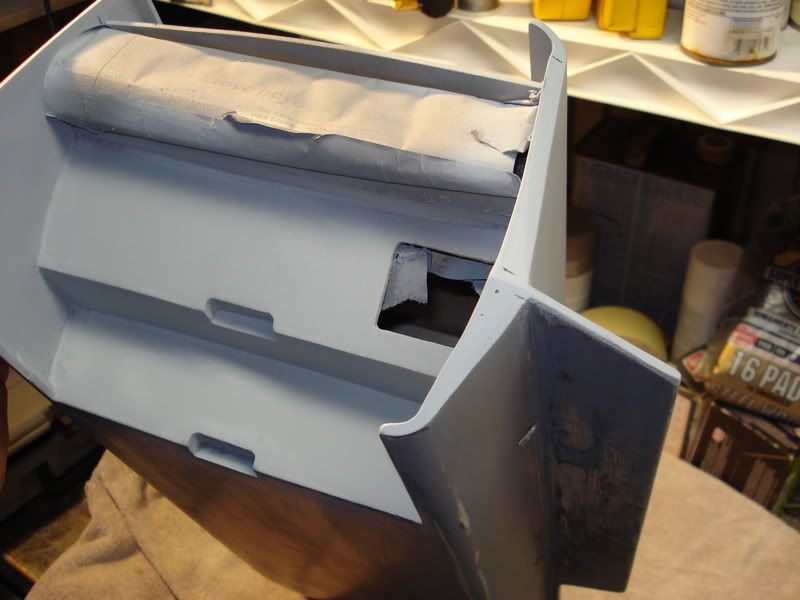
See the little gaps on the edge there? What would be the best thing to fill them with? What about other very small depressions in the body? I need something thin.
DSC00519.jpg


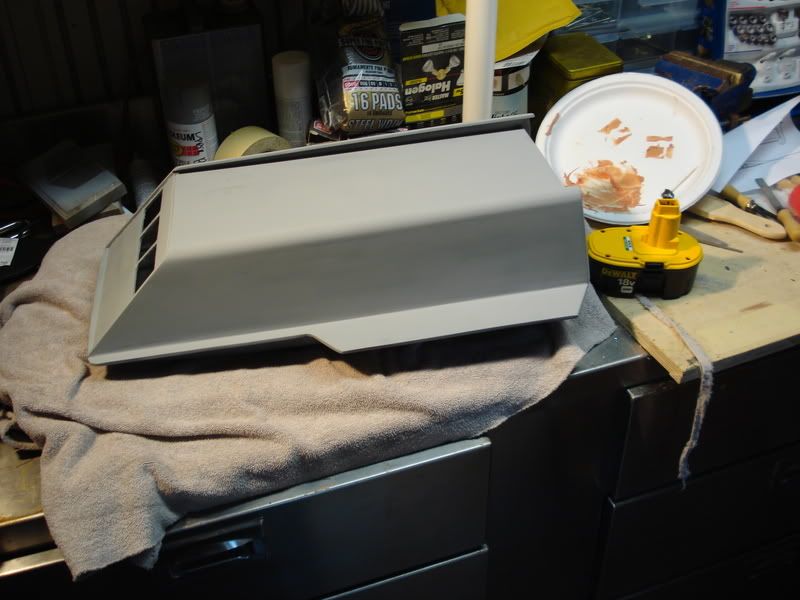
I disassembled the pylons and nacelles to work on the body. This is what it looks like now.
DSC00522.jpg


Thanks
Will
 
Last edited:
I'm sure there are better suggestions, but for very small gaps and depressions you can use Bondo Glazing Putty instead of regular Bondo. There is a small amount of shrinkage when used in larger quantities, but it's easy to work with, sands easily, and is available at almost any auto parts store. And, since it's used for auto body repair, it will work well with regular Bondo and is quite durable once it's cured.

You can also try Aves Apoxie Sculpt. It's a two-part epoxy putty that has minimal to no shrinkage, a working time of approximately two hours, sands very easily, and you can use tap water for smoothing and cleaning your tools (though you can get their solvent if you prefer). Mix equal parts and let it sit for about 30 minutes to decrease the amount of "tackiness", and you're ready to go. The down side is that it has a curing time of 24 hours and, as far as I know, is only available through on-line purchase.

http://www.avesstudio.com/Products/Apoxie_Sculpt/apoxie_sculpt.html

Another thing that I have found helps when trying to get something "flat" is to use wide putty knife when applying and use a sanding block... wrap a piece of sanpaper in a square/flat piece of wood then sand. I also use Glazing putty for small stuff and find it works best as a filler, scuplting stuff with it is a bit frustrating for me - its too soft for a lot of "sculpted shapes" IMO. I have never used AVES but have had peoples whose work I respect rave about it...

Jedi Dade
 
Thank you for the suggestions. I really need something that is easy to sand. That frickin' bondo is like sanding concrete, lol. I'll give it a try.


Will
 
As said, glazing putting is the way to go, dont know why u would use bondo, thats more for filling bigger holes, or adding more to contour something or to add more to the body of something.
 
There are a few tricks to working with Bondo that will help. First off, less is more. I'd rather build up an area with multiple applications than heaping a glop of it on there.

The neat thing about Bondo is that it quicks off rather slowly after it starts to harden. It's difficult to apply to a model in that state, but that gelling time can be used to your advantage. Try this - mix up a small glop o' Bondo and just let it sit. Have an Xacto knife on standby. After it is mixed, poke it with a stick. It will start out the consistency of pudding. Then it will get a little thicker. You'll notice that it will take more effort to move it. Eventually, it will be a solid, but still flexible if you were to flex it. At that point, try cutting it with a knife. You'll find that the knife will go through the Bondo like it were a clay. When I have to clean up an area or trim something, I generally wait for the Bondo to get to this point and then cut away the excess (rather than just trying to wipe away the fresh stuff , which will just smear).

Another trick, especially if you want to get a faux stone texture or try to smooth out an area is Lacquer Thinner. Just have a cheap brush with some Lacquer Thinner on it and brush it on once the Bondo is on the model. I've used this to smooth out the application or to make landscape areas or faux stone.

The Bondo Glazing putty, which air cures, is similar to the Squadron and Testor's stuff in the hobby shop, but at a much better price. You can get it at any auto supply store. There is a fancier stuff that is available at the higher end car paint supply firms, but I've had good luck with the ceap stuff, so I still use it. It helps to have some Mr. Surfacer since the glazing putty is somewhat porous.

Good luck and I think that Shuttlecraft looks fantastic. Be nice to see some other ST:TOS studio scale stuff here.

Gene
 
Everything Gene said, Bondo is all I use for everything. The key is to not let it harden before you work it.

Lately I've been using a combo of Bondo and automotive Duplicolor Gap filling primer, then use a fine primer after that like the Tamiya fine primer or Mr.Surfacer

You can get a super smooth surface with that combination.

This is polyfoam with a bondo shell, then about 3 coats of gap filling primer sanded smooth, then 1 coat of Tamiya primer.
D_041a.jpg
 
Thank you for all of the replies. I don't feel quite so stupid now since the experts here are using the same thing. I picked-up some glazing putty today and I'm going to give that a try (on some of the smaller areas). Also, I'm going to use GKvfx's technique for some of the bigger stuff (thanks for the compliment too). Rel, thanks for the picture. Your work is great and I'm in good company if you are using only Bondo, lol. That finish looks amazing, I'll try the same process. I'll post some more photos when I make a little progress.

Will
 
That Shuttlecraft looks amazing Will.
Everything said before...
Also make sure you mix your can of bondo, the solvents rise to the top.
And knead the hardner tube for consistancy.
But carving when it's in the rubbery state is the most important trick.
I use the bondo surfacing putty also.
With a sanding block, or it'll never come out flat.
Keep us updated, and I'm looking forward to seeing the warp engines being lit up like the original studio model should have had..
 
Bondo is good for filling pot-holes, but for anything smaller, Evercoat Glazing Putty. Its a much finer kind of filler, to be used for medium to thin layers. For surfacing putty, Nitro-Stan Lacquer Putty. In place of the Evercoat stuff, Dynatron Putty-Cote. These are pricy, but worth the cost. You'll find them in stores that serve the auto-body professionals in your area. Not Pep Boys, Auto Zone or any store that advertises on TV!

Evercoat and the Dynatron stuff need catalyst, like Bondo. Nitro-Stan is an air-cure.

Scott
 
No plans to do kits . . . to be honest I wouldn't know where to start. This is TOTALLY scratch build from the plans on up. It's taken a while because I wanted to get this right (I've NEVER seen a decent version of this when I started the project). It's built from plywood, PVC and Bondo, lol. I think it's going to look great when I get done; it's just going to take time. Life really limits how much time I have to spend on it. I am planning on doing the warp engines the same as the original Enterprise effect (except with LEDs) which is not exactly screen accurate only becase they couldn't afford it during the original show. So, I guess this is going to be slightly an idealized version. Glad you like it, I'll post photos as I progress.

Will
 
Bondo is good for filling pot-holes, but for anything smaller, Evercoat Glazing Putty. For surfacing putty, Nitro-Stan Lacquer Putty.

I'll second Scott's recommendation with regard to the above products. Bondo is swell but (fair warning) once you use Evercoat you'll never go back.

Dave Merriman forwarded this link to me, and they're a great source for Evercoat and other finishing supplies. Reasonable prices, and very cool people to deal with.

http://www.caswellplating.com/?source=google&gclid=CInbsZyb7JACFR7LiQodHhXRbw

You're off to a great start with the shuttlecraft, btw. This subject is a favorite of mine, and one I eventually intend to scratch-build. As you say, there's never been a decent kit of this subject, and I look forward to monitoring your progress.
 
Hey whatever you have been doing, keep it up. Looks great!
Excellent tips here from everyone, thanks for sharing those. I have only ever used Bondo and not been a big fan.
Next project, I'll try the glazing putty or some of the others mentioned.


Just looked at the link: LOTS of products there! The Evercoat says metal to metal, is it okay to use on bondo and fiberglass?

Also the Tigerhair and Everglass stuff looks good... Any more specific recommendations?
Sorry, I don't mean to hijack. Great info!

Thanks!
 
Last edited:
Oh, not hijacking at all . . . this thread is about the best products to use. I have now used the Glazing putty and it's much easier for the little stuff I'm doing; thanks for the tips.


Will
 
I have been moving at a snails pace but it gives me a bunch of time to think about what I'm doing. I decided to make the front peice where the windows are out of brass. The reason being that when the window covers are open the thickness of the hull is very thin. I am planning on making this version to have the movable window covers so that they can be opened or closed (showing the lighting inside). In any event here is the front part before priming.

DSC00687.jpg


Here are a couple of older photos . . . before I tore it apart, lol.
P1010011.jpg


Light test:
P1010034.jpg
 
Last edited:
OUTSTANDING!

About time someone did a large scale one of these! (and I'm directing that mainly at myself, since I've been thinking, "you know what would be cool........." for a while.)

Gene
 
^What he said.

Very inspirational. This is a great subject, and I'm having a lot of fun watching it come together.

Please keep us posted.
 
Love the progress shots, and also your slow and steady approach. It's a beautiful build so far, and promises to be spectacular when finished.

Will you make a functioning door, too?

By the way: thanks to all who have posted their tips in this thread. Very instructive, especially coming from so many whose work I admire.

Looks terrific, feek61! Keep it up! :thumbsup
 
This thread is more than 7 years old.

Your message may be considered spam for the following reasons:

  1. This thread hasn't been active in some time. A new post in this thread might not contribute constructively to this discussion after so long.
If you wish to reply despite these issues, check the box below before replying.
Be aware that malicious compliance may result in more severe penalties.
Back
Top