You are using an out of date browser. It may not display this or other websites correctly.
You should upgrade or use an alternative browser.
You should upgrade or use an alternative browser.
Space Cowboys ship, Battle Beyond the Stars FINISHED!
- Thread starter Lee S
- Start date
CyberGolem
Active Member
Outstanding!
Wow, that's terrific, and really nice work on your photography, too!
Joseph C. Brown
Sr Member
Continuing my build:
Final (!) lighting arrangement for me:
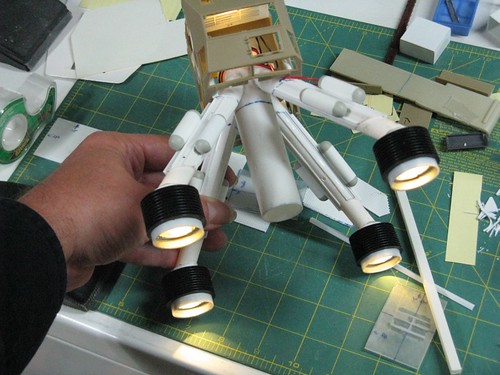 Apr_13_2016_143 by Joseph C. Brown, on Flickr
All the panels to fill Quad Tractor holes:
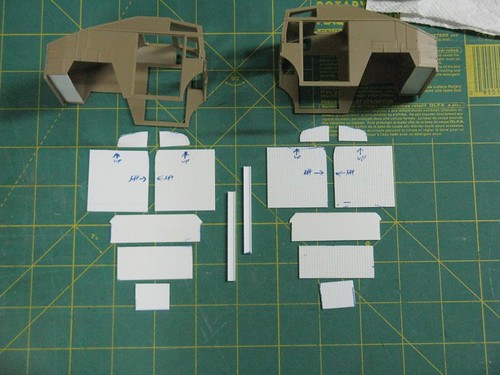 Apr_19_2016_140 by Joseph C. Brown, on Flickr
Another test-fit:
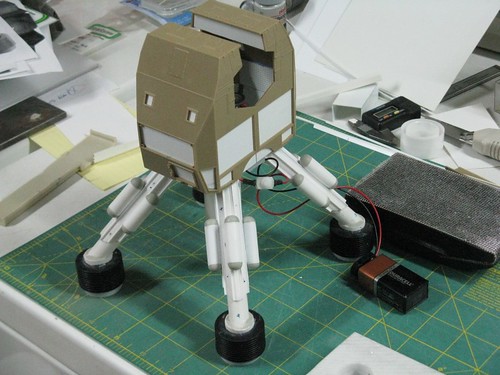 Apr_19_2016_161 by Joseph C. Brown, on Flickr
Interior light-blocking primed:
 Apr_19_2016_163 by Joseph C. Brown, on Flickr
Final (!) lighting arrangement for me:
Apr_13_2016_143 by Joseph C. Brown, on FlickrAll the panels to fill Quad Tractor holes:
Apr_19_2016_140 by Joseph C. Brown, on FlickrAnother test-fit:
Apr_19_2016_161 by Joseph C. Brown, on FlickrInterior light-blocking primed:
Apr_19_2016_163 by Joseph C. Brown, on FlickrJoseph C. Brown
Sr Member
And more:
Cabin sealed up and greeblies added between leg fuel tanks:
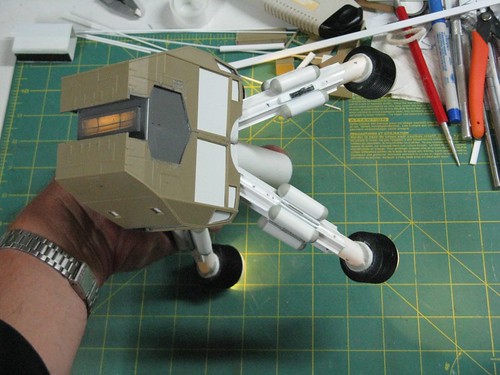 Apr_21_2016_155 by Joseph C. Brown, on Flickr
All greeblies / leg braces / I-beam strip stock / piping wires to central leg tube and all piping by fuel cylinder tanks:
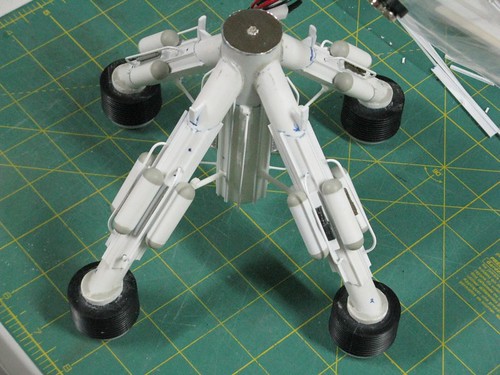 Apr_22 M_2016_142 by Joseph C. Brown, on Flickr
Cabin sealed up and greeblies added between leg fuel tanks:
Apr_21_2016_155 by Joseph C. Brown, on FlickrAll greeblies / leg braces / I-beam strip stock / piping wires to central leg tube and all piping by fuel cylinder tanks:
Apr_22 M_2016_142 by Joseph C. Brown, on FlickrJoseph C. Brown
Sr Member
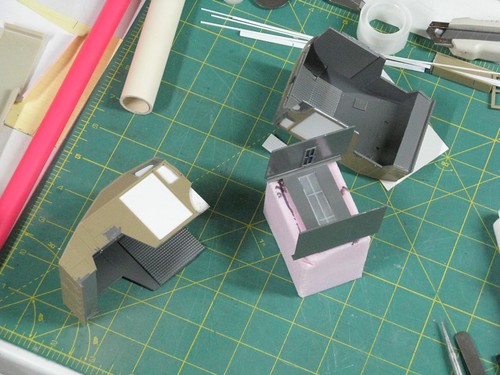
Detailing has started on the cabin, port side:

Joseph C. Brown
Sr Member
And, progress!
Port side of freighter cabin, about dome, just needs the whip antenna added.
Starboard cabin, about 90% done - some detailing still to be added and also the whip antenna for *this* side.
Ventral / underside, still needs the forward-mounted dish antenna in that glaringly empty area near the bow.
Topside view - partially conjecture, no clear shots available for the back topside portion.
Joseph C. Brown
Sr Member
Construction now complete for the crew cabin - then I move onto the cargo section build!


Joseph C. Brown
Sr Member
And finally (and about time): primer!


Joseph C. Brown
Sr Member
And the LED's still work as hoped even after minor fitting mishaps:


Richard Baker
Sr Member
That ship is one of my all time favorites- the design makes a lot of sense to me, a pragmatic, industrial space truck.
You did an excellent job recreating it!
You did an excellent job recreating it!
Joseph C. Brown
Sr Member
A very vexing part was the round thing that covers the aft filming mount of the cargo section. It looks to be a wheel, but no car kit parts of any note had surfaced during the parts hunt, for any of the models used in the film, let alone this one... but while pawing thru all of the donor parts kit *one more time* the lower end caps of the Monogram Shuttle SRB leaped out at me. So, add to it a part from Tamiya SdKfz 222 Leichter Panzerspahwagen, a part from a Leopold (and a Hanomag wheel hub), and some small connectors and that gets me close to what seems to be there!

And mounted:

Under side now done - the best references for this section are very dark and momentary (often flopped or inverted!) scenes when the Jackers are attacking before Nell rescues Cowboy. Which means I had to guess at what model kit part goes with what murky shadow:

And the topside completed:

Now - I need to get the middle section sidewalls detailed, and then, throw primer over all the cargo section parts!")
And mounted:
Under side now done - the best references for this section are very dark and momentary (often flopped or inverted!) scenes when the Jackers are attacking before Nell rescues Cowboy. Which means I had to guess at what model kit part goes with what murky shadow:
And the topside completed:
Now - I need to get the middle section sidewalls detailed, and then, throw primer over all the cargo section parts!
Joseph C. Brown
Sr Member
And... primer: ON!
Starboard upper:

Starboard middle and under:

Port upper:

Port middle and under:

Aft view:

And, now: forward onto the seam-filling, touch-up priming over filling, base coat, decals, and final weathering. But that's nothing compared to what it has taken to get this far!
Starboard upper:
Starboard middle and under:
Port upper:
Port middle and under:
Aft view:
And, now: forward onto the seam-filling, touch-up priming over filling, base coat, decals, and final weathering. But that's nothing compared to what it has taken to get this far!
Joseph C. Brown
Sr Member
Final primer coat is on:
Starboard side

Port

port full view

And with screencap:

Starboard side
Port
port full view
And with screencap:
Joseph C. Brown
Sr Member
Not 'til Friday afternoon or evening you won't! And I'll have my Freman Tarpel Gun stowed in my Major Matt Mason Jetpack if I need it, so you haz been warned! :coolI'mma touch it next week with greasy fingers.
Similar threads
- Replies
- 0
- Views
- 632