Very sharp! Can we get a part breakdown?
You asked for it!
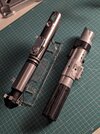
It's a mix of camera parts, left-over machined parts from other projects, scratch built and 3D-printed parts.
I'll do my best to sort it out for you:
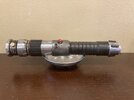
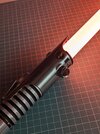
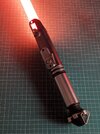
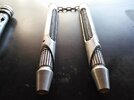
The emitter nozzle is the center of a Heiland endcap and the outer emitter is from a Canon Mark X flash.
They are married together with a custom 3D printed part which conceals another part which contains a 3/8 hex nut and fits though the next part down: a flared steel piece from a surplus store (I've used many times before).
There's a thrust bearing just below the emitter.
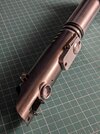
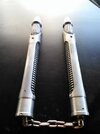
The rest of the neck is composed of a 1/4in thick aluminum washer (left over from my most recent Ahsoka saber project), a HEAVILY modified Luke V2 part (with an o-ring added where a groove was created), a small section of copper tube and a thick steel washer. I have no idea what the section with the knob and glass part is (also from a surplus store and
heavily modified).
The glass eye-looking thing is from a surplus store as well (I've used a few of these in past builds).
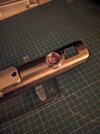
The big knurled knob is from a Graflex slave flash bracket.
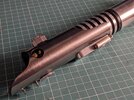
A prequil-style bargraph LED is just above the 3D printed grip section on a section of aluminum pipe I cut just for this.
Within the aluminum pipe is a 3D printed spacer.
The 3D-printed grip section conceals another 3/8" nut.
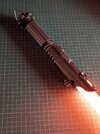
YES - A 3/8" threaded rod runs the length of the saber.
The end is actually just a thick washer (with the edges and surface finished by sanding while chucked into my drill press).
A 3D printed piece to make it look like a MPP-style end.
Most of these pieces were beautifully finished by chucking them in to my drill press and polishing with various grits of sandpaper down to 0000 steel wool. After that I use a combination of chemical darkening and painting techniques to tie everything together and give it some age and personality.
")