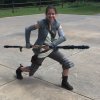
Rey Alternate Outfit? (possible spoilers)

This is the mock up I've done in felt to try to get my pattern right. It has the back princess seams that stop at the peplum, integrated collar with the 2 collar seams, plus the peplum seam all around. Having zero sewing experience, I had to completely teach myself how to use a sewing machine and work with a pattern to make this. Of course the "simplicity" pattern was pretty much anything but. The changes it needed added up to redoing the entire thing so I had to scrap it and make my own new pattern that had all the seams in the right place. I was to able get the general size and shape of panels from it, but that's all. I have a pile of Frankenstein looking mock ups on the floor I did from scrap fabric trying to get things to fit right.

The gauntlets are on the wrong arms in these pics, when flipped around, the long part sits correctly on the back of the arm instead of the side.

Looking at the shoulder pads, I think I may have to adjust the pattern to bring them lower in the front, they look too high to me.
People who know how to sew, try not to laugh too hard!

Are you sure you've never sewn before? You're doing such a great job!! I'd agree with you, though, that making the shoulder pads wrap around the front of the arm holes a bit more would make it even better.
 
thx!...there was that pillow I made in home-ec class 30 years ago, if that counts!

I think what happened is I made the shoulder pads symmetrical on the front and back. The back meets the seam, but they really need to come lower on the front. I'm also thinking that the part the extends on the back of the gauntlets might need to be a little longer too.

Right now, I'm waiting on a sample of some herringbone fabric, so I'll post up what I find out after it comes in.

....anyone have suggestions for pants that are readily available? we haven't found anything suitable yet.
 
Are you sure you've never sewn before? You're doing such a great job!! I'd agree with you, though, that making the shoulder pads wrap around the front of the arm holes a bit more would make it even better.

I think I need to echo tasteewheat here because holy cow. This is a first time sewing project? If I showed you my first time project, it might be hilarious. I think you're doing an excellent job - especially with everything you're having to do here. Adjust patterns, draft up new pieces, make new patterns...that's a lot of a first time job, but you're succeeding at it brilliantly. Nice work.

I'll be curious to see what your herringbone fabric sample looks like. I'm still scouring the internet for fabric ideas, but it's hard to find much of anything that looks just right.
 
Thank you!
I've also made some progress on the bag.

rey-costume-bag.jpg

Scraggly sewing that doesn't require precision - That's my specialty!

Looks brown in this pic but it's really od green. Obviously it still needs alot more work, but i've got it together with what should be the right lines on it.

If anyone has suggestions for cheap flap and strap hardware, especially the flap buckle, please post it up. The vintage UK fighter jet ejection seat parts aren't really an option for me on this project.
 
Last edited:
Thx! no pattern for this one, I didn't use one and it's not needed.

I just looked at it, thought about the sizing and cut the pieces. It's crudely made. I will do a write up about it when I'm done, explaining how I made it though.

I used a military style rucksack, but honestly if I had known I was going to just tear it all down, I could have prob just purchased canvas fabric.
 
made a little more progress on the buckle and upper ring piece.

rey-bag-hardware.jpg rey-shoulder-bag.jpg

Don't know if it was discussed before, but it appears to have a fabric section at the bottom that I'm going to do in mesh. Problem is the mesh I have is black, but I think it is more of a dark tan color….not really sure how to change the color of it. I think it's nylon, so dyeing won't work. Spray paint is the best I've come up with so far.
 
Hi all! I wanted to thank everyone here for being so helpful, and share some photos of my nearly completed costume in hopes that it might help someone else. I still have to edit the bag, and distress the staff more, but so far so good.

171.JPG097.JPG

I made the patterns for the vest and arm warmers using the duct tape/dress form method, which seemed to work pretty well. Also here is my holster, which I made out of the same leather as the belt...
072.JPG076.JPG
 
Leeber23 - your costume is looking awesome! I really love the fabric you selected for your vest and gauntlets. If you wouldn't mind sharing where you'd found it, I'd love to know! :)
 
rey-bag1.jpg rey-bag2.jpg

got the mesh on and added more weathering. Getting closer on the sling and I ordered one of the Xwing pilot harness slide buckles to attach the other end.

This thing is so cool, I think when I get the strap on it I'm going to start bringing it to the office with me to haul all my junk in. This bag just screams "resistance".
 

Attachments

  • rey-bag1.jpg
    rey-bag1.jpg
    277.7 KB · Views: 94
Last edited:
Hello, all! I've been following this thread since January of this year, and it has helped me tremendously in the construction of Rey's Resistance outfit! This is such an awesome and supportive community. I want to thank the super talented and generous Redwillow in particular for her wonderful holster pattern! Also, big thanks to Kristen for the Boots arm wraps!

I just wanted to post a couple of pictures of my (almost) completed costume (please excuse my messy hair!). Just need to tweak the collar, construct a proper bag (the olive green one is a stand-in for now!), tighten up that thigh strap, and fix the invisible blaster situation. ;) Tried to get a couple of cropped close-ups of the pants (decided to go with grey after seeing the BTS footage on the DVD) and the vest fabric in particular. Once again, thank you to everyone on this thread for your great discussions and contributions. :)

7.JPG IMG_0663edit.jpg IMG_0632edit.jpg IMG_0616.JPG
 
Last edited:
:DThank you very much, im glad it helped you out! (Im actually a "him" making pieces for my GF.)
Your costume looks fantastic! You can tell alot of hard work went into it and all the parts go together nicely.....especially like the vest.

What pants did you use? I like your added coloring on the kneepads.

For the resistance bag, i used this rotcho backpack:
http://www.amazon.com/G-I-TYPE-CANV...=1464521096&sr=8-1&keywords=Rothco+mini+alice

my idea was to modify it, but after i got it i realized to be correct, or at least the way i wanted, it would have to be torn down and re made. So if you can buy OD green canvas cheaper that would be just as good. I plan on doing a write up about it soon, after i get it 100% complete.
 
Last edited:
Thanks, Redwillow (and my apologizes, I knew we had a few "hims" on this thread!) Your bag is looking amazing, and I can't wait for the write-up. It was one of the pieces that I was most worried about, as it seems to look a little different from every angle on the DVD. :rolleyes The shape and color of yours look spot-on to me!

The pants were some twill pants that I ordered from Cabella's and cut into capris. They ended up being an odd khaki green color when they got here, so I overdyed them with RIT, and they came out a stone grey color. I made the little oblong pieces (stuffed with some quilting batting for shape) from the excess fabric and dry-brushed them with some white paint to try to get a weathered look. It'll be nice when this costume is put on display somewhere like the desert Rey outfit was, as it's a little difficult to see what's going on with the knee pads in the film!
 
LadyShada- thank you! I got the fabric from QuiltingAcres on etsy...not sure if she's the one who ran out, but you can check:)

Brinstar - costume is looking great!

Redwillow - love the bag so far! That's my next project...making my bag look more accurate...found out that vintage gas mask bags make wonderful purses...so many inner pockets!
 
Catching up on the thread. Some good stuff's been posted - very impressive!

made a little more progress on the buckle and upper ring piece.
View attachment 625241

Don't know if it was discussed before, but it appears to have a fabric section at the bottom that I'm going to do in mesh. Problem is the mesh I have is black, but I think it is more of a dark tan color….not really sure how to change the color of it. I think it's nylon, so dyeing won't work. Spray paint is the best I've come up with so far.

Question for you, Redwillow - it looks like you ID'ed the hardware that's used there on the strapping. Can you share what type of buckle that is? I'm not sure I've seen anything quite like that before. I'm also wondering if you went with the spraypaint idea for the mesh.
 
Here is my wife's Rey from this weekend at Megacon in Orlando. Still needs a few more tweaks but we are very happy with it!

13269296_10105184235467412_7559911141911708982_n.jpg


13339478_10105184235686972_5098731545825382910_n.jpg


13267925_10105184235931482_8090668310012133538_n.jpg


13342974_10105184282443272_111862656113530666_n.jpg


Upgrades we will be making for rebel Legion approval:

1. I have to add the strap to the staff. We got the wrong hardware and just ran out of time before the con.
2. Need to add the greeblies (stud and buttons) to her thigh strap and belt (twill and leather wraps).
3. I think I dyed the leather belt and holster to dark. Used Bison Brown as recommended by someone here but think it's to dark
4. Extend the holster to the proper length
5. Make a custom bag
 
Looking good!

3. I think I dyed the leather belt and holster to dark. Used Bison Brown as recommended by someone here but think it's to dark
You might be able to lighten it up with some rubbing alcohol. Try it on an inconspicuous area first. I've been using Eco dark brown gel antique, but you do have to be careful to apply it light.
1. I have to add the strap to the staff. We got the wrong hardware and just ran out of time before the con.
You might want to get an extra, the bag uses the same enfield sling, but it's an OD greenish color. It appears to have a frayed edge canvas backing on it, as IDed by Division6.


Question for you, Redwillow - it looks like you ID'ed the hardware that's used there on the strapping. Can you share what type of buckle that is? I'm not sure I've seen anything quite like that before. I'm also wondering if you went with the spraypaint idea for the mesh.

Not sure what the upper strap ring on the bag is, I suspect it's something aviation related, but I don't think that was ever determined. I found a plastic webbing buckle on amazon that I used. It's around the same shape, but looks slightly smaller, you can see it in my previous pic a page or 2 back.

The lower strap buckle was IDed at the beginning of this thread as being nearly identical to the Xwing pilot harness buckle which is a "roll pin" buckle. I ordered one from the UK for around $8 shipped, but it's not in yet. I didn't see anywhere in the US to get them.

The bag flap buckle also appears to be a UK jet ejection seat buckle with a spring-pinch mechanism. They are fairly pricey and hard to come by. It's similar looking to a "cobra clip" but I don't think that is it. Again, I'm using a plastic webbing buckle I got from Hobby Lobby, but other places sell them too. I'll have the part numbers and links for all the pieces I used in my write-up.

For the mesh, I pulled some out of an old windbreaker jacket lining. I ended up bleaching it to a brown, then using watery acrylic paint on it. The look and color is very hard to tell on that section. It could be dark brown, tan or grayish, depending on the screenshot....but I am confident it is mesh or perforated in some way.
 
Last edited:
This thread is more than 5 years old.

Your message may be considered spam for the following reasons:

  1. This thread hasn't been active in some time. A new post in this thread might not contribute constructively to this discussion after so long.
If you wish to reply despite these issues, check the box below before replying.
Be aware that malicious compliance may result in more severe penalties.
Back
Top