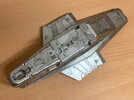
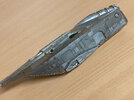
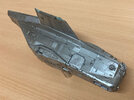
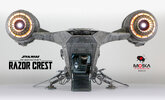
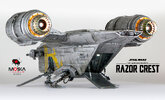
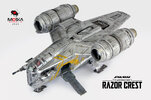
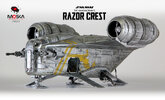
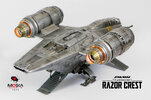
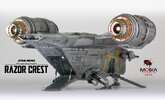
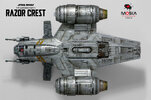
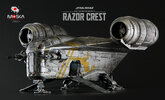
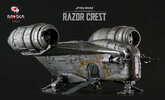
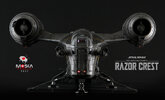
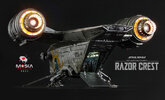
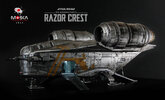
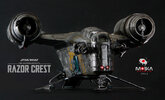
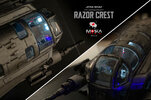
Revell 1/72 The Mandalorian Razor Crest by Moska
REINFORCEMENT AND PAINTING OF LANDING GEARS
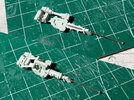
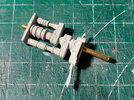
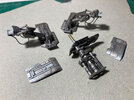
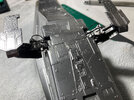
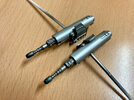
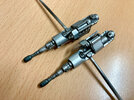
Before starting to paint the exterior I saw that it was necessary to reinforce the rear landing gears because they have a critical point that makes them very fragile. To do this, I have drilled the pieces and inserted a steel pin. More than enough to be able to manipulate those pieces safely.
The front landing gear did not have that fragility problem, but it is where I decided to run the cables from the model to the base for lighting. I have inserted a small brass tube into its axis through which those cables will pass.
0045-Moska-RazorCrest-gears-01.jpg 0046-Moska-RazorCrest-gears-02.jpg

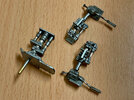
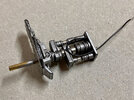
I painted the landing gears with Anthrax Metal from Green Stuff. And I covered the shock absorbers with Bare Metal Foil, which achieves a more realistic finish than most paints. I also added some conduits using 0.5mm electrical wire.
0047-Moska-RazorCrest-gears-03.jpg 0048-Moska-RazorCrest-gears-04.jpg 0049-Moska-RazorCrest-gears-05.jpg 0050-Moska-RazorCrest-gears-06.jpg


EXTERIOR PAINTING
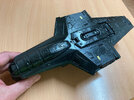
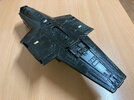
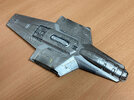
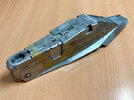
I used the AK Interactive “Fine Primer” spray primer in black for the entire fuselage of the ship. As the finish of that primer is between matte and satin, I applied a few thin layers of AK Interactive “Intermediate Gauzy Agent” with an airbrush. I think this product is very similar to “Future”. “Future” is not sold in Spain because, apparently, it contains a chemical component prohibited by our laws. The images show a very ugly texture, but I assure you that to the human eye it is much softer than it seems.
0051-Moska-RazorCrest-fuselage-01.jpg 0052-Moska-RazorCrest-fuselage-02.jpg

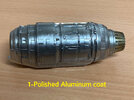
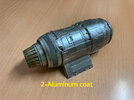
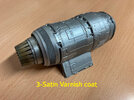
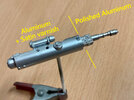
On top of this base coat I painted the fuselage with AK Interactive Xtreme Metal Polished Aluminum, but it was a mistake. This paint has too much shine and gives the metal a dark look. The result is not correct for this model, so I painted it again with Xtreme Metal Aluminum. The result is much better now but, since I don't trust the behavior of that paint when it comes to creating dirty and aging effects, I applied several thin layers of Microscale satin varnish on top. This varnish dulls the shine of the metal a little, but I think it's better this way and it looks more real in this scale.
0053-Moska-RazorCrest-paint-01.jpg 0054-Moska-RazorCrest-paint-02.jpg 0055-Moska-RazorCrest-paint-03.jpg

Cannons:
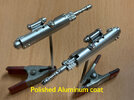
On the barrels I repeated the same painting process, but kept the original layer of Polished Aluminum on the front zone.
0057-Moska-RazorCrest-paint-05.jpg 0058-Moska-RazorCrest-paint-06.jpg

Engines:
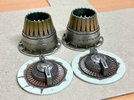
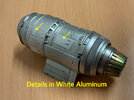
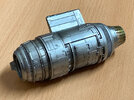
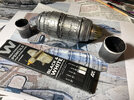
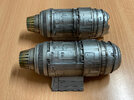
Before gluing the two halves of both engines together, I painted the thrusters and the front piece. The colors used for the turkey feathers are Xtreme Metal Burnt Metal and Tamiya clear acrylics. The rusty look of the blades on the front piece was done with pastel chalk dust. To protect those already painted parts during the process of assembling and painting the engines, I built some cardboard cylinders that fit tightly into the front and rear openings. I highlighted some panels and details by painting them with Xtreme Metal White Aluminum.
0059-Moska-RazorCrest-paint-07.jpg 0056-Moska-RazorCrest-paint-04.jpg

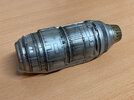
I began the process of dirtying the engines by applying washes with very diluted black oil paint. I then dusted certain areas with black pastel powder applied with a short bristle brush. And, the last step for the moment, is to create the black strokes that we can see on certain areas of the engines.
0060-Moska-RazorCrest-paint-08.jpg 0061-Moska-RazorCrest-paint-09.jpg 0062-Moska-RazorCrest-paint-10.jpg

The technique I used to create those strokes is explained in the following video.

Thanks for watching.
Rafa
 
That is looking really good!
I'm quite annoyed with myself - after spending so long developing all the lighting for mine, I ended up rushing the final assembly and painting and the end result was disappointing. The fragility of the metallic finish I ended up with meant I just couldn't add all the detailing I wanted to due to the handling damage it was incurring :(
Hi Antsnest.
I am not very used to painting metallic finishes on large surfaces. I've looked at several tutorials but I'm practically improvising. It is a bit stressing. o_O
I have seen a video from AK Interactive in which they warn that the Xtreme Metal Polished Aluminum and Chrome colors are more fragile than the rest of the range. Maybe it's because they are the brightest.
Since I used Polished Aluminum, I faced the problem of having a weak paint layer. Despite having covered it with Aluminum and satin varnish, I have to be careful when handling the pieces because the paint disappears on the sharpest edges quite easily. I'm using AK Interactive's True Metal to touch up those areas and it seems to work well enough. Plus, the dirty, used look of Star Wars ships helps disguise some of those problems. Of course, I'll have to apply a protective coat of varnish when the paint job is done.
Yeah it's not an area I've done a huge amount with either - and I've used Alclad Chrome when I have in the past and know that is pretty fragile.

The problem with having to apply a protective coat, is that it's very likely it will destroy the chrome-y effect you get from the bare paint. I know there are a variety of "special" clear coats but I've not had a chance to try all the combos - and I was in a rush to get my RC done for a show.

I've just been doing some photos & video of my finished one - hope to get them posted soon
 
Yeah, about the only solution I've found for properly handling large, metallic models is to use cotton gloves like museum curators use for handling artifacts to mitigate the issue, and also try and find ways of handling it during the painting and weathering process that minimize contact on areas that will be very visible. If you do end up rubbing some off, just recoat it with the colors you used and weather some more. It ends up adding more layers to your paint job, which only improves the look and makes it appear to have more depth to the weathering.
 
Moska,
Reading your thread with great interest regarding cockpit lighting. I have limited experience beyond model trains when it comes to controllable LED lighting. Love the discussion on black boxes, decal paper and fiber optics, but those details need some study on my part.
 
Yeah, about the only solution I've found for properly handling large, metallic models is to use cotton gloves like museum curators use for handling artifacts to mitigate the issue, and also try and find ways of handling it during the painting and weathering process that minimize contact on areas that will be very visible. If you do end up rubbing some off, just recoat it with the colors you used and weather some more. It ends up adding more layers to your paint job, which only improves the look and makes it appear to have more depth to the weathering.
Hi Millenniumf.

Thank you very much for your comment.
I have tried using cotton gloves on other occasions, but I can't adapt to them.
It seems that I need all the sensitivity of my fingers to manipulate the model. :(
 
Moska,
Reading your thread with great interest regarding cockpit lighting. I have limited experience beyond model trains when it comes to controllable LED lighting. Love the discussion on black boxes, decal paper and fiber optics, but those details need some study on my part.
Hi Searun.

Thank you very much for your comment.
I'm not an electronics expert either. I barely know how to calculate the resistance that an LED needs for the supply voltage. For other more demanding projects, I have copied circuits that I have found in tutorials on YouTube. They are very useful. (y)
 
Engines:
I think I have finished my paint job on the engines. After a first treatment with AK weathering pencils, I applied a new layer of varnish and repeated the same process to further enrich the effect. The varnish layer is necessary to preserve the results of the first step. Otherwise they would have been ruined by using water again on the first black strokes.
0065-Moska-RazorCrest-paint-13.jpg

Cannons:
I have also finished painting the cannons. To create a little more color contrast, I decided to darken them and leave only the armour covers with the aluminum color. I painted the barrel and the internal parts of the weapons with Anthrax Metal from Green Stuff. And I further darkened the ends of the barrels with Tamiya black and transparent blue.
0066-Moska-RazorCrest-paint-14.jpg 0067-Moska-RazorCrest-paint-15.jpg

Fuselage:
I painted some panels different colors. Over the aluminum base, I used Dark Aluminum, White Aluminum and Gun Metal. All these colors of AK's Xtreme Metal. Color differences are very subtle. Only the White Aluminum color creates a really accentuated contrast with the others. But I like the result a lot.
To give it a little chromatic variety, I painted the grilles at the top with “burnt” colors.
0068-Moska-RazorCrest-paint-16.jpg

I then went on to do specific washes on all the panel lines and on the different raised details. For washes I always use oil paint, in this case black, very diluted with good quality artists' White Spirit (Talens, Humbrol, etc.). The pure White Spirit sold at chemical stores is too aggressive and can ruin the previous paint job.
When applying these washes, and before the paint dries, I gently wipe a tissue paper over the surface in the opposite direction to the vehicle's travel. This causes a small portion of the paint from the washes to spread across the surface of the panels creating good dirt and speed effects.
Only with these steps, the weathering of the fuselage is almost complete. Since I am going to expose the model in landed mode, I only need to make some vertical streaks to complete its aging. And maybe simulate a bit of a dusty look in the lower areas of the ship. We'll see.
0069-Moska-RazorCrest-paint-17.jpg 0070-Moska-RazorCrest-paint-18.jpg 0071-Moska-RazorCrest-paint-19.jpg 0072-Moska-RazorCrest-paint-20.jpg

Decals:
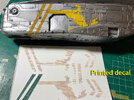
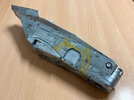
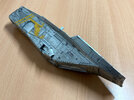
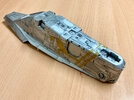
Normally I always try not to use the decals of a model. If possible, I prefer to paint them because it looks better and more realistic. In this case I was afraid of the masking work necessary to paint the marks because that would involve a lot of manipulation of the model, with the consequent problem of ruining and wearing away the metallic finish. So I decided to use the decals from the kit. And I made the mistake of weathering the fuselage before applying the decals.
Despite that error, I am not sure that the weathering would have been enough for the decals to be well integrated into the model. Once placed, the decals looked very artificial. Its color is too yellow, too intense and too clean. Furthermore, they are thick and do not respond very well to the action of the Micro Sol. Although I tore the decals along all the panel lines to avoid the “continuous plane” effect, the result was still very unrealistic and I was very upset. .

I thought about what options I had to try to fix that problem:
1- Try to remove the decals and paint the marks on the fuselage.
2- Try to age them and change their color with a brush.
3- Create new decals that would be superimposed on the original ones.

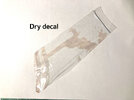
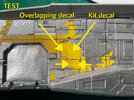
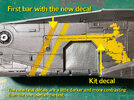
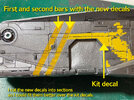
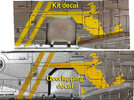
The third option, although it may seem the most crazy, was the one that required the least manipulation of the model. Furthermore, I could do some testing before applying it definitively and decide if this was going to be a good solution or not. So, taking advantage of the fact that I always scan the decal sheets of the models in high resolution before starting their construction, I did some tests on my computer and printed them on a transparent virgin decal sheet. I separated the decal from its support and let it dry in the air. Once dry, I placed it over the original decal that was already on the model and found that the overlapping effect was quite good. So I made a complete new set of decals adjusting their color and effects based on the results of that first test and placed them over the original decals. The result seems very satisfactory to me. The decals are now perfectly integrated into the model and their appearance is much more similar to what we see in the images from the television series.
0073-Moska-RazorCrest-decals-01.jpg 0074-Moska-RazorCrest-decals-02.jpg 0075-Moska-RazorCrest-decals-03.jpg 0076-Moska-RazorCrest-decals-04.jpg 0077-Moska-RazorCrest-decals-05.jpg 0078-Moska-RazorCrest-decals-06.jpg

This is the design I made to create the new decals. If someone wants to use it, it is important that the image is printed with the indicated measurements.
0079-Moska-RazorCrest-decals-07.jpg


In conclusion, a solution that is not perfect or very orthodox but, ultimately, a good solution for my problem.
0080-Moska-RazorCrest-decals-08.jpg 0081-Moska-RazorCrest-decals-09.jpg 0082-Moska-RazorCrest-decals-10.jpg 0083-Moska-RazorCrest-decals-11.jpg

Thanks for looking.
Rafa
 
Your decal solution does look good, Moska. I'll be building this soon, and I'm almost positive I'm going to paint on the stripes. I've heard multiple horror stories about the decals so I'm simply not going to risk it.
 
Hello fellow modellers.

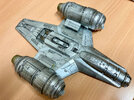
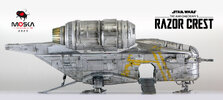
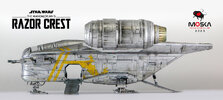
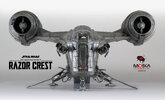
I present to you my finished Razor Crest.
Since my last post I have completed the assembly and the only notable thing is the dirt that I finally applied to the metal finish of the model. Basically I used oil colors, AK Interactive weathering pencils and pastel paint powder.
Although its appearance depends a lot on lighting conditions, I find the level of shine and reflection of the metallic finish convincing enough for this scale.

My conclusions about this kit.

The worst:
- The grainy texture of the fuselage.
- The poor quality of the decals.
- The rear landing gears are very weak, but it must be admitted that this is not the kit's fault. To maintain fidelity to the original they have to be like this.

The best:
- The fit of the pieces is very good.
- The detail is also pretty good.
- The interior is an extra contribution that is interesting as an option.

In short: A pretty fun kit to build. The interior can be improved with little extra work. The exterior is almost perfect. Providing it with lighting is a little more complicated due to the small spaces in which the installations must be made. And another nice Star Wars piece for my collection ;).

Next project: Revell 1/2700 Imperial Star Destroyer.

Thank you very much for following my thread and Merry Christmas to everyone :D.
Rafa

Razor-Crest-Moska-05.jpg
Razor-Crest-Moska-12.jpg

Razor-Crest-Moska-01.jpg Razor-Crest-Moska-02.jpg Razor-Crest-Moska-03.jpg Razor-Crest-Moska-04.jpg Razor-Crest-Moska-06.jpg Razor-Crest-Moska-07.jpg Razor-Crest-Moska-08.jpg Razor-Crest-Moska-15.jpg Razor-Crest-Moska-16.jpg Razor-Crest-Moska-19.jpg

Razor-Crest-Moska-09.jpg Razor-Crest-Moska-10.jpg Razor-Crest-Moska-11.jpg Razor-Crest-Moska-13.jpg Razor-Crest-Moska-14.jpg Razor-Crest-Moska-17.jpg Razor-Crest-Moska-18.jpg
 
Moska,
The amount of professional modeling techniques concisely presented in your thread on the Razor Crest is staggering. Explanation & pictures cover complete span of construction, lighting & painting along with a ”deep dive” on the unique insignia & precise fix of the decals on chrome finish. Thanks for so freely sharing your talent with the other experts on this site that have similar DNA.
 
Thank you very much, guys.
Like everyone here, I just do what I can and always try to improve my techniques with each new project.
I have learned a lot in this forum, so I consider it an obligation, as well as a great pleasure, to share my humble efforts with all of you.
Modeling is not a hobby for lazy people. We are a community of people eager to get to work. So it's great to share our little tricks with each other to make our jobs easier.
Thank you again for your kind words. See you in the forum. ;)(y)
 

Your message may be considered spam for the following reasons:

If you wish to reply despite these issues, check the box below before replying.
Be aware that malicious compliance may result in more severe penalties.
Back
Top