mastersetter
New Member
I have had some great results with pastels, and using testors dull cote spray to seal them in. It gives a lovely flat finish, it was the only spray that gave the results I was looking for.
")
Wow thanks PHA, I have some humbrol matt clear coat in a little rattle can, do you think that is ok for the falcon? I'm not sure what the lighting will be yet, probably led's, almost everything is led's now
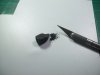
After looking at some more pics..It looks (to me at least) that the gun port disc is too short. Seems like raising up that disc a bit would be an easier fix?Quick peek at the internal support I'm building for the BMF. It's made of MDF, so it's a little heavy, but it will provide solid support. It's 3/4" thick, so that will be the thickness of the new sidewalls. I'll glue and screw styrene sheet to the curved outer edge to start building up the details. The goal is to replicate the 5-footer, at least in spirit. Where you see lines I'll be adding curved supports to increase the top to bottom hull thickness by about 1/2 inch and add more curvature to the hull.View attachment 409124
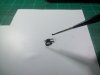
I'm also reducing the inside edge height of the three-sided docking ring arms (or whatever they're called). On the 5-footer, their height should be lower that the height of the gunport disc.View attachment 409125View attachment 409126
Hunk a Junk said:
Quick peek at the internal support I'm building for the BMF. It's made of MDF, so it's a little heavy, but it will provide solid support. It's 3/4" thick, so that will be the thickness of the new sidewalls. I'll glue and screw styrene sheet to the curved outer edge to start building up the details. The goal is to replicate the 5-footer, at least in spirit. Where you see lines I'll be adding curved supports to increase the top to bottom hull thickness by about 1/2 inch and add more curvature to the hull.Attachment 409124
I'm also reducing the inside edge height of the three-sided docking ring arms (or whatever they're called). On the 5-footer, their height should be lower that the height of the gunport disc.Attachment 409125Attachment 409126
After looking at some more pics..It looks (to me at least) that the gun port disc is too short. Seems like raising up that disc a bit would be an easier fix?
Cool.. Yeah that is what I thought I was seeing. However I know sometimes a certain angle can play tricks with your head. My plan of attack is to perhaps raise up the turret disc and call it a day. Just waiting on the rest of my shapeway parts now. Proud owner of all the parts nowYeah, the 5 footer's turret is taller and has a sharper slope to the hull
J
(or soon to be)... that 20% off sale pushed me off into the deep end I suppose I should ask...on the smaller falcon..what is correct? The way the hasbro toy is, or which part is wrong. Now that I know whats up with the 5 footer it would be easier to fix if going for that look. I'm just not sure about the smaller one.Yeah, the 5 footer's turret is taller and has a sharper slope to the hull
J
If you search for "hsbro falcon" or "hsbro millennium" you should be goodAnyone have a link to the shape ways parts? I'd like to see how they look
You mean you just want to see what's available? Just hit Shapeways and search HSBRO - brings them all up.
Thank you gentleman!If you search for "hsbro falcon" or "hsbro millennium" you should be good
Hi guys!
Sorry for being too late posting here, but I'm really busy designing parts by now for the Hasbro...
Yes, the new Falcon has a new quad radar dish! And I've designed it too!!! You can see it at Shapeways (do a search for "quad radar dish HSBRO").
And yes. I've designed all the upgrades for the new Hasbro baby than Mike commented above: complete set of sidewalls, to replace the stickers, slightly smaller radar dish (67 mm), laser cannons and yoke, complete front and rear landing gear, and cabin cockpit. And Mike will use them to cast a resin kit, cheaper than 3D printed parts.
Actually I'm designing the cabin cone (2 sizes), and I will design too the jawbox sidewalls, the turret well and the boarding ramp. I will adapt also the engine louver arms to the Hasbro scale (on the Hasbro are attached to the hull).
When Mike will be ready on the castings, we will be posting all the details. So, stay tuned!!!
I will try to be connected here often, so be patient if I don't reach RPF daily...
Many thanks to all of you for your big interest in this great project! And thanks to Mike to offer his know-how.
Best
I just got 3 of the sidewalls from shapeways today..they are nice...and super thin(so not sure how awesome a resin one would be over these)..I ordered everything else today and saved 50 bucks...so I can't wait now !just ordered all side walls, longer cone, radar dish, cockpit kit off of Toney 's store on Shapeways. saved over $60 with Black Friday code. Cant waut. i will say one thing that needs to be said about Shapeways: maybe I'm spoiled by amazon but ordering off that website brings me back to 1998.
I just got 3 of the sidewalls from shapeways today..they are nice...and super thin(so not sure how awesome a resin one would be over these)..I ordered everything else today and saved 50 bucks...so I can't wait now !
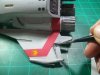
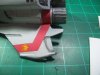
Will attach photo....but...The 2 front sidewalls look very nice. The 3rd part I have so far is the middle side..it appears to have a lot of goo on it. It seems to clean up ok, but mine needs a lot more love to get it all off. Like I mentioned before the sidewalls are very thin..I may have even nicked off something since I have this small chunk of something that may have come off one part, but for the life of me can't figure out where...perhaps it was just some fuzz on the side that fell off. I have never gotten 3d parts before so I can't really compare this to anything, but I "THINK" they will work out really nice. I stuck in one of the sidewalls just to see and it looked awesome!Is it as smooth as well done resin is?? I have seen a lot of rough 3D printed stuff lately.
 but this will have to do for tonight.
Am I correct in that I read you are not going to do the cockpit and that it will need to be bought on Shapeways??
Thanks
Tom