You are using an out of date browser. It may not display this or other websites correctly.
You should upgrade or use an alternative browser.
You should upgrade or use an alternative browser.
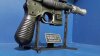
My DL44's (airsoft + 3d printed parts)
- Thread starter guabe
- Start date
cayman shen
Master Member
The 3D printed texture gives the scope and old fashioned cast metal look that I like.
The 3D printed texture gives the scope and old fashioned cast metal look that I like.
Yeap that is the main reason i didnt sand them.
cbradshaw007
New Member
By the way, I made my models downloadable if you guys have a 3d printer feel free, however the models are optimized for the shapeways printers so you might have to tweak them to make them work in other home printers. Just please do not mis use the files, I have placed a lot of time and effort in to making these.
Have fun.
Where are these available for download? I have a 3D printer and would love to print these up. Amazing work!
Thanks a lot...
All the models were made by me and are optimized for shapeways... you might have to tweak them for your printer...
have fun: http://www.shapeways.com/shops/gg4g
All the models were made by me and are optimized for shapeways... you might have to tweak them for your printer...
have fun: http://www.shapeways.com/shops/gg4g


You must quite the collection of lanyard ring tassels... :lol
:lol
indeed pluss long cartdriges and yellow bb's :lol
cayman shen
Master Member
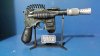
Awesome! What's the spiral cord attach to in the back? And what's the plug at the front of it?

cayman shen
Master Member
Oh cool...does it just go into a hole by the hammer, or...? And what are you spraying the guns with to make them look metallic? I really dig what you're doing.
Yes i drill a hole in to the hammer, slightly smaller than the cable so it goes in with pressure, and I also use E6000 to fix.
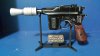
The flash suppresor is painted in brilliand aluminum paint by krylon color master. The i use black acryllic paint to weather it and remove the excess.
For the Mauser and greeblies I use flat black spray paint and for the metallic look I use rub & buff
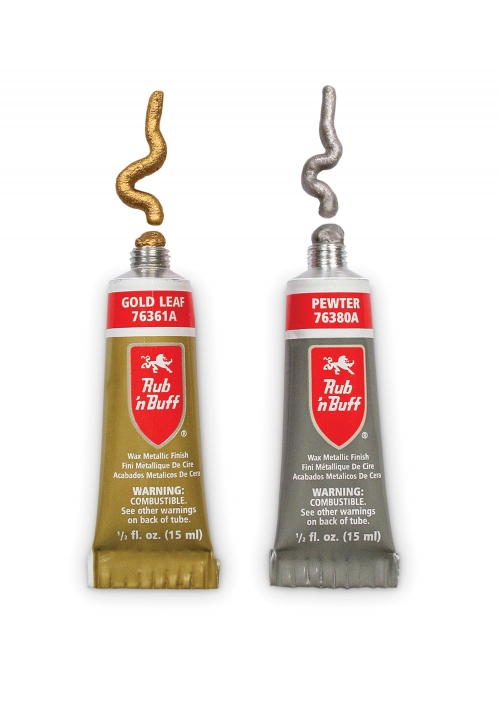
the trick is to put a very small drop on a surface and then use your fingertip to spread it around on the surface (less is better) then with your finger just slide it over all the vertexes and corners and edges of the blaster once you got that then slide it all over, you shold have very little paint left so its just barely leaving some particles on the body of the mauser. only slide it in the same direction so it looks like brushed.
Thanks.
The flash suppresor is painted in brilliand aluminum paint by krylon color master. The i use black acryllic paint to weather it and remove the excess.
For the Mauser and greeblies I use flat black spray paint and for the metallic look I use rub & buff
the trick is to put a very small drop on a surface and then use your fingertip to spread it around on the surface (less is better) then with your finger just slide it over all the vertexes and corners and edges of the blaster once you got that then slide it all over, you shold have very little paint left so its just barely leaving some particles on the body of the mauser. only slide it in the same direction so it looks like brushed.
Thanks.
cayman shen
Master Member
Cool thanks for the info!
These are amazing. Is the scope hollow?
Last edited:
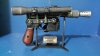
Here is my latest DL44, I changed a few dimensions here and there mostly on the scope and mount...Also I used a Denix mauser this time...


Btw.. I have both a single piece and a two piece scope design... I made it 2 piece because shapeways cant polish anything longer than 200mm... and I want it to be polished... The parting line will always be hidden. But i do have the single piece scope too.
Next up is weathering...
So how does it look? Thanks.


Similar threads
- Replies
- 25
- Views
- 1,453
- Replies
- 15
- Views
- 692
- Replies
- 3
- Views
- 1,073
- Replies
- 15
- Views
- 1,072
- Replies
- 8
- Views
- 804