Millennium Falcon Dejarik Holochess Build

jbfatcats

New Member
Hello all,

For a long time I've wanted to build a Falcon Dejarik Holochess table but never really had a reason to build one. Now I have a little corner in my office that would be perfect for just such a table. So the build is on. Here we go.

Please feel free to offer ANY suggestions. But be aware that I have limited skills…tools…and space. I will modify my projects to fit my needs. For this build I also needed to use up old supplies! How I'm building this is also based around that as well.

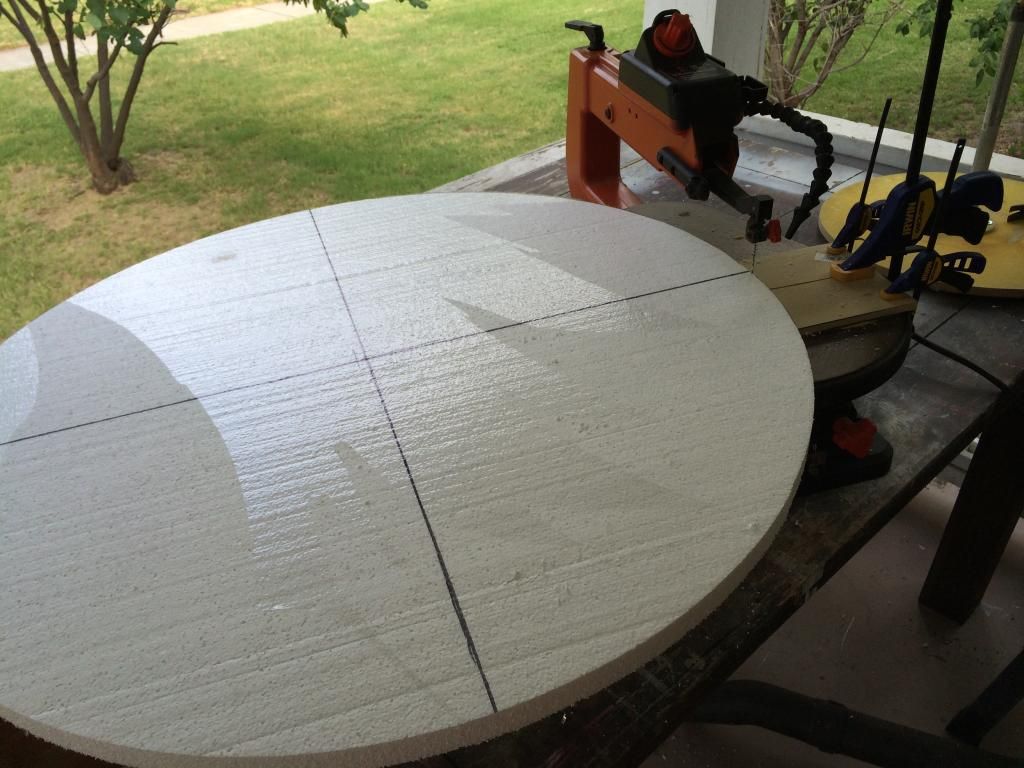
First things first. I needed foam for the inside core shape. Sadly the only stuff available around here is at Home Depot and Lowes and it's 1 inch thick. That means I had to glue sheets together. I used Smooth-On 300 because I have plenty and it seems to work. If there is another better option PLEASE let me know.

After I got my shape mostly where it needed to be I started the Bondo and Sanding dance. If I ever own a prop shop I'm going to call it "80 Grit".

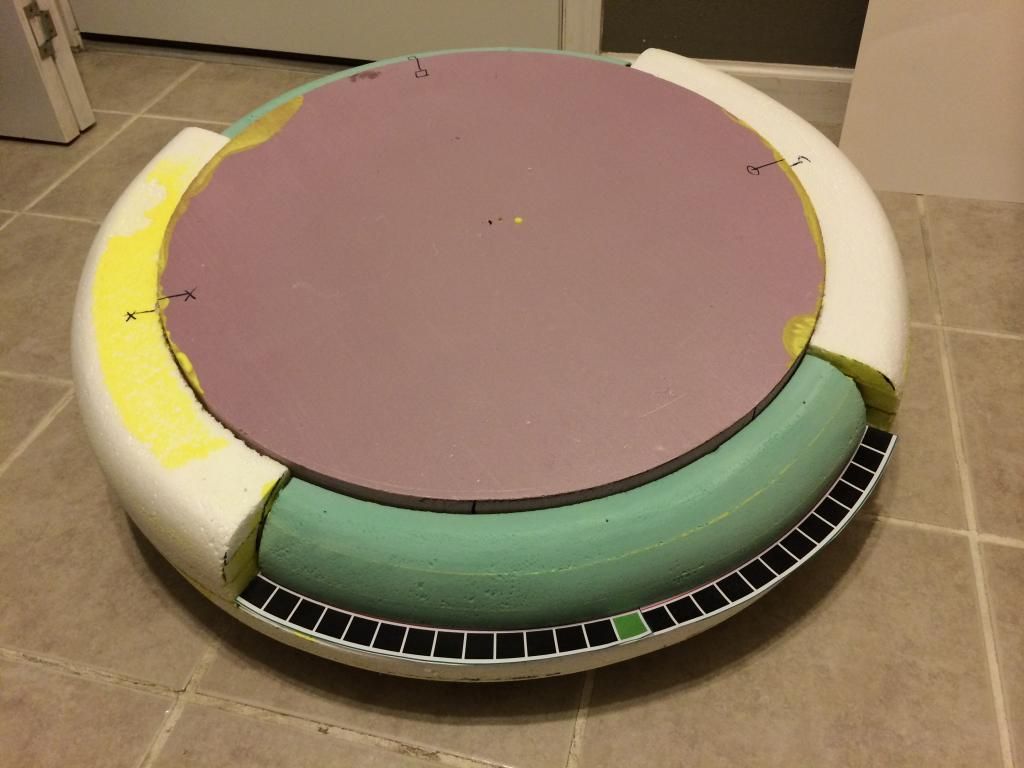
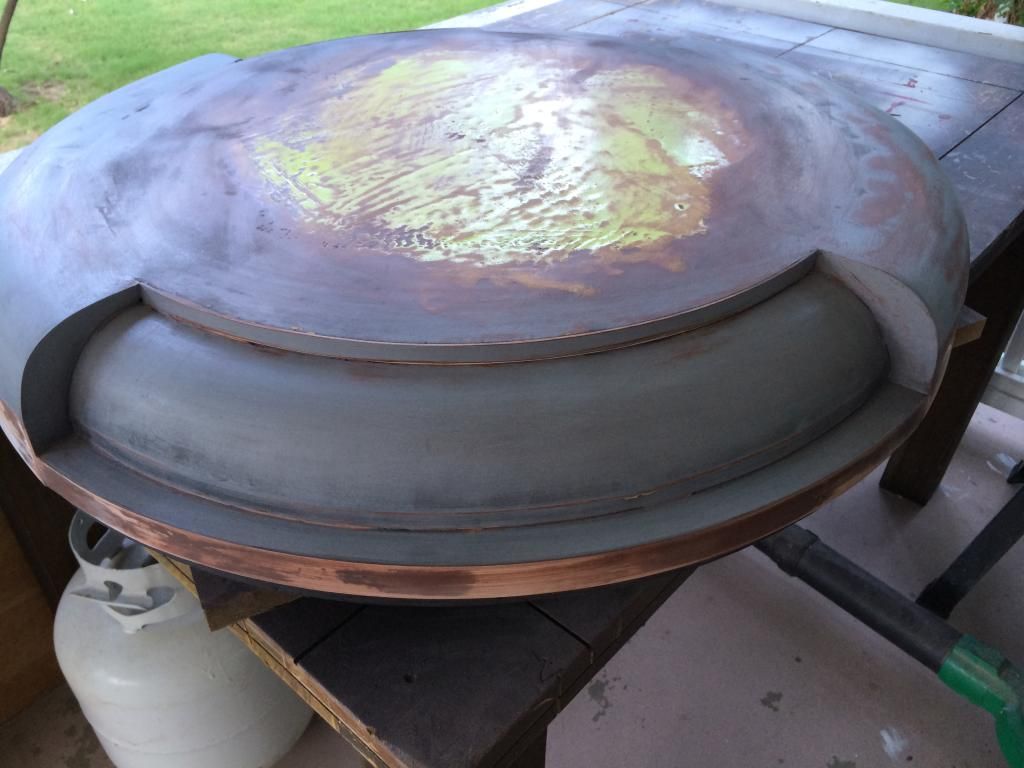
Then came time to prime. The first and second pass, great. I ran out of primer. I got Rustoleum in brown this time to help me see my low spots. But what I didn't do was pay attention to what kind I was getting. Now I would like to punch Rustoleum directly in the face! It ended up reacting to other paint and messed every thing up. After a nice little Acetone washing I got back on track!


Cutting Circles, Shaping and Sealing:


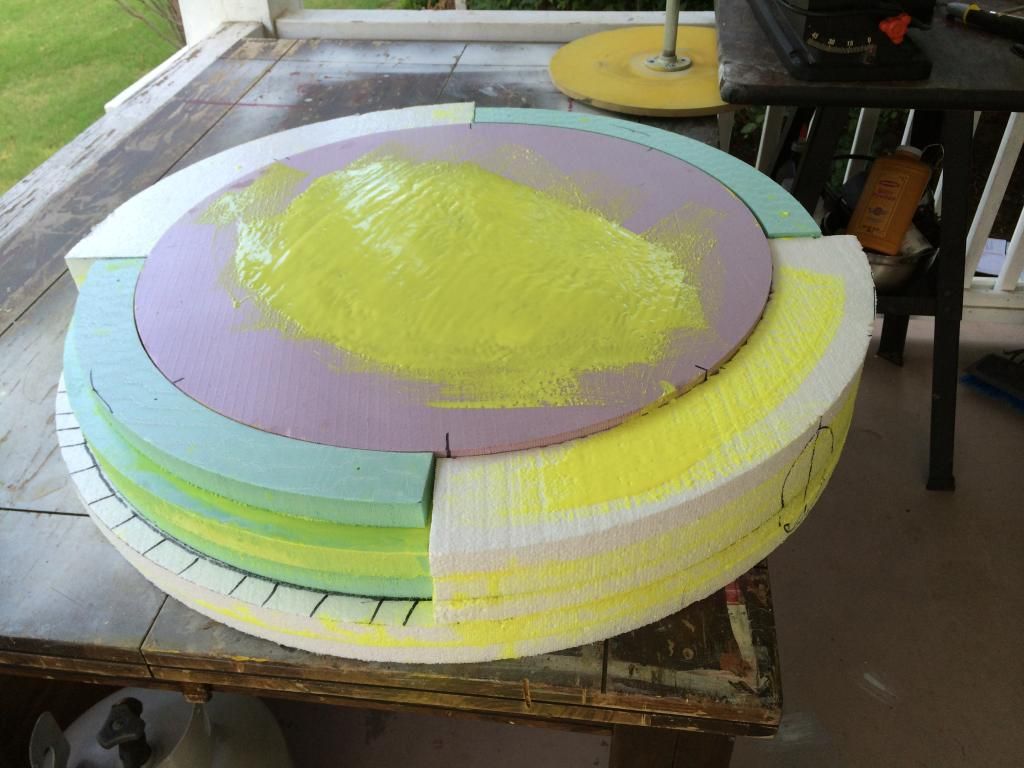
Bondo, sand…prime…re-pete:


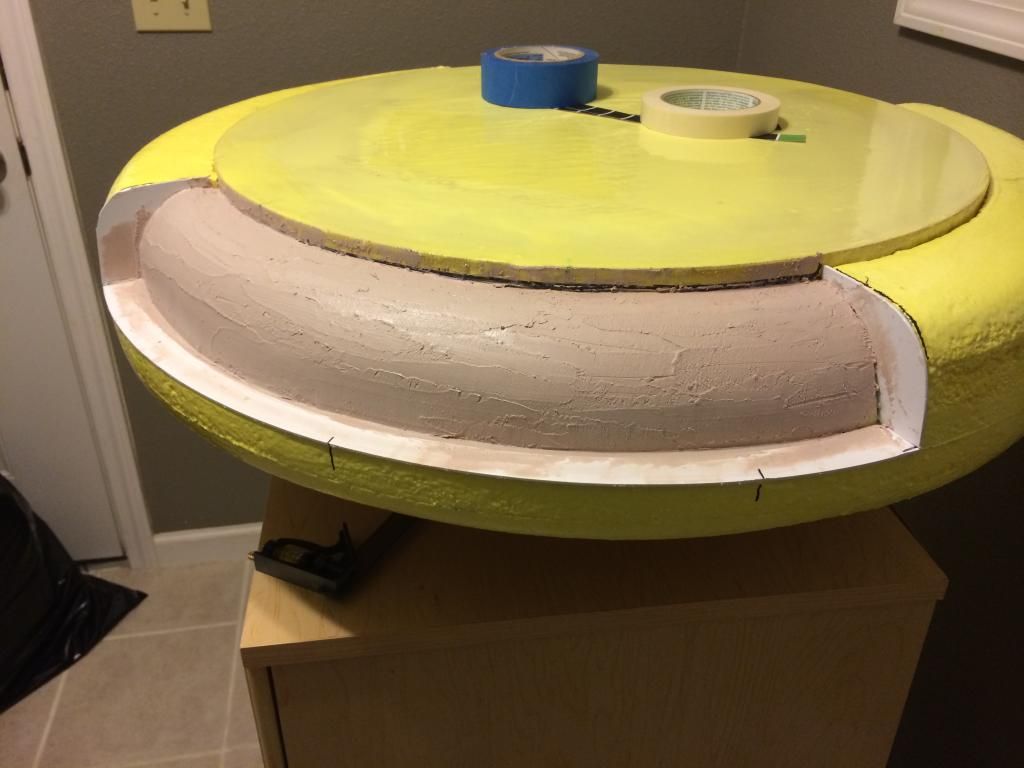
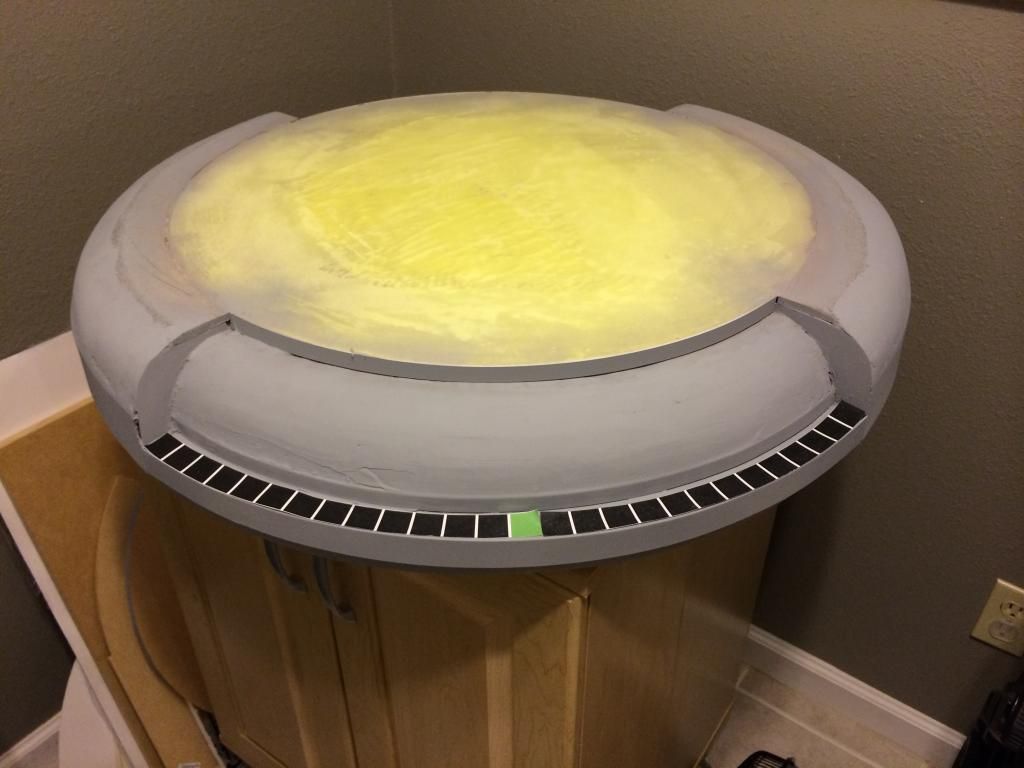
After my primer mistake and recovery:

 
Last edited:
By the way, ignore the top. I have a piece of styrene that I will glue in place before I make the mold. If I do it now I'll end up messing it up!

So tonight I'm going into all the little joints and going to use Apoxie Sculpt to clean them up. Again because I have some that I need to use. But mostly I've found that it work really well for me. The fact that I can use water to smooth it out is awesome for those little tight areas. It SHOULD make for a clean...sort of...soft curved joint. I'll post more photos tomorrow once it's finish and cured.


Last edited:
I'll post more photos tomorrow once it's finish and cured.

What a great start to this table! I am immediately subscribed! One day I plan to build one of these for my Star Wars Movie Set Den, but I have no skills in sculpting foam. Most of the materials you've used here, I am unfamiliar with. Certainly, I will be googling them and pricing some things out for a future build. Keep it up.
 
Under the red spot putty is a SMALL line of Apoxie Sculpt. It's what I had. I need to get a small soft curve in the joint. I used that. It seems to work. I went over it with Spot Putty to fill in tiny scratch marks.

 
It's all primed up with dark gray primer. The GOOD stuff and not the crappy Rust Rustoleum that almost ruin my project (GRRR). I still have a few minor finishing details. I'll do that later in my final pass. I still have to flip the whole thing over and bondo the bottom part of the curve. Thank goodness it's small in comparison to the work on the top!

Dark Primer is good for seeing the smallest detail


Left over RUST PRIMER! You dirt bag!

 
Next comes the keys. I have this amazing ability to over think things and make it way more complicated then it needs to be. Case in point. This tiny little 3/4 of an inch thing took me all of about 1 hour to produce. This was the 4th attempt though. The other 3 were total fails. I sculpted one...looked like trash! Then I cut one out of a wood dowel but added the extras bits. And it looked like trash. Then I tried one out of styrene. It was okay but still looked like trash!

Finally it hit me. Just cut it out of 3/4 inch MDF on your scroll saw. Problem solved. Some times I can be the dumbest dumb person!

Final Cut Part


Molding the Part
For the record this is not the right mold material for this. But I'm trying NOT to buy more material so Rebound 25 in a cup it is. Hopefully I won't have any air bubbles caught underneath. I'll know in a few hours.

 
Last edited:
If you made some ABS shells of your top, you might make some money.

I LOVE THIS PROP!

My pictures from Disney Studios:

DSC01518.JPGIMG_0226.jpgIMG_0227.JPG

Here I am playing a round on Rebelscum's (Mr Wise's)table in his Collection:
image[2] (2).jpg
 
Last edited:
Are these the true dimensions, or are you building to fit your needs?

And yeah, if there were shells of your top produced, I could see a couple being bought...
 
Yep. I'm an idiot! FAIL. Oh well it was just a 3 ounce fail. Let's try again. I went ahead and bought the proper silicone for the mold.

FAIL!


THE LONG POUR!


- - - Updated - - -
 
Last edited:
Thanks everyone.

As far as the size. I really couldn't find much size reference. I found a lot of "It seems to be..." but nothing confirmed. I probably overlooked all the solid reference. So I really did it by my best guess AND kind of what material I could get my hands on.

The table is 30 inches round. The center most circle or the top "chess" board is a 23 inches. It's about 5 inches high. The keys that go around the board are 3/4 square by 1.25 high. There are 27 of them on each side. From the photos of the one at Disney there seems to be 27 as well.

As far as the height of the leg piece. I'm planning on making my a comfortable height for sitting at as this will end up in my office at work. It will replace the current round table so it's gonna get used for meetings. They're about the same size.

- - - Updated - - -

MJF, COOL. Did they have the keys and buttons doing any thing or was it for decoration?
 
I don't remember. Being around that collection was sensory overload. Too much coolness to take in. I'm pretty sure I'm only acting like I am touching the table. I was too scaried to touch anything.

more Disney: http://www.rebelscum.com/story/front/Original_Dejarik_Table_Back_At_Disney_151305.asp

rebelscum's finished table: http://www.therpf.com/f9/millennium-chess-table-s-finished-73616/

here re is the thread where some of the build discussion took place:
http://www.therpf.com/f9/has-anyone-made-millenium-falcon-chess-table-28492/
 
Ha. I understand. I'd be the same way!

Thanks for the links and thread reference. It sounds my table dimensions aren't too far off what this person is claiming. I had a feeling I was close. I did veer off the "original" more round edges and go with a more squared off look. That's because I really like the image JJ Abram's released. It seems to be more square. I just like that better.

I do know that the metal knobs in his versions are Fender thumb screws. I haven't yet tracked down the lights. It's either stock or made. If I can't find them I'll fabricate the shells and use LED to light it.

The original table has these white pieces in place of the knobs. I happen to know exactly what those are. They are the plastic parts you screw into the back of a of drawer. It's what the draw slides attach to. Don't ask me why but I have a bag of about 50! I won't be using them on this project though.
 
If I had the space, money, and time to dedicate to a build like this, I would have all kinds of life size props. The holochess table has always been one of my absolute favorites. I can't wait to see the final product.
 
This thread is more than 9 years old.

Your message may be considered spam for the following reasons:

  1. This thread hasn't been active in some time. A new post in this thread might not contribute constructively to this discussion after so long.
If you wish to reply despite these issues, check the box below before replying.
Be aware that malicious compliance may result in more severe penalties.
Back
Top