sidheman
New Member
Been a while since I posted here, and this time I actually have a nearly finished product! Seems every other time I start a thread either I lose track of it or the person who commissioned it falls completely off the grid (looking at you, Iron Man build!). Today's build journey: the Terminus armor from the Mass Effect series! Apologies in advance, as quite a number of pictures were taken with my phone.
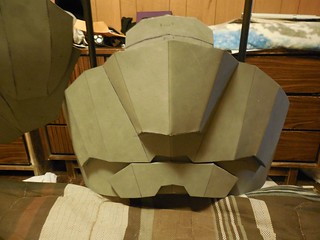
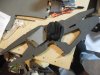
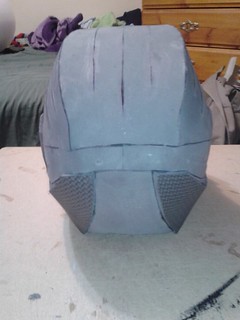
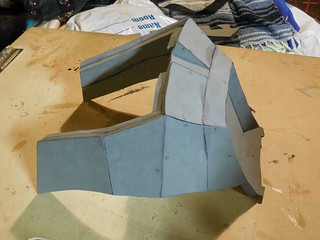
This one started off in the usual way:

Lots of darts, and my first real experiment with angled cuts, since the Terminus has a lot of corners and angles in it. Looks messier than it really is, since a lot of those lines you see are excess marker lines (though still some seams to fill). Lucky for me, due to the nature of the pieces, I didn't have to do any major heat forming - it came together pretty much all on its own!

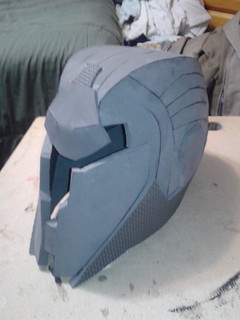


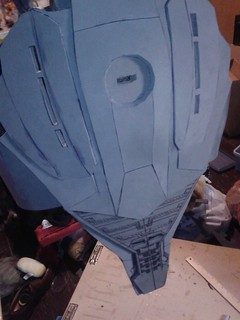
The fit is pretty dead on: nice and snug to my face, but enough room to fit a visor and some wiring. Pretty happy that it was turning out so well! So happy, in fact, that I decided to paint it and grab acrylic for the visor.

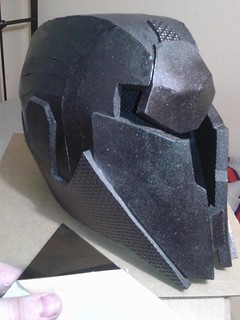
The Terminus armor is very black in game, but the reference shots I was using (I'm sure we're all familiar with the ones) showed some lighter areas, so I wanted to add some contrast. First up was sealing the foam with everyone's favorite Plasti Dip. For the black sections I used Rustoleum's Metallic Oil Rubbed Bronze, and the dark, dark grey I used Rustoleum's Metallic Charcoal. In some lights it looks the same, until you hit the light at a certain angle and then the two colors really pop. You'll see more of that later - the helmet was a lot more subtle of a shift.
I also picked up a transparent black and red acrylic sheet for the visor. Couldn't decide which one I wanted to use; the reference pic looked black, but with all the black everywhere I kinda once again wanted a bit of contrast with more red. Everyone else seemed to agree that red would be better, so I put it aside and used the black for other things.
This is where things got reeeeally interesting.

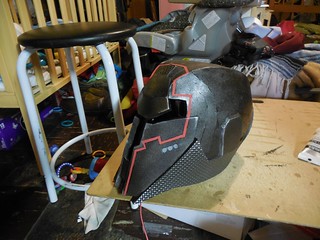
I was going to originally use EL wire for the highlight lines, but I decided against it. For one, I didn't want to deal with all that, and for another I decided that LEDs would be enough and that I shouldn't worry about overkill this time 'round. So, I taped that helmet up good - took me about an hour lol. Grabbed a brush, then painted some red all over.

You can also see where I used the back side of the foam to accentuate the occasional section that was carbon fiber in the reference pics. I've tried some other options masking options out that seem to work well, but stuck with this for this build.
Helmet was basically done at this point, other than the visor and lights, but I wouldn't be able to work on those for a couple months since I was getting ready to move to the other side of the country. That was fun! /s
Once that was over, and I had everything unpacked (though with much less room unlike the promised garage I'd have) I started on the arms.
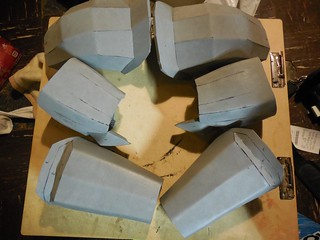
The large pieces I cut all out of a single piece, then cut trenches out of the back to make the more pronounced edges and angles of the armor. This also made it easier to fit it to me, while giving it the angular look that is so awesome about this particular armor set. I made the hips the same way:

The edges on those will look more pronounced later, once the strapping is on. Anyway, started painting the finished pieces while I worked on others. The arm pieces I experimented with Mod Podge to fill some of the open seams, but the painting was all the same: Plasti Dip, followed by the piece's respective black or dark grey. And more taping.
Lots and lots of taping.


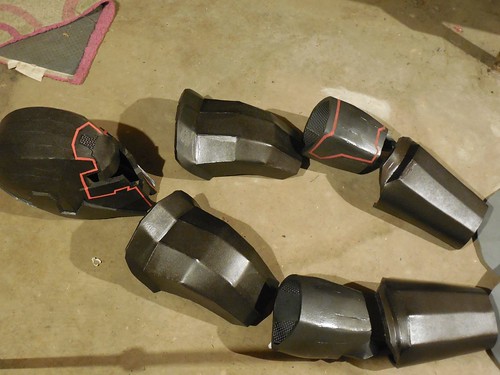
These bicep pieces I did with the dark grey and, even though up close you can see the seams, I think it turned out pretty well. They sit on my arm by friction alone, and I haven't had any problems with it twisting around or anything, so I'm super happy. While those were drying between coats, I started on the shins:

These were rather fun to make, though they didn't want to hold the shape I wanted at all, despite heating them quite a lot. Wasn't too much of a problem though.
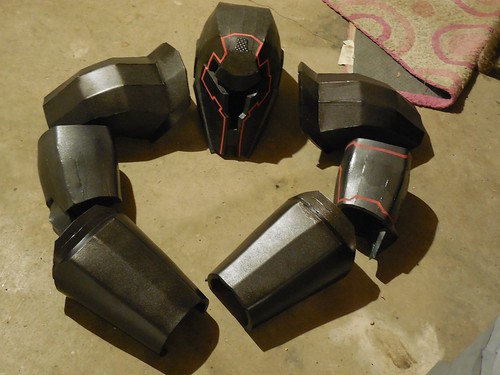
Progress up to this point:
 Legs
Legs
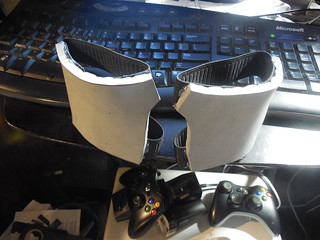
 Arms and Helmet
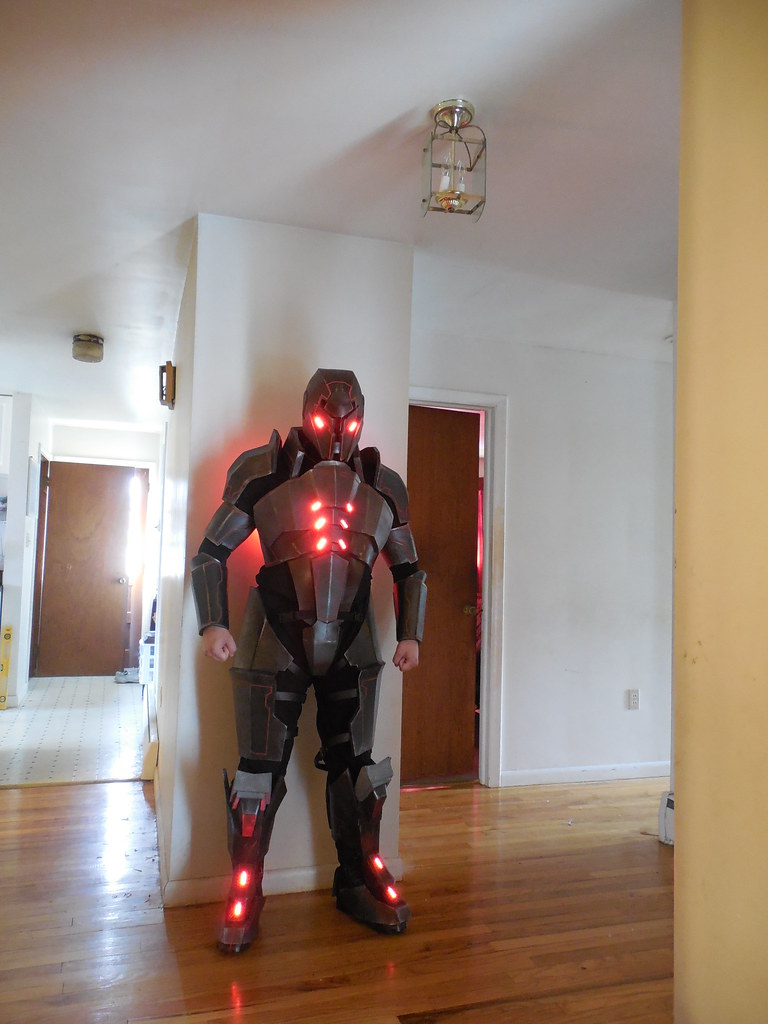
 Everything
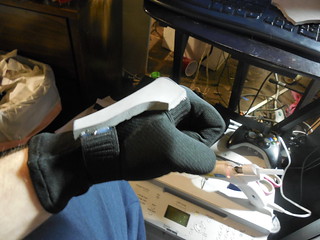
 Arms in rough position
 Legs, and 1 boot cover
To be continued! Splitting this up into a few posts as not to overdo it on the pictures.
This one started off in the usual way:
Lots of darts, and my first real experiment with angled cuts, since the Terminus has a lot of corners and angles in it. Looks messier than it really is, since a lot of those lines you see are excess marker lines (though still some seams to fill). Lucky for me, due to the nature of the pieces, I didn't have to do any major heat forming - it came together pretty much all on its own!
The fit is pretty dead on: nice and snug to my face, but enough room to fit a visor and some wiring. Pretty happy that it was turning out so well! So happy, in fact, that I decided to paint it and grab acrylic for the visor.
The Terminus armor is very black in game, but the reference shots I was using (I'm sure we're all familiar with the ones) showed some lighter areas, so I wanted to add some contrast. First up was sealing the foam with everyone's favorite Plasti Dip. For the black sections I used Rustoleum's Metallic Oil Rubbed Bronze, and the dark, dark grey I used Rustoleum's Metallic Charcoal. In some lights it looks the same, until you hit the light at a certain angle and then the two colors really pop. You'll see more of that later - the helmet was a lot more subtle of a shift.
I also picked up a transparent black and red acrylic sheet for the visor. Couldn't decide which one I wanted to use; the reference pic looked black, but with all the black everywhere I kinda once again wanted a bit of contrast with more red. Everyone else seemed to agree that red would be better, so I put it aside and used the black for other things.
This is where things got reeeeally interesting.
I was going to originally use EL wire for the highlight lines, but I decided against it. For one, I didn't want to deal with all that, and for another I decided that LEDs would be enough and that I shouldn't worry about overkill this time 'round. So, I taped that helmet up good - took me about an hour lol. Grabbed a brush, then painted some red all over.
You can also see where I used the back side of the foam to accentuate the occasional section that was carbon fiber in the reference pics. I've tried some other options masking options out that seem to work well, but stuck with this for this build.
Helmet was basically done at this point, other than the visor and lights, but I wouldn't be able to work on those for a couple months since I was getting ready to move to the other side of the country. That was fun! /s
Once that was over, and I had everything unpacked (though with much less room unlike the promised garage I'd have) I started on the arms.
The large pieces I cut all out of a single piece, then cut trenches out of the back to make the more pronounced edges and angles of the armor. This also made it easier to fit it to me, while giving it the angular look that is so awesome about this particular armor set. I made the hips the same way:
The edges on those will look more pronounced later, once the strapping is on. Anyway, started painting the finished pieces while I worked on others. The arm pieces I experimented with Mod Podge to fill some of the open seams, but the painting was all the same: Plasti Dip, followed by the piece's respective black or dark grey. And more taping.
Lots and lots of taping.
These bicep pieces I did with the dark grey and, even though up close you can see the seams, I think it turned out pretty well. They sit on my arm by friction alone, and I haven't had any problems with it twisting around or anything, so I'm super happy. While those were drying between coats, I started on the shins:
These were rather fun to make, though they didn't want to hold the shape I wanted at all, despite heating them quite a lot. Wasn't too much of a problem though.
Progress up to this point:
Legs Arms and Helmet Everything Arms in rough position Legs, and 1 boot coverTo be continued! Splitting this up into a few posts as not to overdo it on the pictures.


 After that came the front chest bits: