Howlrunner
Sr Member
Yeah, looking NICE. :thumbsup
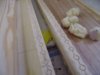
 and I can't afford to buy more. I did try to use vinamould instead but it had hilarious consequences... foaming... lots of foaming. So anyway I carved it all.

 seems quite good, but there is still loads to do...

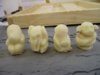
If you're using circular magnets, you may want to insert two magnets, side by side - i.e. OO - into the bottom of the playing pieces. I found that I had to do that - when I had just one magnet in the bottom the piece spun in circles when I moved it along the track, instead of facing the right way the whole time.
, although the playing pieces are only about 15mm across on the bottom. The magnets I was using are 10mm across, would it work if I got smaller ones? Or maybe longer ones that fit in the centre? I really appreciate the help thank you 


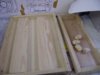
What is it that you've done on the sides there? all the little indents?
I mean the edges of the game borders.


 haven't got round to tidying it up yet.