Jason's TOS Battlestar Galactica *WIP*

Hi Jason,

Thanks for your kind replies. Where would I still be able to pick up that other accurrization kit?

The grafitti remover works actually remarkably well on the plastic kit alone and is also less smelly then usual thinner and indeed perhaps it would have been best to have tried it on a resin part somewhere less visible but then again I did not anticipate the graftti remover would attack the resin altogether.

The 'in scale with the Galactica' rag tag fleet I've seen on ebay. And indeed it was why I considered buying this set, since the added detail parts (normally $50) and the extra ships (usually $35 each) alone were worth it. Also it is a nice project to get my creative juices flowing again and my humble modelling skills to another level :)

-Chaim
 
Hi Chaim,

true, I guess it had to come to that sooner or later anyway... removing the paint from the rest of the model and leaving it on the accurization parts just so as not to destroy them would leave you with an even bigger mess. :)

Thanks for the information, I am going to have to see if I can find the rest of the ships,,, I thought about making some myself but if I can find a couple already finished and ready for painting, that should save me some time.

As far as the accurization kit goes, I dont really understand the relationship but the kit is from AMP, although they are only to be found by a company call Ironshipwrights... I am not sure if it is one and the same or if they are working together but that is where I got mine... ironshipwrights.com

Hope that helps.

Jason
 
After a hair tearing out session I was finally able get all of the low level lighting patterns on to one large ATtiny2313 chip (17 outputs)

Here is my lighting plan (according to my current voltage, I can put up to 2 LEDs on one LED output)...

Landing Bays
2 rows of Landing lights in each bay will be made from fiber optics connected to 9 LEDs

both Landing Bays will be lit with warm white light, with an optional red lighting for Battlestations.
Engines
Each main engine outlet (3 main engine outlets) will have up to 2 steady white LEDs and 2 flickering low power blue LEDs

Cruise engine (1 small engine outlet) will have 1 steady red LED and 1 (or perhaps 2) flickering yellow or orange low power LEDs
Windows
All windows should be able to be lit from fiber optics connected to 1 large warm white LED
Battle Damage effect
each area of battle damage effect will contain 1 steady red LED and 2 or more fading in and out orange/Amber LEDs

Galactica_firefight.gif


ATtiny2313

Done 1 LED output Warm White for window light
Done 1 LED output Red for Battlestations light

Done 3 LED output for steady White engine light
Done 1 LED output for steady Red engine light

Done 1 LED output Red/Green blinking Nav light (1 sec on, 1 sec off

Done 9 LED outputs - Chaser for the Landing Bays
 
Well, I am still waiting for things to arrive. That is why I am busying myself with other things. Today I was able to get a pretty close replica of a TOS Viper in the scale 1:4105(Which is what the Galactica is supposed to be). I didn't have a penny Handy to use as size reference, I think it is a little too big to be perfectly in-scale but pretty darn close if I do say so myself...

1-4000_MkII_TOS_Viper_a.jpg


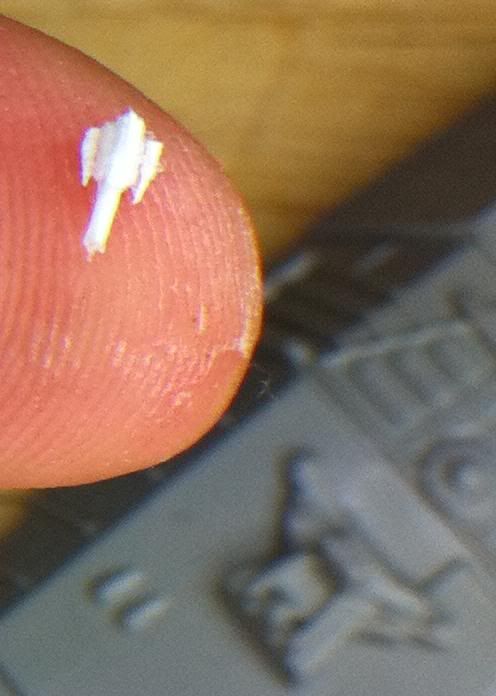
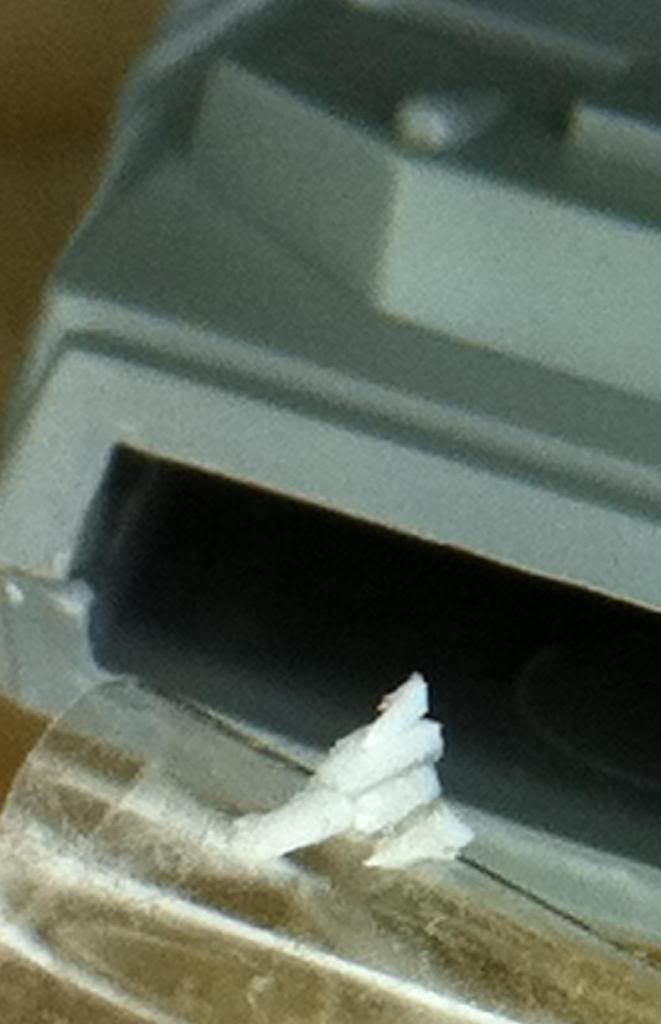
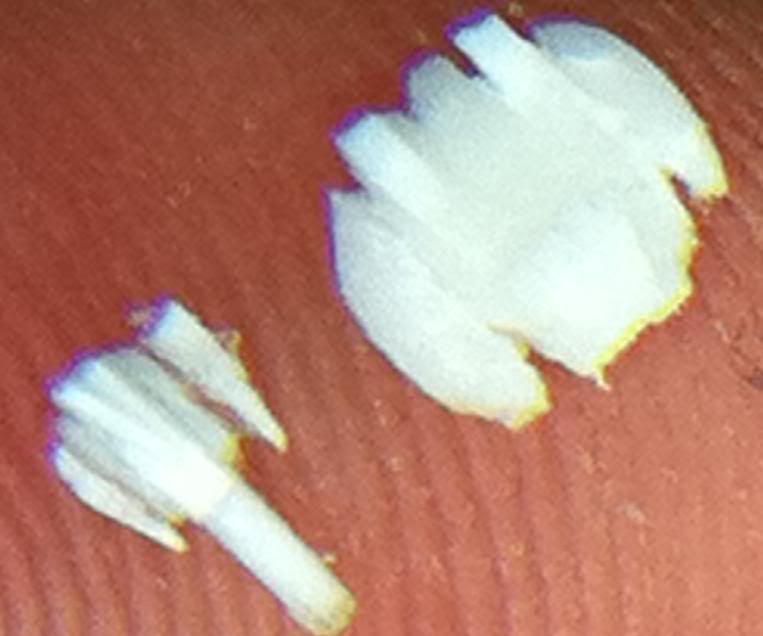
There is a lot of transparency between the parts due to the CA glue, once it is cleaned up and painted the gaps should be filled in. I used normal CA, and had a heck of a time trying to fit the 7 pieces (made mostly of 0.05mm rods) together until the glue was hard enough. More often than not the pieces stuck to the tweezers more than the other parts. If I find the patience for it, I may try it again with gel CA glue and see if that is any easier. As it was, I needed about an hour to an hour and a half from start to finish.

did someone say there is 75 of these?!?!?!!? :facepalm

Here is another shot of the Viper with one of the landing bays as scale reference...

1-4000_MkII_TOS_Viper_b.jpg
 
Last edited:
Still waiting for things to arrive, RTV Silicone is what is really holding the show up. Well at any rate, I made a Cylon Raider today. Not quite sure what I will do with them, I would assume one will be in the landing bay somewhere (Baltar's ship), depending in what kind of showcase I will put this in, I may have a couple raiders dogfighting with vipers or doing attack runs on the Galactica. I will cross that bridge when I get there. I have the viper next to it for comparison, again here, the raider will look much better once I get a coat of color and highlights done.

1-4000_CylonRaider_2.jpg


1-4000_CylonRaider_1.jpg


I attempted to make a Colonial Shuttle, but before it was finished I realized it was too small (at least as compared to the viper). My reasoning is that it is my assumption that the landrams are transported by shuttles to the surface, meaning a viper could quite likely fit inside a shuttle. Here are the pics anyway, even though it is back to the drawing board for me.

1-4000_Colonial_Shuttle_1.jpg


1-4000_Colonial_Shuttle_2.jpg
 
Nice work here, opal1970! I really like where you're going w/showing the work on the electronics. :thumbsup

Timeslip Creations makes a couple of great resin models to go w/your TOS Galactica. Unfortunately, most are out of production at this time. George has got: Prison Barge, Gemini Freighter, Colonial Movers, Rising Star and Mineral Ship. ARVEY Model Products also has a very nicely done Foundry/Recovery ship, which is currently available.

Anyhow, I appreciate the sharing of your work. I look forward to watching your build progress, as well.
 
Hi Jason! Here's my Galactica:
Thanks Chris, that is a nice piece of work, I like the background, looks like she is doing a low orbit flyby. yes, I have a love/hate relationship with insanely ambitious projects. sometimes I do wonder why I do things like that, I think sometimes it is just a competition with myself, just to see if I can do it. I wish I could say they all turn out as I planed.


Thanks Griffworks for your complements and for following my Thread.

I already spoke to George over at Timeslip Creations, just have not gotten around to getting out an order. I asked him íf he had any pictures of them a while back but have not gotten a reply yet. Thanks for the tip regarding Arvey, I didn't see that kit on the website... gonna have to take a closer look. :)

I just saw your thread on the RagTag fleet... pretty impressive I will definatly be staying tuned there as well. ;)
 
Last edited:
Hi folks,
sorry for the delay, had to put a little more energy into other things the last couple weeks.

I ordered the model making DVDs from Fon Davis which arrived about a week ago. Alot of things I had already figured out from trial and error, but still alot of "Ohhhhh" moments. well worth the money for anyone interested in model building.

Well after about 8 weeks of waiting the slightly better microcontrollers that I need to power the LEDs FINALLY arrived the other day. I haven't had a chance to hook them up to my Arduino Board yet, but I am starting to get the hang of it so there is no reason why they should not work.

Here are the chips that I have tried out so far...
ATtiny 85
VERY small but only 5 usable output channels and only 2 of those being PWM, meaning able of producing fading or flickering LED commands.

ATtiny 2313
about twice as big as the ATtiny85 but it has 17 output channels, unfortunatly only 4 of them have PWM.

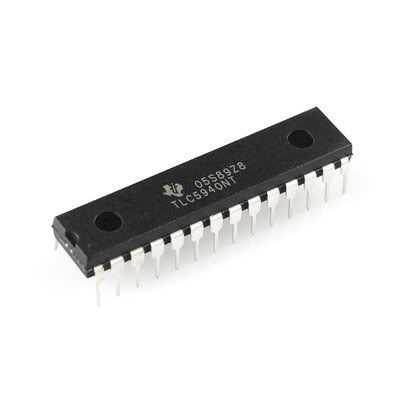
TLC5940
slightly larger than the 2313, it has 16 output channels all of which are PWM enabled (as with the chips above, each channel is capable of lighting 2 LEDs)
_scaled_tlc5940.jpg

As for learning expiriences...

1). I tried to take a shortcut by doing some hard-to-get-to parts of a mold with "Brush-on" silicone and then after it dried with normal Silicone... Needless to say, DO NOT try to combine a "Brush-on" silicone with a normal High Visc. Silicone. They did not stick to each other to a satisfactory degree, removing the object from the mold caused them to separate from another. :facepalm As it was a pretty big mold I would like to use what I have if possible, I have the mold fixed back up but I have not tried to cast from it yet.

2). Remember Grandma telling you that "Hast makes waste"? well I proved her right again by reparing yet another mold gone bad and wanting to test it so fast that I forgot to take out the original that was still inside... cursing the whole time I was pouring resin that there was a block in the channel somewhere. Luckily I reallized it before the 3 minute resin had set and was able to clean up my original. And THAT boys and girls is why we do not stay up till the wee hours of the moring doing things that need more than one brain cell.

Things should start picking up speed now, I will be posting more pics soon.
 
Last edited:
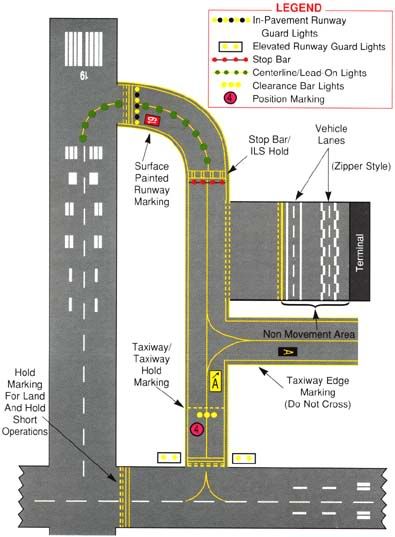
I did a rough draft of the landingbay runway.
RunwayDiagram_edit.png

Still have to scale it down to fit the bays though. This will be lit, the Red marker lights on the side will be the typical chaser lights that we all know and love. Additionally, I am thinking about lighting up the white markings by cutting them out on the styrene and filling them in with transparent resin and backlighting them with a very dim LED (just enough to notice them).

this is a runway layout that I used for reference, I may or may not do the yellow barriar markings... that far into the landing bay will not be seen anyway. We will see.
runway01.jpg


Just food for thought... It doesn't seem like a "runway" in the sense that we know it is really necessary... I mean lets face it the Galactica is in space so there is no reason why the ships couldn't slow down to a crawl before entering the bay (similar to incoming ship scenes on the DeathStar). Granted in a dogfight a pilot would not want to slow down before entering the protective bay area and it does add to the dramatic feel.
 
Last edited:
Wow- never seen this level of attention paid to that area on a model of the ship before... this is gonna be one for the history books.
So says Chrisisall!:lol
 
Quick update, things are starting to come together. On the up-side I finally got the tlc5940 chip working, and have a test sequence of 16 LEDs going back and forth like a cylon eye. :) The cool thing about the tcl5940 is that you can "daisy-chain" them together giving you up to well over 200 channels to control different LED functions. On the down-side, I found out that unlike the ATtiny chips the tcl5940 cannot operate alone and needs another chip to give it commands. I am in the process of finding out which microcontrollers can do this job.

As far as modeling goes, I started hollowing out the accurization landing bay tips and arms. this is necessary if I am to do any kind of lighting at all. I will get some pictures of that up tomorrow. I also put a coat of primer on odds and ends, it has been 24 hours now and I am not really impressed with how the primer adheres to the pieces. scratches off so easily I could skip the primer all together and just apply normal paint. :angry I am not sure if the primer is too "cheap" or if it just doesn't work with the resin I am using, at any rate I will leave it alone for another day, maybe it just needs longer. I also tried light-blocking the inside of the engines... after 3 coats it is still not 100% "light-tight", this is going to be real fun. NOT.
To make sure the light is transfered evenly, I am casting transparent pieces for the bottoms of the engine wells, which will be frosted and glued to the engine unit. again, pics tomorrow.
 
Last edited:
Jason, I got a kit on eBay a couple of months ago that I will be lighting as well. So, supremely interested in you build. I'll be tossing comments your way as you go... nosey doofus that I am.:lol
 
Jason, I got a kit on eBay a couple of months ago that I will be lighting as well. So, supremely interested in you build. I'll be tossing comments your way as you go... nosey doofus that I am.:lol

Hi Chris,
I would be more than happy to help, the door is always open.
Which kit did you buy? the Revell kit? The more I get into this the more I think it would have been better going a different route. I did not want to completely scratchbuild it, but the accuracy of the revell kit is soooo god-awful I would love to just sand down all the details and start from there. the accurization kit from AMP is absolutly manatory, that is the only thing that makes the revell kit look halfway decent. Starshipmodeler has a really nice resin kit only problem is that only the main body is rotocast and it would be almost impossible to do the lighting that I am planning. And it costs about the same as what you pay for the revell kit, round 200. I might just get it anyway and used the parts from both to get the effect that I want. Time will tell.
 
Hi Chris,
I would be more than happy to help, the door is always open.
Which kit did you buy? the Revell kit?
I got an unpainted, crudely assembled Revell model for like, $20- I disassembled it as soon as I got it. Came apart very easily.
the accuracy of the revell kit is soooo god-awful
The basic shape is okay, but the launch bays are a couple mm's too narrow IMO. And of course, surface detail is very toy-like.
the accurization kit from AMP is absolutely mandatory, that is the only thing that makes the revell kit look halfway decent.
I'll fabricate stuff. I'm reasonably good at it now.
You'll find you get into an addiction with it- needing to refer to studio model pix CONSTANTLY... heh heh!:rolleyes
 
You'll find you get into an addiction with it- needing to refer to studio model pix CONSTANTLY... heh heh!:rolleyes

Are you kidding? My walls are already covered with them. :) which of course makes me hate the revell kit even more... But (Gone with the wind music in the background, Red sunset) with god as my witness I will make this kit something worth looking at, oh yes. :lol
 
The lighting is causing some problems. As mentioned in a previous post, I received my Texas Insruments TLC5940 chips to control the LED and I hooked it up to my Arduino board and had a very nice "Cylon-Eye" effect going with 16 LEDs. My plan is to reduce the size of this, as I do not want to put an Arduino board in the model (about the size of 3 9-volt batteries). The Arduino board runs off a Atmel ATmega328 microcontroller, and I ordered some of these to create a minimun system. Here is a video of the two chips on a breadboard runing 16 LEDs:


Of course I will not be running a Cylon-Eye anywhere on the Galactica, this is only to test if all channels are outputting when and how they are suposed to. Once I get the hardware working the way I want it to, I will write a code to make each output pin do what it is suposed to do, i.e. the engine lighting, landingbay lighting etc. If you have ever seen those 3D LED cubes, they are usually driven with TLC5940s.
 
Last edited:
While I am still working some bugs out of the hardware coding, I fiber optisized the bridge. The fiber optics are .25mm, I would have done them even smaller but 1) I could not find a drill bit that small and 2) a bit smaller than the one I have would probably break too easily.

The little beads at the ends of the fiber optic strands are from holding a lighter close to them melting the tips to form a small ball, this is to insure that they do not slide back through the holes until I get them fastened down on the other side. Which I do not want to do until the bridge is securly fastened to the main body and I know that all the strands are long enough to go where they are suposed to go. :)

IMG_0729.jpg
 
Last edited:
This thread is more than 11 years old.

Your message may be considered spam for the following reasons:

  1. This thread hasn't been active in some time. A new post in this thread might not contribute constructively to this discussion after so long.
If you wish to reply despite these issues, check the box below before replying.
Be aware that malicious compliance may result in more severe penalties.
Back
Top