You are using an out of date browser. It may not display this or other websites correctly.
You should upgrade or use an alternative browser.
You should upgrade or use an alternative browser.
Delete thread
- Thread starter STEALTH
- Start date
-
- Tags
- iron man 2
- Status
- Not open for further replies.
MasterRoshi
New Member
Re: Robo3687 - IRON MAN Mark 4/6 Pepakura FOAM Templates -Easy to Build "Green" Versi
This thread is the most engrossing read I've had in ages. Love all these projects! I'm going to start my own Mk something soon because you've all inspired me so much.
Bleahhh that armour is looking great!
This thread is the most engrossing read I've had in ages. Love all these projects! I'm going to start my own Mk something soon because you've all inspired me so much.
Bleahhh that armour is looking great!
Timo Machine
New Member
Re: Robo3687 - IRON MAN Mark 4/6 Pepakura FOAM Templates -Easy to Build "Green" Versi
Hello can someone tell me how to do those 3D pepakura files because i wanted to do this mask on foam so help me STEALTH , ROBO3687 or anyone whos mastered that if possible could do that for me please

Hello can someone tell me how to do those 3D pepakura files because i wanted to do this mask on foam so help me STEALTH , ROBO3687 or anyone whos mastered that if possible could do that for me please
Jeepychan09
New Member
Re: Robo3687 - IRON MAN Mark 4/6 Pepakura FOAM Templates -Easy to Build "Green" Versi
i have not gotten too deep into this project yet but im concerned with the legs being too bulky and not proportionate, im almost 6'-3,4. and im not sure what size person these files at the beginning are made for. should i scale up, down, or keep default on the files?
BTW New Member Here!!
i have not gotten too deep into this project yet but im concerned with the legs being too bulky and not proportionate, im almost 6'-3,4. and im not sure what size person these files at the beginning are made for. should i scale up, down, or keep default on the files?
BTW New Member Here!!
Nattosan71
New Member
Re: Robo3687 - IRON MAN Mark 4/6 Pepakura FOAM Templates -Easy to Build "Green" Versi
Thanks for doing all of this hard work and sharing with the rest of us. Hope all your builds are coming along nicely.
Thanks for doing all of this hard work and sharing with the rest of us. Hope all your builds are coming along nicely.
AkiBadtrip
Member
Re: Robo3687 - IRON MAN Mark 4/6 Pepakura FOAM Templates -Easy to Build "Green" Versi
Hi,
I'm fairly new to this (prop making) and this forum. First I'd like to thank all the guys that helped me start this project (Feb 2012). Many thanks to STEALTH and his awesome job with TheHeroTutorials and Robo3687 for the great pep files (and Sharkhead7854 for the Helm!) And of course to those guys who helped in unfolding and stuff. Also to my fellow Filipinos who also inspired me to work on my own. Looking forward on meeting some of you guys and probably work on something together") I'm not yet done with my mkVI which is my first build. Sad to say, I didn't dwell much on scaling and as soon as I had enough knowledge through watching tutorials by various people from this field I started my quest on making my own build. I was so hesitant to post here and other forums that helped me for I don't have anything to show. I'm almost done with my mk VI. Still working on minor details like the hand and some custom parts here and there...would also be making a new helmet since again, I did not mess with the scaling and just started building So I hope people can learn from my mistakes. I have the paint ready and just working on the rest of the parts..hoping to get it done by this coming week... here's my progress so far
I'm not yet done with my mkVI which is my first build. Sad to say, I didn't dwell much on scaling and as soon as I had enough knowledge through watching tutorials by various people from this field I started my quest on making my own build. I was so hesitant to post here and other forums that helped me for I don't have anything to show. I'm almost done with my mk VI. Still working on minor details like the hand and some custom parts here and there...would also be making a new helmet since again, I did not mess with the scaling and just started building So I hope people can learn from my mistakes. I have the paint ready and just working on the rest of the parts..hoping to get it done by this coming week... here's my progress so far

This helmet here was edited in photoshop and reduced by 10%
Hi,
I'm fairly new to this (prop making) and this forum. First I'd like to thank all the guys that helped me start this project (Feb 2012). Many thanks to STEALTH and his awesome job with TheHeroTutorials and Robo3687 for the great pep files (and Sharkhead7854 for the Helm!) And of course to those guys who helped in unfolding and stuff. Also to my fellow Filipinos who also inspired me to work on my own. Looking forward on meeting some of you guys and probably work on something together
I'm not yet done with my mkVI which is my first build. Sad to say, I didn't dwell much on scaling and as soon as I had enough knowledge through watching tutorials by various people from this field I started my quest on making my own build. I was so hesitant to post here and other forums that helped me for I don't have anything to show. I'm almost done with my mk VI. Still working on minor details like the hand and some custom parts here and there...would also be making a new helmet since again, I did not mess with the scaling and just started building So I hope people can learn from my mistakes. I have the paint ready and just working on the rest of the parts..hoping to get it done by this coming week... here's my progress so far
This helmet here was edited in photoshop and reduced by 10%
Last edited:
abaker1381
Active Member
Re: Robo3687 - IRON MAN Mark 4/6 Pepakura FOAM Templates -Easy to Build "Green" Versi
Thanks so much for all of your vids and post stealth. has helped me out sooooo much.
Thanks so much for all of your vids and post stealth. has helped me out sooooo much.
abaker1381
Active Member
Re: Robo3687 - IRON MAN Mark 4/6 Pepakura FOAM Templates -Easy to Build "Green" Versi
AkiBadtrip, looks amazing. Can't wait to see it painted!
AkiBadtrip, looks amazing. Can't wait to see it painted!
Re: Robo3687 - IRON MAN Mark 4/6 Pepakura FOAM Templates -Easy to Build "Green" Versi
I'm 6'2, 185lbs and so far I haven't had any fitment issues. I've been working from the head down though so no lower half parts yet. I'm almost done with the left thigh and it seems to fit ok so far.
i have not gotten too deep into this project yet but im concerned with the legs being too bulky and not proportionate, im almost 6'-3,4. and im not sure what size person these files at the beginning are made for. should i scale up, down, or keep default on the files?
BTW New Member Here!!
I'm 6'2, 185lbs and so far I haven't had any fitment issues. I've been working from the head down though so no lower half parts yet. I'm almost done with the left thigh and it seems to fit ok so far.
AkiBadtrip
Member
Re: Robo3687 - IRON MAN Mark 4/6 Pepakura FOAM Templates -Easy to Build "Green" Versi
Thank you! I'm still not done with some small parts like the gloves, hip pods and I'm also planning on working on some custom parts like the one on the back of the thigh and shin parts. This is my first build and I'm planning on making the next suit probably to my scale. This is the default scale.. again, thank you! It took a lot of courage for me to post here for I'm a bit hesitant on the way the suit ended up being a bit too "roomy" for me
Thanks! My God! Me too! I thought I could have painted it last week, but then I saw a lot more parts that I need to work on... so excited to finish this... I'm also nervous 'cause I never painted anything as big as this..last one I did was a small sculpt of Karn (Magic the Gathering)
oh! here's a pic of 'ol Karn...
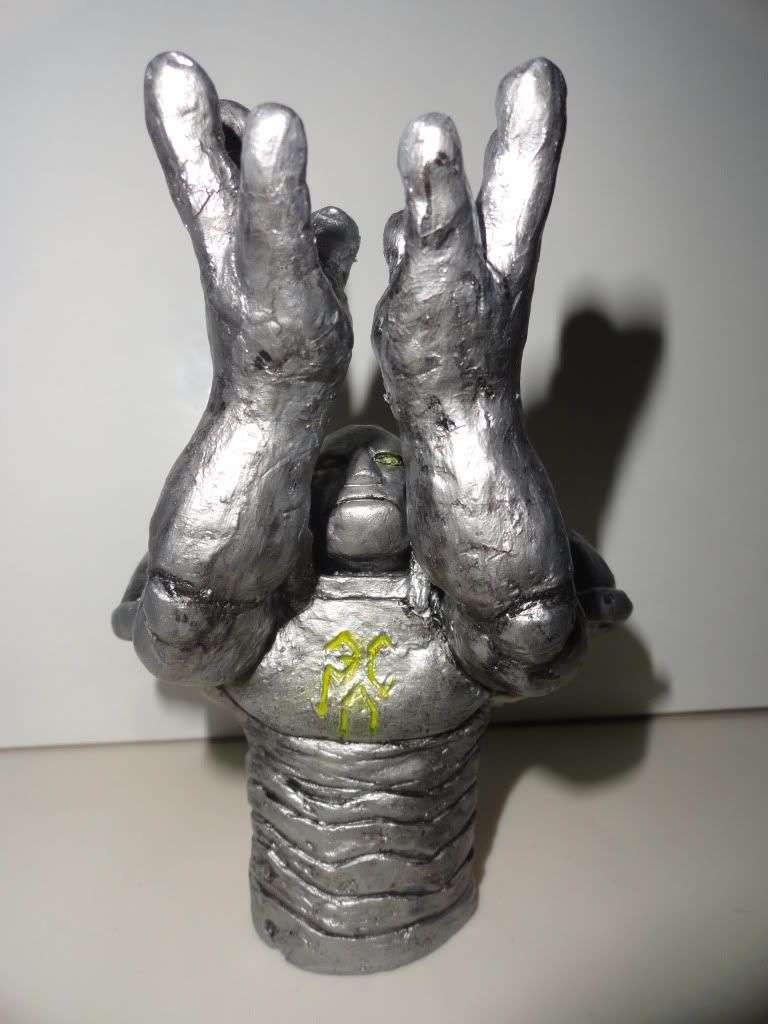
I doubt this 5-6inch dude would help me with the life size ordeal of painting the whole suit! Which leads me to this question: How much cans of paint are we talking here? I bought 4cans of primer,2 cans of CTM red, a can of metallic silver and a can of gold dragon... how much do I need?
Aki, that suit looks sick man. Good work. I'm currently in the progres of making my own MKVI suit. I'd be really happy if it turns out anywhere near as good as yours!
Thank you! I'm still not done with some small parts like the gloves, hip pods and I'm also planning on working on some custom parts like the one on the back of the thigh and shin parts. This is my first build and I'm planning on making the next suit probably to my scale. This is the default scale.. again, thank you! It took a lot of courage for me to post here for I'm a bit hesitant on the way the suit ended up being a bit too "roomy" for me
AkiBadtrip, looks amazing. Can't wait to see it painted!
Thanks! My God! Me too! I thought I could have painted it last week, but then I saw a lot more parts that I need to work on... so excited to finish this... I'm also nervous 'cause I never painted anything as big as this..last one I did was a small sculpt of Karn (Magic the Gathering)
oh! here's a pic of 'ol Karn...
I doubt this 5-6inch dude would help me with the life size ordeal of painting the whole suit! Which leads me to this question: How much cans of paint are we talking here? I bought 4cans of primer,2 cans of CTM red, a can of metallic silver and a can of gold dragon... how much do I need?
Last edited:
7sinzz
Well-Known Member
Re: Robo3687 - IRON MAN Mark 4/6 Pepakura FOAM Templates -Easy to Build "Green" Versi
Hey guys, thanks to stealth and ROBO, I built, coated and spray painted an entire War Machine and 3 quarters of Iron Man in 2 weeks in a rush effort to get them ready for my birthday night out. Here's how they turned out:


The time scale is something I'm very proud of considering how they turned out. Sadly they took a real beating on the night out and are in desperate need of repairs. Ill be re-coating them in PVA glue then plastic coating them using xrobots method (found here: xrobot plastic coating)... Then obviously a respray.
I also have a full time job and an active social life. If I'd had more time I would have done the plastic coating and it probably would have only added half a week on to the overall time. Hope this inspires people to get cracking.
A few things i learned during the last 2 years since i first became interested in this:
I used interlocking floor mats on war machines chest, back, biseps and forearms, and it is an absolute nightmare to work with. Its way to thick and way to rigid. I used cheap ebay camping mats for most of iron man and it is WAAAYY to flimsy. Use good quality camping mats, around 6-10mm and you should be fine. Sainsburys camping mats are pretty much perfect for you UK people.
The red I used is nightfire red from halfords in the UK. This is too dark for some people, but I really like it, gives him a more sinister presence. The gold was a mock up of some crappy gold the hlafords guy mixed up and i had to lighten it with the silver.
Make sure you do at LEAST 3 coats of PVA glue, any less and you can guarantee the paint will crack.
If the PVA glued piece warps, do not force it back into shape, the part will split and damage. My cod part is screwed due to this.
Craft knives are a nice under certain circumstances, but i haven't found an application that cant be achieved using scissors. To obtain an angle using scissors, just place the scissors as you would normally around the foam to cut. Then pivot them round to the right and cut, the foam will bend round the scissors but achieve your 45 degree angle cut, and you can still follow the line.
Keep your spare off cuts of foam. Stealths duct tape mannequin is great but mine died as it was to heavy packed with clothes. Recycle your off cuts of foam and jam them in the dummy. I would also like to add that my mate nearly ended up circumcised and minus one ball while making the dummy, although I found this absolutely hilarious, do be careful! A ball-less mate, is an unhappy mate.
I found superglue much easier to work with than hot glue. I got sick of being burned every 2 seconds. Having tried many types of superglue, I find loctite is the ONLY option. Buy it in bulk from ebay and you get a good price. Approximately 10 x 7.5g tubes will be sufficient.
I used iron man cod and ribs section on war machine, because the war machine parts were to time consuming. His abs were built by hand, thats why theyre **** lol. I will remake this part eventually with the correct pieces.
The entire abs and ribs section are permanently attached to the COD on both armours (as seen in the war machine foam cod files if you have them).The right side of the abs is hot glued to the ribs part, and the left side is attached using velcro, the split goes from the top of the abs, right down through the crease of the cod. Pissing is not a problem at all. If you look you can see the split. A few extra pieces were added before the PVA glue part for vlecro attachments. Will provide pictures if desired.
I added an extra tier to the top of the ribs and abs to ensure they do not slip out from under the chest. This looks much tidier and never leaves a gap when you lift your arms.
Abs were created by adding an extra cm to the bottom of each big ab piece and just over lapped them onto the next part. Same with the neck piece.
Rush arc section was a smaller triangle that slotted in and out of the chest section with a triangle piece of laminated paper glued to it (picture below), looked absolutely fine. The light was obtained using a head torch clipped into the hole you can see in the middle of the triangle gap. Batteries lasted well over 24 hours (forgot to turn it off as i was drunk).

Notice mario in the mirror in the photo?
Red shiny metalic leggins for Iron man (blush). Seriously guys: RED, I can't say this enough, so many of you wear black underneath and it breaks up the image really badly, looks messy! I would have also worn a metallic red top but didn't have time to buy one. For war machine wear metallic silver leggins and top. You ruin the entire look by thinking you can hide in the shadows of black.
I know iron mans head is to big. This was my fourth attempt at the correct size and it was starting to p*ss me off so I settled with this.
I'm exactly 6 foot tall, slim build, the only scaling I did was 95% on back and chest of iron man and also once the biseps were complete I cut a 2 inch strip up the back of them then glued it back together. Slimmed up the biseps to suit my proportions. Very happy I did this.
I bought 500ml of each colour from halfords then used 500ml of thinner to thin each colour down to make a litre of each. Obviously had some gold and silver left over but the red was just right. I used the remainder of the red to apply extra coats.
I highly suggest everyone ups the scale on war machine a few percent on upper body parts. He looks like an absolute weed. Way to thin. Legs are fine.
I will probably add more tiers onto the iron man neck, I'm like a giraffe.
Again, a huge thank you to Robo and stealth for your amazing efforts.
Hey guys, thanks to stealth and ROBO, I built, coated and spray painted an entire War Machine and 3 quarters of Iron Man in 2 weeks in a rush effort to get them ready for my birthday night out. Here's how they turned out:
The time scale is something I'm very proud of considering how they turned out. Sadly they took a real beating on the night out and are in desperate need of repairs. Ill be re-coating them in PVA glue then plastic coating them using xrobots method (found here: xrobot plastic coating)... Then obviously a respray.
I also have a full time job and an active social life. If I'd had more time I would have done the plastic coating and it probably would have only added half a week on to the overall time. Hope this inspires people to get cracking.
A few things i learned during the last 2 years since i first became interested in this:
I used interlocking floor mats on war machines chest, back, biseps and forearms, and it is an absolute nightmare to work with. Its way to thick and way to rigid. I used cheap ebay camping mats for most of iron man and it is WAAAYY to flimsy. Use good quality camping mats, around 6-10mm and you should be fine. Sainsburys camping mats are pretty much perfect for you UK people.
The red I used is nightfire red from halfords in the UK. This is too dark for some people, but I really like it, gives him a more sinister presence. The gold was a mock up of some crappy gold the hlafords guy mixed up and i had to lighten it with the silver.
Make sure you do at LEAST 3 coats of PVA glue, any less and you can guarantee the paint will crack.
If the PVA glued piece warps, do not force it back into shape, the part will split and damage. My cod part is screwed due to this.
Craft knives are a nice under certain circumstances, but i haven't found an application that cant be achieved using scissors. To obtain an angle using scissors, just place the scissors as you would normally around the foam to cut. Then pivot them round to the right and cut, the foam will bend round the scissors but achieve your 45 degree angle cut, and you can still follow the line.
Keep your spare off cuts of foam. Stealths duct tape mannequin is great but mine died as it was to heavy packed with clothes. Recycle your off cuts of foam and jam them in the dummy. I would also like to add that my mate nearly ended up circumcised and minus one ball while making the dummy, although I found this absolutely hilarious, do be careful! A ball-less mate, is an unhappy mate.
I found superglue much easier to work with than hot glue. I got sick of being burned every 2 seconds. Having tried many types of superglue, I find loctite is the ONLY option. Buy it in bulk from ebay and you get a good price. Approximately 10 x 7.5g tubes will be sufficient.
I used iron man cod and ribs section on war machine, because the war machine parts were to time consuming. His abs were built by hand, thats why theyre **** lol. I will remake this part eventually with the correct pieces.
The entire abs and ribs section are permanently attached to the COD on both armours (as seen in the war machine foam cod files if you have them).The right side of the abs is hot glued to the ribs part, and the left side is attached using velcro, the split goes from the top of the abs, right down through the crease of the cod. Pissing is not a problem at all. If you look you can see the split. A few extra pieces were added before the PVA glue part for vlecro attachments. Will provide pictures if desired.
I added an extra tier to the top of the ribs and abs to ensure they do not slip out from under the chest. This looks much tidier and never leaves a gap when you lift your arms.
Abs were created by adding an extra cm to the bottom of each big ab piece and just over lapped them onto the next part. Same with the neck piece.
Rush arc section was a smaller triangle that slotted in and out of the chest section with a triangle piece of laminated paper glued to it (picture below), looked absolutely fine. The light was obtained using a head torch clipped into the hole you can see in the middle of the triangle gap. Batteries lasted well over 24 hours (forgot to turn it off as i was drunk).
Notice mario in the mirror in the photo?
Red shiny metalic leggins for Iron man (blush). Seriously guys: RED, I can't say this enough, so many of you wear black underneath and it breaks up the image really badly, looks messy! I would have also worn a metallic red top but didn't have time to buy one. For war machine wear metallic silver leggins and top. You ruin the entire look by thinking you can hide in the shadows of black.
I know iron mans head is to big. This was my fourth attempt at the correct size and it was starting to p*ss me off so I settled with this.
I'm exactly 6 foot tall, slim build, the only scaling I did was 95% on back and chest of iron man and also once the biseps were complete I cut a 2 inch strip up the back of them then glued it back together. Slimmed up the biseps to suit my proportions. Very happy I did this.
I bought 500ml of each colour from halfords then used 500ml of thinner to thin each colour down to make a litre of each. Obviously had some gold and silver left over but the red was just right. I used the remainder of the red to apply extra coats.
I highly suggest everyone ups the scale on war machine a few percent on upper body parts. He looks like an absolute weed. Way to thin. Legs are fine.
I will probably add more tiers onto the iron man neck, I'm like a giraffe.
Again, a huge thank you to Robo and stealth for your amazing efforts.
Last edited:
pinder91
Sr Member
Re: Robo3687 - IRON MAN Mark 4/6 Pepakura FOAM Templates -Easy to Build "Green" Versi
That turned out really nice! I'm actually surprised how much you got done in so little time. The darker red on Iron Man looks great as well. Brighter colors just feel to comic bookish to me.
That turned out really nice! I'm actually surprised how much you got done in so little time. The darker red on Iron Man looks great as well. Brighter colors just feel to comic bookish to me.
Re: Robo3687 - IRON MAN Mark 4/6 Pepakura FOAM Templates -Easy to Build "Green" Versi
WOW! 7sinzz, those look great.
It really is incredible how far along the foam builds have come in terms of development and technique in such a short amount of time
I'm really starting to consider a foam build...
-Nick
WOW! 7sinzz, those look great.
It really is incredible how far along the foam builds have come in terms of development and technique in such a short amount of time
I'm really starting to consider a foam build...
-Nick
7sinzz
Well-Known Member
Re: Robo3687 - IRON MAN Mark 4/6 Pepakura FOAM Templates -Easy to Build "Green" Versi
Cheers guys. With the plastic coating option offered by xrobots in the link I find it very hard to understand why anybody would choose fibreglass over foam now. I saw a quote once saying an iron man suit can be seen as a shop right across the street from your house. Foam builders go straight out the front door to the shop,fibreglass guys go out the back door, round the whole world, to get to the same shop. Not sure who said that. But it's really stuck with me.
The first quarter of my iron man build was done over a few weeks. Before my time limit came in. My speed averaged 3 hours per piece. Sealing both with pva Took A day (during our hot spell). Spraying was half a day each. And attaching the parts was just a few hours.
defektedtoy
New Member
Re: Robo3687 - IRON MAN Mark 4/6 Pepakura FOAM Templates -Easy to Build "Green" Versi
This has inspired me to re-do my suit.
Thanks a ton for making the pep files foam friendly! If it wasn't for this, I might not have been motivated to work on it again.
Time to go shopping!
This has inspired me to re-do my suit.
Thanks a ton for making the pep files foam friendly! If it wasn't for this, I might not have been motivated to work on it again.
Time to go shopping!
- Status
- Not open for further replies.
Similar threads
- Replies
- 1
- Views
- 1,078
- Replies
- 1
- Views
- 697
- Replies
- 16
- Views
- 4,894