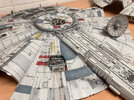
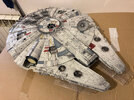
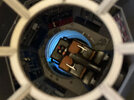
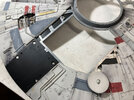
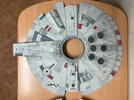
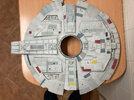
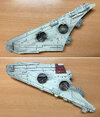
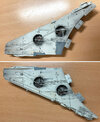
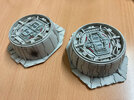
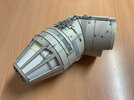
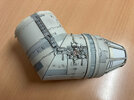
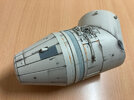
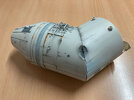
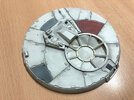
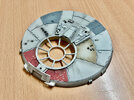
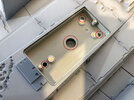
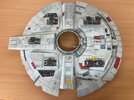
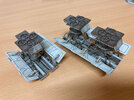
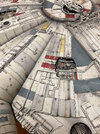
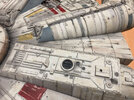
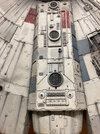
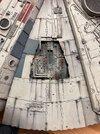
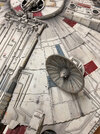
DeAgostini Millennium Falcon By Moska, 2022

Beautiful work Rafa ! Absolutely stunning !
I’m hoping that you’re still enjoying this project, even though you’re correct in exclaiming that there’re ‘ screws, screws and more screws ‘ etc.....:rolleyes:;)
Have you decided on how to display your incredible interior as a separate entity from the main model ?

Hello Ged. Thank you very much for your comments.
I am really enjoying this project. When I finished the lower structure I was impressed by its size. I already knew that it is a large model, but it was only when I saw it assembled that I realized its real dimensions. I've even had to "adapt" my workspace to handle it.

As for the idea of showing the interior separately, I haven't made up my mind yet. But it's becoming increasingly clear to me that I don't like how this issue is raised in the model.
I don't like having to remove so many parts of the outer hull to be able to see inside. I'm sure if I do it like this, the interior will be quickly forgotten. The model will remain closed for months and years. And it annoys me to hide that interior area after so much work.

I have to think of some simple and efficient way to show the interior separately. If I find a solution that works for me and isn't too complicated or laborious, I'll probably do it. But I'm still not clear.
 
Hello fellas.
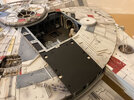
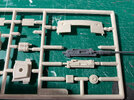
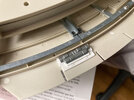
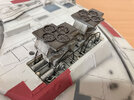
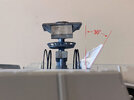
I am already finishing the assembly of my Falcon. As a tribute to the IL&M model, I have used an original part to detail the upper turret. This is the part from the Tamiya 32554 German 20mm Flakvierling 38 kit.
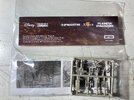
It has been really exciting to open the famous 100A pack :D.

0154-Moska-Deagostini-Falcon-Tamiya-piece.jpg 0155-Moska-Deagostini-Falcon-Issue-100A.jpg


Now I'm already thinking about the paint job that I will probably start at the end of this week. I have decided not to fully assemble the model to make this task more comfortable. When the paint job is practically finished, I will assemble it completely and leave the final touches and details for last.
I have devised and built a very simple tool, but I think it will be very useful when painting the radial effects of the Falcon. This tool allows me to support the brush or even the airbrush on the methacrylate strip, with the guarantee that the strokes will always be perfectly radial and convergent with the center of the ship.


I hope you like it and that my idea is useful to you.

That is all for today. Thanks for watching.
Rafa
 
Hi guys.
These are my latest advances.

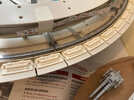
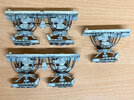
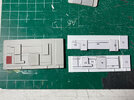
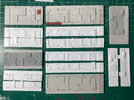
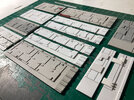
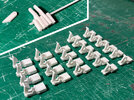
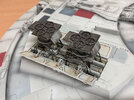
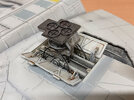
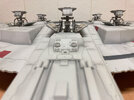
To detail the internal part of the thrust vector plates a bit, I built a small part with scraps from other models and styrene sheets. I made a mold and made as many copies as necessary. I think this will give that area of the model a little more appeal.

0156-Moska-Deagostini-Falcon-vector-plates-detail.jpg 0157-Moska-Deagostini-Falcon-vector-plates-detail.jpg

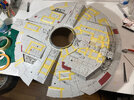
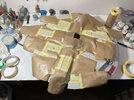
Now, from the creators of: “screws, screws, screws,…”, today we present: “masking, masking, masking,…”

0158-Moska-Deagostini-Falcon-masking-1.jpg 0159-Moska-Deagostini-Falcon-masking-2.jpg

A rather tedious and repetitive task, but essential to achieve a good finish.

0160-Moska-Deagostini-Falcon-painting-1.jpg 0161-Moska-Deagostini-Falcon-painting-2.jpg 0162-Moska-Deagostini-Falcon-painting-3.jpg

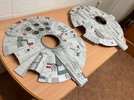
Don't you ask what colors I used because most are random mixes obtained from other mixes I already had from previous models. Of course, the vast majority of the colors are acrylics from Tamiya and a few from Vallejo. The grays are mainly variations of XF-19 Sky Gray and also Tamiya's XF-24 Dark Grey.

I hope you like how my little bird is progressing.
Regards, Rafa
 
Hi guys.

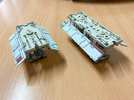
Progressing on the paint job. I am doing it in parts and, when joining all the pieces of the model, I will worry about giving uniformity to the whole if necessary.

I'm trying to keep the look of the original model as much as possible, but applying the effects more carefully than in IL&M. I'm not in the hurry that they surely were to finish the model. I don't want to see spider legs, excessive airbrushing, or sloppy blemishes on my model.
Mind you, I'm applying a light/medium pinwash on all surfaces because it's something I've always done on my models and because I think it improves the overall appearance of the finish.

What I am not clear about is the splashes. I don't like the look of that finish at all. Although at a certain distance it has a good effect, it seems to me a very coarse technique that worsens the finish when observed from closer.
I have to try some trick that allows me to get really small splashes. If I don't come up with a technique that works for me, maybe I'll try the sponge trick… Well, I'll cross that bridge when I get to that river. :rolleyes:

Here are some samples of how some pieces are turning out.

0163-Moska-Deagostini-Falcon-mandibles-1.jpg 0164-Moska-Deagostini-Falcon-mandibles-2.jpg 0165-Moska-Deagostini-Falcon-scape-pods-1.jpg 0166-Moska-Deagostini-Falcon-cone-1.jpg 0167-Moska-Deagostini-Falcon-cone-2.jpg 0168-Moska-Deagostini-Falcon-cone-3.jpg 0169-Moska-Deagostini-Falcon-cone-4.jpg 0170-Moska-Deagostini-Falcon-turret-inf-1.jpg 0171-Moska-Deagostini-Falcon-turret-sup-1.jpg

As for my doubts about whether to place the interior or expose it as a separate model, the truth is that after a couple of months since I finished the interiors, I have already lost a lot of interest in them. Right now I'm just concentrating on the exterior finish and I'm feeling VERY LAZY to start doing some kind of display to show the inside of the Falcon. So it seems sure that I'll place it inside the model and not get into any more trouble.

Thanks for watching.
Rafa
 
Last edited:
That's been my thought as well, after buying about $800 in 3D printed interior parts.
If I put the model in a case, I would have to open the case to open the Falcon.
I decided I would build the hold and display it in the case next to the exterior.
I will also have to 'wall' it in to hide the electronics.

I also toyed with the idea of installing the smallest wireless cameras I could find (plus appropriate lighting) inside the model from varous vantage points (that don't see another camera).
My hope would be to use a tablet app to view through them.

Great work, btw. I hope mine (someday) will look as good. I love the building, modifing and detaling, but painting scares the crap out of me.
All that physical building can go bad real quick.
Hi Rahn420

Thank you very much for your kind comment.

I will be delighted to see your finished model. With the interior exposed in a separate showcase. I've thought about it a lot, but I've decided it's not worth the effort. I may regret it when I see your finished work.

Your idea to install mini-cameras makes me salivate like Homer Simpson over a doughnut... We are all crazy :lol:.

As you say, it is always disturbing to face the paint job. I have been building models for many years and I am very clear that this fear will never disappear. The only solution is to face the challenge and put our best skills and intentions at the service of the cause.

Don't be intimidated by the challenge. I'm sure you can do a good job (y).

Greetings.
Rafa
 
Hello folks.
Today it's time to talk about landing gears.

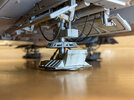
Although my intention is to display my model using the wall anchor. It seemed wrong to waste the landing gears. It's like leaving the model unfinished.
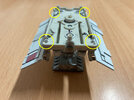
As designed, it's supposed you must choose whether to finish it with or without the landing gears. If you fit the landing gears you can no longer remove them because they snap into place by pressure and you can break the pieces if you pull on them to remove them.
Well, this can be fixed very easily. You just have to enlarge the holes where the pieces fit so that they go in and out freely.

IMG_8235.jpg

In addition, there is enough space to fit 1mm magnets to create a good hold for the landing gears. Now I can easily interchange both finishes.
I placed 3 Ø5x1 mm magnets on the front three and 4 Ø5x1 mm + 2 Ø3x1 mm on the rear ones. I assure you that they provide more than enough support.

IMG_8236.jpg IMG_8255.jpg

Since to make this transformation it is necessary to manipulate the lower part of the Falcon a lot, and the mobile ramp is already in place, there is a danger of damaging the mechanism due to some mishandling or accidental blow. To protect that mechanism, I installed a very rigid cardboard protective cover. Now I can work more calmly.

IMG_8238.jpg

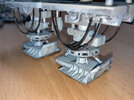
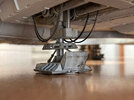
Once the above was solved, I painted the pieces and placed hanging “wires” using electric guitar strings. I soiled the strings with a strong wash of black oil.

IMG_8184.jpg IMG_8187.jpg

Once they were in place, I realized that, without having the bay doors open, they were very incomplete. It was obvious that something was missing.

IMG_8251.jpg IMG_8263.jpg IMG_8256.jpg

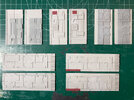
So I set about the task of building some replicas of the doors that come with the kit, but divided in half.
I scanned the original parts and drew on my computer all the parts I would need to complete them. I also designed some simple reinforcement structures to enrich the finish on the inside of the gates. For all these pieces I used 0.25, 0.5, 0.75 and 1mm thick Styrene from Evergreen.
I also designed the articulated arms that hold the doors. First I did a test with an inclination of 30° with respect to the vertical, but with that inclination, the doors hid a good part of the landing gear and its details. So I modified the angle of the arms and left it at 60°.
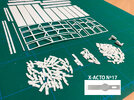
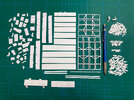
There are a total of 24 arms and each of them is made up of 11 small pieces, which gives us a total of 264 pieces that I had to do manually. And that only for the arms, you have to add the pieces that make up the doors.
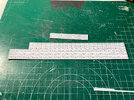
The technique I always use for these tasks is to draw and print the pieces. I paste the printed paper on styrene sheets of the appropriate thickness. And I go cutting and trimming the pieces, one by one. I use the X-acto nº17 blade a lot. It is very useful for making small straight cuts using vertical pressure.

IMG_8195.jpg IMG_8209.jpg IMG_8212.jpg IMG_8214.jpg IMG_8221.jpg IMG_8223.jpg IMG_8232.jpg IMG_8190.jpg

My first idea was to simply glue the arms to the landing gear base piece, but it didn't seem like a strong enough connection, so I reinforced those connections with M1.4x6 mm size screws. Smaller than any of the ones used to assemble the kit, but they do their job of reinforcing very well. To place them it was necessary to remove part of the interior rim of the base pieces.

IMG_8274.jpg

I painted the new gates taking great care to leave them the same as I had painted the originals. Since I had completely used up my Tamiya Insignia White sprays, I had to make my own mix to get that color back with acrylics. It was pretty easy mixing Flat White XF-2, Sky Gray XF-19 and a bit of Buff XF-57.
An absurd effort since you will never see both types of gates at the same time.

IMG_8265.jpg

IMG_8292.jpg IMG_8296.jpg IMG_8297.jpg IMG_8302.jpg IMG_8304.jpg IMG_8309.jpg

Thanks for whatching.
Rafa
 
Hello everyone.

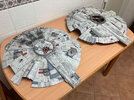
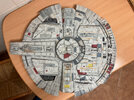
Since my last post, I have been very busy with the paint finish. Trying to copy as accurately as possible each and every one of the different aging effects that I have been able to document from the original model.
Most of these effects have been done using Tamiya's XF-24 Dark Gray. I have also used X-19 Smoke to tint and darken some areas and, of course, some rust tones as well.
For the rust effects I have used different techniques and paints, depending on the area and the effect to be replicated. Mainly oil colors, pastel colors and weathering pencils from AK Interactive.
I have only used the color black for the deepest parts of the impacts spread over the fuselage. I will post more and better photos when it is finished.
0172-Moska-Deagostini-Falcon-paint.jpg 0173-Moska-Deagostini-Falcon-paint.jpg 0174-Moska-Deagostini-Falcon-paint.jpg 0175-Moska-Deagostini-Falcon-paint.jpg

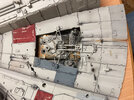
As for the strokes, I must say that the technique suggested by Steve Dymszo on YouTube was not enough for me. There are really fine strokes that I don't see myself being able to reproduce using just a mask. In most cases I have used masks on both sides of the stroke. Once that line was made, and if I considered it necessary, I would remove the masks and make soft passes with the freehand airbrush to slightly blur the line.

I always made the famous “splotches” after painting the stroke, using very low pressure with the airbrush and getting it very close to the surface of the model. In addition, I always tried to spray the paint with the airbrush very inclined and pointing in the direction of the stroke to avoid round effects.

This is my experience with these stroke effects and I am quite satisfied with the result.
0176-Moska-Deagostini-Falcon-paint.jpg

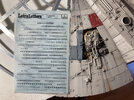
I have not made the small parallel lines throughout the ship with a fine marker. Fortunately, I have quite a number of old "LetraLetters” transfer letter sheets. Many of you may not know what this is. And it is that it is a tool that was used in graphic design before the arrival of computers and the digital world. Letters and symbols are transferred from the sheet to the surface by rubbing over them with a rounded tip. To make these parallel marks I have used many capital letters "I" and lowercase "L". In this way, the finish looks much more “professional” than using a marker.
0177-Moska-Deagostini-Falcon-letraletters.jpg

Once most of the painting work was finished, I went to check the fit of both halves of the fuselage and, as I already supposed, I found several points in which the parts that I added to the interior of the ship hindered that fit. I was forced to do some reshaping to fix those issues, but luckily they are all in areas that won't be visible once the model is complete. So I didn't worry too much about giving them a good finish.

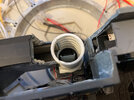
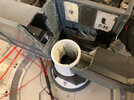
The small corridor that joins the two gun turrets I did as I had planned, using a piece of flexible tube. Since the corrugations in the tube were too small and too close together, I alternately filled those corrugations with Milliput putty. Thus, I achieved a look much more similar to the pads that the real corridor has.
0179-Moska-Deagostini-Falcon-turrets-corridor.jpg 0180-Moska-Deagostini-Falcon-turrets-corridor.jpg 0181-Moska-Deagostini-Falcon-turrets-corridor.jpg

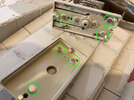
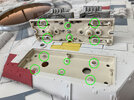
I also saw that the area that opens to see the interior leaves nine holes through which internal areas that are outside the walls of the interior cellar can be seen. I didn't like the effect those holes had. In addition, the light from the LEDs that illuminate the model filtered through them. So I decided to cover them using black polystirene from Evergreen. I cut the necessary pieces in such a way that they would fit perfectly in those gaps. Then I glued some flaps on the inside that helped me glue all those pieces at the same level of depth with respect to the metal frame. Although polystirene is black in color, plastic always looks like plastic, so I painted them with black primer from AK Interactive. I also painted the interior panel above the battery box with the same product, since it is also exposed when the model is opened to see the interior. I think that area now has a much more "elegant" look.
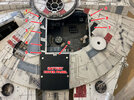
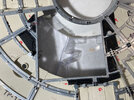
0185-Moska-Deagostini-Falcon-gaps.jpg 0182-Moska-Deagostini-Falcon-gaps.jpg 0183-Moska-Deagostini-Falcon-gaps.jpg 0184-Moska-Deagostini-Falcon-gaps.jpg

I have made sure that all the lights, both those that come with the model and those that I have added, work well with a 9V / 2A transformer.
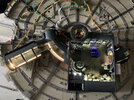
0178-Moska-Deagostini-Falcon-lights.jpg

I have joined the upper helmet and the jaws with cyanoacrylate, but I was not quite confident in that union. The weight of the jaws causes them to rock up and down a bit. And I was afraid that would end up causing those pieces to come unstuck. Those who designed this model should have devised a stronger joint.
I have tried to solve it by taking advantage of the two largest details that are glued between both surfaces to reinforce that union, so that it helps to hold the jaws more firmly. I have threaded two screws in the upper hull, so that they are inside the detail, occupying a good part of the interior space and, taking advantage of that now smaller space, I have put a good amount of two-component epoxy glue to create a very solid block.
It's not the perfect solution, but I trust it will do the job well.
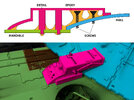
0188-Moska-Deagostini-Falcon-reinforcements.jpg

Now I am with the last details to finish the assembly. When it's complete I'll apply a good coat of matt varnish to protect the entire paint job.
I'm pretty happy with how it looks right now, but to try and make my model look even more like the original, I'm going to do some testing to apply the splatter effects. If I do not achieve a convincing result, I can eliminate these effects thanks to the protective layer of varnish.
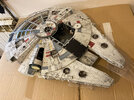
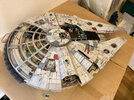
0186-Moska-Deagostini-Falcon.jpg 0187-Moska-Deagostini-Falcon.jpg

Greetings.
Rafa
 
Hello friends.

I have made these two photographic montages to be able to compare my Falcon with the original model. This helps me spot differences so I can correct them. I have already noted some things that need to be improved.

Even so, I am VERY HAPPY with the finish I have achieved.

Now I'm taking a week off, and when I get back, I'll be able to see my model with new eyes and find more details to improve.

I hope you like my work.

Greetings.
Rafa
comparison-top.jpg


comparison-bottom.jpg
 
Last edited:
Hello friends.

Finally, after many doubts and hours of observation, I came to the conclusion that, although I was very satisfied with the finish of my model, it needed a little more dirt to gain more realism. Despite all the strokes, oxides and splotches, the surfaces still looked too clean. So I understood why the IL&M modelers decided to apply those splash effects.

As I have said before in this thread, I don't like the splatter technique at all. It is difficult to control and when observed closely the result is not realistic at all. I did some tests with the sponge technique and I liked the result, so I applied it all over the top of the model without any problem. The process was fast and the result very satisfactory.

In these two images you can see the upper part of the model before and after applying the dirt.

top-view-01.jpg
top-view-02.jpg


The following images show the fouling in more detail.

Moska-Deagostini-Falcon-final-sponge-01.jpg Moska-Deagostini-Falcon-final-sponge-02.jpg Moska-Deagostini-Falcon-final-sponge-03.jpg Moska-Deagostini-Falcon-final-sponge-04.jpg Moska-Deagostini-Falcon-final-sponge-05.jpg


The finished model.

Moska-Deagostini-Falcon-final-01.jpg
Moska-Deagostini-Falcon-final-02.jpg


With his little brother; the old MPC model (before fouling).

Moska-Deagostini-mpc-millennium-Falcon.jpg


Showing the interior (before fouling)

Moska-Deagostini-millennium-Falcon-lights.jpg


I think I can call the job done on my Millennium Falcon. It has been more than a year and a half of work, but I have really enjoyed all the steps of its construction and finishes. And I am very happy to add this beautiful model to my collection.

Thank you very much for following my thread. I hope it's useful for someone.

Greetings.
Rafa
 
Last edited:
One of the best ones I have seen, if not the best. I hope someday mine will look as good.

Amazing!!!!!!!!!!!!!!!!(y)(y):love::love::p:p:D:D:eek::eek::eek::eek::eek::eek::eek::eek::eek::eek::eek:
 
Absolutely excellent work! This is just becoming available through Fanhome in the states so my first issue should ship next week. I can't wait!
 
Congratulations on another wonderful, stunningly executed and finished model !.
Like yourself, the somewhat random ‘splatter paint/tooth-brush effect’ didn’t hold much interest for me in terms of weathering or dirtying-up my own build.
I don’t remember seeing it in detail, onscreen (due to the effects of studio lighting, film speed/movement etc...), so I didn’t want to include that technique either, especially on a static kit.
However, your further ‘grittier’ finish achieved using the ‘sponge’ technique is something I’ll seriously consider should I ever decide to tinker with my MF’s final appearance in the future (actually ‘finished’ my build a few years ago) ;)

Thank you for sharing mate !
 
Last edited:
Congratulations on another wonderful, stunningly executed and finished model !.
Like yourself, the somewhat random ‘splatter paint/tooth-brush effect’ didn’t hold much interest for me in terms of weathering or dirtying-up my own build.
I don’t remember seeing it in detail, onscreen (due to the effects of studio lighting, film speed/movement etc...), so I didn’t want to include that technique either, especially on a static kit.
However, your further ‘grittier’ finish achieved using the ‘sponge’ technique is something I’ll seriously consider should I ever decide to tinker with my MF’s final appearance in the future (actually ‘finished’ my build a few years ago) ;)

Thank you for sharing mate !
Hey, Gedmac. Thank you very much for your comments and suggestions throughout this thread. It is very pleasant to feel accompanied throughout the process of building and painting a model. :)

I invite you to follow my next thread: The Mandalorian Razor Crest.
I've already started working, but I haven't posted anything yet. Maybe this week.

A cordial greeting from Spain.
Rafa
 
Hello friends.

My Millennium Falcon is now placed in its final location. I have put it on a wall because I don't have enough space to place it in another way. Due to its weight and size, I needed the help of a friend to be able to place it.
I would have preferred to put it pointing up, but in order to better show the interior areas, I decided to put it down.

My latest conclusions about this model:

THE GOOD:
On the outside, it is a good model in general. For me, it is faithful enough to the original to be worth it. The internal structure seems strong enough to guarantee the integrity of the model. It's fun to build and also fun to paint.

THE BAD:
Its weight and size makes it very unwieldy. You have to be careful when handling it because you have to hold it quite strongly. That forces you to know very well where to take it so that it does not break or a piece comes loose.
The inner parts. Many parts are too wrong. It looks more like a toy than a model. It lacks lighting. It requires too much conversion work and replacement of parts to get an acceptable interior.

And… that's all.

Thank you very much for following my thread. See you in my next project:
The Mandalorian Razor Crest (Revell)
Revell 1/72 The Mandalorian Razor Crest by Moska

Greetings.
Rafa
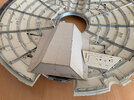
Moska-Deagostini-Falcon-final-03.jpg


Moska-Deagostini-Falcon-final-04.jpg
 
Last edited:

Your message may be considered spam for the following reasons:

If you wish to reply despite these issues, check the box below before replying.
Be aware that malicious compliance may result in more severe penalties.
Back
Top