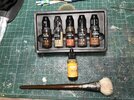
I've done both with success. For Vera, I'd be inclide to tint the metallic paint directly instead of doing a candy coat. (Candy coats are GREAT for gold chrome though!)
If you want to go the acrylic route (even though you already got some paints)... Vallejo's "metalizer" range is great.
Apologies, but I don't have the link without searching... look for my threads with the mandalorian blaster, the Blade Runner Concept COP and my Buck Rogers replica... some details there. I also have a technique for doing an "brushed/machined aluminum" look with chrome paint (because "aluminum" colored paint NEVER looks right) but again... search for threads with my nickname 'cause I don't have them handy!
I suspected that might be the case. Vera's outer barrel was 22-ish mm I think, so maybe that leaves room for an inner barrel. (Been a while so I can't remember exactly!)
There are photos of what seem to be people firing the Showtime guns (without the extra Vera parts) at a shooting range. No info on if they were firing blanks or not. Someone on Showtime (the director maybe, or production designer) called the original guns "evil" when fired....!
They did a lot of shooting in Showtime! However, something is telling me that they never actually fired it "for real" in Firefly. The shots at the end of "Our Mrs Reynolds" were done with a fake, loose, muzzle and compressed air. Jayne runs around with Vera on Niska's station but I can't remember if he ever shoots her. (Been a couple of years since I watched the show.)
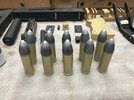
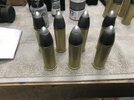
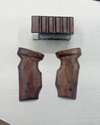
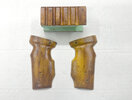
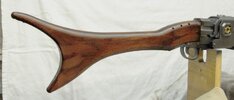
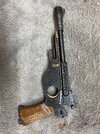
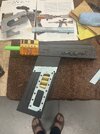
 While waiting for the gloss black to dry again I decided to try and make some actual progress and do some assembly of parts that have been finished being painted ...
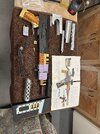