Borderlands 2: Maliwan Sub-Malevolent Grace (Take two)

I'm so excited!
I cant wait for an update. How are you going to get the magazine turning? I'm planning out my own build at the moment and having fun nutting that out.

I love the detail you're putting into it. Excellent work!
 
Great Odin's Raven, it's been almost a month since my last post. Here we go.


With the grip and stock assembled and primed it is time to work on the upper portions of the housing, namely the display windows in the nose of the gun. Since I already included the majority of the cavity in the initial cut, I only needed to add the reveal portion. I pulled out my blueprints and transferred the shape to a template piece and then traced the template on to the pieces.


The reveal section has a unified depth. After making the decision for the size of the depth I marked it out using the flat side as a datum. I then marked the depth line on all pieces.


To remove the material I turned to my trusty utility knife. Holding the blade perpendicular to the flat, back face I cut down to a uniform depth on all but the horizontal depth line.


The very edge of the cut will flair up on both sides but that is no worry. I plan on sanding quite a bit over the next few posts.


The next step is to cut horizontally parallel to the depth line.


The MDF is comprised of layers and layers of rough fibers that will flake off, leaving a nice edge that can be cleaned up if need be.


I followed the same steps on all components until the desired depth was achieved. All they needed was a little sanding.


All tuned in and looking beautiful. I have been working on thick sheets of polyethylene foam so that the sculpted contours don't get damaged by my work surface. MDF is stronger than foam but a far cry from steel.


The best/worst part of having an assembled primed base is that you see all the things that need to be changed. After seeing some newly posted HD images via Google, I set to trimming and smoothing some of the aspects of the grip. She is a Maliwan after all. "Them curves...."


All glued up.


Here is a view of the very beginning of the sight. I am so pleased with the assembly thus far. Without plans this would have been another crap-shoot. (Emphasis on the crap.)


Now for the final component of the body: the little triangular tail section. I didn't take any photos of the process or tools I used to make this little bugger (or his brother) but here he is.


And fit into place.


Another generous coat of primer and I swear this thing is singing to me. Or maybe its the paint fumes...


And speaking of fumes: Bondo.


That about wraps it up for now. Thanks for tuning in.
 
Very impressive work you've done; this build only gets better with every update. BTW, I know how you feel about the primer; one more coat, just one more coat...
 
It's looking stunning.
The idea of building it up in blocks and then blending all of the parting lines is a clever one, cuts down on materials and makes assembly nice and easy. Cool stuff.
Nice curves going on in there now.
 
Thanks for the compliments. I have been continuing work, though I did get distracted by an original knife sculpt for about a week. This weekend I worked out the initial steps so I can start on the sight this week.

Stay tuned...
 
"A-hem." *dusts off thread*


I had to go digging to find out where exactly I left off. And I found it.


So, I have been using Apoxie sculpt for my filling at home as there is no discernible sour odor, and subsequently no sour moods, around the house. It takes a bit longer than the Bondo to cure but the benefits outweigh. Reliable sanding tooth and texture that can be polished in a pinch. It can be carved and machined like normal plastics as well.


After the last filling and sanding session covered here, I slapped a nice coat of the light grey auto primer I have been using almost exclusively up to this point. This shows the blemishes in the finish, but it also does a bit to fill in the little pains in the neck. I needed to back-fill more to get the contours down. As my substrate is wood (MDF) the Apoxie Sculpt is the perfect choice for me. I have no idea what foam builders use. (I am honestly a bit intimidated by the medium. It would be like, "No mistakes, or else..." in my mind. But I digress.) Long story short I went "to town" with the filling, adding plenty to the grip and display panels.


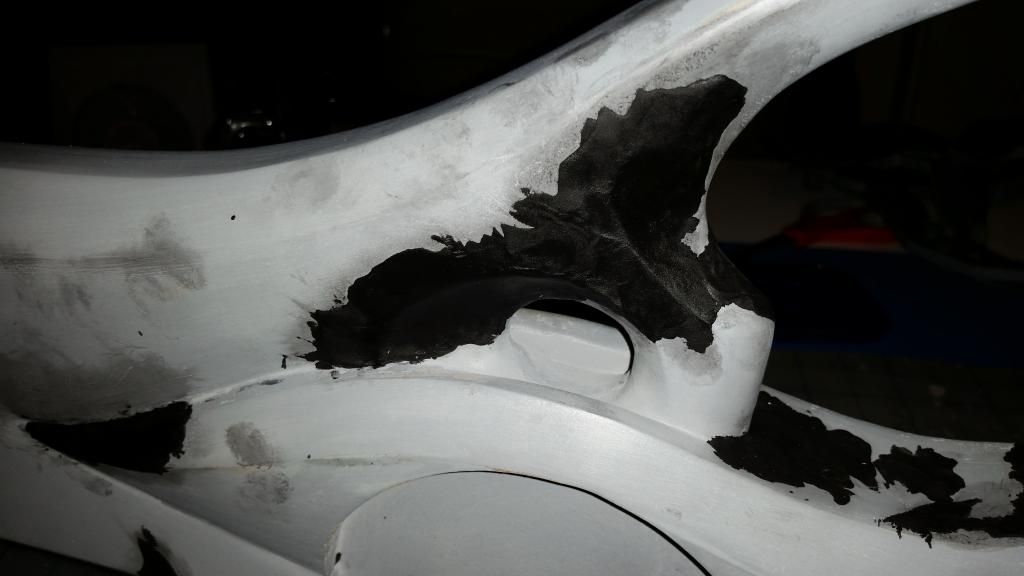
These were tuned in with a variety of files and various grits of emery cloth ending at 320 grit. I switched primer color after this round from grey to white. The difference in color lets me know when to stop focusing on an area I don't want to effect too much. So when the paint turns grey, stop. Unless you see that the previous work is insufficient and is in need of further shaping.


There was an additional coat of white primer in between photos. The primer has enough body to fill small gaps and with many, many, consecutive coats (sanding between) to fill greater anomalies.


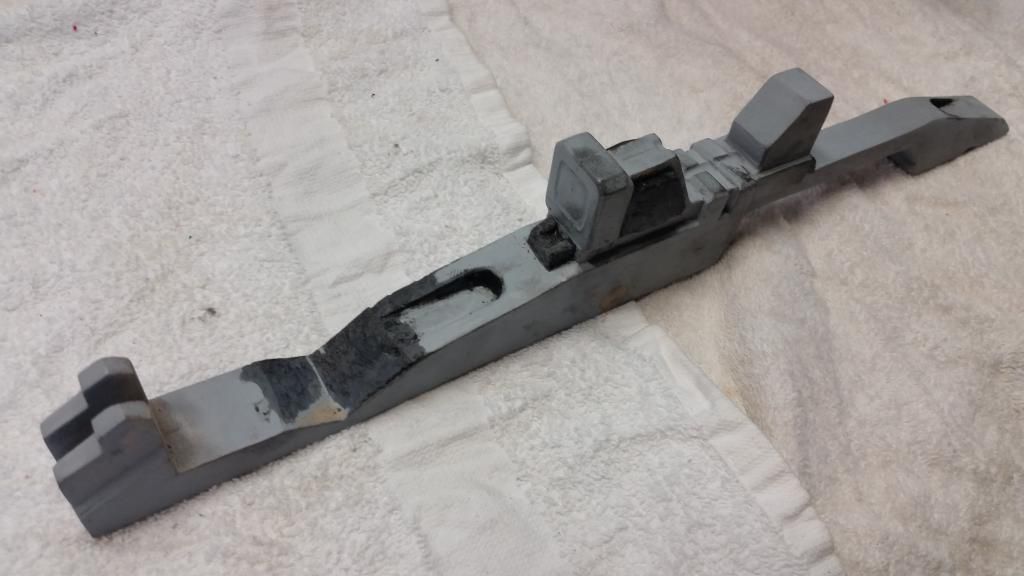
Up to this point I have used light body automotive primer. I had a limited selection at the store on two different occasions and acquired some different types/brands of primer. The first being a red oxide rusty metal primer (Rust-oleum) that looks amazing applied to the main component.


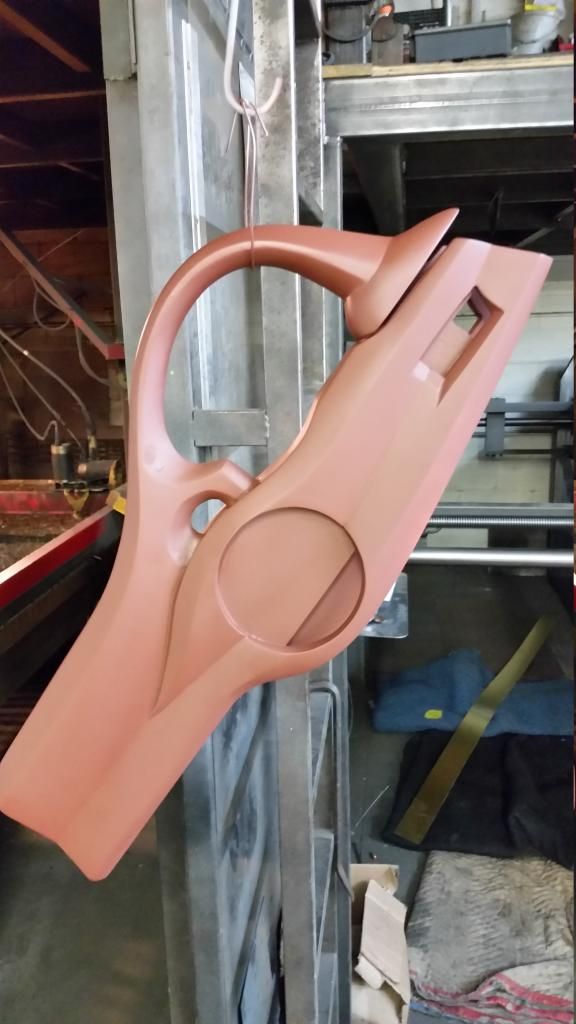
I was used to the quick drying time of the auto primer even though left for 4 hrs the paint was still tacky for a full 24 hrs. Initially I was dismayed. I tried to approach this primer coat the same as I had in the past and it was coming off in little rolls. How was I going to work with this gummy thick paint? By chilling out and letting it to its job. After the paint cured it sanded beautifully and held up its end of the bargain. I applied an additional heavy coat and let it cure fully before sanding to most benefit filling low areas and inconsistencies.


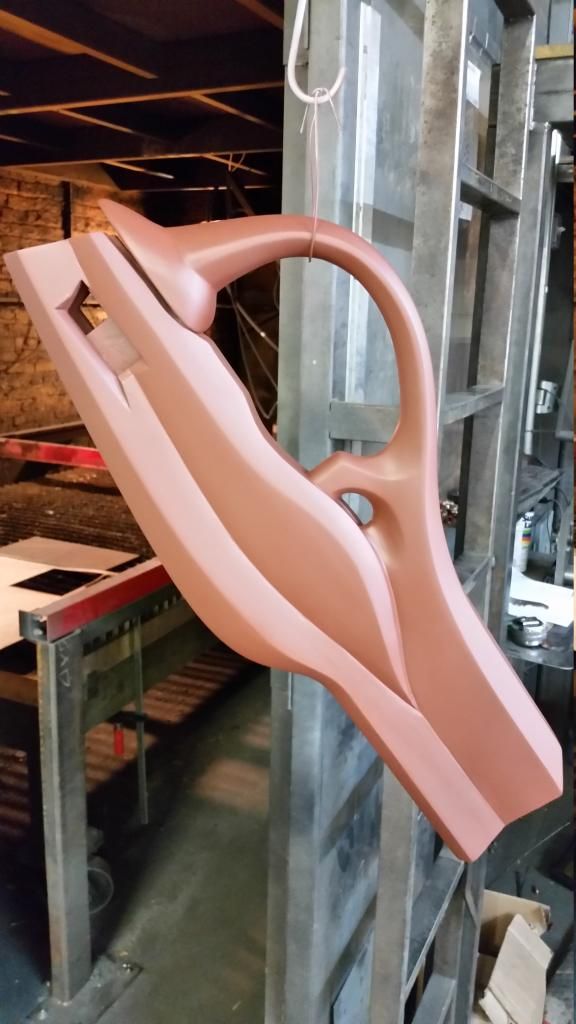
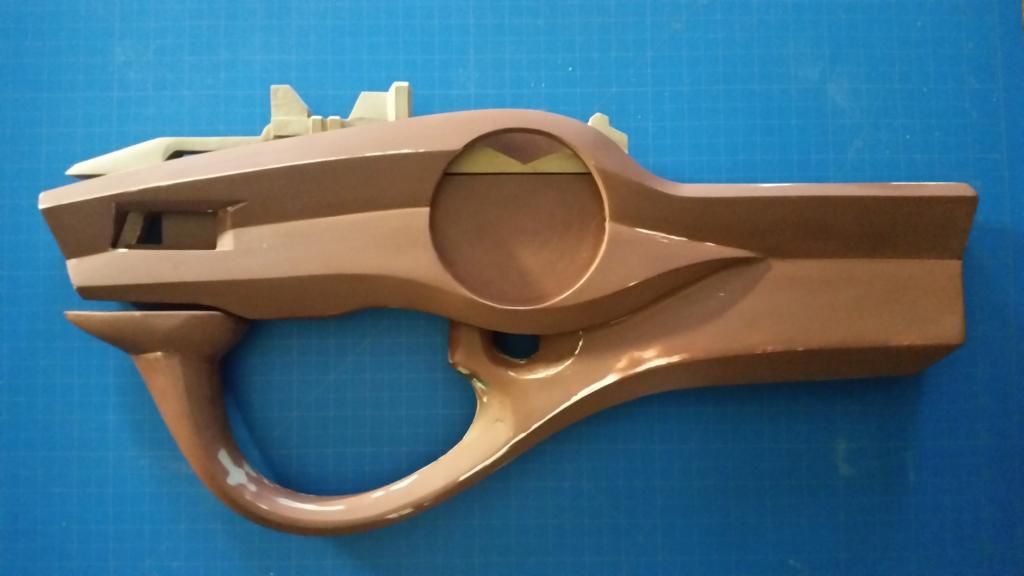
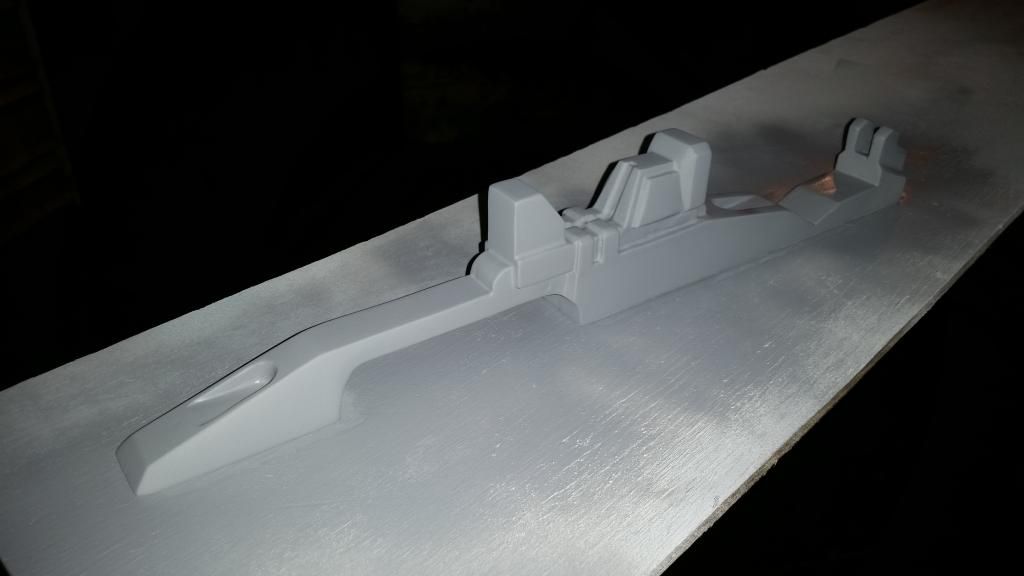
I joked that this looks carved out of Monster Clay:


Sanded to a smooth surface and extra tuning of the sharp edges leaves the main body with a cell-shaded look.


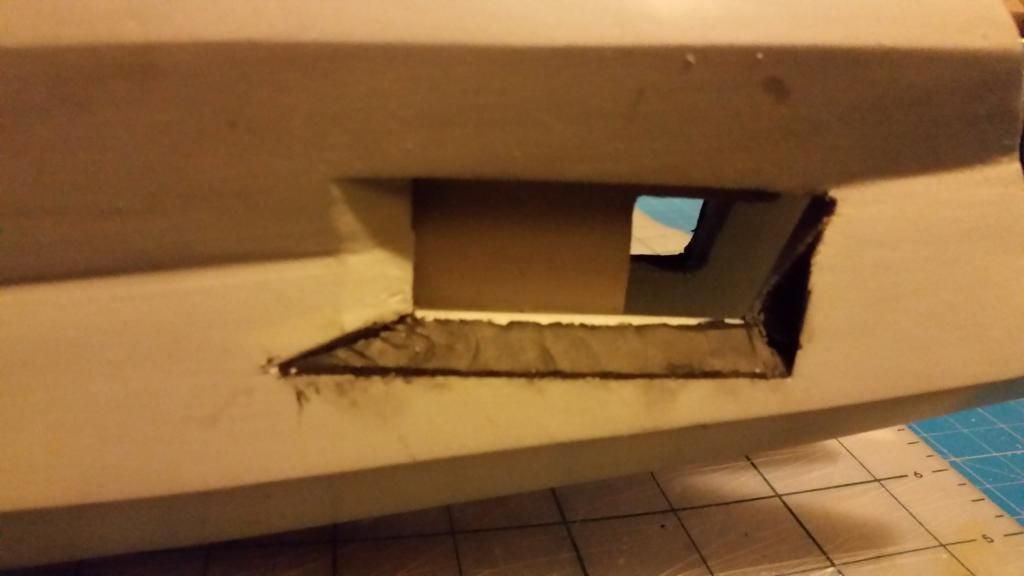
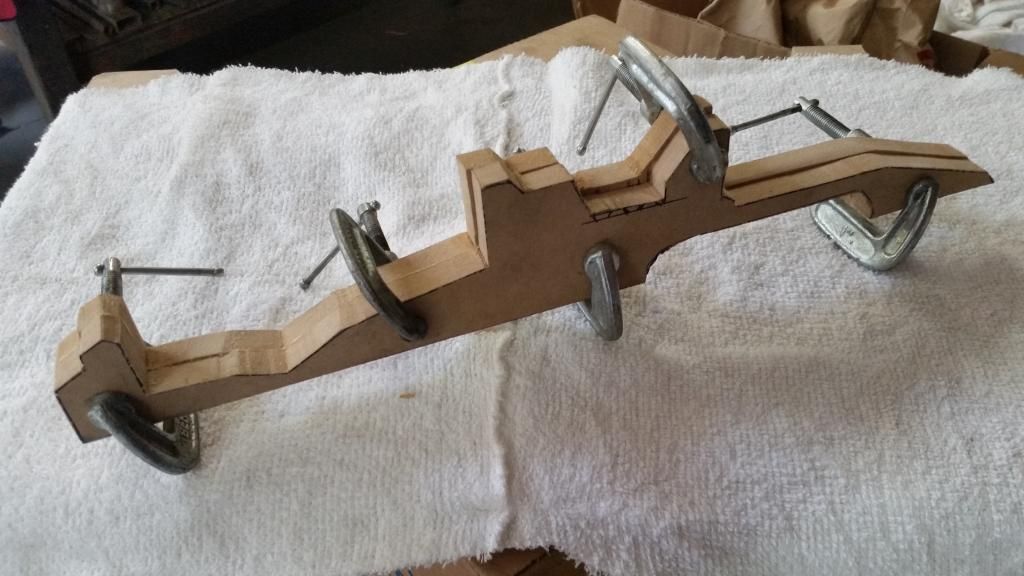
With the main body coming together I decided to get back to work on the sight component. Retrieving my prior drawings and template work I did a layout on 1/2" MDF and rough cut the shapes with my trusty Jig Saw. I would usually prefer to cut the shapes closer to true with my small bandsaw but I burnt the blade working through last years Kreig axe build and Freddy's Nightmare Glove. (Which I absolutely love.) The Jig works in a pinch but leaves much to be desired for accuracy in tight spaces. Desperation and haste are the parents of shoddy decision making, and we all lay in the bed we make.


So, heck, so what if they aren't that close to the template? I can make it work. I can do anything. We all can, if we want to.
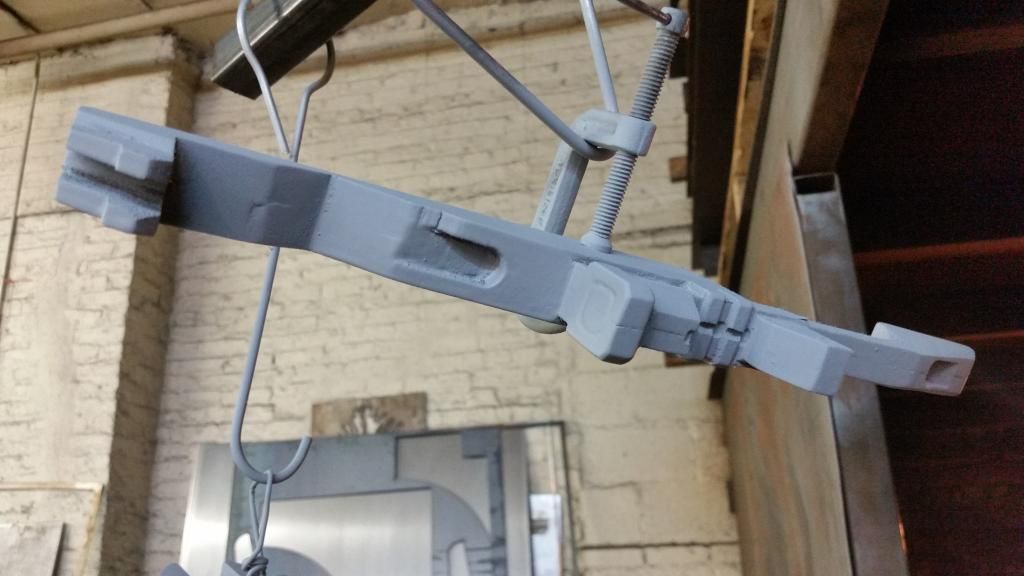
Here the two halves are glued with Tightbond 3 and a couple clamps.


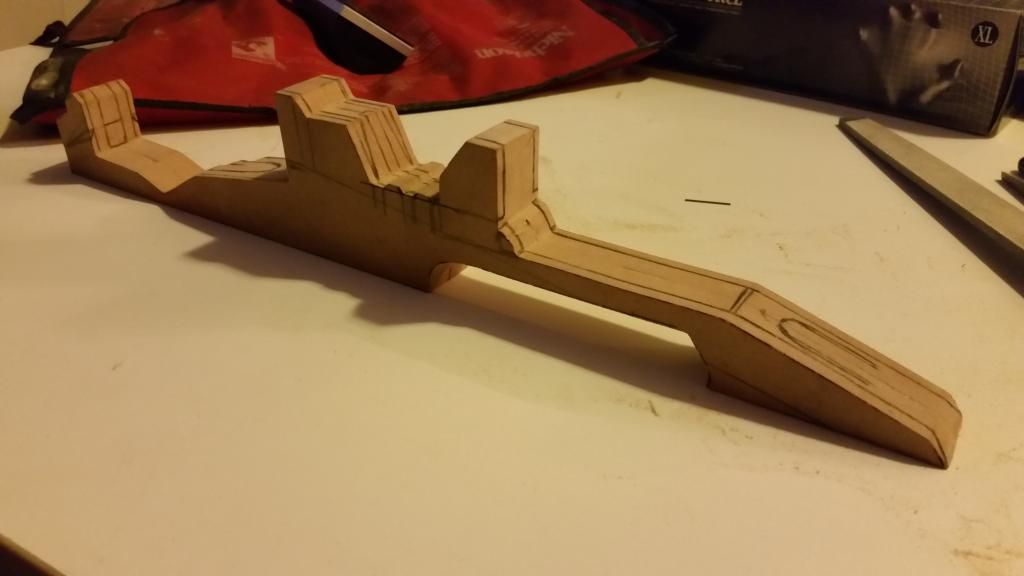
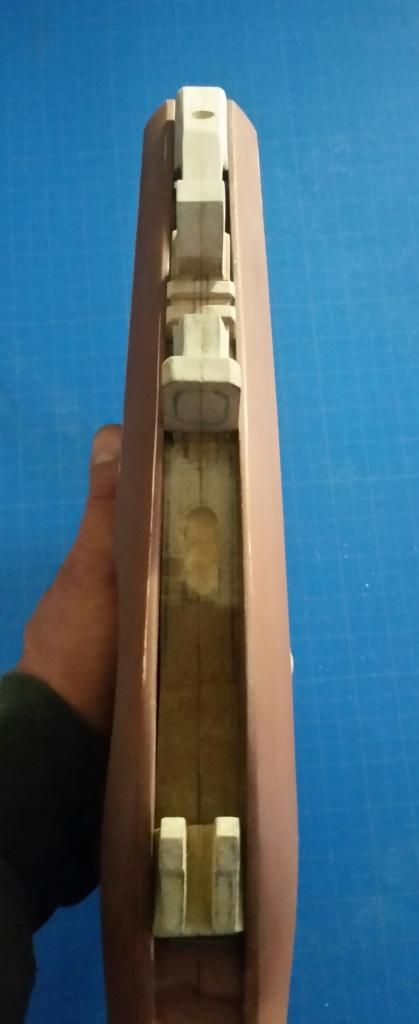
Needless to say: files/sand = BOOM, Breakfast. Here is a shot of the trimmed assembly dry-fit in the body.


I pulled up my in game models and layed out the cut pattern for the start of the detail work on the sight. I will employ the same techniques I have discussed earlier this thread.


ALA-KAZAM!


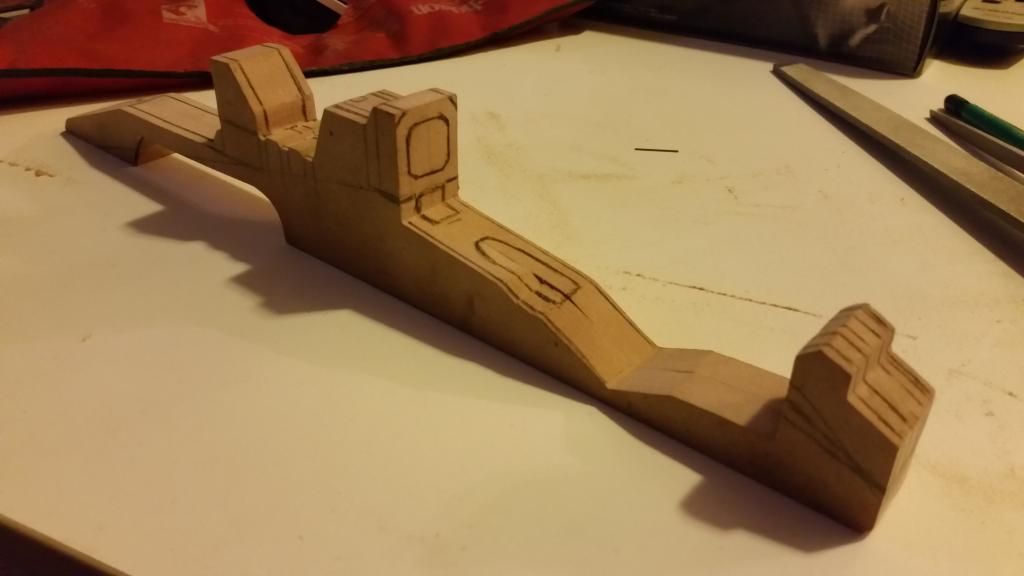
Here are a couple of dry fit photos:


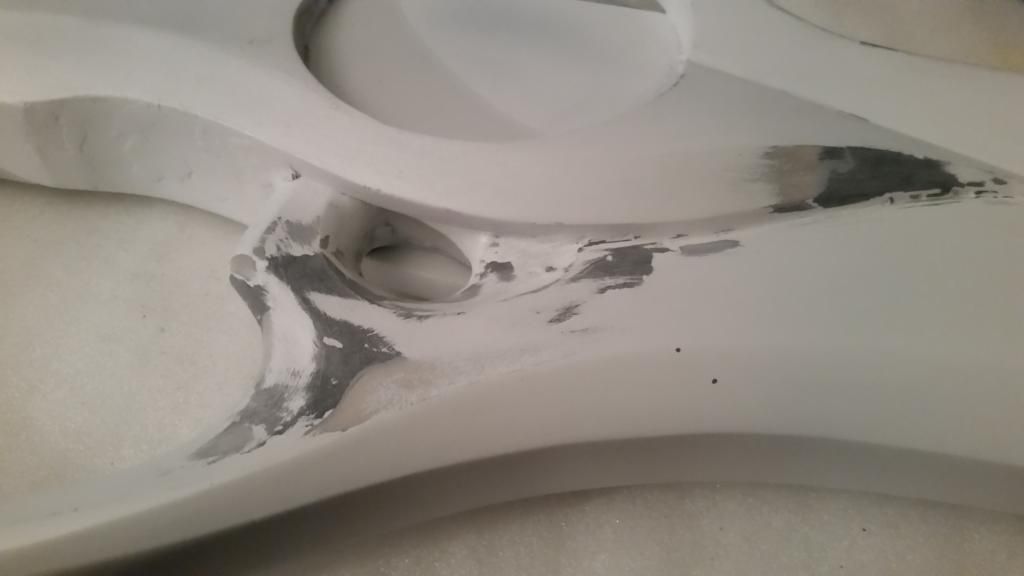
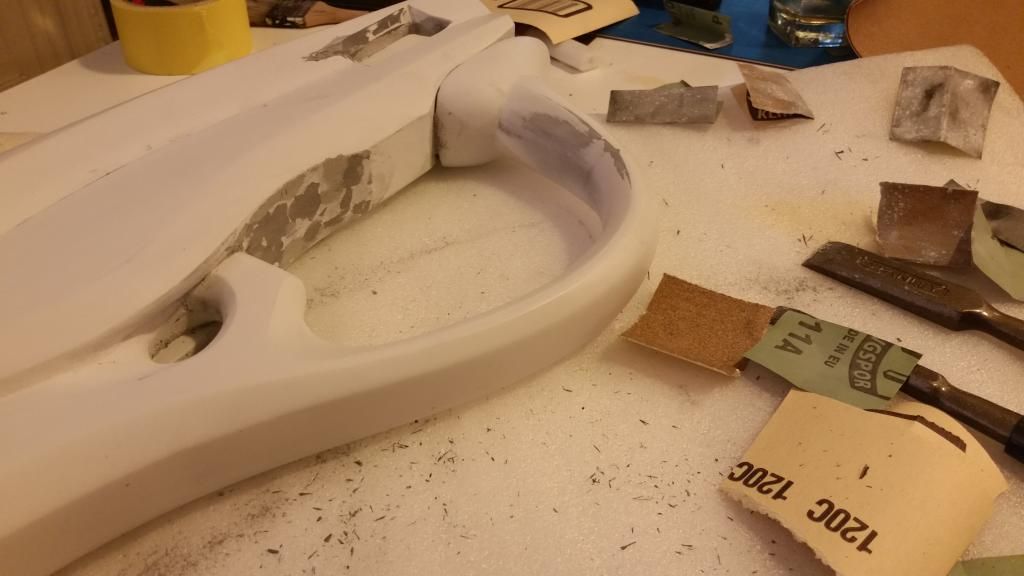
I did the inside detail work with a 3/16" ball end mill in a Dremel. The whole shape got a comprehensive sanding and a "heavy" coat of light body primer to start the process.


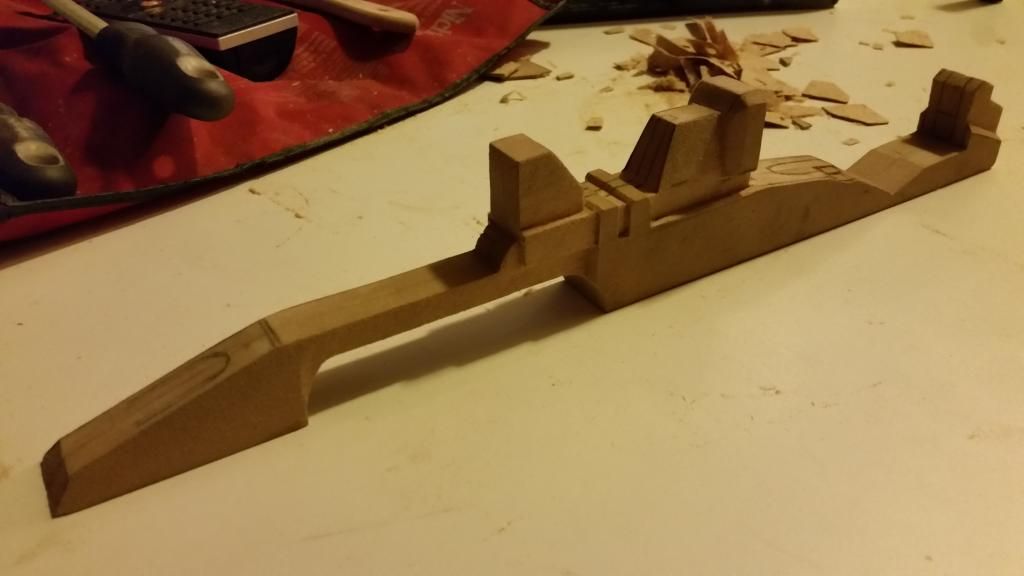
Some aspects of the design escaped my initial cut and shape so I employed my trusty Apoxie Sculpt.


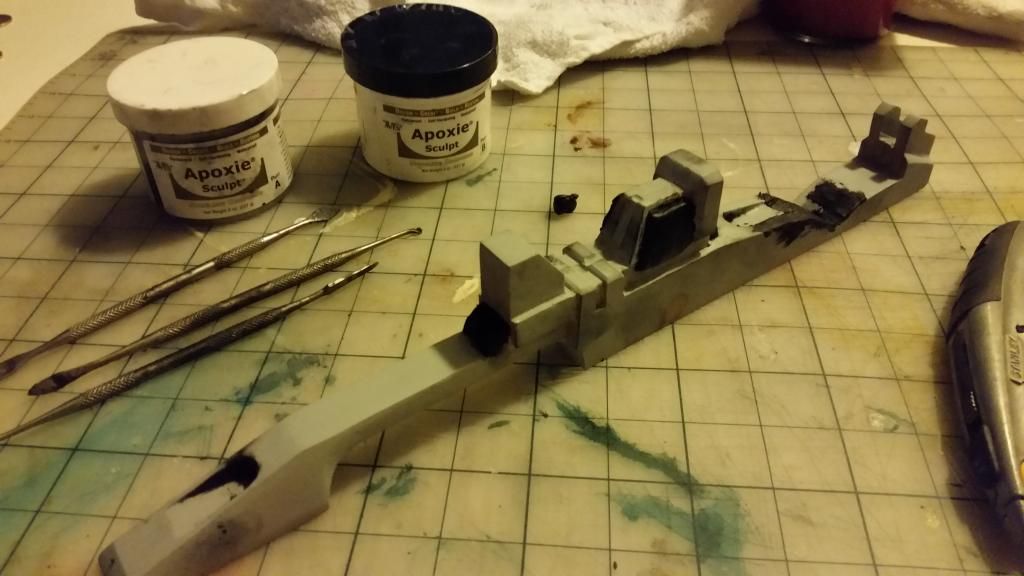
Initial fill and fix, filed and sanded down. Plenty raw at this point.


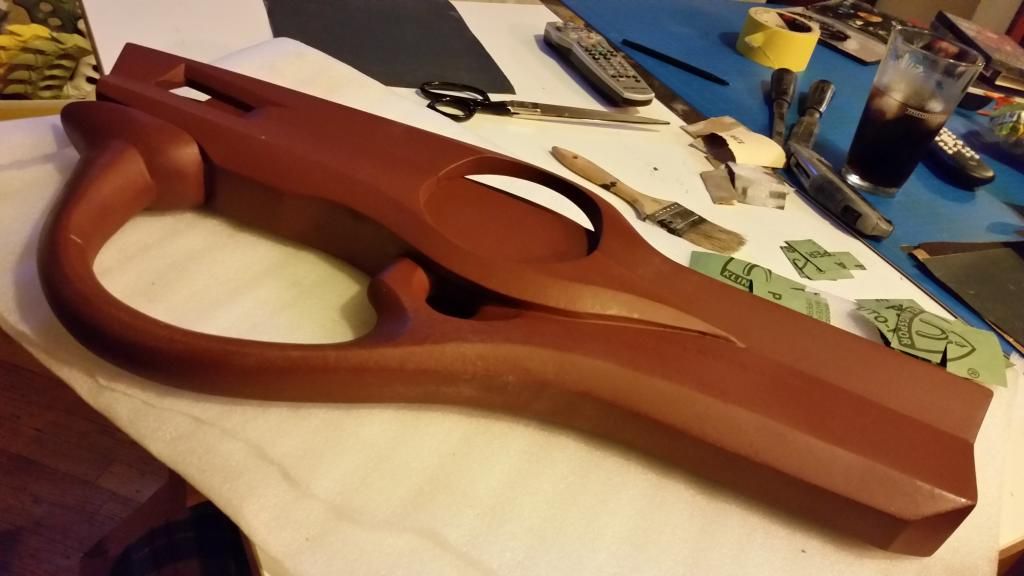
I assure you that there were many layers of primer after the fact. Zinsser 1-2-3 to be exact. This primer is an amazing tool. Boasts 1 pass coverage and could deliver. My particular use was quite complex and required extra dexterity however. The filling quotient of this particular product excels over the red oxide but feels a bit like plastic after fine sanding.


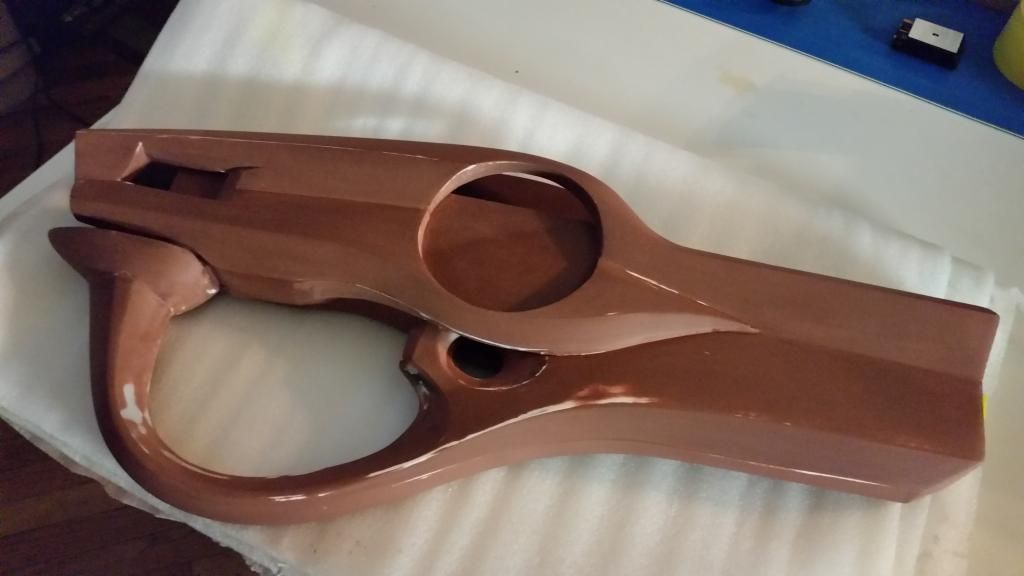
After many coats and sanding I arrived at a product that I would call 85% complete. It's all in the details.


This project is gaining momentum...
 
Hello, all! I'm back with another update on my build.


Carrying on with the sight, I first directed my efforts towards the widget at the front of the sight.


It appears to be a leveling device consisting of a clip that surrounds the "bridge" and a level mount. I decided to make the clip out of 16 gauge aluminum. After consulting my plans (via my light table) I derived some basic measurements and created a flat pattern.


Using a shear, I trimmed a blank and with a drill and a Dremel I notched the interior of the clip, tuned with a variety of files. I used a hand break and a series of pointed pliers to shape the clip, eventually truing and sizing with a hammer over an appropriate piece of steel stock. I apologize for the low rez picture, it is a tiny piece.


After fitting to the "bridge", I cut a small piece of 3/4" MDF (over-sized but available) and carved the appropriate shape from it. I glued the little assembly together and plugged the abnormalities with Apoxie Sculpt. Here it is during a test fit.


I added a small (1/16") reveal around the edge of the sight's viewing screen with Apoxie Sculpt as well. And added an additional screen detail after a few more coats of primer, sanding all the while.


Tiny screen...


Next component I focus on is the magazine. I have had a good idea as to the construction of this for a while. I was short on time and this aspect resulted in a fair amount of trial and error and as such, have almost no photos. Here is a spread of the trials on the day.


I basically cut two different sized rounds out of 1" MDF and shaped them with a couple different sanders. The inner component was cut to be 1/2" less in diameter than the outside. As there is a pitch in the magazine I sanded the inside component to a miter after gluing.


Once I had the miter adjusted, I shaped the outside into a smooth shallow dome as per my references. I then layed out the design for the outside of the magazine using a green charcoal pencil. I like to use different colored pencils when laying out fresh design so that if I need to slightly change an aspect, I can tell the difference between good lines and bad lines.


Using some old carving gouges I have had for about 25 yrs I meticulously etched the design in the outside of the magazine. Carving a round reveal line can be a pain. I used some 300 grit emery to smooth out the hiccups. Only a couple surface scratches to fill.


After the first coat of primer, the component really starts to shine.


I gave it and the main body a light comprehensive sand with 300 and 600 grits and mocked them up with the sight. It's starting to look right.


The magazine sticks out a little too far and there is a detail on the sight that slipped my initial sculpt, so I will be going over those fixes as well as a little design aspect that I incorporated in my next post.
 
Continuing on from the last post...


It is "funny" to me how little details can get overlooked. We get so engrossed in progression sometimes that we have to backtrack and re-finish work that could be marked off as done. This is all part of the curve.


Going back in to the weapons viewer in the game allowed me to see some errors in my work so far. There is a set of reveals on either side of the sight, a couple of "buttons" on the body, and what I can only determine as the place shells would be ejected from the body.


So, I carved them out. This kind of sucks as you are left with raw material next to finished surface. The MDF is fibrous and needs a bit of work to make look smooth. Doing this adjacent to already cleaned will invariably lead to chips and holidays and tears. And after some dedication you get a better, more accurate product. I am still not satisfied with the outcome so far, but am working towards that goal. Here are a couple low-res photos of the sight after some sanding and back to back coats of heavy fill primer.


Writing this post makes me want to get back to work on the project.


So I guess this is just a teaser. Oh, and I worked up the lower barrel with the help of my friend and co-worker. Enjoy!


OHMYGOODNESS. That's looking fantastic. So inspired to get back to work on my own one. I can't wait to see the update.

scream1.jpg
 
Last edited:
Okay, back on the scene...


As I was writing the last post, I started to scrutinize the sight. I had been toying with the idea of boring out the top of the "clip" on the fore end and inserting a cylindrical spirit level. (I even sourced a supplier for the tiny buggers.) Unfortunately the tolerances were a bit to tight for the amount of variable that would inherently come with this addition. Though it would have been pretty cool. This realization came upon me as I studied my own work on the computer screen before me. So scrap that idea and strike while the iron is hot.


Later that day I dismantled my hacksaw and used the blade to cut down the clip on the front of the sight. Since I made it out of aluminum, I had no other alternative. Using files and sandpaper I coaxed the round out of a square.


I also took some time between the photos shown in the last post and the work/photos in this post to tighten the edges of the details on the sight. The heavy fill primer is great but it tends to mute fine details. Top-coated with an ultra flat dark grey primer.


With the tight etching on the magazine looking so good, I turned my attention to the main body. The Mailwan Corporation is known for the many intricate plates that form the smooth contours they are known for. Turning back to the weapons viewer in-game and my own schematics I did the layout in pencil. Turning to my steel ruler and carbide scribe I started etching the details into the body.


Ideally this would be performed much earlier in the build process for reasons I have gone over in earlier posts. After a quick coat of primer it is apparent that the scribe etch just isn't going to cut it. I used sheets of 220 grit cut into a hundred pieces folded to get into the tiny grooves and open them up. So many junctions...


As the layout starts to come together more details get added to bring it all together.


Needless to say I go through this process several times painting, sanding, re-etching, painting, sanding.... over and over until I get something I am satisfied with.


After a heavy coat of red oxide I notched out the rectangular reveals just past the hip and etched the last couple details I still wanted to add. Here it is all mocked up with the current parts.


I made the upper barrel out of a few different aluminum profiles. The top is a 1x1" tube with one wall ripped out, the yoke is a piece of 3/4" angle, and the stem and backing plate are pieces of shear bar. All parts are 12 ga. I had a friend at work weld the assemblies together as my aluminum TIG skills aren't that tight. Here they are just prior to final weld. I will fill the gaps and holidays with Apoxie Sculpt prior to final paint.


With the barrel coming together and everything else but the trigger on lock, I decided it was a prime time to modify the fore grip... yeah. (I'm a glutton for punishment.) The way I sculpted the top of the fore-grip was a nice rounded shape. Kind of like the way you would observe the gun from a distance through dirty glasses in the rain. Apoxie Sculpt to the rescue! Fill, file and you get a nice jawbreaker effect from all the layers of primer.


Another fill procedure and nice even flat white primer coat to call this post a big deal. Have a good one, Folks. See you next time.
 
Holy cow, I haven't posted the final components I made. Sorry, Y'all.


Okay, so trigger. I needed to trouble shoot the trigger...


Since I have done so much finishing work on the grip and underbelly of the gun I was trying to figure out how exactly to make the trigger strong while not being too invasive. Believe it or not, it is a total B!TC# to sand inside corners and match-finish after this amount of work. So I am going to try to avoid that.


I had some miscellaneous plastic stock lying around, so I lined up the basic shape of the trigger and cut out two to get a thickness of .125". These were glued together with super glue and left to cure. The Maliwan trigger has a unique geometry and to address this I utilized my trusty Apoxie Sculpt. I mixed enough up and worked out the basic shape allowing for overage. Everything gets pared down to make it right.


I used my regular tricks to shape with files and made the small indentation on both sides with the same drill bit I used on the main body. It all got sanded down with 400-600 grit to soften the file marks.


Now that the shape was satisfactory how do I make the assembly strong? I first thought about just gluing it in place but raw plastic glued to several paint coats didn't sound so hot, especially when you consider that it is an integral part of the most handled are: the grip. Okay, next I thought about carving a groove or reveal into the existing grip to facilitate the gluing operation. It would definitely make the junction stronger and I would be gluing to raw wood instead of layer upon layer of paint. However, as I earlier stated, it would make for some cleanup finishing work. Not a happy solution...


;) Genius strikes.


I dug around in my bit collection and found a tiny 16ga bit and carefully drilled two "blind" holes in what would be the top side of the trigger. The diameter of the bit is nearly half the diameter of the majority of it and subsequent measures of care were taken to ensure no blowouts.


Into these two holes I glued a small finishing nail with the head cut off. The resulting component resembles a strange fuse.


With the nails cured, I drew a line on the main body to show where the trigger should end up. I only got one shot, so I had to make it perfect. I added a thin layer of glue to the mating face of the trigger and lightly tapped the spikes into the underside of the main body. (It was actually a little difficult as there is a lot of stuff going on under all that paint.) After the glue dried, I was left with a strong trigger.


Here is a mock up of all the components. There are still some mild derivations and sanding work to be done before this can get completely molded, but I feel good about the work thus far.
 
This thread is more than 8 years old.

Your message may be considered spam for the following reasons:

  1. This thread hasn't been active in some time. A new post in this thread might not contribute constructively to this discussion after so long.
If you wish to reply despite these issues, check the box below before replying.
Be aware that malicious compliance may result in more severe penalties.
Back
Top