imkewl
New Member
So I decided (a little too late) to start a thread on my own amazing spiderman 2 build. This is one of my first builds so any advice would be appreciated.
Sorry for the lack of pictures but my updates will be pic heavy.
The first thing I did was make the lenses. I wanted to try to make all this stuff "in hose" so to speak. I saw some other threads about making lenses and figured Id combine a few techniques and some things I've learned from other builds. I started by tracing a picture of the lenses to size off of my computer monitor. I cut them out and retraced them onto a piece of card stock. Then I cut those out and taped them on to a piece of acetate and set it between two blocks to keep the bend in it. Next I covered the two stencils in fiberglass. Once it dried i peeled it off the acetate and shaved of the card stock with a razor. I used this awesome stuff I had from another project called apoxie sculpt. Its basically a two part compound that can be sculpted like clay. Its workable for about two hours then hardens completely in 24 hours. It comes in 1 or 4lb tubs and is pretty cheap and useful. Once they hardened I sanded them down until I liked it and painted them.

I found this bag at target purely on luck and thought it would look good for the inner lens. I placed the stencil that I traced for the frame over it and cut it out. I got another piece of acetate and cut it out the same way. I used super glue gel and glued the acetate to the frame, then the fabric.

This was my final result and Im pretty pleased with it. I used a bit that was about 1/8" from my dremel to put a few holes in the back to glue in some neodymium magnets whenever they get here.
Next was the face shell. I had a plaster cast of my face laying around and decided to sculpt a face shell onto it. I used regular sculpting clay

Here's the sculpt with the lenses sitting on it
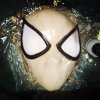
From here I would recommend using Smooth on rubber mold to get a mold of the face mask. I however decided to skip that and coat the clay in Smooth-cast 300. This ended up making a lot more work with trying to pry the face cast out of the polyurethane and clean out all of the clay. I also ended up with a really bumpy face shell.

But after a few hours of sanding starting from 80 working to 150 I got it to look pretty good. I drilled some holes in it and voila

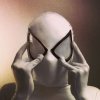
I tried on the face shell and lenses with a zentai suit and was pretty happy with the way it looked
Im still working on the webshooters but what Ive done so far is made a stencil with a piece of cardboard and covered it i apoxie scuplt to get a rough shape.

Luckily my godfather happens to be a master wood carver and has agreed to help me carve these into shape.
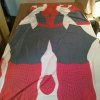
Thats all I have for now. Im currently waiting on my Orhadar print to get here from fabric on demand. There website was a little confusing but these guys have been extremely helpful on helping me figure out what options I need to print this right. Ill post updates once I get my fabric
Sorry for the lack of pictures but my updates will be pic heavy.
The first thing I did was make the lenses. I wanted to try to make all this stuff "in hose" so to speak. I saw some other threads about making lenses and figured Id combine a few techniques and some things I've learned from other builds. I started by tracing a picture of the lenses to size off of my computer monitor. I cut them out and retraced them onto a piece of card stock. Then I cut those out and taped them on to a piece of acetate and set it between two blocks to keep the bend in it. Next I covered the two stencils in fiberglass. Once it dried i peeled it off the acetate and shaved of the card stock with a razor. I used this awesome stuff I had from another project called apoxie sculpt. Its basically a two part compound that can be sculpted like clay. Its workable for about two hours then hardens completely in 24 hours. It comes in 1 or 4lb tubs and is pretty cheap and useful. Once they hardened I sanded them down until I liked it and painted them.

I found this bag at target purely on luck and thought it would look good for the inner lens. I placed the stencil that I traced for the frame over it and cut it out. I got another piece of acetate and cut it out the same way. I used super glue gel and glued the acetate to the frame, then the fabric.

This was my final result and Im pretty pleased with it. I used a bit that was about 1/8" from my dremel to put a few holes in the back to glue in some neodymium magnets whenever they get here.
Next was the face shell. I had a plaster cast of my face laying around and decided to sculpt a face shell onto it. I used regular sculpting clay

Here's the sculpt with the lenses sitting on it
From here I would recommend using Smooth on rubber mold to get a mold of the face mask. I however decided to skip that and coat the clay in Smooth-cast 300. This ended up making a lot more work with trying to pry the face cast out of the polyurethane and clean out all of the clay. I also ended up with a really bumpy face shell.

But after a few hours of sanding starting from 80 working to 150 I got it to look pretty good. I drilled some holes in it and voila

I tried on the face shell and lenses with a zentai suit and was pretty happy with the way it looked
Im still working on the webshooters but what Ive done so far is made a stencil with a piece of cardboard and covered it i apoxie scuplt to get a rough shape.

Luckily my godfather happens to be a master wood carver and has agreed to help me carve these into shape.
Thats all I have for now. Im currently waiting on my Orhadar print to get here from fabric on demand. There website was a little confusing but these guys have been extremely helpful on helping me figure out what options I need to print this right. Ill post updates once I get my fabric


