akootbascomb's Arkham Knight Scarecrow - 2015 Halloween Costume Contest Entry

Re: Scarecrow :: Arkham Knight edition

Gauntlet time! Oddly enough this was probably the most straight forward part of this whole thing. This was a first for me as I'd never used EDF foam before, but I have to say I'm hooked, considering on the ease, speed, and affordability of the medium. I drafted some blueprints in illustrator and started with the basic shape. My new scroll saw made getting the exact angles a hell of a lot easier. Details like the vents and screws were cut in and heat-gunned which saved me a lot of time compared to having to cut the shapes out individually. I have to thank WMarmory and Evil Ted for their great tutorials in that regard. Then layer after layer until I was satisfied. The tubes I hit with the heat gun and put in place while they were still malleable. When they cooled, they held their new shapes perfectly. I sprayed the tubes separately and glued them in place after everything had been painted for my own ease.

IMG_3022.jpgIMG_3024.jpgIMG_3027.jpgIMG_3030.jpgIMG_3043.jpg

A few coats of plastidip later, I threw some automotive paint on and started weathering with thin coats of acrylic and ink. The years of painting Games Workshop miniatures paid off greatly I must say...Then last but not least, wired up some LEDs in the caps of the vials (which were filled with a kid's borax slime recipe by the way) and this bit was done. I didn't have time to add a few wires that just out at the end and hold the whole thing in place on my arm, so I had a bit of an issue with it sliding down my arm throughout the day, but I plan on adding them later.

Syringes are coming up next. In contrast, they were a nightmare.

IMG_3052.jpgIMG_3112.jpgIMG_3108.jpgIMG_3145.jpgIMG_3158.jpg
 
Re: Scarecrow :: Arkham Knight edition

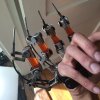
These...little...expletives...while the blueprints were relatively straight forward, assembling them took the larger part of 9 hours or more. All of it is wonderflex built around some extra chemical vials I had left over that I dremeled to the appropriate size. I stupidly tried using the built in adhesive at first, heating each piece and sticking them together. But when it came time to complete the assembly I realized that a heat gun is not appropriate when its collumn of heat is as large as the item I'm trying to put together. The ungodly asymmetrical test run proved that very quickly as the whole thing deformed in front of me. So I just opted for super glue and contact cement instead. As with the last scarecrow gauntlet the needles are just filed down ink reservoirs from cheap pens. All in all though I think it turned out quite sturdy and while I failed to account for the needles splaying out with the curve of my hand, I kind of like the giant claw look I got.


IMG_3081.jpgIMG_3101.jpgIMG_3123.jpgIMG_3105.jpgIMG_3125.jpgIMG_3147.jpgIMG_3161.jpgIMG_3168.jpgIMG_3171.jpg

All that was left was the canisters at this point. I drilled an opening in the bottom so I could glue in some images of bubbling liquid I had printed out (just some spray adhesive) after which I attached a cap of mdf and wonderflex. Liquitex and acrylic weathering was applied to the tubes and the appropriate leves of rot and grime were added to the canisters. The whole batch, tubes and all, was self contained and velcroed, so that I could easily remove it and not have to go crazy trying to deal with tubes. Most of them just wrap behind my neck!

IMG_3058.jpgIMG_3063.jpgIMG_3150.jpgIMG_3136.jpgIMG_3059.jpgIMG_3151.jpgIMG_3199.jpg

And that was that. 3 months and many sleepless nights later I finished this. Of course, there are some things that I plan on adding later, but for now, I was pleased with what I had, and frankly there was no time left to work on this so it was done for now whether I liked it or not. I omitted his leg brace for this reason, as well as the fact that I have a long history of problems with my left knee anyways, so the thought of using a home made brace, real or not all weekend, was less than appealing. Not worth yet more surgery! Finished pics coming next.

IMG_3200.jpgIMG_3194.jpgIMG_3192.jpg
 
This thread is more than 8 years old.

Your message may be considered spam for the following reasons:

  1. This thread hasn't been active in some time. A new post in this thread might not contribute constructively to this discussion after so long.
If you wish to reply despite these issues, check the box below before replying.
Be aware that malicious compliance may result in more severe penalties.
Back
Top