5' Falcon base hull building

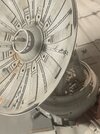
So thanks to t2sides I've updated my 3D model and printed new brick. It's too thin, but turned out pretty well. I will probably use standard resin for this rather than the flexible stuff. But for an experiment, I'm reasonably happy.

If you want to have a go at printing your own, the files are here -> H&R HO Brick 101

1711150868750.png


1711150883883.png
 
Started putting together the plan for the main RADAR dish. I have the 6" plastistruct part, the Saturn V bits, and a few others. Although I'm likely going to need to cast the SeaLab parts as I'm not really interested in buying 10 more kits (I doubt I could find that many anyway).

But my initial question is the rings that are under the sealab parts. Do we know if those rings are scribed into the pastistruct dish? or are those rings the joins of cut 0.05mm plastic? Also I'm not sure why those lines do not go under the UBoat rails.

thanks

1711733746772.png
 
Started putting together the plan for the main RADAR dish. I have the 6" plastistruct part, the Saturn V bits, and a few others. Although I'm likely going to need to cast the SeaLab parts as I'm not really interested in buying 10 more kits (I doubt I could find that many anyway).

But my initial question is the rings that are under the sealab parts. Do we know if those rings are scribed into the pastistruct dish? or are those rings the joins of cut 0.05mm plastic? Also I'm not sure why those lines do not go under the UBoat rails.

thanks

View attachment 1804733
I think they are scribed in rather than joints of thin plastic layers. Some Falcon model kits have this wrong I guess and have them as physical steps.
When I modeled my dish I also realized most (all?) don’t go full circle, at some points there are jumps in the radii.
 
A further dish question that sort of arose, I've noticed a couple of folks are using what almost look like vacuformed main dishes, eagle1 for instance looks to be using a vacuformed dish(?), and I've seen another that looks like it's done completely from clear acrylic?

I was under the impression that ILM used Plastistruct VHD600 with two added strips on the inside edge of the lip. This is what I've come up with, but based on what I'm seeing others do, is this the correct dish shape?

thanks

1711747946957.png
 
Last edited:
I thought it was too, but the raised portion is only about half the width of the thickness of the dish, I don't see how you'd do that if you routed it down. So I added strips to the inside edge of the lip.

I could be wrong though, it's really hard to tell in some of the images. Which is why I'm asking :)

1711749086340.png


1711749201947.png
 
Yeah, that could be correct. I don't think I have a tool that can do that though. Also it seems like an odd thing for ILM to do given how quickly they were trying to build this thing. Taking my approach seems like it would be so much faster. Still, it could be routed, I can't really tell, and I don't have a tool that could do that, unless you can do that with a Dremel router table attachment.
 
Yeah, that could be correct. I don't think I have a tool that can do that though. Also it seems like an odd thing for ILM to do given how quickly they were trying to build this thing. Taking my approach seems like it would be so much faster. Still, it could be routed, I can't really tell, and I don't have a tool that could do that, unless you can do that with a Dremel router table attachment.
they had the cockpit and the dish already. Then they had to hurry with the rest of the Falcon - my guess
 
Here is an stl of my dish. I might have the scaling not 100% correct yet, but I’m pretty convinced about the ratio depth vs. radius. the stl also has the support, hope that is not distracting.
I’m only on mobile for the next few days, so I can’t check myself, but if you want to have a look if the ratio radius vs depth is that of the plastruct part or rather (depth of plastruct part)+x please do! Maybe it helps, maybe not.
 
I can assure you, that ILM routed out the VHD – 600 plastic dome to get the ‘lip’, then they filed down the lip on both sides, I’ve gotten that info directly from an ILM source.

The lines that you talk about are pencil lined in, also quoted directly from the source.

Here’s a few pics of mine if it helps, and one of the test domes I routed, basically done on a small table saw, blade set to specific height, with a ‘fence’ for the offset, and rotate the dome around the blade against the fence.

Everyone should build to their own way, but this is how the original was done.

And don’t forget to ‘flip’ the dish, all the public on display pics dish is 180 degrees out.
 

Attachments

  • IMG_0082.jpeg
    IMG_0082.jpeg
    1.5 MB · Views: 63
  • IMG_0084.jpeg
    IMG_0084.jpeg
    1.4 MB · Views: 69
  • IMG_0085.jpeg
    IMG_0085.jpeg
    1.4 MB · Views: 59
  • IMG_0086.jpeg
    IMG_0086.jpeg
    1.6 MB · Views: 51
  • IMG_0087.jpeg
    IMG_0087.jpeg
    1.7 MB · Views: 59
You sure come up with some detailed questions and fine points to consider.

I made a carefully layout mock-up of kit parts: U-boat rails and Sea Lab parts before ever scribing the ring spacing on the radar dish concave surface. Did not see the rim routing until later when one of this web site folks brought it to my attention. Scribing was the most difficult part and only accomplished using rather medieval methods.

The overall affect of the completed radar dish design is beautiful. Realistic by any standard. Another one of the most absolutely well thought details of the Falcon.
 
I can assure you, that ILM routed out the VHD – 600 plastic dome to get the ‘lip’, then they filed down the lip on both sides, I’ve gotten that info directly from an ILM source.

The lines that you talk about are pencil lined in, also quoted directly from the source.

Here’s a few pics of mine if it helps, and one of the test domes I routed, basically done on a small table saw, blade set to specific height, with a ‘fence’ for the offset, and rotate the dome around the blade against the fence.

Everyone should build to their own way, but this is how the original was done.

And don’t forget to ‘flip’ the dish, all the public on display pics dish is 180 degrees out.
That’s great info and description Sean, thank you!
 
The lines that you talk about are pencil lined in, also quoted directly from the source.
You can see the gaps where the pencil lines don't finish where the pencil lead hits a raised detail. In a production setting I imagine someone just used a straightforward draughtsman's compass to get it done and out of the way.
 
I can assure you, that ILM routed out the VHD – 600 plastic dome to get the ‘lip’, then they filed down the lip on both sides, I’ve gotten that info directly from an ILM source.

The lines that you talk about are pencil lined in, also quoted directly from the source.

Here’s a few pics of mine if it helps, and one of the test domes I routed, basically done on a small table saw, blade set to specific height, with a ‘fence’ for the offset, and rotate the dome around the blade against the fence.

Everyone should build to their own way, but this is how the original was done.

And don’t forget to ‘flip’ the dish, all the public on display pics dish is 180 degrees out.

Hi. Thanks! That helps. I'll have to go and get a router table for my Dremel.

Those pencil lines make sense, but the confusion is coming from the kits I see (like the Bandai one) have them as engraved lines and holes.
 

Your message may be considered spam for the following reasons:

If you wish to reply despite these issues, check the box below before replying.
Be aware that malicious compliance may result in more severe penalties.
Back
Top