3d Printed Doctor Who Props by Doctor Octoroc (building & finishing thread)

Status
Not open for further replies.
Hmmm...having second thoughts about how I want to finish the 8th alternate Sonic now that I'm looking at the parts...I was going to give all of the "metal" parts a base coat of flat black and then once that was good and dry go over it with antique gold Rub N' Buff...but given the intricacies of some of these parts, I'm not sure now. Thoughts?
 
Last edited:
My sonic arrived today! It's a bit smaller than I thought, but is so well designed. It is also thicker than i expected.

Thanks Doctor Octoroc for making such an awesome prop!
Yeah, when compared to the CO 9th sonic, it seems super tiny, but based on my reference material, it's to scale with the actual prop.

Yup, Alt 8th came in today! The detail is INSANE. I love it.
Thanks! That one was a lot of fun to draft! Glad you're satisfied with the detail level, I wasn't sure what some people expected from these, but so far the reactions have been good.

Hmmm...having second thoughts about how I want to finish the 8th alternate Sonic now that I'm looking at the parts...I was going to give all of the "metal" parts a base coat of flat black and then once that was good and dry go over it with antique gold Rub N' Buff...but given the intricacies of some of these parts, I'm not sure now. Thoughts?

I used dry brushing techniques, but Rub n Buff with q tips or another small, long tool might work nicely. It's got such a dirty look to it that it's really hard to do totally wrong. If you look at the original, it almost looks like brush strokes over the metal. A mix of the two might work - then add the patina effect to blend things into one.
 
I used dry brushing techniques, but Rub n Buff with q tips or another small, long tool might work nicely. It's got such a dirty look to it that it's really hard to do totally wrong. If you look at the original, it almost looks like brush strokes over the metal. A mix of the two might work - then add the patina effect to blend things into one.

How did you get the patina effect? I have next to no experience with that technique, so this will be yet another first for me...(and seeing how I DETEST the way it was done on the CO River Song sonic, whatever I learn here can be applied when I eventually redo that one...)
 
How did you get the patina effect? I have next to no experience with that technique, so this will be yet another first for me...(and seeing how I DETEST the way it was done on the CO River Song sonic, whatever I learn here can be applied when I eventually redo that one...)

A great way I've seen others do it is to mix light blue medium green for the right shade, water it down to a water color consistency, then dip the brush into the mixture and sort of let it drip into crevices. It will naturally follow the path of negative details along edges and will be watery enough to flow around (not too watery!). I found a great tutorial on YouTube that looks very effective.

How to Paint Oxidized Metal Effect - YouTube

At 1:40 is where he explains the oxidation effect. He wets the brush instead of mixing the water into the paint directly, but the effect is the same.

For my alternate 8th sonic, I used just the paint and just applied it lightly, almost like dry brushing, but rubbed the brush into the crevices I wanted to have the effect. I added slightly thicker amounts randomly along each path to vary the amount then once I used up the amount of paint on the brush, rubed back and forth lightly to blend it all together.
 
Got my order yesterday too! I can't wait to get this alt 8th finished! It really is a beautiful, well designed model, Doc! Being able to actually handle the prop, I'm surprised how much this design is growing on me. This is also the first time I've handled a 3d printed model...wow. The detail IS insane. What a cool technology!

I gotta get back to figuring out which paints I wanna buy! BTW, has anyone had any experience with automotive filler primer on this type of plastic? I want to smooth out the texture without losing detail...

Thanks, Doctor Octoroc! Great run!
 
I have a question, my initial idea was to use the guts of an 11th toy that the LED had burnt out on to put inside the Alt 8th simply for the fact it'd be a lot simpler to just solder wires together & have the battery compartment already in-tact. Now I see the body of the Alt 8th is a tad small for this to work. I have zero knowledge as to what the easiest battery housing would be or what size I need or anything like that. Could one of you gentelmen give a rough idea? Thanks in advance!
 
I have a question, my initial idea was to use the guts of an 11th toy that the LED had burnt out on to put inside the Alt 8th simply for the fact it'd be a lot simpler to just solder wires together & have the battery compartment already in-tact. Now I see the body of the Alt 8th is a tad small for this to work. I have zero knowledge as to what the easiest battery housing would be or what size I need or anything like that. Could one of you gentelmen give a rough idea? Thanks in advance!

Supposedly, the guts of the trans-temporal sonic fit inside - but don't quote me on that. Another member and I were discussing the possibility of designing it specifically to house the T-T sonic guts but never got any further than the concept stage. It might be worth breaking out the ruler if anyone has that CO version on hand!

Or maybe the lower half of the housing for the 9th/10th extendable sonics would fit inside and since that's already designed to house an A27 12V, all you would need is the battery contacts. If enough members wanted that custom housing for an A27 12V battery, I could upload a model of that compartment to Shapeways for you to download and all you would need is the contacts for each end. I have the part number for Digikey but you would have to order at least 10 of each contact but you may be able to find what you need in an old scrap piece of electronics that uses AAA batteries or smaller?
 
I have the trans-temporal. It's almost the same size as the 11th so just a touch too big.
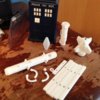
I was hoping to fit the Personalize-your-sonic core into the Alt 8th, so this is a bit disappointing. Oh well! Guess I need to learn how to solder...

In fact, if there are any LA-based prop-makers who might be interested in helping, hit me up via PM. I'm a complete beginner when it comes to pretty much every aspect of this kit.

Here's mine (TARDIS USB hub not included):
tumblr_msqckodokZ1qdvhmoo1_500.jpg
 
I was hoping to fit the Personalize-your-sonic core into the Alt 8th, so this is a bit disappointing. Oh well! Guess I need to learn how to solder...

In fact, if there are any LA-based prop-makers who might be interested in helping, hit me up via PM. I'm a complete beginner when it comes to pretty much every aspect of this kit.

Here's mine (TARDIS USB hub not included):
View attachment 228698

As far as painting it goes it shouldn't be too bad. Soldering does take a bit of finesse.. I just am a total rookie on building battery packs from scratch.
 
2r5yRxz.jpg


I've been having issues with mine. I tried to wire up the CO electronics to this, and that just didn't work. Then i found out that the tactile switch is the wrong polarity. Push is Off, instead of on =P gonna go hunt for one. Other than that, great! Love it! and I can't wait to paint it and make it look pretty!

Edit: I have figured out my switch issue. Both of my switches are "NC" tactile switches. Connect everything, and illumination immediately! So! I need to find two NO tactile switches.
 
Last edited:
http://i.imgur.com/2r5yRxz.jpg

I've been having issues with mine. I tried to wire up the CO electronics to this, and that just didn't work. Then i found out that the tactile switch is the wrong polarity. Push is Off, instead of on =P gonna go hunt for one. Other than that, great! Love it! and I can't wait to paint it and make it look pretty!

Edit: I have figured out my switch issue. Both of my switches are "NC" tactile switches. Connect everything, and illumination immediately! So! I need to find two NO tactile switches.

I haven't had that problem, I wire them on prongs diagonally from each other and that gives the correct function.
 
I haven't had that problem, I wire them on prongs diagonally from each other and that gives the correct function.

I see! Well, i will definitely give that a shot!

Edit: I may need to see a picture of the wiring scheme you use, because mine is still push for off.
 
Last edited:
Anywho! So, i've given up on the electronics for now, but that may change in the future!

For the moment, this is what I have:

mVA2ZYl.jpg


the Tennant screwdriver is on bottom, and almost fully assembled! As far as paint is concerned, I decided to use Ceramcoat and Testors.

I've got a mix of Antique White, Gunmetal, and Drizzle Grey. Four or Five good drops of Drizzle Gray on a quarter or larger sized dollop of Antique White. and a drop of Gunmetal. That's what I used for the base color for the body. whenever I get back to it, i'll put the crackle layer on, and then follow with a mix of Antique White and the Gray. I put the body on an acrylic rod and just spun it against a sponge brush. It came out pretty good if I do say so myself!

The silver is a basecoat of just the Drizzle Gray, followed by two coats of the Testors Aluminum model paint. if it looks good, and it pleases the masses, I might write up and photo the Aztec build!
 
Welp, I've tried everything. They're just not working right for me. The connection is always on, and pushing the button turns off the LED.

Sorry to hear the switch is giving you grief. I wonder if any other members have had that problem with theirs? Can you post photo of your wiring scheme, I'm no expert but if I saw how it was wired, I might be able to pinpoint the problem.

For the record, here's the exact part I ordered:

https://www.allelectronics.com/index.php?page=item&id=PB-126&extra=a%3A2%3A{i%3A0%3Bs%3A40%3A%2203823345592a403b2f4a37a59384e7ab28f02be1%22%3Bi%3A1%3BN%3B}

It doesn't seem to be inverted or anything other than a regular push button. Were you testing it on a breadboard or did you wire it directly? I know wthe first time I tested the circuit for my sonic on the breadboard, I had the switch in the wrong place and the circuit was completed by the positioning of the button on the board.

The sonic looks great so far! Have you done any sanding or smoothing of any kid or did you paint directly?
 
Re: 3d Printed Doctor Who Props by Doctor Octoroc (building & finishing thread)

The sonic looks great so far! Have you done any sanding or smoothing of any kid or did you paint directly?

I just painted it directly. I'm no good at sanding, and you'd lose the detail on this lovely model if you did such!

- - - Updated - - -

U2tJzxW.jpg


Also, this is the section I mentioned in PM.

For all the others with the 9th/10th kits, and I assume any kit that has a battery core, be careful with twisting, because you may snap the wall of the battery core, like I did!
 
Just a reminder that this is not a sales/interest thread. If you have sales related questions, please refer to the Junkyard forum. This thread is for help with building, not buying or showing interest in a run. Thanks.
 
Is anyone going to try the crazy glue and acetone mixture to "seal" their sonic before painting? I'd be curious to see the difference of how painting one that is sealed looks vs just painting it as is. Do you think they would look pretty much the same painted or would they likely look different painted?
 
Status
Not open for further replies.
Back
Top