32" Falcon Progress/ more new piccys page 23

Re: 32" Falcon Progress/update newer pics page 10

Thanks guys, just to answer Lee's question..I dunno yet exactly how I'm gonna display it, or where come to that...Not really an answer that is it ?:lol

I've got this metal tube that was part of a shower rail so I was thinking of useing that, so I can run the wire for the lights up inside. Then some sorta custom wooden base with room for the transformer inside. Might get a buddy to run his router around it to funk it up a bit...woodwork ain't my thing

It's all just wizzing round my head at the mo tho...:wacko
 
Re: 32" Falcon Progress/update newer pics page 10

Back off Cowen, i was going to ask the same Q :lol seriously, im eagr as hell to see this completed, Phil is without doubt, another on my huge list of Hero builders......clinical work!

lee
 
Re: 32" Falcon Progress/update newer pics page 10

Hey Phil, that looks incredible, your jaw boxes fit just perfectly, I remember I had some difficulties with that !

Looks like you have scratched a part while you got the right kit :

topjawsml3.jpg


Those bits are from the flakvierling 38 and are cut to shape !

I hope it helps,

Julien
 
Re: 32" Falcon Progress/update newer pics page 10

Guys you can't have it, it's mine I tell you.. all mine...:lol

That's brilliant !, Thanks Julien, I'll swap that bit...I thought I'd seen it somewhere before, but I think I had another case of kit part blindness:wacko

Might do a bit today, I was thinking of detailing the tops of the corridors, I think I'm just putting off doing the plating tho...need to start that really, but it's a bit daunting....

I'm gonna be in a padded cell after this I think..:lol

Phil
 
Re: 32" Falcon Progress/update newer pics page 10

OK, how about, weekend visits, supervised of course :lol Phil im so with you on the plating, doing some now, had to come away for a beer, and man its rare i sit and have a beer :lol

lee
 
Re: 32" Falcon Progress/update newer pics page 10

Ok, so more piccys..I realised after I got some more reference and parts, that the pits I'd made were too small to fit the parts into. So I marked out a larger hole and chopped it out..

newpitsml.jpg

pit2sml.jpg


This is it almost finished, just the new walls to sand down and tidy up

pitdetail1sml.jpg


pit3smlalldetail.jpg

I think it's about right now, I added a couple of other bits just to fill space, but it'll be hidden under the plating, so there was no need really. I scratched the tam 232 bit 'cos my attempt to do a bit of casting a few weeks back went wrong. This was one of the bits I was trying to cast. It was quicker to do that than wait for the darn rubber to set etc, no patience..anyway, when it's under paint who's gonna know.:lol
This is the other side, had to make this hole bigger too,
pit5sml.jpg


And onto the dreaded plating...:wacko
pitpaintplatingsml.jpg

I shot some primer into the holes before I started the plating, I thought it would be a bit difficult to get into there with the paint after the plates were on.

That's it for now.

Cheers

Phil
 
Last edited:
Re: 32" Falcon Progress/ even newer pics page 11

Ooohhh, very brave of you to fix the pit dude, but man it turned out awesome!. She's looking fantastic Phil, plating is amazing!. Kit part detail nice and clean build. I think anyone who pulls off a Scratched Falcon can achieve anything and immediately earns a right of passage!. Not too far to go now eh Phil lol?.
Stu
 
Re: 32" Falcon Progress/ even newer pics page 11

stuff like that never ceases to amaze me. And people say R2 building is challenging... kudos to you!
 
Re: 32" Falcon Progress/ even newer pics page 11

Its kinda clever of you to do the hull plating as you go... I imagine it helps prevent plating burnout...

Looks fantastic BTW...

Jedi Dade
 
Re: 32" Falcon Progress/ even newer pics page 11

That's looking great Phil !
Did you scratchbuilt the sdkfz 232 chassis in the access pit ? It's awesome !
 
Re: 32" Falcon Progress/ even newer pics page 11

Excellent build. This is going to help me get mine finally started. Thanks for the insight I really like how youve attacked this build. Thanks heaps for shareing this.
 
Re: 32" Falcon Progress/ even newer pics page 11

This is an amzing build, you're doing the Falcon more than justice!
I notice you're in Leeds, i live in East Yorkshire, any chance i'd be able to see the finished model in person?

Rich
 
Re: 32" Falcon Progress/ even newer pics page 11

Any progress on your Falcon Phil? Its daunting the amount of work that goes into a scratch build. Yours looks awsome. :thumbsup
 
Re: 32" Falcon Progress/ even newer pics page 11

Just caught back up on this, wow this makes building fun watching this come to life!!:thumbsup
 
Re: 32" Falcon Progress/ even newer pics page 11

Any progress on your Falcon Phil? Its daunting the amount of work that goes into a scratch build. Yours looks awsome. :thumbsup

There's been a little bit more prog.. the plating on the pit area you saw recently is done and I've added the little chips to that, plated just behind the cockpit tube, and started the opposite rear pit plating....looooong way to go yet..

I'll post some more pics when I get that bit finished.

Phil
 
Re: 32" Falcon Progress/ even more newer pics page 12

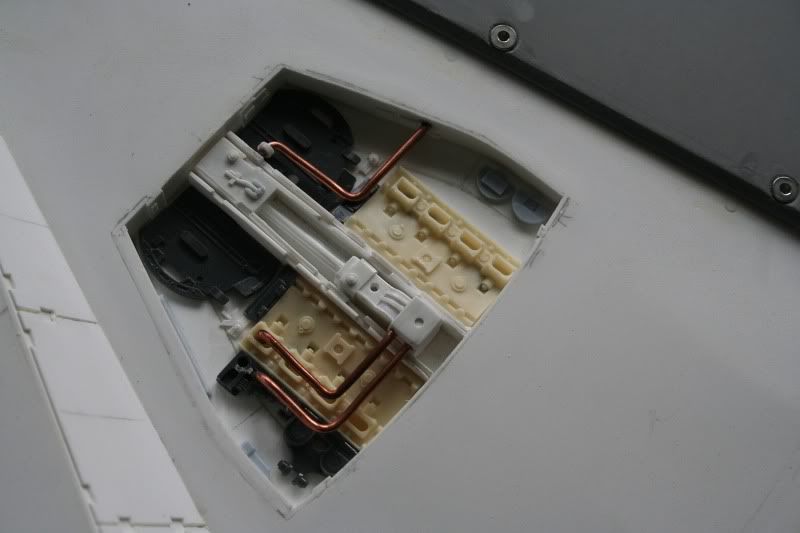
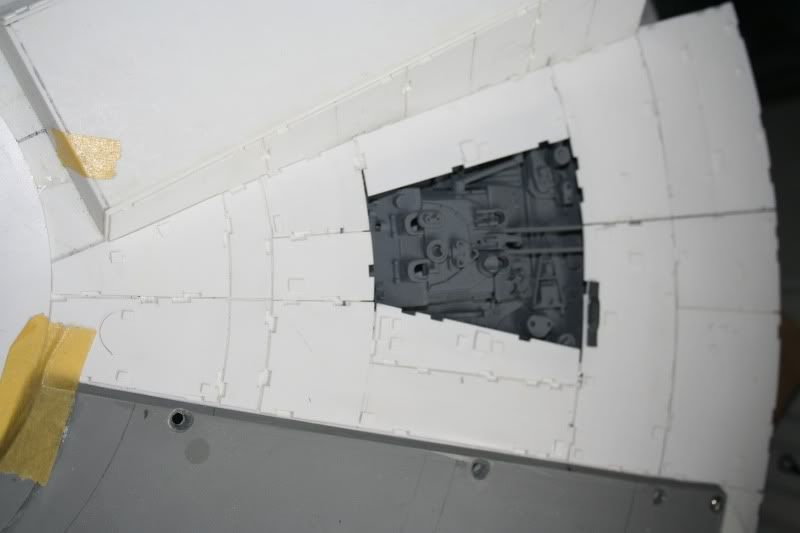
More pics..Completed pit area with chips added

Blockpitlatestsml.jpg


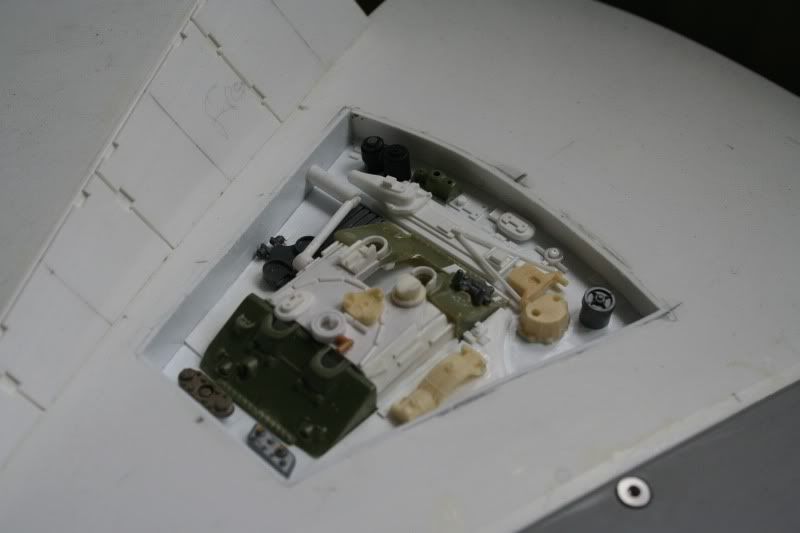
And the other side, a bit out of focus, but you get the idea..
Shermpitlatsestsml.jpg


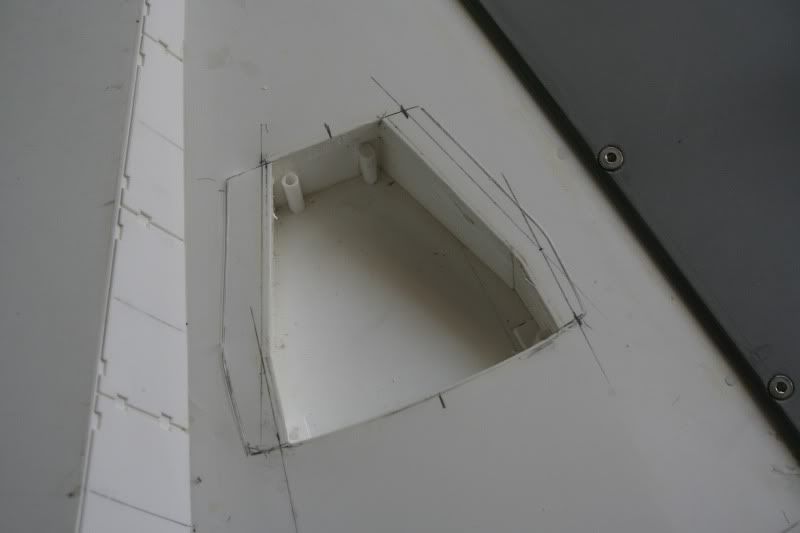
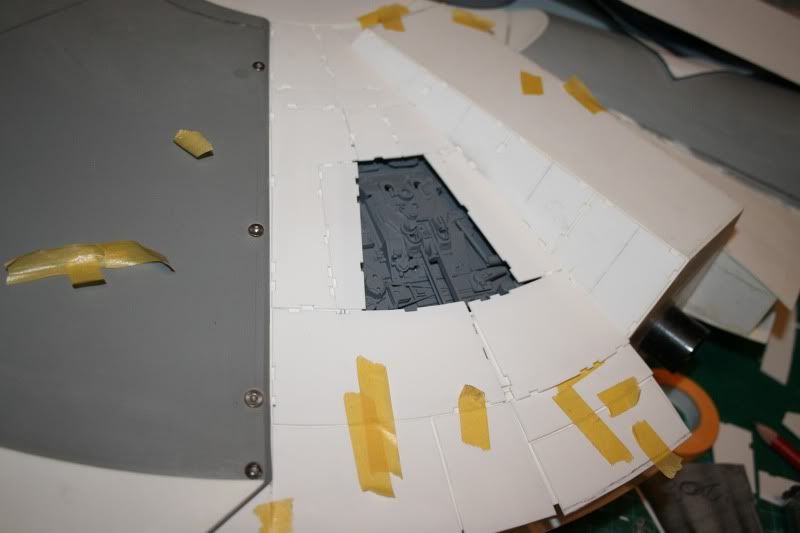
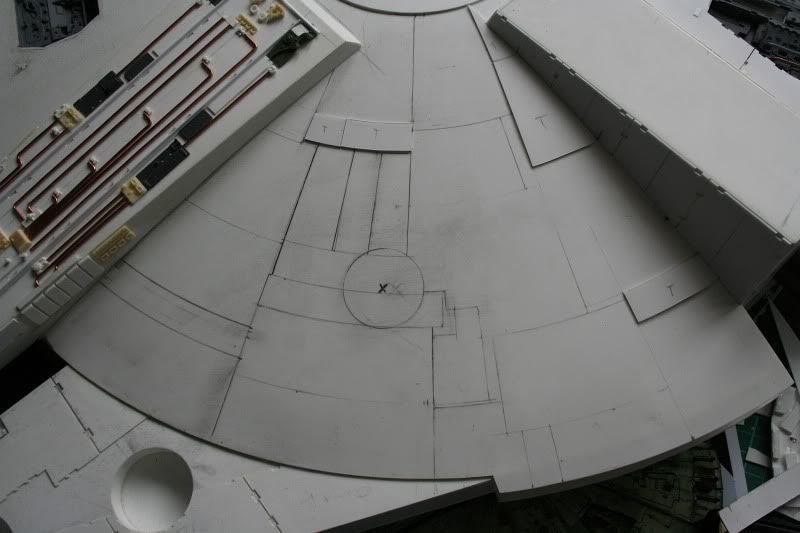
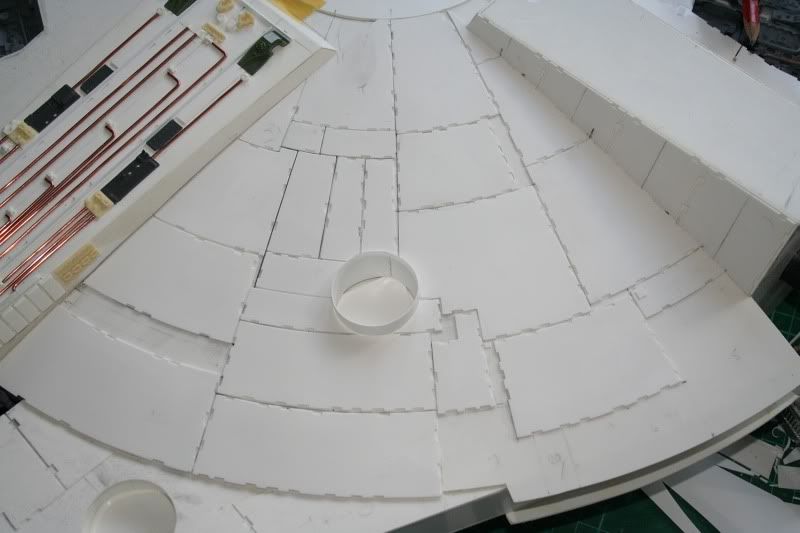
This is the radar area with penciled marks to test where the plates should be, lots of measureing pics and stuff to figure this out. A bit of messing about was needed to get it to work out though, because most pictures are taken from angles that throw out the perspective.
Dishsectmarkssmall.jpg


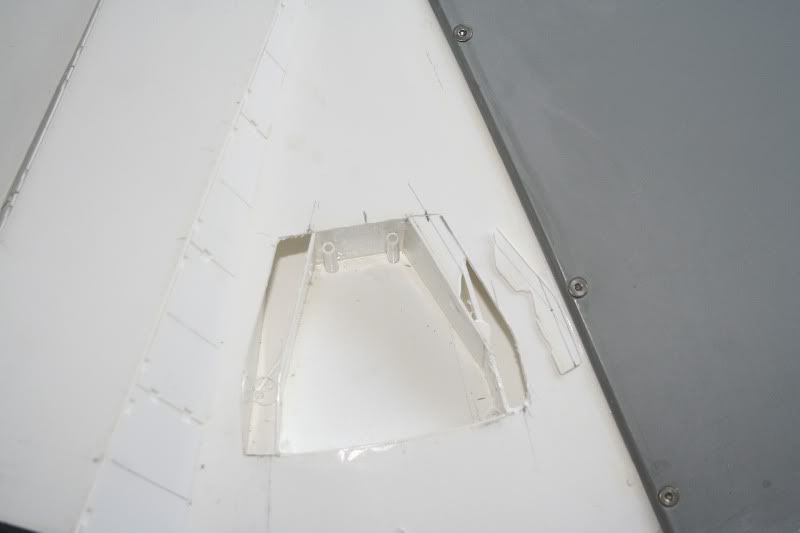
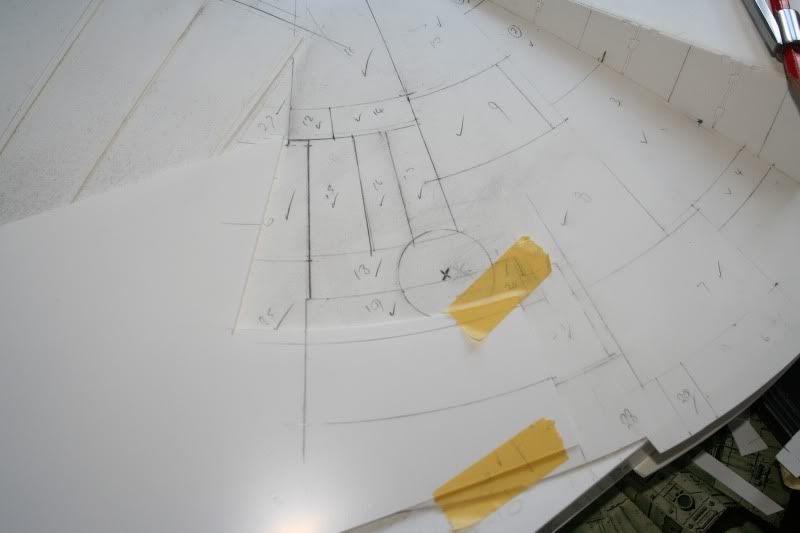
This is how I tranfered the markings to the styrene plates..I hope you can see what I've done. I placed the straight edge of the styrene against a straight pencil line and put the curves in with the large compass.
DishSectmarkstransfersml.jpg

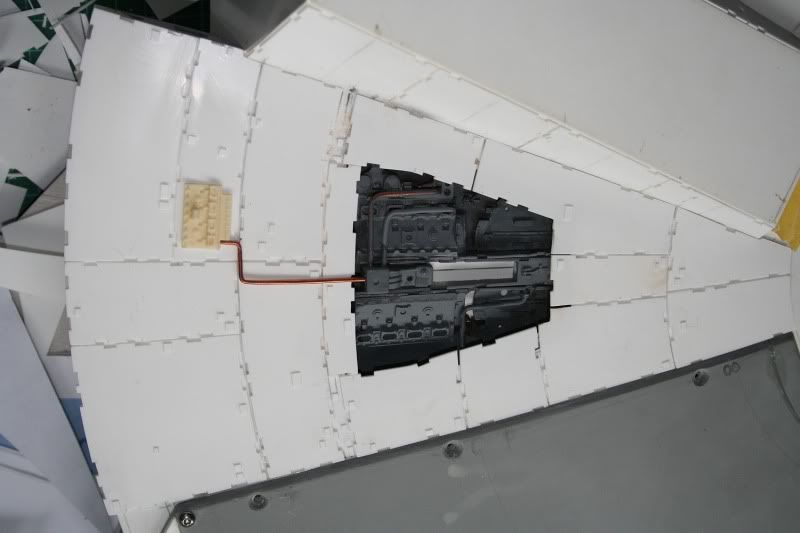
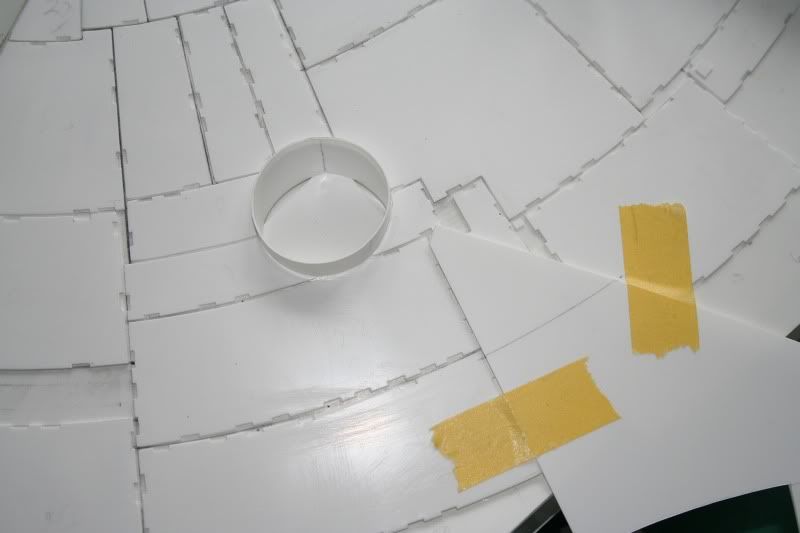
Bit more of the same... as the plating was added, I butted up against that to add the next plate.
Dishsectalmosttransfersml.jpg

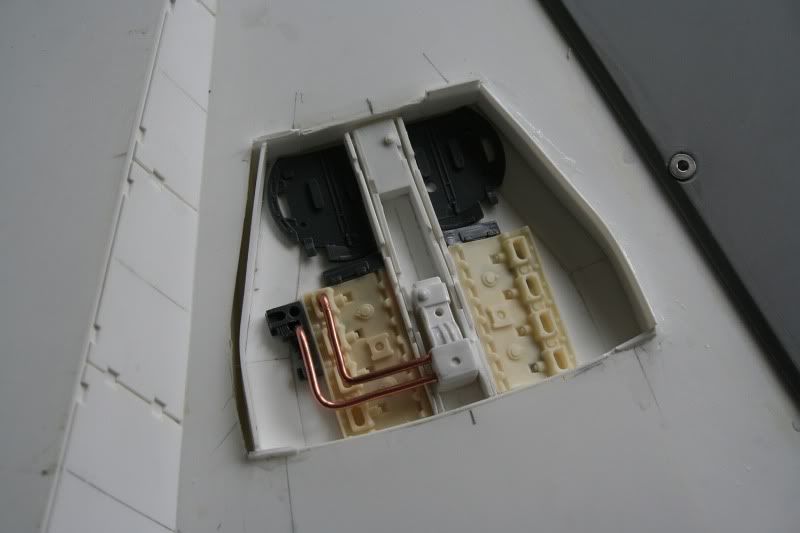
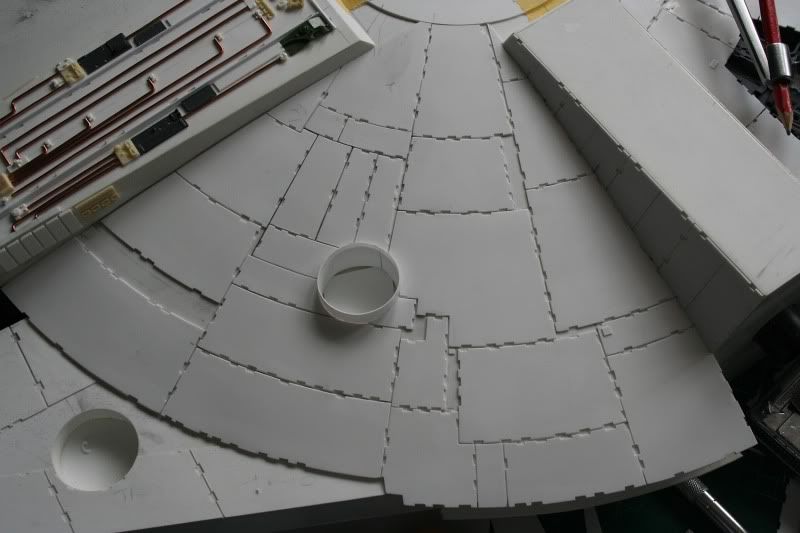
The next pics are the progress as the plates were added.
Dishsectpartialplatesml.jpg

Dishsectplatealmostdonesml.jpg

Dishsectcompletesml.jpg

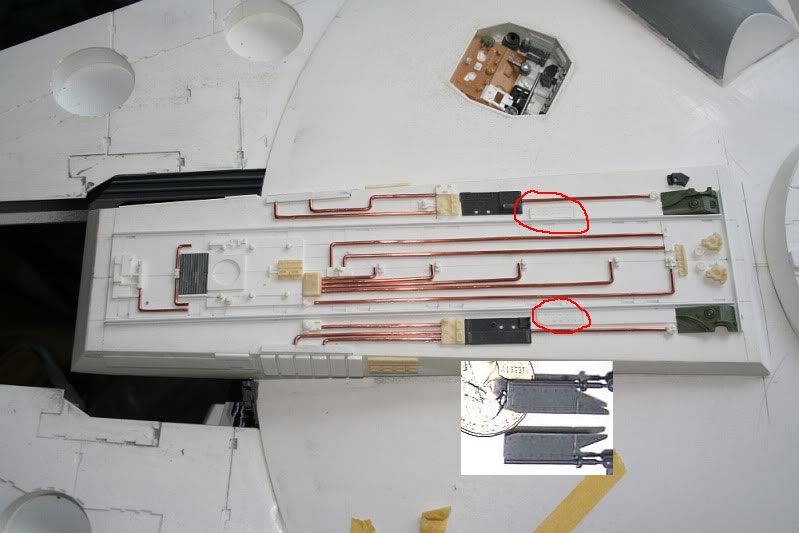
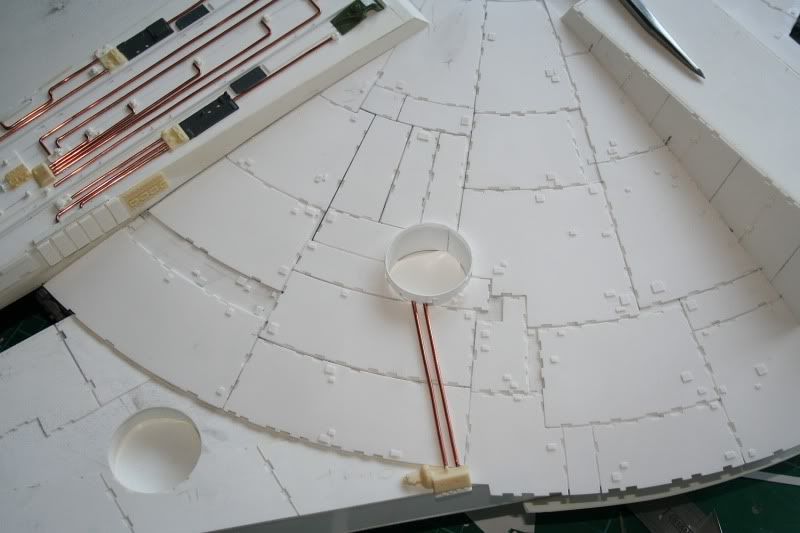
And finally to where I'm am now with chips stuck on and a bit of piping

Dishsectcompletechipssml.jpg


Until I looked closely at pics I thought the plates lined up in a sorta organised way, but they are stepped in places and have small gaps where there's no plating. I'm sure ILM did this to make copying this thing more difficult..

Anyway let me know what you think

Cheers

Phil
 
Last edited:
This thread is more than 6 years old.

Your message may be considered spam for the following reasons:

  1. This thread hasn't been active in some time. A new post in this thread might not contribute constructively to this discussion after so long.
If you wish to reply despite these issues, check the box below before replying.
Be aware that malicious compliance may result in more severe penalties.
Back
Top