1:1 Landspeeder Project - Completed!

Re: 1:1 Landspeeder Project - NEW Pics & Vid on Page 31!!!

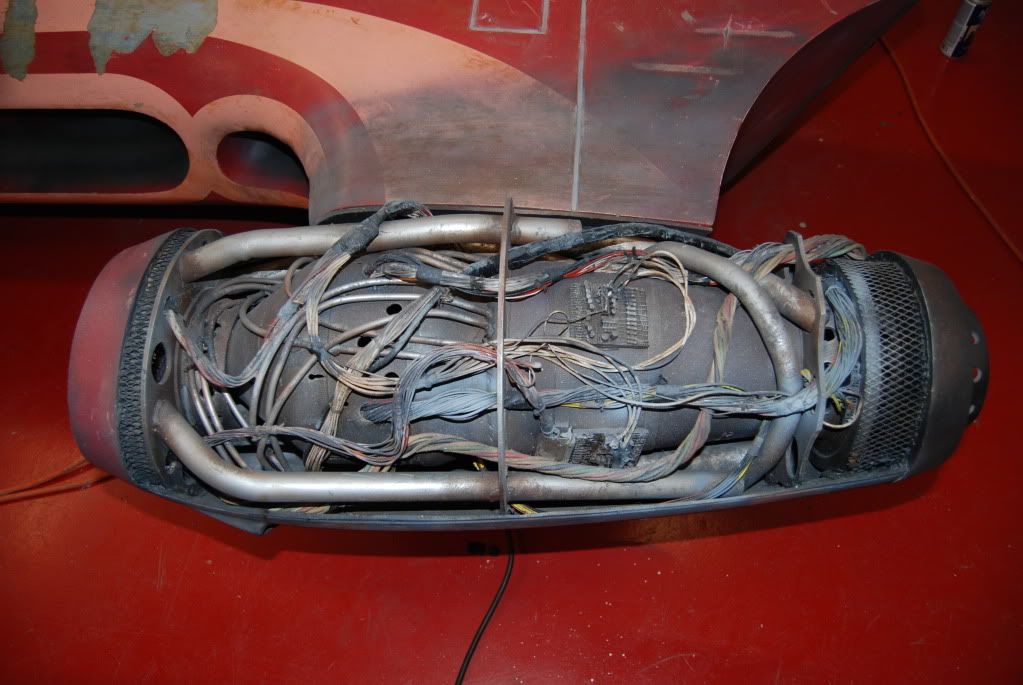
No, not the whole thing. I have no place to keep it even if I had the time (and cash). I'm going to make it a display piece that opens up to reveal the engine, and paint it with a black and silver scheme so I can put it in the back of my truck when we do parade. The top will be hinged so you can pop it open to show the engine, and maybe put some LEDs on it too. I was also thinking about putting in piping so I could run a smoke machine through it, for the parades.

Scott


Cool,

so how is he and his wife doing? I hope they're all ok. Last I heard they were having major health issues :confused
 
Re: 1:1 Landspeeder Project - NEW Pics & Vid on Page 31!!!

Cool,

so how is he and his wife doing? I hope they're all ok. Last I heard they were having major health issues :confused

My understanding was there was a serious car accident. I haven't met his wife, but he appears to be doing better. He climbed a ladder to get the "jet" off a high shelf, so he seems to be moving around just fine.

Scott
 
Re: 1:1 Landspeeder Project - NEW Pics & Vid on Page 31!!!

DSC_0003-8.jpg


What are the larger tubes you have running around the burner can? And while I'm asking, what about the smaller silver/gray tubes?

Thanks!

Scott
 
Re: 1:1 Landspeeder Project - NEW Pics & Vid on Page 31!!!

The larger tubes are 1", 1/4" and 3/4" pvc pipe from home depot. Just heated them up and bent them. I used a plumbers torch and heated the large ones....probably not a good idea...had to do a ton of sanding to get the burn marks off of them. I could have bought real pipe but I was concerned with weight and went the pvc route.

The smaller tubes are copper...the kind that you would hook up to a fridge for the water intake. They bend really easy and are easy to cut.

All the tubes were painted with rustoleum alum color spray paint.

Doesn't look too bad IMO.
 
Last edited:
Re: 1:1 Landspeeder Project - NEW Pics & Vid on Page 31!!!

Look at Wayne being all modest...:lol

The truth is that it looks even better in person. I had no idea the big tubes were PVC until he told me.

Using PVC was a perfect choice, as you really want to keep the whole thing as light as possible. The body isn't tremendously heavy, but every little bit counts.

Jason

HA! So it worked...I tried to distract you so you wouldn't look at the crappy job I did!

Got the windshield today....going to cut it this weekend and be really done!!!!

photo.jpg


pray for me.....:eek:lol
 
Re: 1:1 Landspeeder Project - NEW Pics & Vid on Page 31!!!

If anyone can do it, its your crack team down there! Good luck!

Who (and how) made the windshield? Even through the plastic, it looks super clear. Was it formed over a mold? :thumbsup
 
Re: 1:1 Landspeeder Project - NEW Pics & Vid on Page 31!!!

If anyone can do it, its your crack team down there! Good luck!

Who (and how) made the windshield? Even through the plastic, it looks super clear. Was it formed over a mold? :thumbsup


Ron had a guy who does aircraft windshields mold it up. I believe he used a buck to mold it....

I just forgot...I have to do the center console too......so I'm not that done yet :lol
 
Re: 1:1 Landspeeder Project - NEW Pics & Vid on Page 31!!!

I believe the windshield was made using a droop mold. They have a big box with massive heating elements inside and a hole on top that has the basic shape/diameter of the bubble you need to make.

They place the plastic on top...heat it up...it droops down into the mold and they pull it once it gets to the right "height".

Don't worry Wayne...We'll knock this out pretty quickly, and then you can find something else to do with your spare time. :)

Jason
 
Re: 1:1 Landspeeder Project - NEW Pics & Vid on Page 31!!!

That makes sense then. We can never get clear to stay clear over a mold, but dropping it is crystal.

Thats one serious drop mold though! Very cool. :cool
 
Re: 1:1 Landspeeder Project - NEW Pics & Vid on Page 31!!!

Wow - I can't believe that is pvc. The pipes really look like aluminum!
 
Re: 1:1 Landspeeder Project - NEW Pics & Vid on Page 31!!!

Like the video says, this is just about the coolest thing I have ever seen! :love

I might just have to put the video link on my Facebook page, if you don't mind. I'm sure it would be a hit on Digg and whatnot as well, if you're so inclined!
 
Re: 1:1 Landspeeder Project - NEW Pics & Vid on Page 31!!!

Cool, thanks! Hot did you attach the "jet" (what is it called?) to the center...arm? support? I need to build that part.

Scott
 
Re: 1:1 Landspeeder Project - NEW Pics & Vid on Page 31!!!

Cool, thanks! Hot did you attach the "jet" (what is it called?) to the center...arm? support? I need to build that part.

Scott


I tacked a bead of hot glue around every support then hot glued the support to the bottom of the engine housing.
 
Re: 1:1 Landspeeder Project - NEW Pics & Vid on Page 31!!!

Like the video says, this is just about the coolest thing I have ever seen! :love

I might just have to put the video link on my Facebook page, if you don't mind. I'm sure it would be a hit on Digg and whatnot as well, if you're so inclined!


I say go for it. When we get the canopy on, we'll make a better quality video!
 
Re: 1:1 Landspeeder Project - NEW Pics & Vid on Page 31!!!

Simply....awesome....
Maybe i missed this earlier, but what is the drive train of this beast?? Go kart? Golf Cart? VW Bug (haha)?

The most important question though....when will a kit be available!!!! I want one!!!!
 
Re: 1:1 Landspeeder Project - NEW Pics & Vid on Page 31!!!

Just hot glue? You think that will hold?

Scott


I think it will.....I drove it on a trailer about an hour and it bounced around like crazy the whole time. Didn't have any problems. Maybe at some time I'll upgrade it to epoxy.
 

Your message may be considered spam for the following reasons:

If you wish to reply despite these issues, check the box below before replying.
Be aware that malicious compliance may result in more severe penalties.
Back
Top