Steampunk Portal Gun

PrimoOptimoso

Sr Member
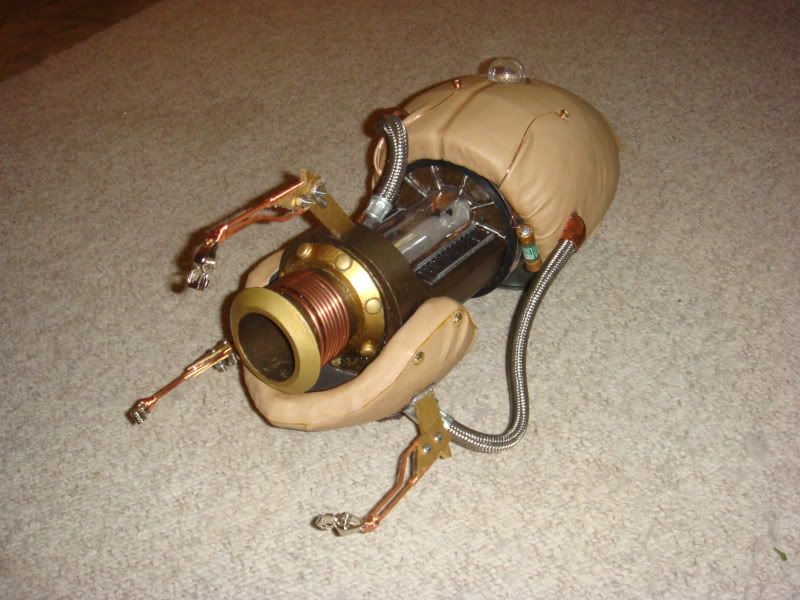
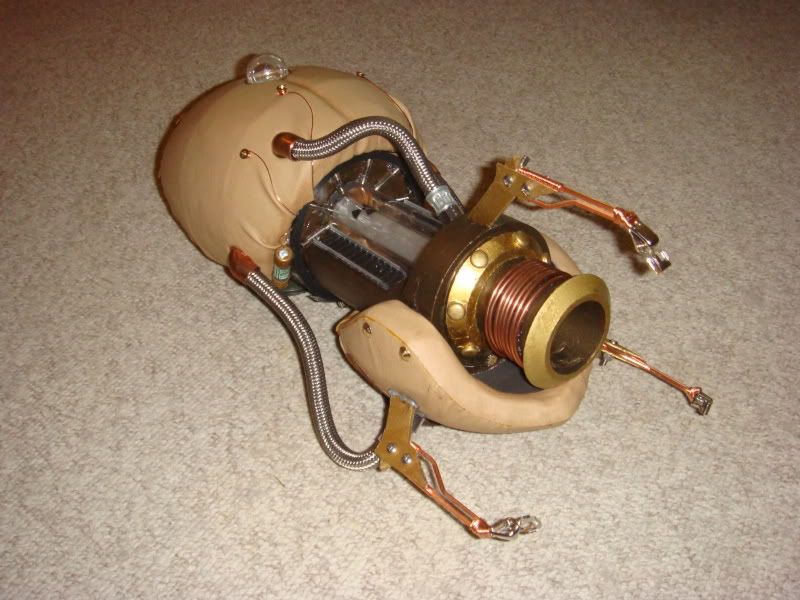
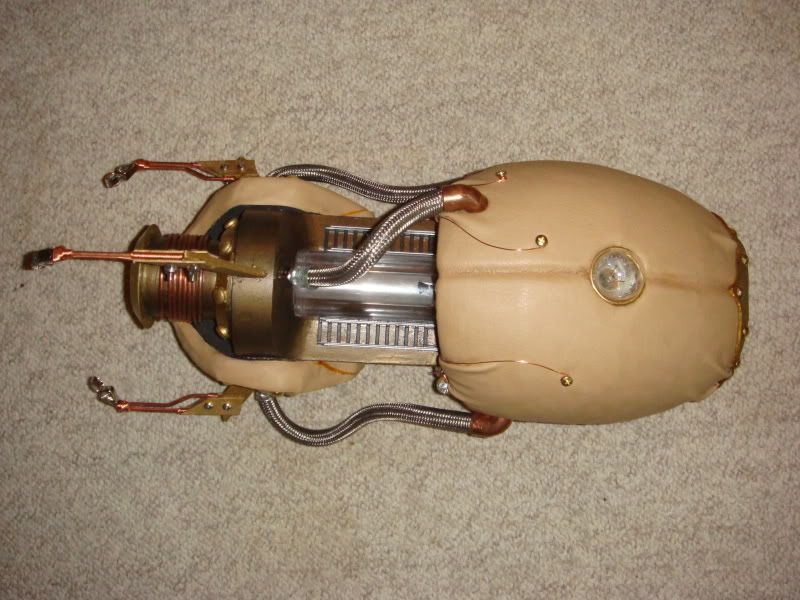
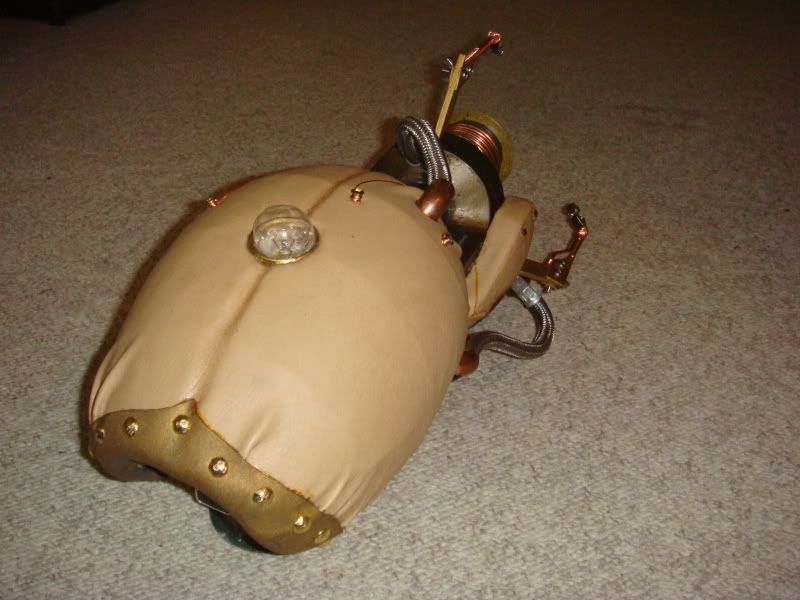
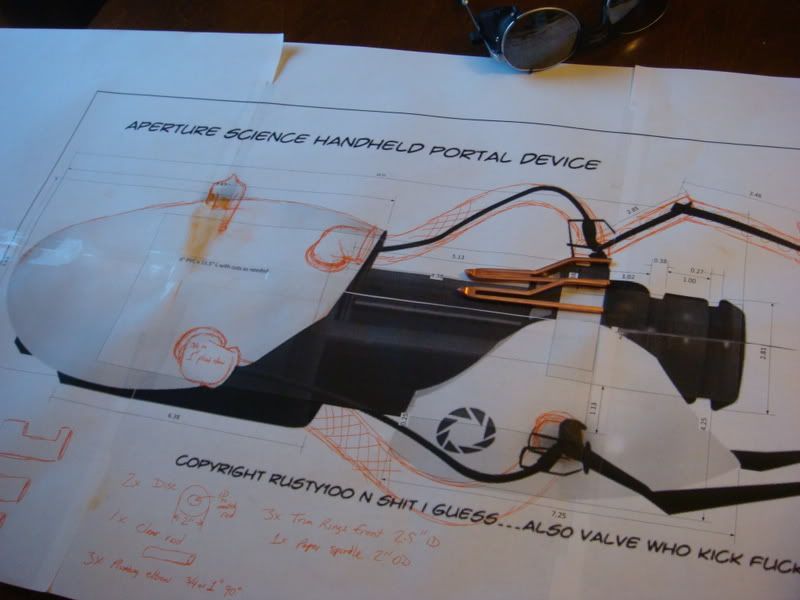
... or, the Aperture Mechanical Works Personal Porthole Device.

Hi guys - I'm a newbie here and am a strict amateur when it comes to builds - mostly I am lucky if something can be worn twice since I use a lot of cheap or found materials and just kind of hack it all together.

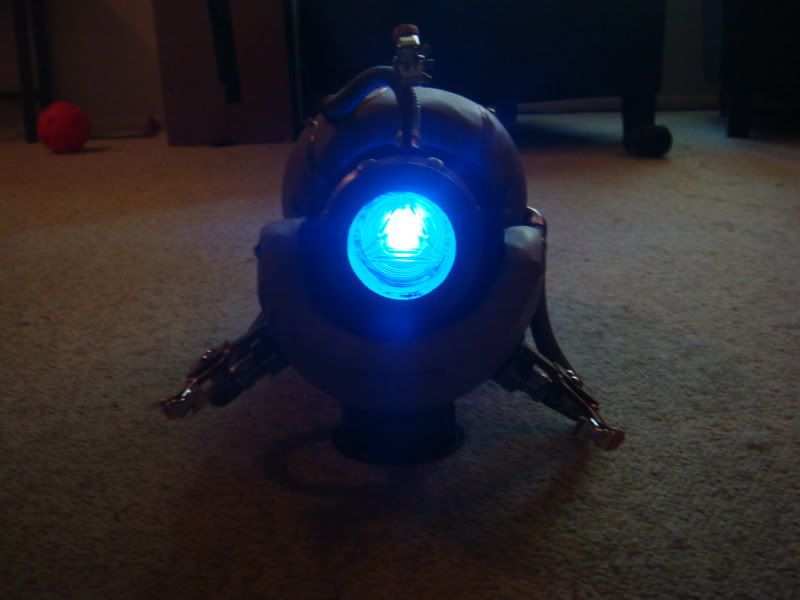
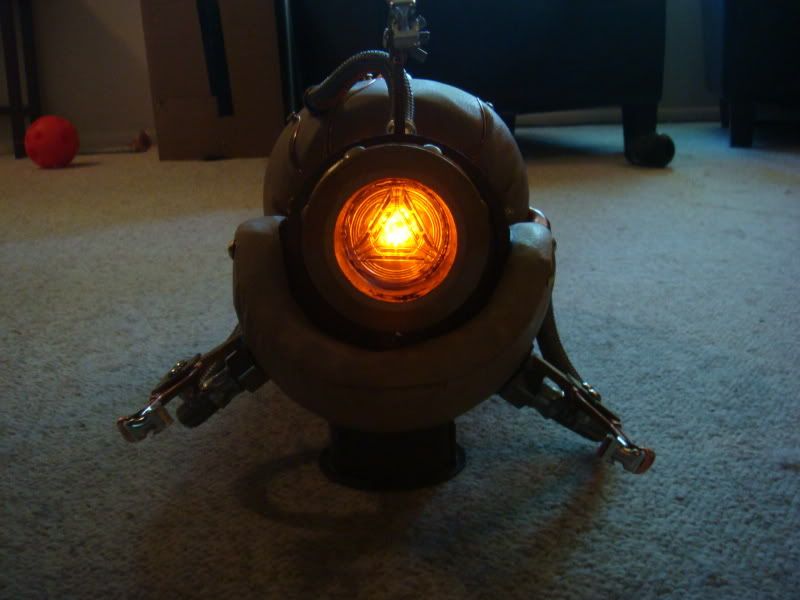
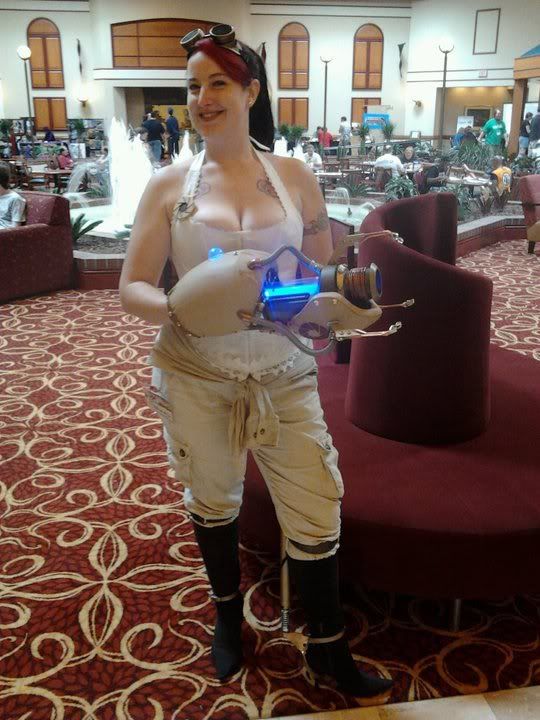
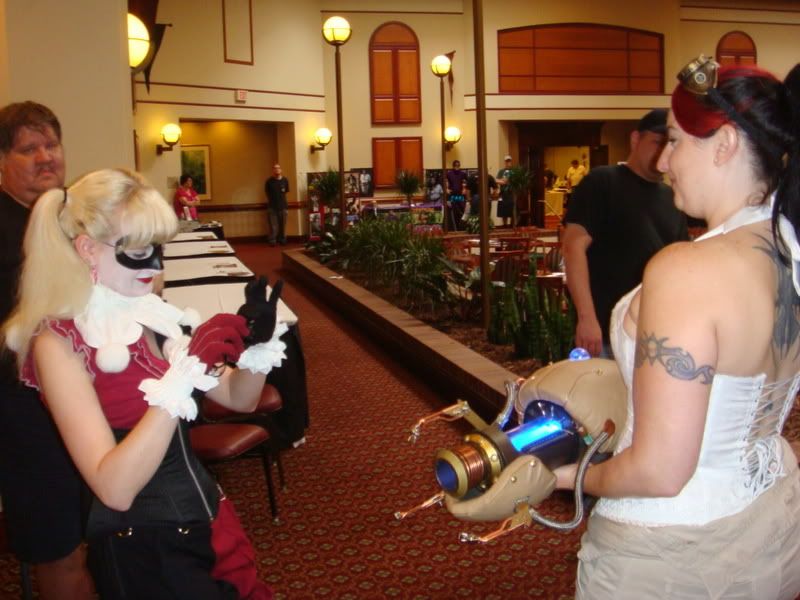
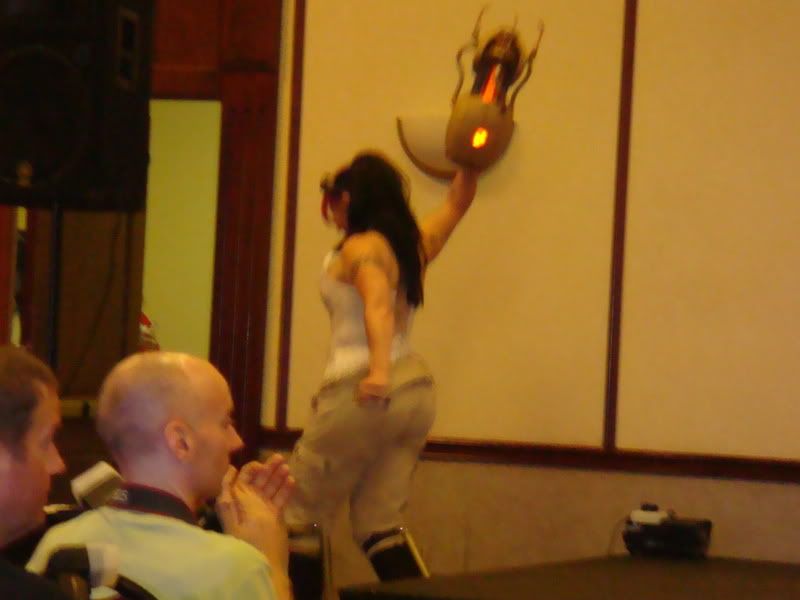
Anyways, long story short - My fiancee wanted to be Chell from the videogame Portal at PlayOn Con 4 last weekend in Birmingham. I asked her if we could do it steampunk, since Chell has been done to death at cons... not that steampunk hasn't, but it is my very favorite aesthetic and I had never built anything steampunk before.

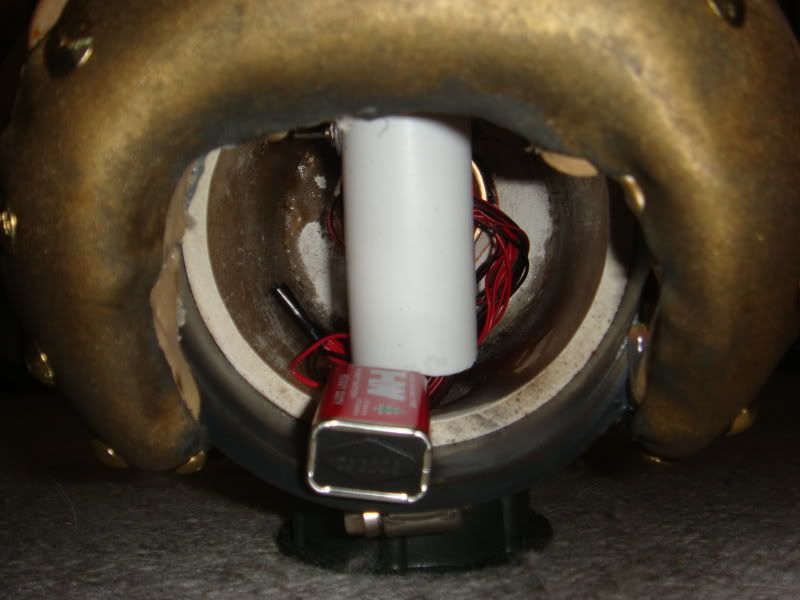
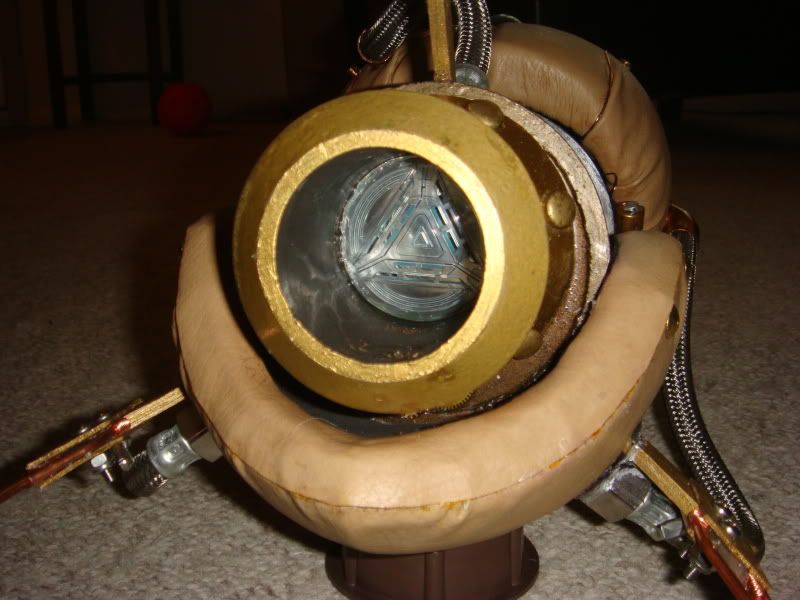
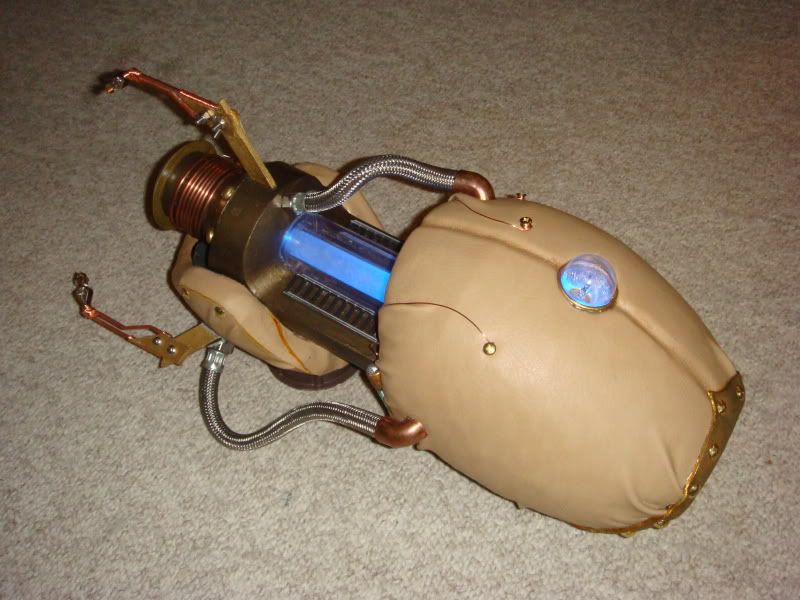
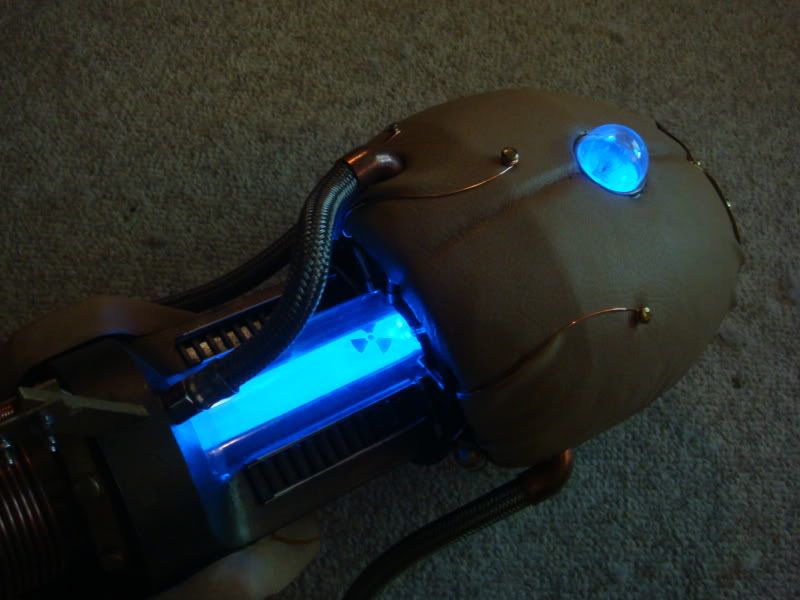
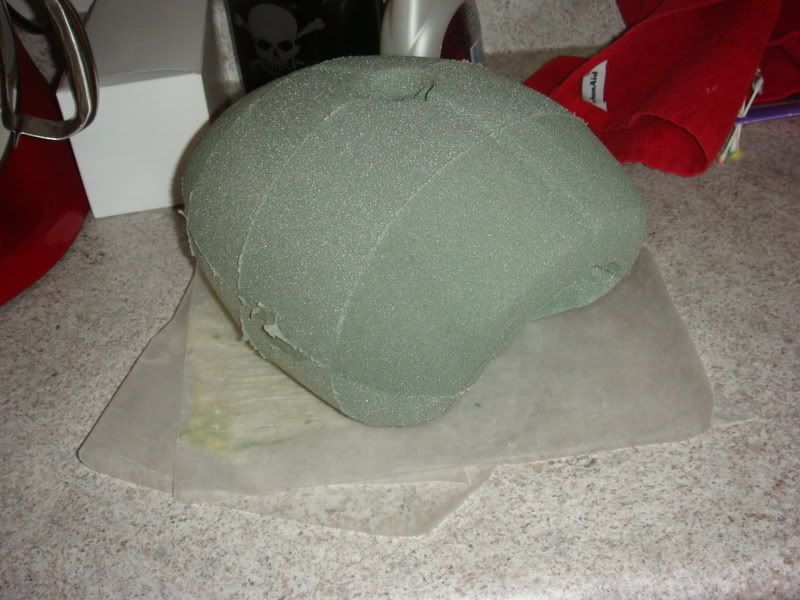
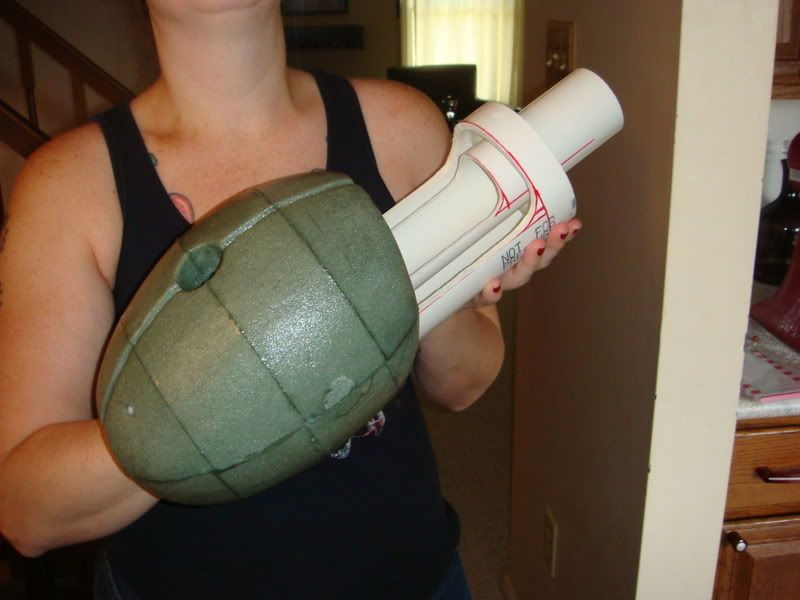
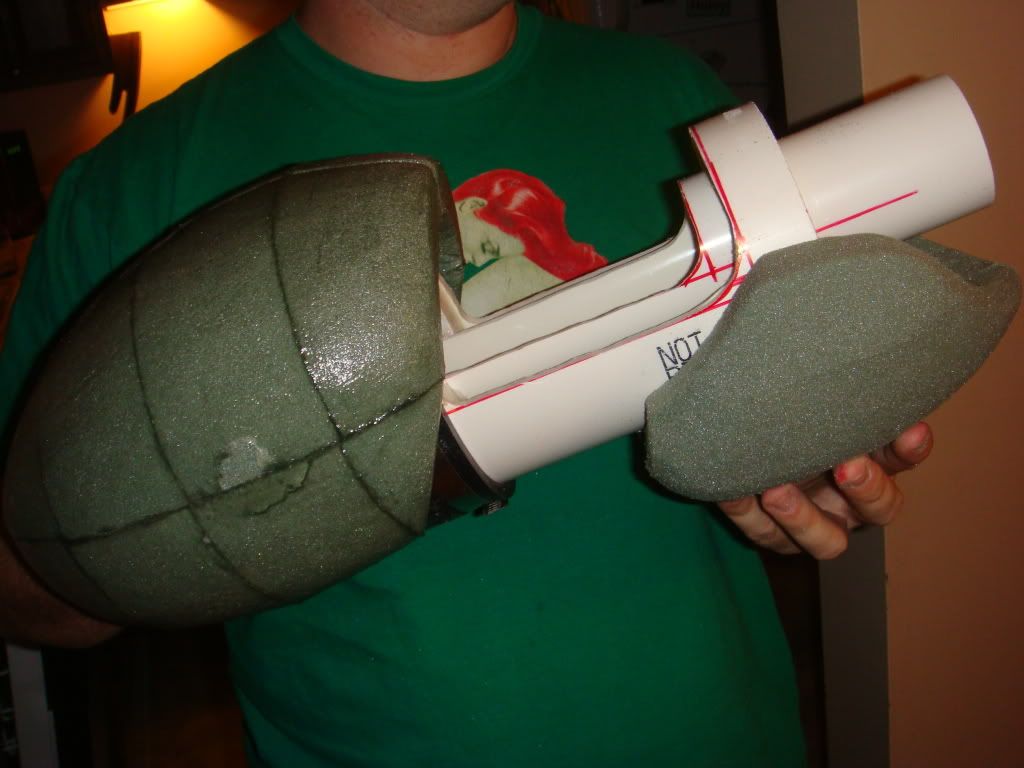
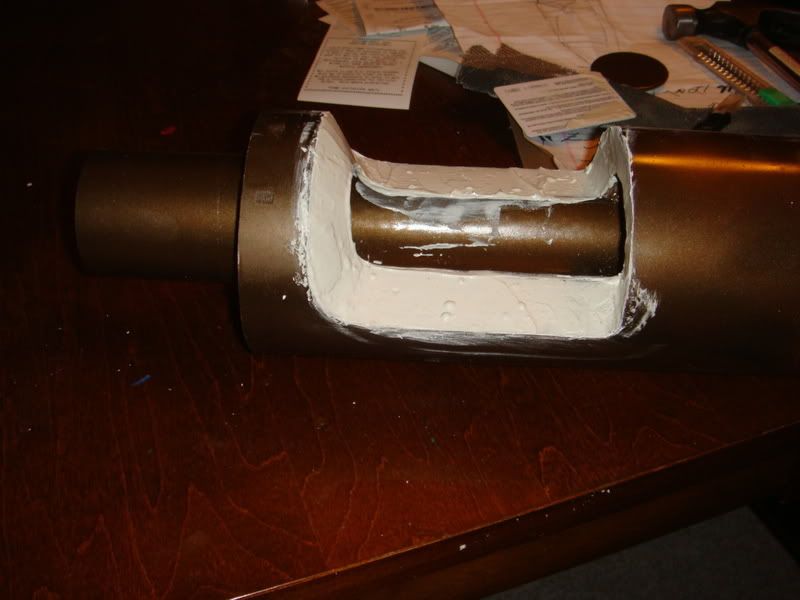
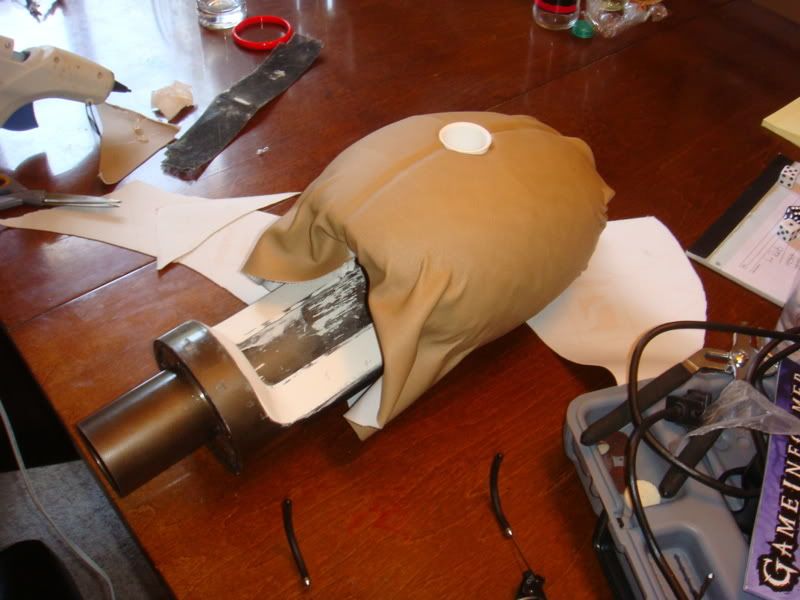
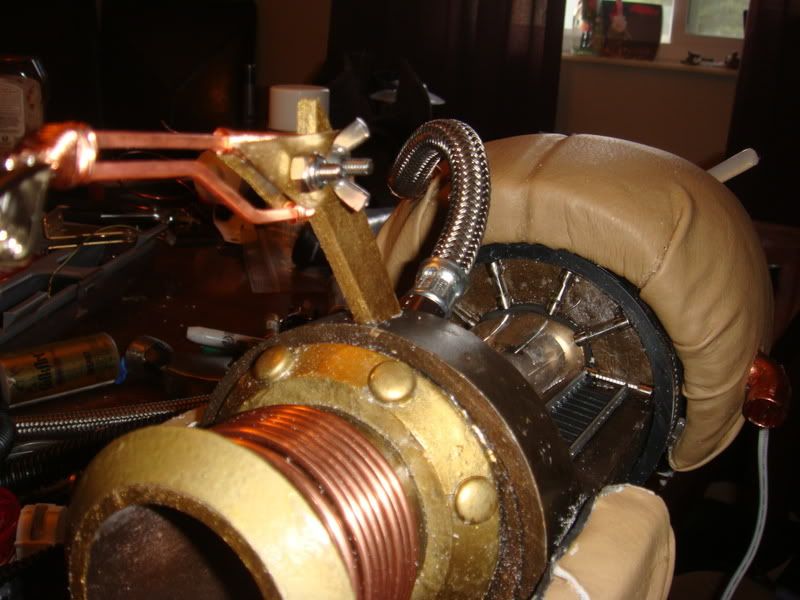
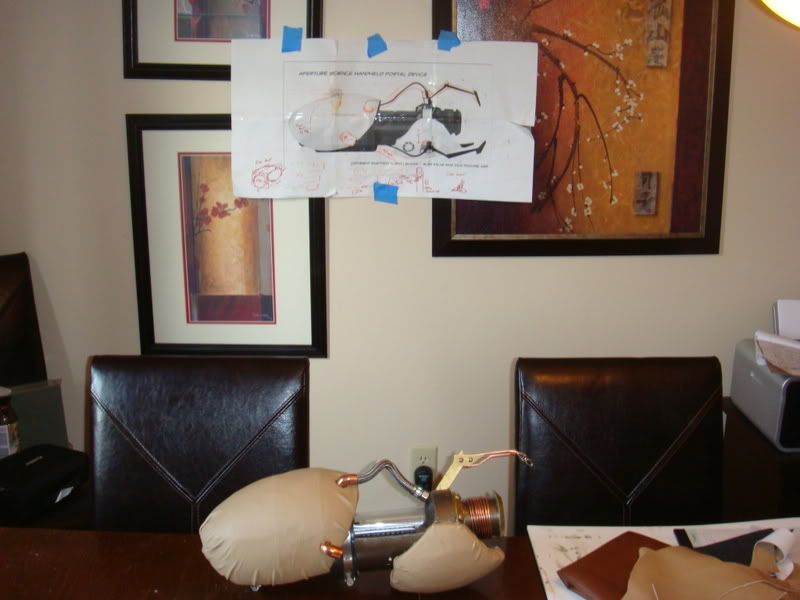
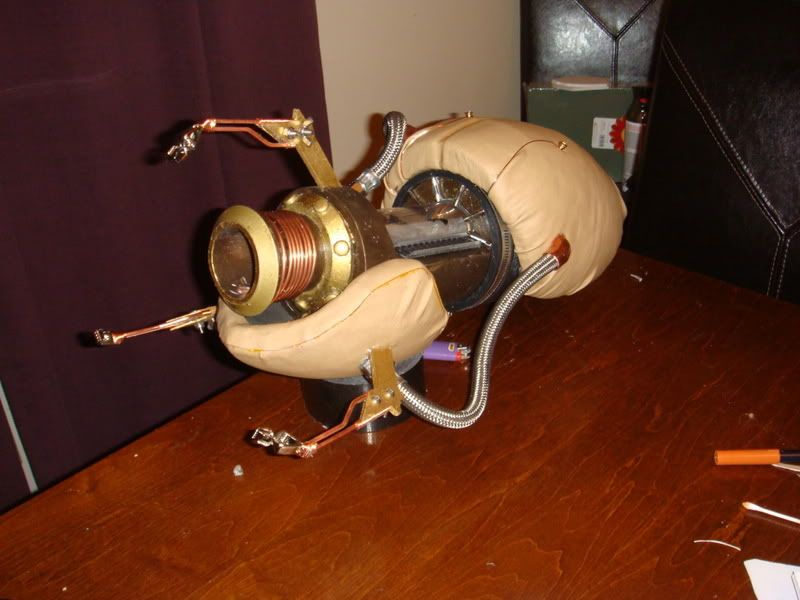
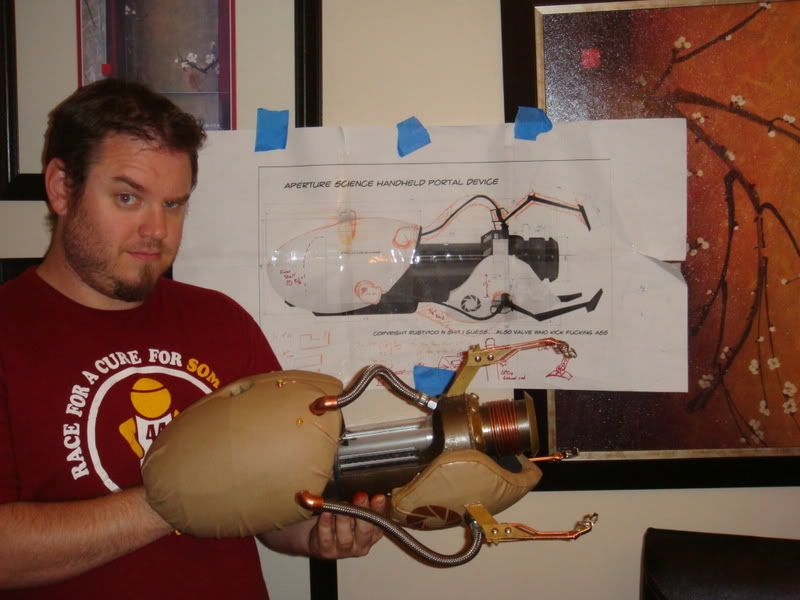
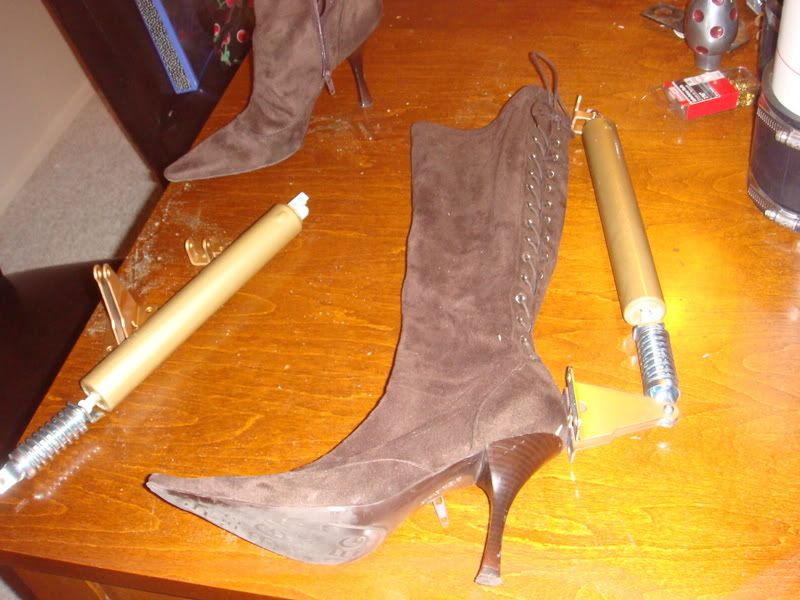
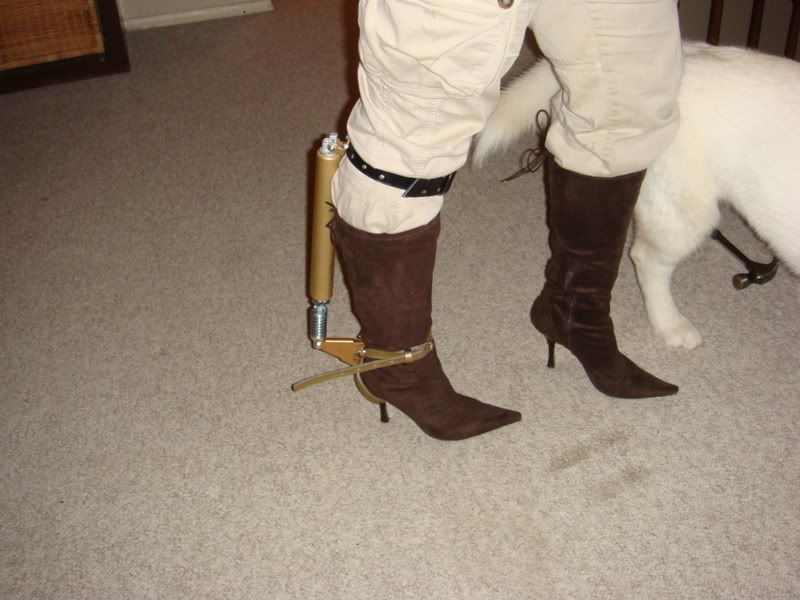
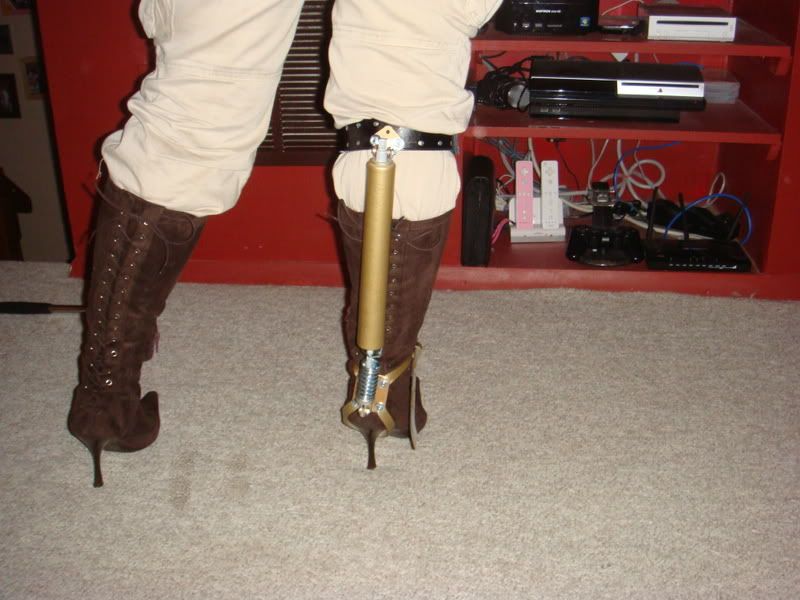
The following posts will detail out the build of the gun (and boots somewhat) - the con is done but we got so much attention I wanted to put it online. UPDATED with finished shots further down the thread!
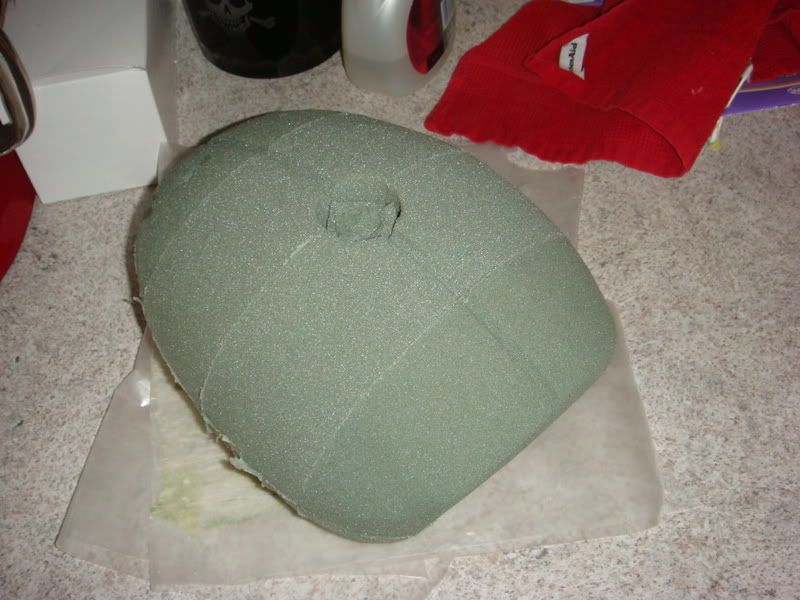
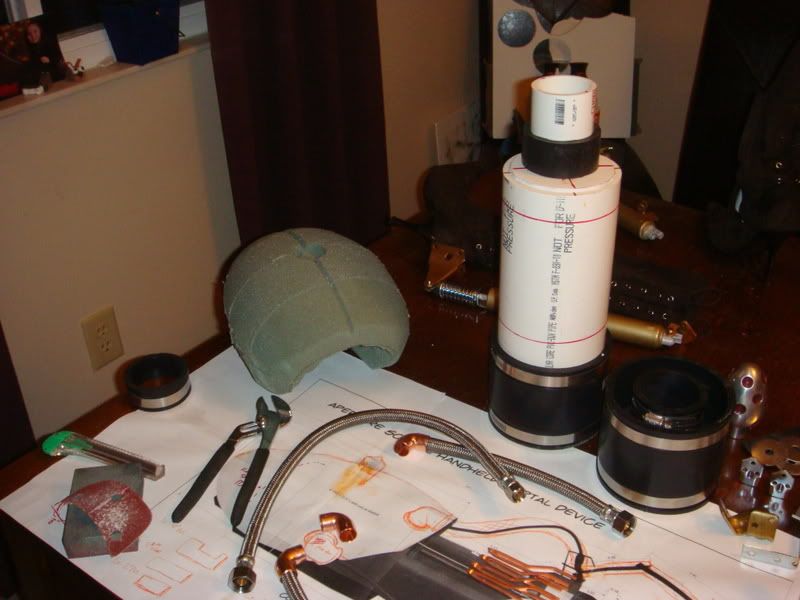
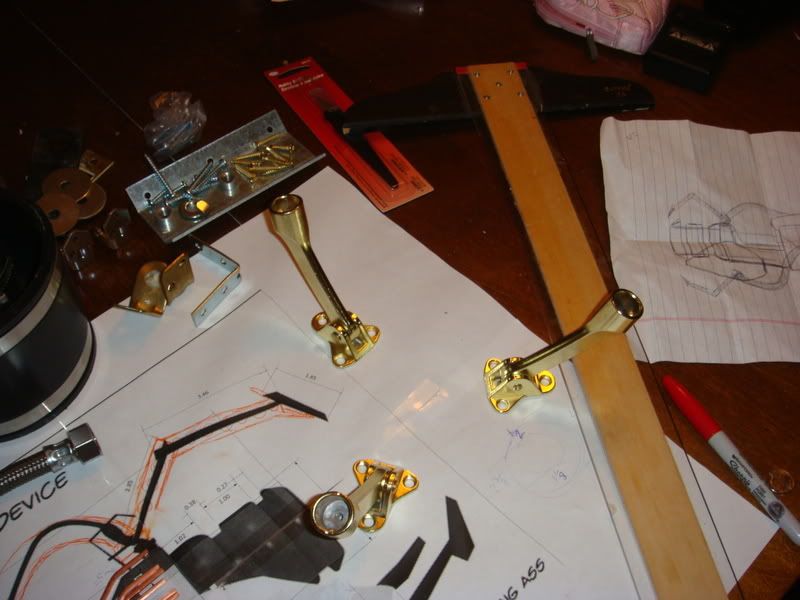
On to the build...
 
Last edited:
It all started with two things: 1. Volpin Props, who created the definitive real-world version of the original Portal Gun (seriously, look it up) and unwittingly provided me the inspiration and a couple technique tips, and 2. A picture of a side view of the game's Portal Gun, created by one Rusty100, whom I do not know.
I used Visio to blow up the pic to 1:1 (using one measurement from Volpin as a known quantity... remember kids, 4" PVC has an outer diameter of 4.5"!) and went from there, drawing on a few of my steampunky changes and such.
DSC04375.jpg


Starting to size up the PVC...
DSC04374.jpg


Cut the PVC to length by hand with a hacksaw, and started planning the other cuts...
DSC04384.jpg


Test-fitting the barrel and the body... I used foamcore to create the spacers holding them in relative location to each other.
DSC04386.jpg
 
Last edited:
Got the PVC all cut - the Dremel is the no-workshop-man's best friend.
DSC04411.jpg


One of the tips I got from reading Volpin's build? Florist's foam is awesome to work with. Just glue it up into a block and attack it with a knife.
DSC04387.jpg


The rear casing of the gun coming along...
DSC04390.jpg


Rear casing final sculpt
DSC04391.jpg


A plan is starting to come together
DSC04392.jpg
 
One caveat: I easily overspent by buying stuff that ended up not working. All you pros probably have a plan from start to finish, but I was winging it. These were the first stab at the "claws" around the front of the gun; $21 wasted right there since I drilled and mangled them trying to see if they'd work out.
DSC04394.jpg


Test assembly of the body and rear casing! (With my lady Freckles hiding her face from the camera) Note the casing coated in ModPodge sealer/glue. It helps avoid the crumblies from the green foam. Did I mention the green foam dusts like a mofo? Goggles, mask and vacuum recommended.
DSC04412.jpg


Carved out the front bottom casing while I was at it...
DSC04415.jpg


Hit the PVC with some bronze paint instead of gloss black - remember, this is steampunked - and filled in the gaps between the PVC with Hilti expanding foam (way better than great stuff - totally cuttable and sandable!) and ordinary spackle.
DSC04424.jpg


Another view of the slopes created when the gaps were filled in and smoothed over, but not yet sanded.
DSC04425.jpg
 
Again due to the themed twist on the gun, instead of coating the casings in a glossy white, I wanted to do something different. So instead I used a faux leather with a little bit of stretch to it. This stuff was very soft to the touch, and fairly classy looking. Tough to wrap entirely without folding/pleating, so I tried to make it look nicely done where I had to fold it. Here it's not all on yet.
DSC04426.jpg


Meanwhile, at the operational end of the device... Plumbing flanges, heavy copper wire, and button covers for that authentic porthole look.
DSC04427.jpg


The center of the main body of the gun is home to a glowing rod o' power, for which I used a test tube. Again wasting money, I first tried frosting spray (pictured) but ended up using ordinary waxed paper inside a non-frosted test tube, which looked better and propagates light more evenly.
DSC04433.jpg


The front half of the body and barrel - I think you can see in this shot the clear chamber the glowing test tube rod sits within. Dollar store fake-hotwheels cars come in the perfect sized clear plastic tube, and they're only a buck! Painted the endcap gold and cut out holes on either end with an xacto knife to seat the test tube in the chamber. Also visible: where I had to grind the excess copper out of the inside of the barrel. I repainted that area later after I put the lens inside.
DSC04434.jpg


With the barrel done, it was time to readdress the claws. I decided on a structure of popsicle sticks, nuts & bolts, a copper soldering gun tip, some wire, and a spring clip. I think they look pretty good for being a total reinterpretation.
DSC04435.jpg
 
Last edited:
And of course, the wires that lead to the claws are instead braided water lines, in this steam-powered alternative vision. They lead to 1/2" copper elbows coming out of the rear casing. Also check out the fine array of fuses and dollar-store railroad track =0)
DSC04436.jpg


Checking progress against the original drawing...
DSC04439.jpg


Identifying marks - the logo of the infamous Aperture Mechanical Works, circa 1886, as rendered in cutouts of fine football pleather.
DSC04444.jpg


Are we done yet?
DSC04445.jpg


Not quite.
DSC04446.jpg
 
Last edited:
Checking again...
DSC04447.jpg


But it needs light! So I assembled this all-in-one handle, upper indicator light holder and switch housing out of a found piece of plastic pipe which I painted gold on the end to be exposed. Inside, blue and orange LEDs, a 3-way center-off SPDT switch, all wired to a 9V battery. This is not my first costume or prop with lights, but it is the first time I've ever had to wire anything and the lights used weren't self-contained. (Edit: note, there is another array of LEDs hanging down here, from the same switch - those were glued into the test tube for barrel lighting once the whole assembly was dropped in.)
DSC04448.jpg


For most of the build, my dining room was full of parts and tools and detritus, like so...
DSC04441.jpg

DSC04442.jpg


And I had a couple helpers guarding the area...
DSC04443.jpg


Before I finished, I had to get the Long Fall Boots done right quick so Freckles would have something to strut about in...
 
Last edited:
Quite frankly, I love it. Was going to build my own game-accurate portal gun, but now you've got me tempted to venture into re-imagined versions also.
 
Surprisingly, the boots were a very simple thing. Couple of appropriately-sized shock absorbers and a few belts, and Frex's brown suede boots were straight out of Aperture history. I'm Cavellius Paffer Johansson; we're done here!
DSC04396.jpg

DSC04451.jpg

DSC04452.jpg


Now, maybe there's a fetish aspect, but I swear the boots got just as much attention at the Con as the gun did!

I have to go find and/or take a couple better shots of the fully completed gun itself, but meanwhile, here is one of Freckles and our new friend Bunny sharing a mutual admiration for each other's costumes (Bunny won one of the costume categories for her steampunk Harley Quinn, seen here)... Note Freckles has just fired a blue portal in this one =0)
20.jpg


And when she was traipsing offstage during the costume contest, Freckles decided to indulge the judges by firing an orange portal at the ceiling.
26.jpg


Again, stay tuned for the totally-finished pics, hopefully in a day or so.

Cheers and enjoy! Thanks for putting up with this behemoth thread.

BTW, can non-members see thread pictures? I'd love to link this to a couple people but don't want them to have to sign up if they don't want to.
 
In a world of over-done, gears-pasted-every-damn-where "Steampunk" you've actually made something that looks really good. I'm a fan of this Neo-Victorian adaptation of the Aperture Science Handheld Portal Device. Well done, sir. :)
 
In a world of over-done, gears-pasted-every-damn-where "Steampunk" you've actually made something that looks really good. I'm a fan of this Neo-Victorian adaptation of the Aperture Science Handheld Portal Device. Well done, sir. :)

Any and all RPF praise is humbling to me after seeing some of the amazing things you guys make - thank you. I have a couple older costumes I'll probably show off because I love them, but from this one forward I know I'll be looking to up my game =0)

PS: there are three gears in this one, hidden under the barrel on the front face of the main body of the gun. Nice and subtle, and honoring the gears-pasted-everywhere crowd =0) I admit I did want to include either a pressure gauge or a smokestack (billowing dry ice steam lit by a couple more LEDs), but either of those would have taken away from the silhouette.
 
I think a pressure gauge would add to the overall look. Also concerning gears: There's adding "functional" gears and cogs to a steampunk piece and then there's having gears just for the sake of having gears, or a stand alone gear on the side of something that is purely decorative.

My hand to God, if I see another NERF Maverick with gears glued in places for no reason, I'm gonna ... keep quite and nerd rage about it on the internet. >_>
 
Finally took some completed shots! Here you go. Small notes not addressed in the build:
- The lens inside the barrel is a shaved-down lens taken out of a $5 Iron Man arc reactor toy
- The big fuses on the sides of the body of the gun looked a bit old and weathered right out of the package
- The small lightbulb used for the upper indicator is lit from beneath by LEDs and the bottom half frosted; it doesn't actually light, itself
- Hot glue painted silver passes for solder pretty well =0)

DSC04630.jpg

DSC04629.jpg

DSC04631.jpg

DSC04632.jpg
 
Last edited:
The handle, wires, and battery inside (switch is upper left of handle, operated with thumb upward for blue and downward for orange) - you see there's no actual room for the battery...
DSC04640.jpg


The lens down in the barrel:
DSC04635.jpg


And some lit pics, of course:
DSC04641.jpg

DSC04646.jpg

DSC04645.jpg

DSC04647.jpg

DSC04648.jpg


Again, thanks for looking! Feedback has been great so far.
 
I'll admit, I am not a fan of Steam Punk at all, and one of the things that drive me crazy is when people say they are working on their "Steam Punk" costume only to find out they are glueing random gears to Nerf Guns.

This build, on the otherhand, is what Steam Punk is suppose to be. You took a well known technology and created its vectorian era counterpart, and without a Nerf Gun. Well done.

Quoted for truth.
 
This build, on the otherhand, is what Steam Punk is suppose to be. You took a well known technology and created its vectorian era counterpart, and without a Nerf Gun. Well done.

Absolutely my intention - thanks so much. I tried to think along the lines of "what could I semiplausibly explain this piece as?" - like the toy train tracks, which of course are really positron alignment rails, keeping the portal-generating radiation from shooting out the back end of the bloody thing by mistake. Then again, the big fuses on the side I wanted for looks because they are just so cool. =0)

I'll admit, I actually like *some* of the stuff with gears on it, if only because I like the way gears look. But I agree that especially in the "steampunk guns" department, there's a lot of slapping crap onto other crap.
 
Lest I forget the young lady that made this build look so good, here is a good shot of the full costume, sported by my lovely Freckles. The corset beats a wifebeater anyday, and there probably weren't too many orange jumpsuits in the late 1800s, so we went with a nice khaki instead. Since we didn't want to emblazon the Aperture logo across the corset, I made her a logo brooch which she pinned onto the halter strap of the corset.

83.jpg

It was hard to tell from the other pictures but this one definatly shows the Chel tributes. Like I said before, THIS is what Steampunk is suppose to be.
 
This thread is more than 11 years old.

Your message may be considered spam for the following reasons:

  1. This thread hasn't been active in some time. A new post in this thread might not contribute constructively to this discussion after so long.
If you wish to reply despite these issues, check the box below before replying.
Be aware that malicious compliance may result in more severe penalties.
Back
Top