Doctor Who: Shark Eaten Sonic Screwdriver, and Modded 11's Screwdriver

Vlair

Well-Known Member
So, I recently modded two 11's Sonic Screwdrivers.

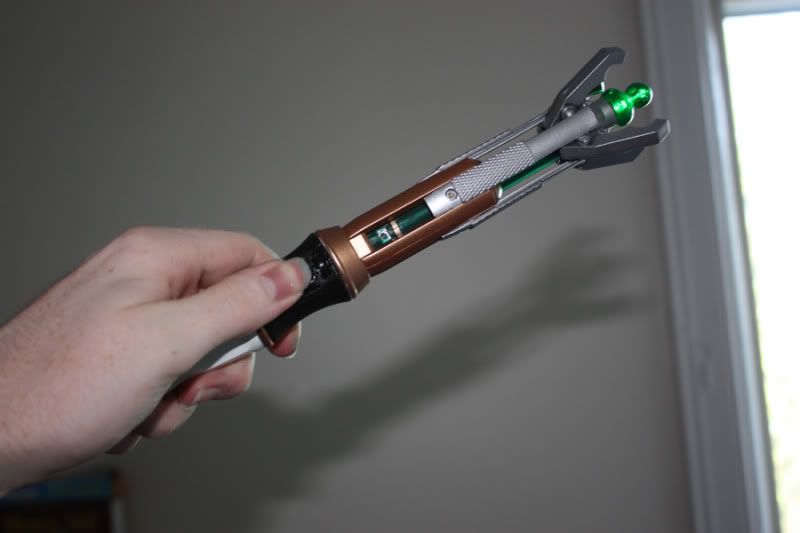
The first was simply modding the activation. In the show, the button is at the bottom of the black hilt piece, and that, along with the inability to activate the sonic when it was open, really bugged me. So, I took my sonic to a friend's workshop,cut the top section in two places so I could remove it, and cut out a square section with a jewler's saw. From there, I trimmed it, and then reattatched it to the red internal slide, with a mixture of hot glue to build up the height, and model glue for strength. Put it all back together, and Voila.

Modded.jpg


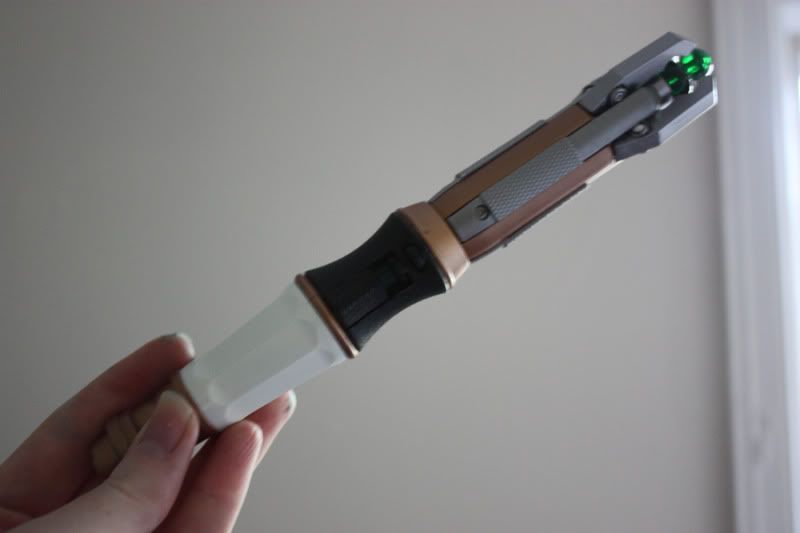
At a glace, it looks very similar (if I ever do this again, I'm going to make the sliding slot smaller, so as not to have a gap), but can your sonic do this?

LookwhatIcando.jpg


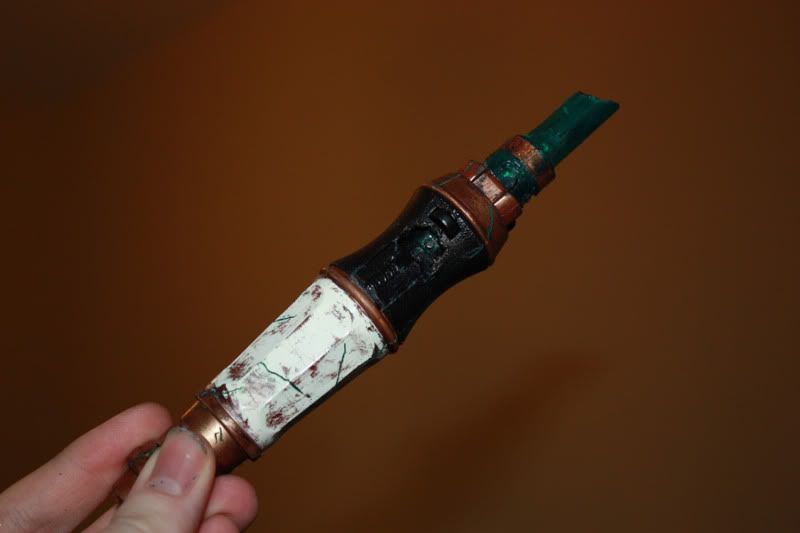
So then the second one I made, was the Shark bitten sonic. See, last October I made the Raggedy Doctors blown up Sonic, when I made the Raggedy Doctor costume. So when A Christmas Carol aired, I got texted by a bunch of people, If I was going to make the shark eaten sonic. And on top of It, my girlfriend wanted to Cosplay as Tux Doctor and Marilyn Monroe. So I made a Shark Eaten sonic.

SharkEaten.jpg


SharkEatenLit.jpg


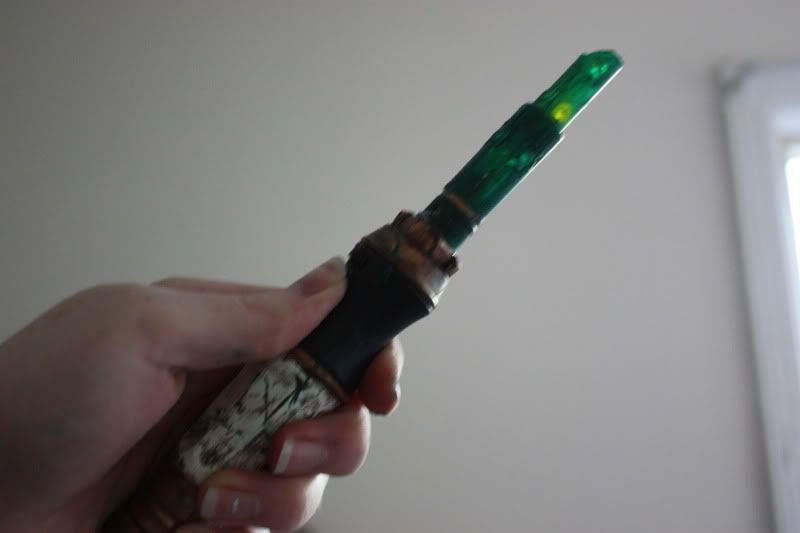
This was done after staring at a dozen reference pictures. The main differences are that the central column is a bit too long, but as you can see when its lit, its the shortest I could get away with, with the electronics inside it. The other difference is that I made all the cracks green on the inside, as if it was leaking out from the inside of the Sonic. I just thought it looked cool.
 
Last edited:
So, right here is the problem with being a perfectionist, and neurotic. it was really bothering me that it was too long, so I opened it up, took out the center spring, slid the entire center column in, readjusted the activation so that it'll fit with the new length, made a new brass ring for the top, reassembled, and then touched up the paint. Ugh my madness.

SharkEatenShortened.jpg


PS: I blended the brass colour out of a gold and two browns, and I'm really rather impresseed at how close I got it to the rest of it.
 
A friend just bought me the real screwdriver version of this prop which has a working LED and sound effects plus it has metal elements. Maybe a hybrid could be possible?
 
Unlikely. The metal end doesnt have the same size or internal build as the hilt of the plastic one.Although hypothetically one could hollow it out, and use it as a shell around the plastic inner workings. but that would be really difficult, as the spring is set on a bar held in place by two built in grooves in the plastic edgings, which would be difficult to replicate, and nearly useless without.

and Greatwazoo, there was a guy who was machining an 11 sonic. plus CT has plans. why not send it to the guy who made your Teletran sonic?
 
Is the column on the shark bitten sonic open ended, or have you closed it off somehow?

Thinking about making one for myself, once I figure how to go about it.
 
I'd say good find but that's your own site so good job on the build of the site.

Now the big question: did you guys build the sonic for the series or are you offering high end replias of it?
 
Nope I'm not offering replicas that would be silly, I dont think the BBC would still be giving me work If I was reproducing props without permission.
Ive been the propmaker on the show since its relaunch, and as we are in a break between series, ive set up my own business. Thought some pictures would help.
 
Hey have a look at this!
prop makers

Every time I see those I'm blown away. Quick, slightly off-topic question: is the main silver, slider section (Encompassing the knurled "legs" and the part that holds the "teeth" and emitter tip) machined out of a solid metal (Aluminum/Aluminium) rod? If so, bravo, that is a beautiful piece of machining! Especially for the time frame I read you had to produce the original prop.

Back on topic, Vlair, I'm about to launch a Sonic modifying mission myself. Are there any internal pitfalls I should be aware of on the toy? Or any lessons you can pass along? Your work is absolutely beautiful, so I just figured I'd ask before further destroying an already broken toy.

Thanks.

-Nick
 
Tom: Its closed. I filled the tip with hotglue, smoothing it as i went. I'll take a pic from above, to show what it looks like.

Rubbertoe: Thats so cool! And as you can tell, I'm a fan of your work, its gorgeous stuff.

Nick: the biggest internal pitfall is the metal bar that crosses the center bottom of the hilt section. if that little pin falls out, you will have a hell of a time getting it back in. Also, the two buttons that come built in the hilt are on top of tiny springs. be insanely careful with these. i spent 25 minutes searching for one that fell on my floor. I undoubtably have made a few other errors I can help you avoid, lols, what Kinda mods are you going to be doing? Also, for opening this thing up, I suggest using the thinnest sawblade you have, else you'll need to fill far more when you put it all back together.
 
Last edited:
I'm basically looking to tear the entire thing apart and rebuild it (with some new parts as well) to make it work more accurately, including the addition of single micro-switch activation, leather handle, the ability to "flick" it open, two-part nesting green slider, and possibly a metal part or two...but that last one is WAY down the line.

It's going to be my ongoing project. Little by little I hope to push this thing to its most accurate extremes.

-Nick
 
looking at the pics of the real sonic it seems it had the red hidden button at the bottom just like on the toy one,they never address it in the show
 
Ken: From what I recall, it was originally was meant to always be activated from the bottom, but matt didnt like that, so they added the microswitch.

Nick: If you're planning to do that, you're going to have a hell of a time with the toy as a base. See, the slider inside is two different sizes, plus has holes drilled into it, its a problem to take off without cutting off the brass piece of the slider, or popping the emmiter off, which will disconnect the wires. you'd also have to rework the battery compartment, as well as the placement (and probably the soundboard size, if the Tennant CO was any indicator. ). then rework the slider, so it actually extends and slides. as well as holding the soundboard in place, so you can have the microswitch in one place. It'll be far more work than I think you think it'll be.

gotta love Character Options. lols. See, I looked into doing this originally, with the microswitch and flick extend as well. but that required an extra amount of rewiring and resizing and replacing. Plus, with the modification that I made, building in the slider switch, I couldn't disable the spring activation, because the same sping is used to hold the switch in place. Its actually a pretty cleverly built toy, but it makes making it more screen accurate more problematic.
 
Tom: Its closed. I filled the tip with hotglue, smoothing it as i went. I'll take a pic from above, to show what it looks like.

I thought it looked closed. xD Thanks.

So did you cut between the "brass" and the black parts to modify the sonic? And by the looks of it, it's just one big button now?

I'm also trying to look into reshaping the emitter head, as it should be flat on the top rather than round.

I assume it would be practically impossible to change the LED, though?
 
This thread is more than 10 years old.

Your message may be considered spam for the following reasons:

  1. This thread hasn't been active in some time. A new post in this thread might not contribute constructively to this discussion after so long.
If you wish to reply despite these issues, check the box below before replying.
Be aware that malicious compliance may result in more severe penalties.
Back
Top