Borderlands 2: Maliwan Sub-Malevolent Grace (Take two)

BRDencklau

Well-Known Member
I started a work in progress thread for a Borderlands 2 themed prop. More of a barge into Prop-dom than a well thought out execution. Needless to say I learned more than I produced a finished product.

And the birds go tweet.

I acquired a copy of Charles Adams: Model Design & Blueprinting Handbook Vol.1 and after re-acquainting myself the the process of orthographic projection and scaling, I couldn't help but see the glaring flaws in my previous endeavor. I shelved the prior project and set out to make a nice collection of workable drawings utilizing the in-game inventory viewing option. I didn't have any examples of the specific weapon I want to reproduce so I utilized three different versions of the Maliwan SMG to get the proper organization of parts. If my math is right, there are 125 different versions of SMGs offered by each of the five weapons manufacturers in the game excluding elemental additions. That's a total of 625 different standard damage sub-machine gun BODIES in game. (The actual amount of smg's based on stats is nearly limitless, but that's not why we are here.)

From these drawings, I made a set of templates and started cutting out the forms. I used standard MDF in 1/2" and 5/8" thickness.


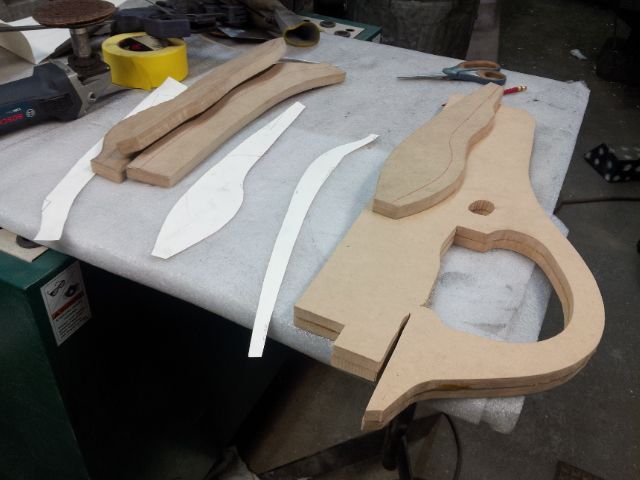
Here is the first set of components mocked up. So far so good.


From my own experience with the forms and reading others efforts, I chose to allow room for the barrel assemblies and sighting components from the start, incorporating space into the stock cutouts.


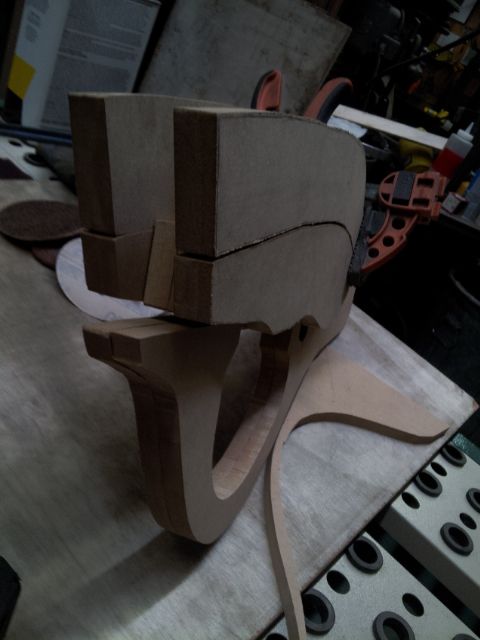
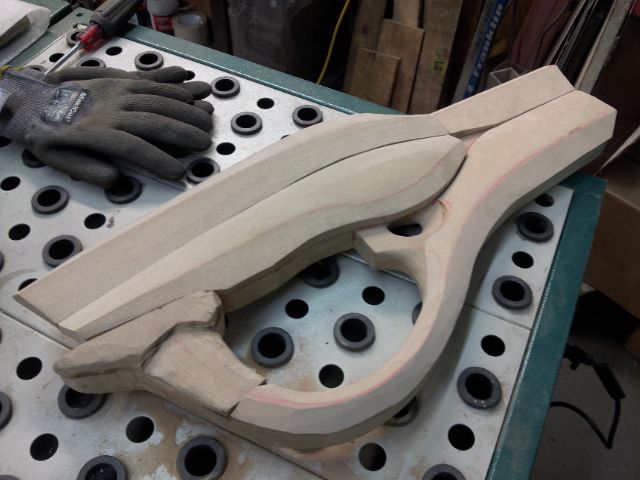
After some basic assembly and shaping techniques, the top of the prop is starting to look good.


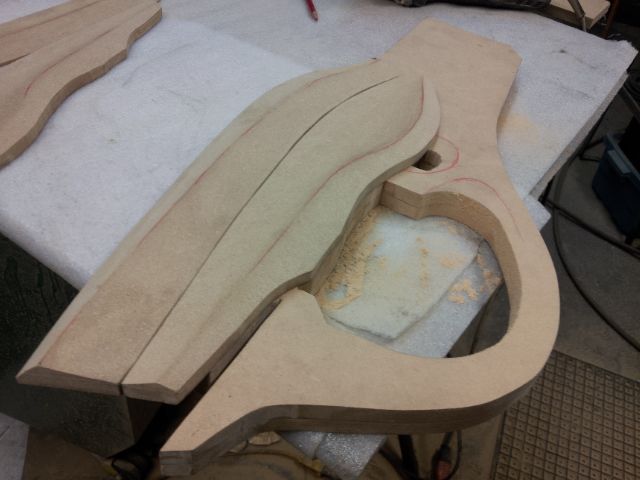
Good drawings are a cornerstone to quick and proper execution. I templated the lower half of the stock/grip and started roughing in the form. Almost all sanding, up to this point, has been done with an angle grinder set up with a sanding backer/60 grit.


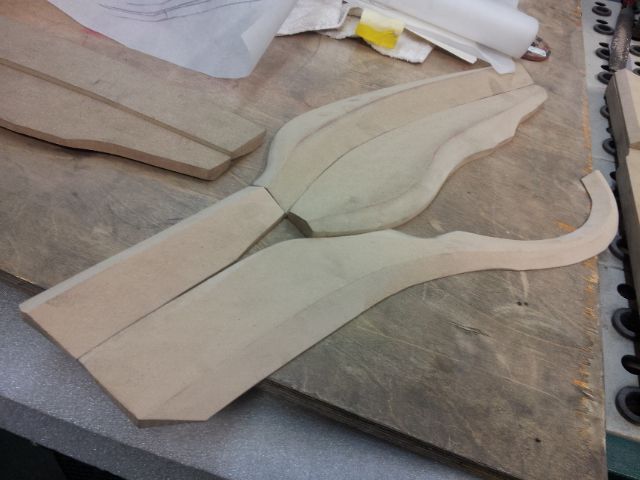
Smoothed out with an orbital sander, the relief components lose dimension in this photo.


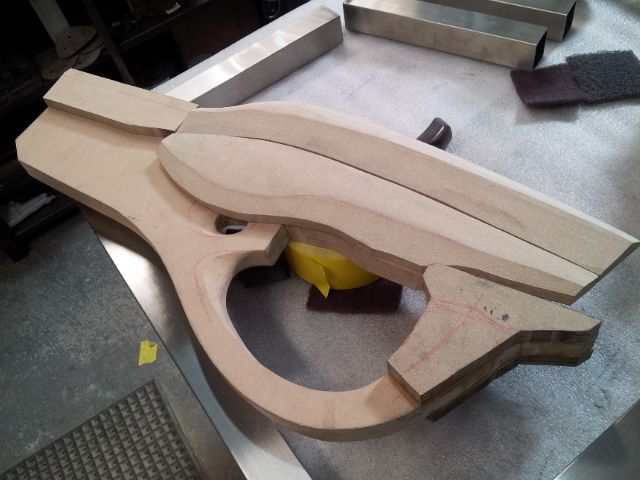
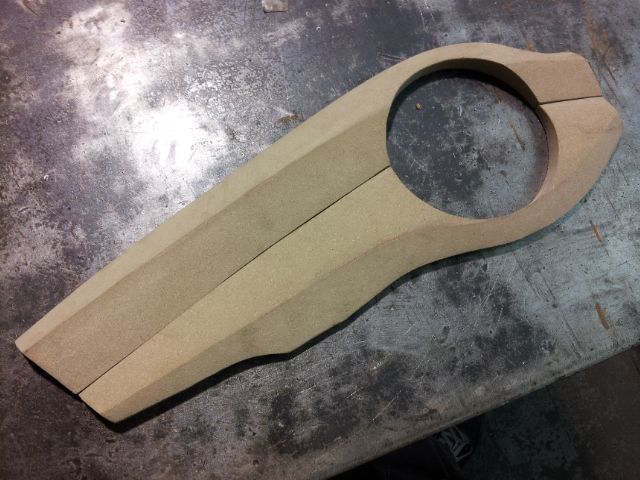
Layout of the magazine cavity. As you can see a good set of scale-able drawings is paramount.


Fine tuned.


This is how I left it yesterday. More work to come next week.
 
Looks like MDF shapes really well to the curves, I might pick up one of those blueprint books for myself. I've still got to finish my Maliwan SMG; still haven't figured out the rail, barrel(s) and decals yet. Are you incorporating electronics for this one, like LED's and a spinning mag?
 
It might be in the cards. My father-in-law was a head IT at AT&T with a wealth of electronics knowledge. I planned on incorporating the display windows and diodes so why not the spinning mag as well.

Should be a nice challenge. :)
 
Haha. Making Borderlands stuff never gets old. Love it.

Sold 7 all up. 4 fully finished with stands and 3 raw casts. Not bad considering I didnt plan on selling any, to begin with.

Still interested to see how youre going to do this hex pattern too.

Have you had a look at my commissioned helmet build? Id love your opinion.
 
Holy geeze, I haven't posted in a minute...


So aside from distractions I squeezed some work in on the Mailwan. But to start things off I thought I would share the different models I used to pull my aspects.


This Moxxi for the stock:


This Moxxi for the fore-grip:


And this version for the access to the sight portion of the model:


I feel a little like Dr Frankenstein...


With the lower portion of the handle in place, I set to roughing out the info panel near the nose of the prop. Utilizing my template I marked out the location of the deepest portion of this cavity and removed the majority of the material. When I notch material, regardless of the material, I always use a drill in the corners to provide a clean end point and alleviate any over-cutting. After the majority of the excess is cut off, clean the cavity with a rasp or coarse file and sand with a medium to light grit emery.


Here is a shot of it mocked up with the cavity roughed out:


A bit later I attached the upper portions of the tail in the usual fashion, glue. I always add a layer of glue to both parts to be adhered, spreading a small amount around with a chip brush.


I use a lot of registration lines when I assemble components to try and minimize drift when I clamp. The different angles in this prop offer some challenges in regards to clamping.


Here you can see one solution to the extreme angles. I use a large squeeze bottle to apply glue, patina, solvent... It allows for greater control and conserves product. If any gaps remain after clamping, I apply a bead of glue to help seal the inaccuracy and wipe away the excess.


After that cured pulled out the orbital and started smoothing out the rough assembly. I use a 4000 series dremel with a mini barrel sander to rough out the tighter curves then smooth the whole thing out with a series of emery cloth grits and scotch pad course grades. Here are shots with the nose fairly rounded out. "A little too round..."


As I was wrapping up tonight I got a little case of "LEVEL UP!" and briefly entertained the idea of gluing up the rest of the prop. Forging ahead through the fog... Luckily I double checked my double check. The components of the main body do not meet the criteria but I did get some nice photos with the lower portions mocked up. I did take some time to tighten up the nose geometry with my trusty half round rasp.


I've been all over lately. I am cooking a lot of dishes, so to speak. I hope you like my work and are inspired to create on your own.


-BRD
 
Good progress man, it's looking pretty solid! about your screenshots for your pieces, I have an incredibly good screenshot of a good touch with all maliwan parts, and weirdly, it's missing a piece so you can see the entire rail/sight combo. If you want it, just PM me and I'll send it to you, who knows, it might come in handy for you.
 
Looking like you're on a track that's got a light at the end of the tunnel (whoa...way too many railroad-related comments there...)

For your next trick, might I suggest registration pins. I started using wooden dowels countersunk between the laminated parts so I wouldn't have to glue the whole thing up until I got to a point where I am overly satisfied that something I need to do isn't getting interfered with by something I've already done in a permanent fashion.

It's also nice to be able to route out internal paths for wiring/lights once you have most of the body completed if it's going to be a one-off for yourself or a commission.

For the record, I'm really looking forward to seeing you finish this! As much as I loathe SMG's in the game (I'm more of a Sniper and Shotgun kinda player), they are some of my favorite weapon designs.
 
Thanks guys!

Looking like you're on a track that's got a light at the end of the tunnel (whoa...way too many railroad-related comments there...)

For your next trick, might I suggest registration pins. I started using wooden dowels countersunk between the laminated parts so I wouldn't have to glue the whole thing up until I got to a point where I am overly satisfied that something I need to do isn't getting interfered with by something I've already done in a permanent fashion.

It's also nice to be able to route out internal paths for wiring/lights once you have most of the body completed if it's going to be a one-off for yourself or a commission.

For the record, I'm really looking forward to seeing you finish this! As much as I loathe SMG's in the game (I'm more of a Sniper and Shotgun kinda player), they are some of my favorite weapon designs.

Thanks for the tips on dowels.
I have always intended to use the Maliwan as a starting point to master jacket molds and design/build a rotocasting machine. Which is still the plan.

Spoiler: shotguns are in the cards.

Sent from my SGH-T989 using Tapatalk
 
I'm back with some progress to share.

I started this session of work with cleaning up the forward display windows. Using the markings on the back I employed some ******* files to shape the wood trying to maintain a plane perpendicular to the back face. It is easy to let things get out of hand and over-file or round the plane off.


The ******* files (half-round, flat, and square) I used are aggressive enough to efficiently remove material but not too much. These are ordinary Nicholson brand files that you can get at the hardware store. The file will fill up with dust (this is called loading) and need to be cleaned. I usually tap the loaded file on a wood workbench or my thigh every few passes to alleviate needing to brush the file clean. Using a steel brush is the surest way to get a clean file, however. I used these files extensively for this round.


With the front windows trued I wanted to get an idea of how the magazine will look in proportion to the rest of the gun. After searching around the shop for something the right size I decided to just mock one out of foam. I chose a healthy scrap of 3" thick and set to laying out the general shape.


I used a tape measure and thick white marker to get the proportion close and cut it out using a vertical band-saw. I used the 12" disc sander to true the plug round. I flipped the piece over so the marks I made for the rough cut don't distract me from sanding the shape round.


It fit like a glove.


I marked the top facing direction and sides for alignment with the seam. As the magazine is pitched, I marked a general idea of high and low sides.


After that it's back to the disc sander to make the domed shape. I tried to work in the pitch of the magazine from my drawing set.


Sanding the shape left the face fuzzy with little foam bits so I fanned it with a Map gas torch and rolled the warm face on a cool steel plate to smooth and stiffen the surface.


I spent the next couple of hours tuning in the lines of the assembled fore-grip and stock. Again employing the variety of ******* files I mentioned before. I marked out the various lines with a green charcoal pencil and set to planing down the surface. I kept flipping the gun over and over as I worked, approaching every side from different angles so that I could help maintain symmetry and fluidity. Here it is hanging before an initial primer coat.


I applied three rounds of spray coats totaling one rattle-can of primer. I tried to be generous to the portions of the MDF that are "open grain." I say that a little tongue in cheek as there is no real grain in MDF, just layers. Its amazing to me how a layer of primer homogenizes and visually brings the piece together.


I gave it a sand with some 600 grit and where the primer got good coverage, the surface is silky smooth. (Insert Dark Souls II reference) There is more than a bit of fill and sand to do and much more to come
 
Lookin' mighty fine! That's some interesting foam you got there, what kind is it? I've never seen foam that looks like that.
 
This thread is more than 8 years old.

Your message may be considered spam for the following reasons:

  1. This thread hasn't been active in some time. A new post in this thread might not contribute constructively to this discussion after so long.
If you wish to reply despite these issues, check the box below before replying.
Be aware that malicious compliance may result in more severe penalties.
Back
Top