EDIT: Holy long thread, Batman!
Go to P. 16 for final pics and video of my "Discovery" style Daft Punk Guy helmet.
Go to P. 20 for the start of my TRON remake.
———
I've got a thread going on about this as well over at the 405th, but figured I'd toss my progress out here for you guys to see as well.

I started doing research for this project back in February, and the build started in late March. In my research, I did come across a thread on the RPF where people were discussing Guy's helmet. One member called it "deceptively complex." After having worked on the mold master for a few months, I can definitely say he was right.
There is a pep file floating around for Guy's helmet, but the more I looked at it, the more it looked incorrect. I decided to do a full sculpt from scratch.
I should preface this by saying I have never done a helmet sculpt before, and because of this my entire process has largely been invented on the spot. I've learned a LOT in the duration of this build, and I definitely know what to watch out for next time. In the end, this helmet will be a mix of the "Discovery" and "Human After All" helmets - having the shape of the latter and the illumination of the former.
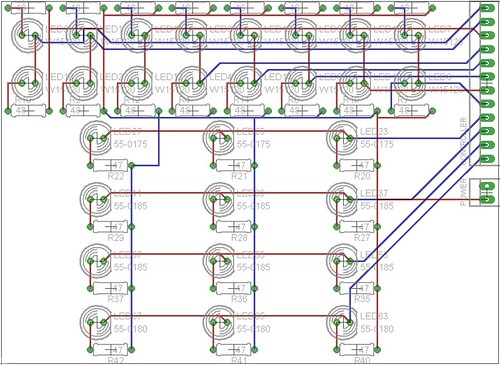
First thing was first, I needed to make accurate illustrations of the helmet and figure out the wiring I'm going to be tossing in there. Guy's helmet is the gold one, with the large black "fishbowl" visor, and large color bars left and right. After a lot of research, I built this in Illustrator:

You'll notice the mention of shift registers in there. I'm going to be using an Arduino programmable logic board to power the LED banks. By using 4 shift registers, I can control 32 independent channels for all the LED effects. These will all be selectable from a controller connected to the helmet, which will be build into a wrist piece (this - the wrist controller - is the way Daft Punk controlled their V1 helmets)
I won't be making the LEX matrix that covers the front part of the helmet for 2 reasons: #1 - you wouldn't be able to see anything out of it, and #2 - I plan on running the whole helmet off a small (pocket-sized) battery pack. An LED bank of that size would require a backpack system. While that is canon to the "Discovery" era helmets, I didn't want to have to build a backpack system for support.
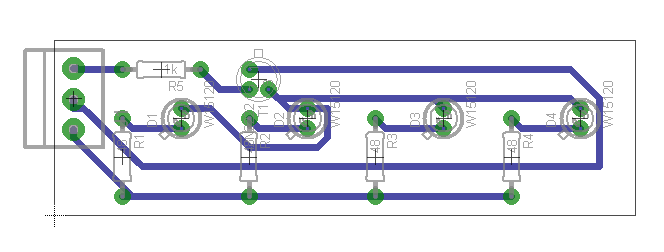
Next step was some PCB layout design. This is the "chin" LED banks, where you see the red, yellow, and green square LEDs in the picture above, as well as the 2 rows of white LEDs. There will be 2 of these boards, a left and right.
This is the board that will house 4 white LEDs and illuminate all of the color banks on the left and right sides of the helmet. There will be 16 of these total.
Enough drawings, onto the actual work!
Strange as it sounds, I took the template I made above, and built a faux 3-D helmet out of it on illustration board. This gave me a rough idea of scale before actually sitting down and carving clay. I also took the excess material from the illustration board and kept it as templates to put over the working helmet to make sure I was getting all the curves right.
This next part is a little weird. This is my first helmet sculpt, so I'm really winging it here process-wise. I started by covering my fake 3-D thing with a bunch of expanding foam:
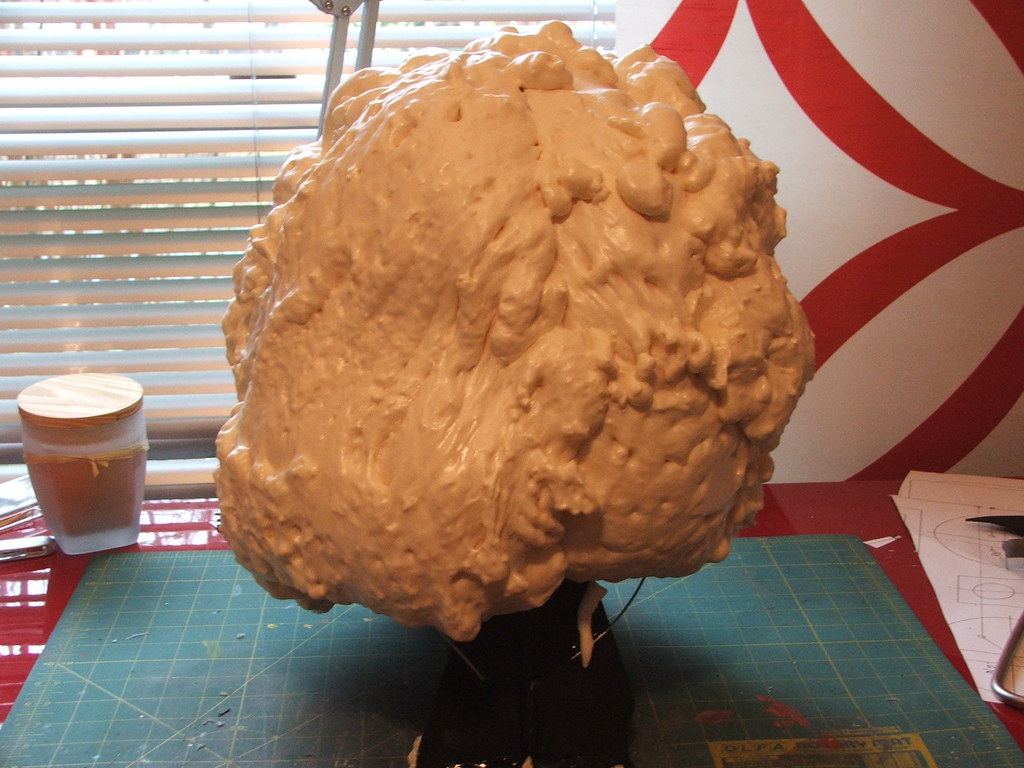
Which I then carved into a rough shape:
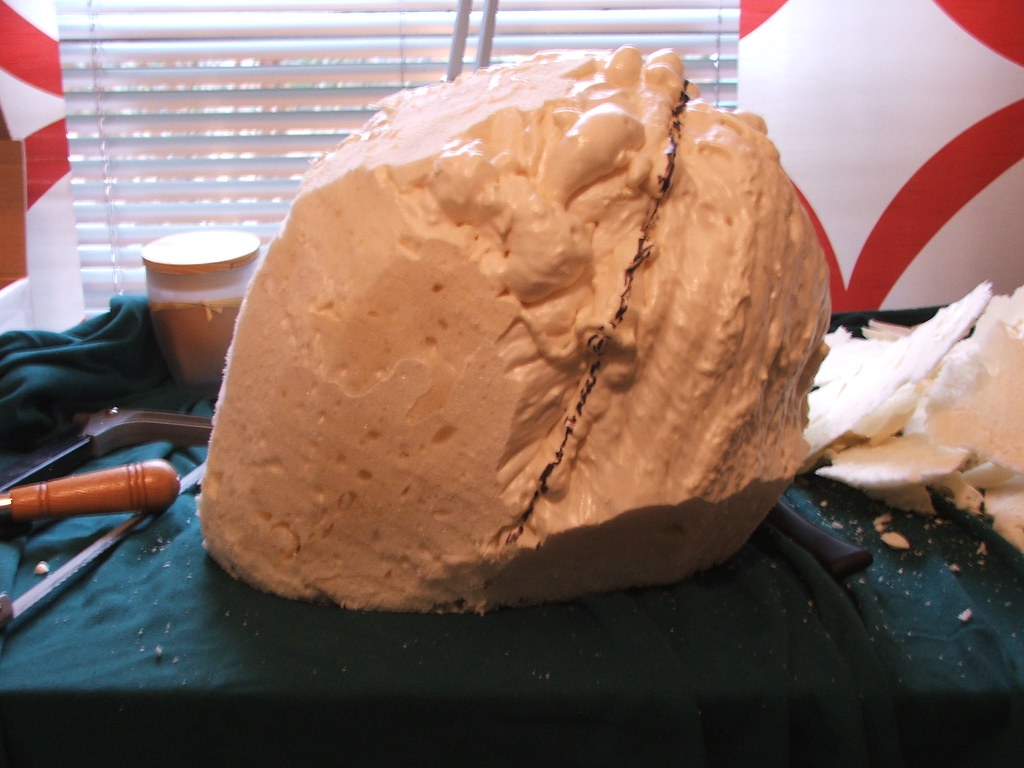
...really rough...

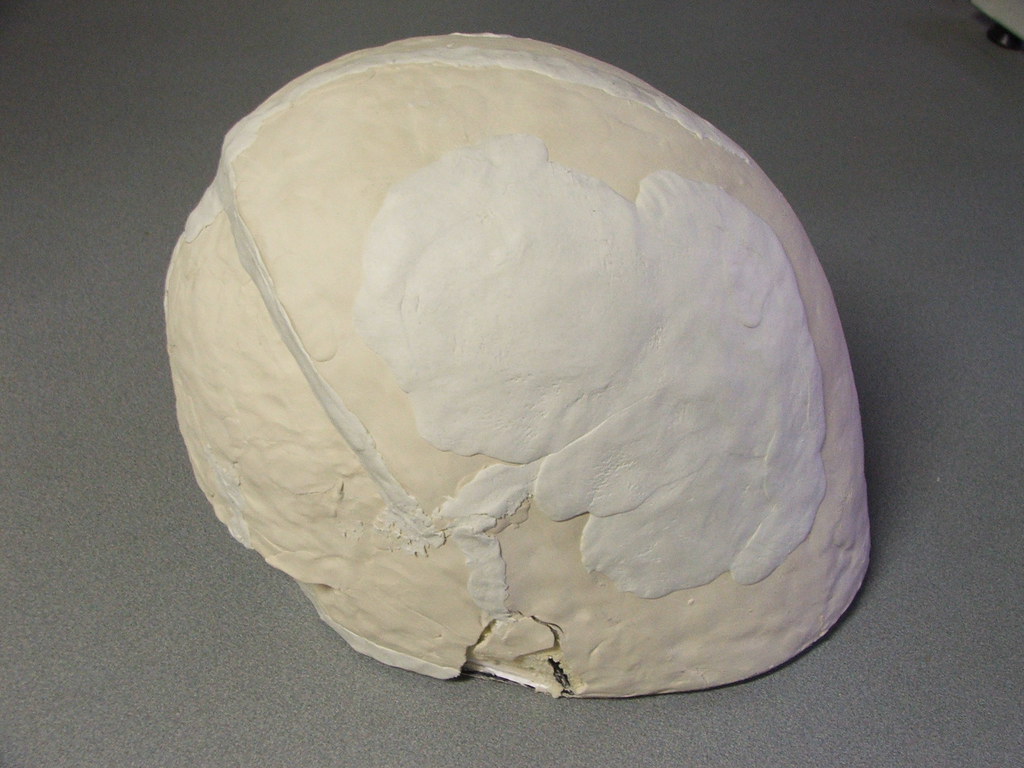
Then I got started with some clay, which (after drying) got some apoxie sculpt in the lower places. I know this seems like I'm using every material in the book, and I think in the future I can cut down on this a lot... but its actually working out rather well so far.
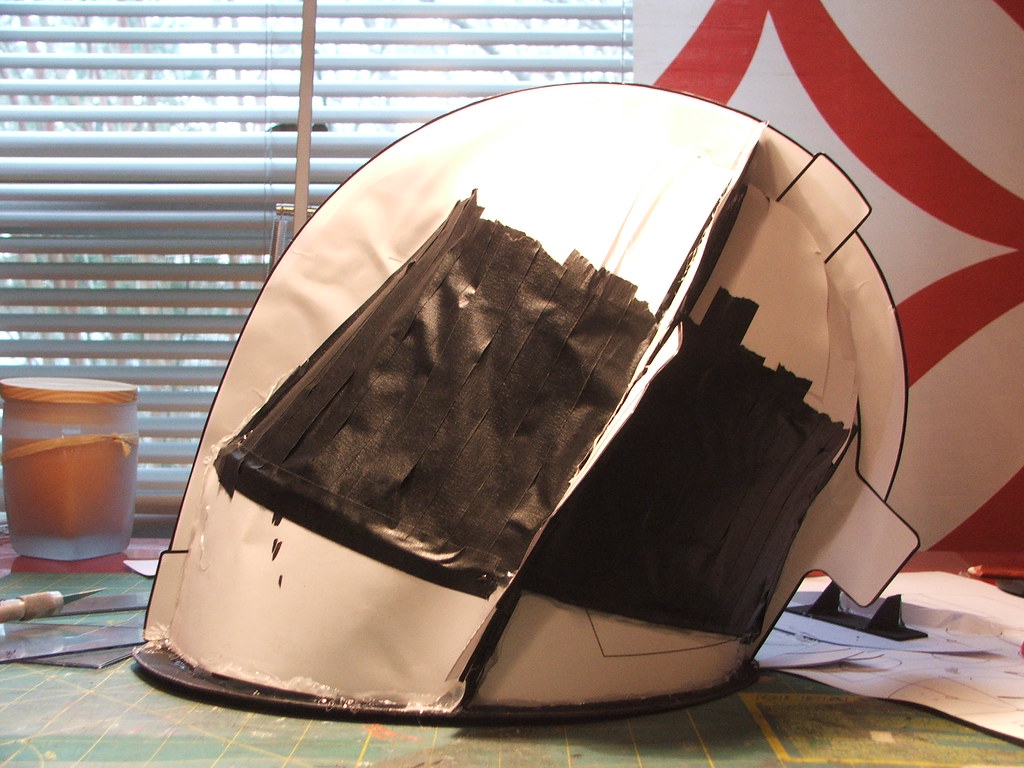
The ear puck areas were trimmed out

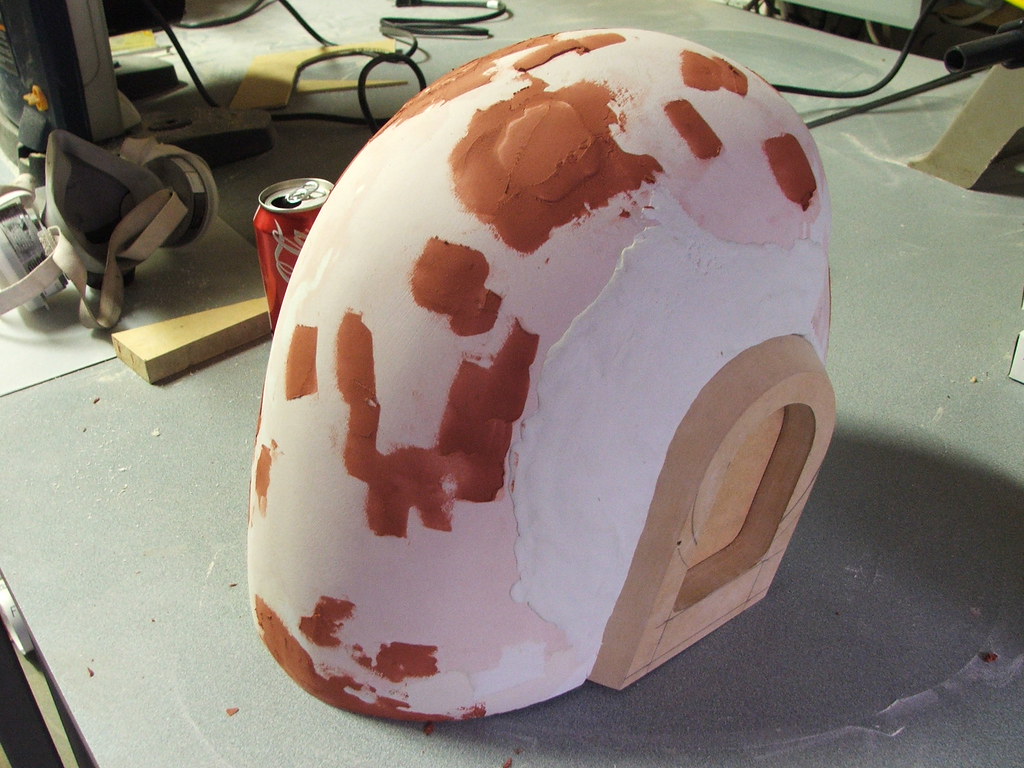
And then I built up some of the areas in bondo to match the curvature of my diagrams

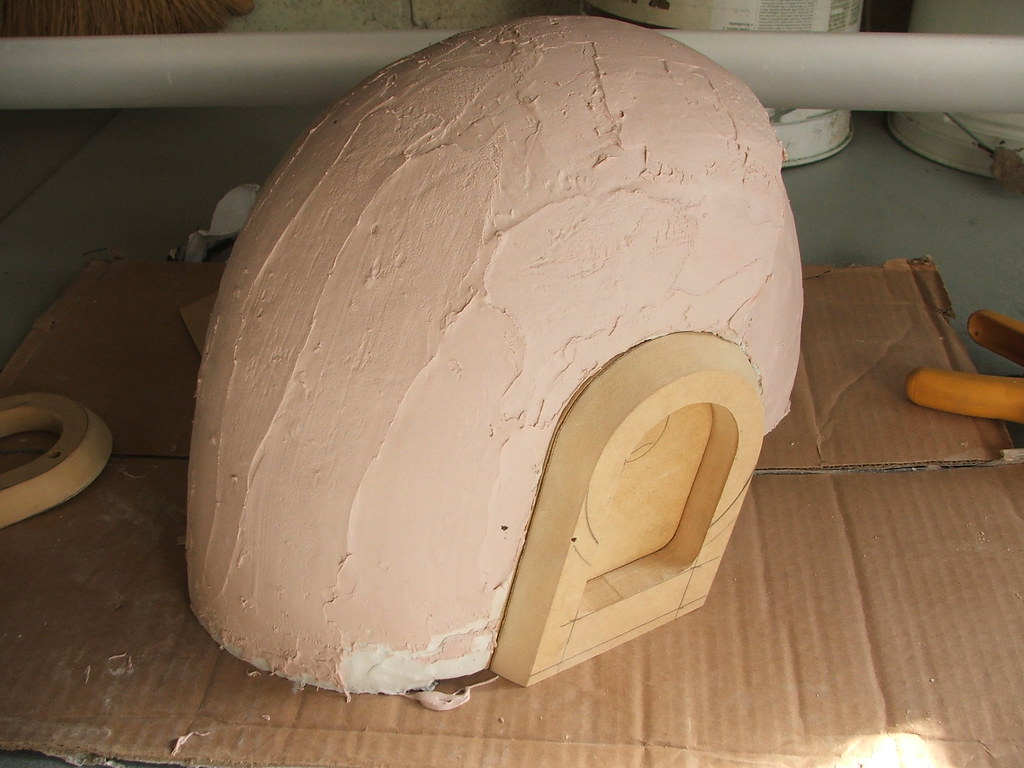
Ear pucks were carved out of MDF screwed together to make sure I kept the same shape.
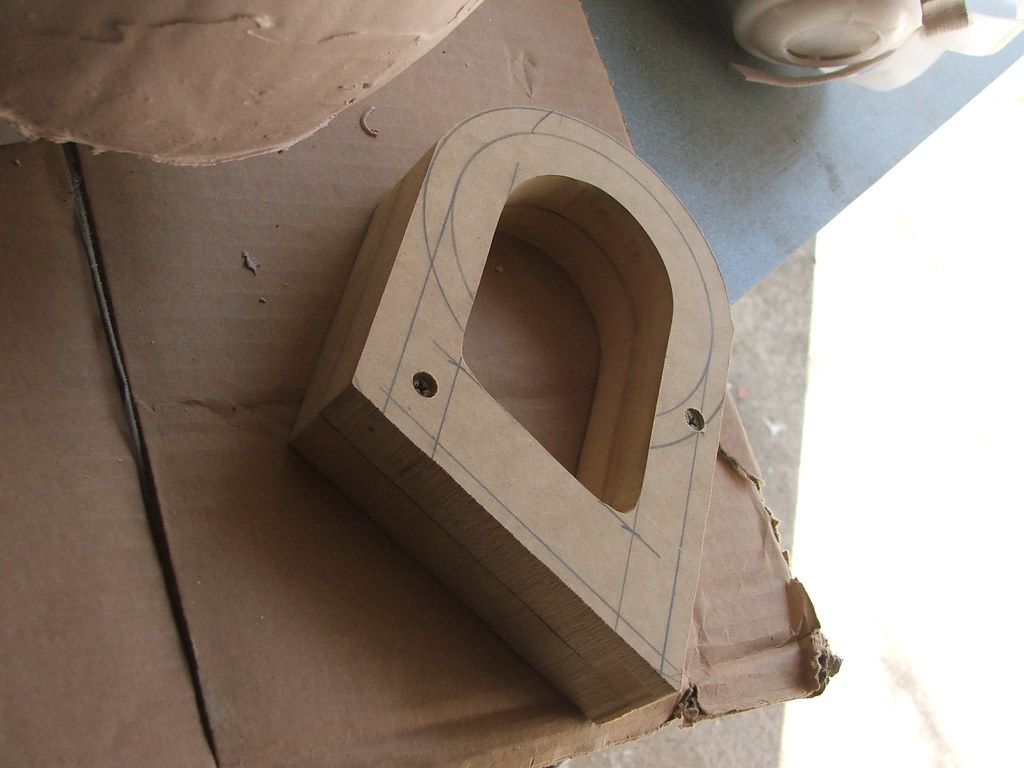
and were shaved down on a router

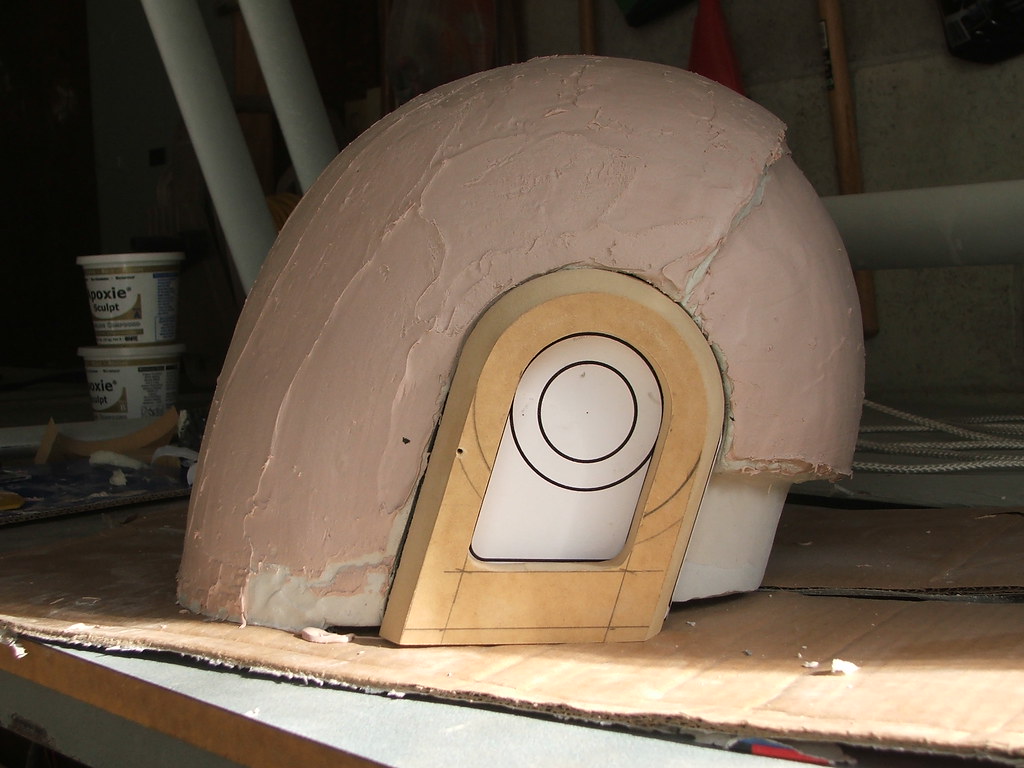
A couple of test fits
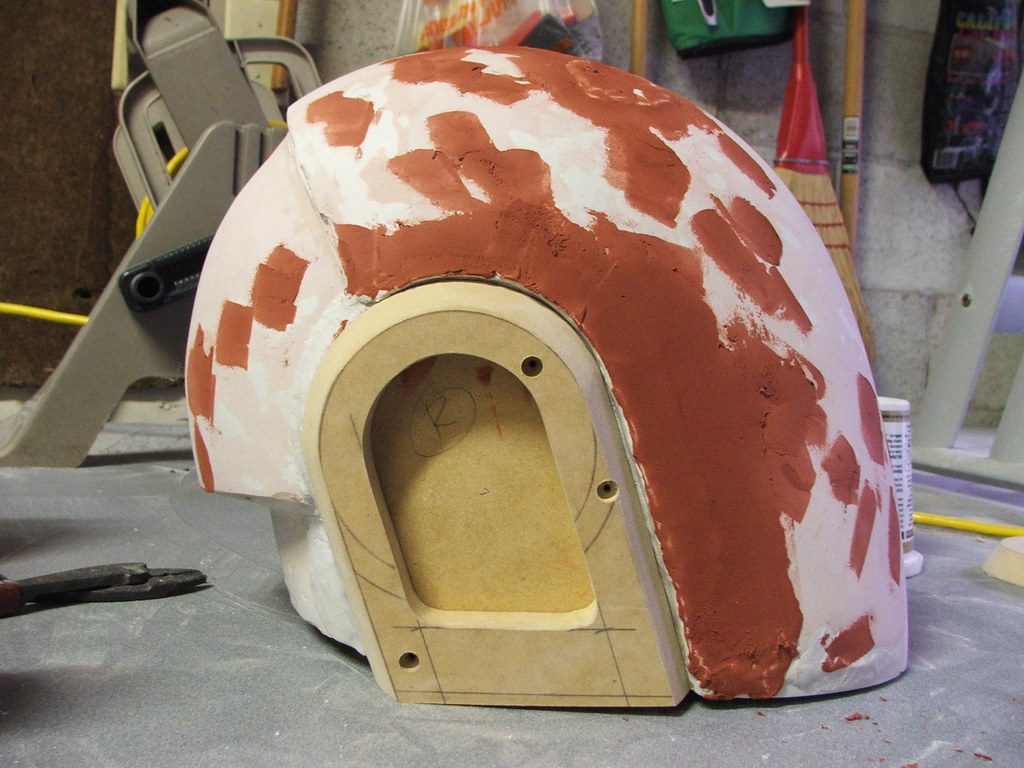
And after anchoring the baseplates for the ear pucks (am I just making up words here?) and sanding down the first coat of bondo.
THE QUESTION I GET ASKED MOST OFTEN: How are you going to see out of it / How are you going to make the visor?
The master is 1/8" deeper in the area where the visor will go. Once I pull a finished mold, I'll cut that part out and make a vacuum-form mold from the resin piece. This will be used to vac-form the visor out of tinted PETG or Acrylic.
I have more progress, but need to run to a meeting, so I'll be updating this again later today.
Edit: I know my pics are huge, so if they need to be taken down in size a bit, just let me know.
Go to P. 16 for final pics and video of my "Discovery" style Daft Punk Guy helmet.
Go to P. 20 for the start of my TRON remake.
———
I've got a thread going on about this as well over at the 405th, but figured I'd toss my progress out here for you guys to see as well.
I started doing research for this project back in February, and the build started in late March. In my research, I did come across a thread on the RPF where people were discussing Guy's helmet. One member called it "deceptively complex." After having worked on the mold master for a few months, I can definitely say he was right.
There is a pep file floating around for Guy's helmet, but the more I looked at it, the more it looked incorrect. I decided to do a full sculpt from scratch.
I should preface this by saying I have never done a helmet sculpt before, and because of this my entire process has largely been invented on the spot. I've learned a LOT in the duration of this build, and I definitely know what to watch out for next time. In the end, this helmet will be a mix of the "Discovery" and "Human After All" helmets - having the shape of the latter and the illumination of the former.
First thing was first, I needed to make accurate illustrations of the helmet and figure out the wiring I'm going to be tossing in there. Guy's helmet is the gold one, with the large black "fishbowl" visor, and large color bars left and right. After a lot of research, I built this in Illustrator:
You'll notice the mention of shift registers in there. I'm going to be using an Arduino programmable logic board to power the LED banks. By using 4 shift registers, I can control 32 independent channels for all the LED effects. These will all be selectable from a controller connected to the helmet, which will be build into a wrist piece (this - the wrist controller - is the way Daft Punk controlled their V1 helmets)
I won't be making the LEX matrix that covers the front part of the helmet for 2 reasons: #1 - you wouldn't be able to see anything out of it, and #2 - I plan on running the whole helmet off a small (pocket-sized) battery pack. An LED bank of that size would require a backpack system. While that is canon to the "Discovery" era helmets, I didn't want to have to build a backpack system for support.
Next step was some PCB layout design. This is the "chin" LED banks, where you see the red, yellow, and green square LEDs in the picture above, as well as the 2 rows of white LEDs. There will be 2 of these boards, a left and right.
This is the board that will house 4 white LEDs and illuminate all of the color banks on the left and right sides of the helmet. There will be 16 of these total.
Enough drawings, onto the actual work!
Strange as it sounds, I took the template I made above, and built a faux 3-D helmet out of it on illustration board. This gave me a rough idea of scale before actually sitting down and carving clay. I also took the excess material from the illustration board and kept it as templates to put over the working helmet to make sure I was getting all the curves right.
This next part is a little weird. This is my first helmet sculpt, so I'm really winging it here process-wise. I started by covering my fake 3-D thing with a bunch of expanding foam:
Which I then carved into a rough shape:
...really rough...
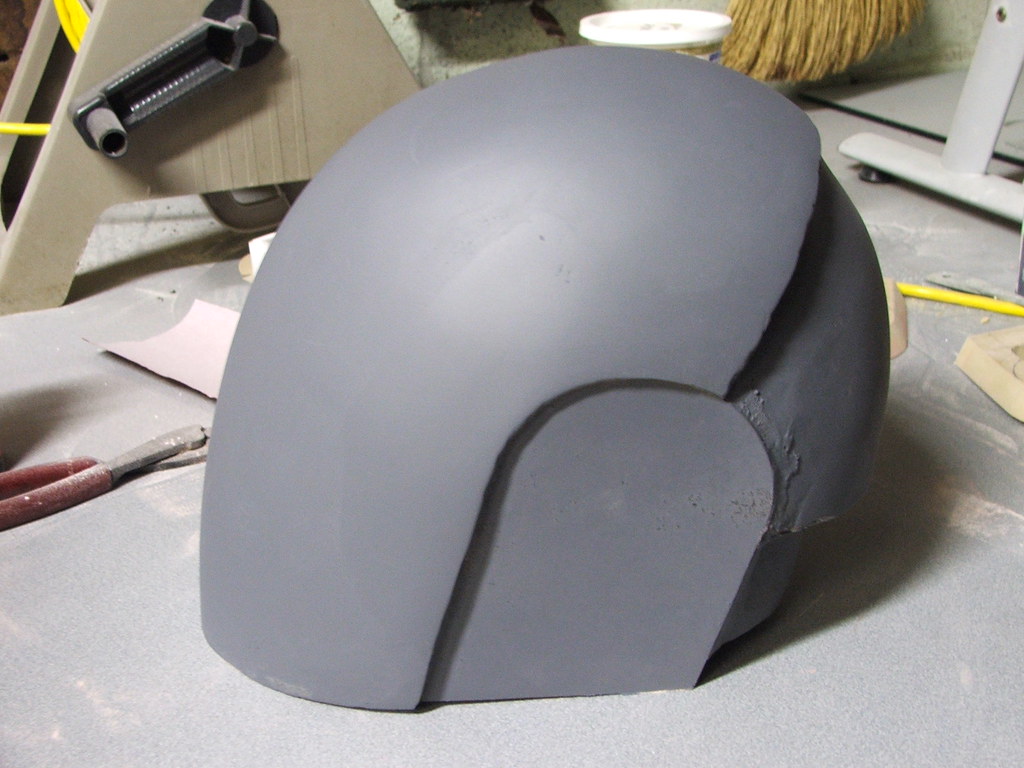
Then I got started with some clay, which (after drying) got some apoxie sculpt in the lower places. I know this seems like I'm using every material in the book, and I think in the future I can cut down on this a lot... but its actually working out rather well so far.
The ear puck areas were trimmed out
And then I built up some of the areas in bondo to match the curvature of my diagrams
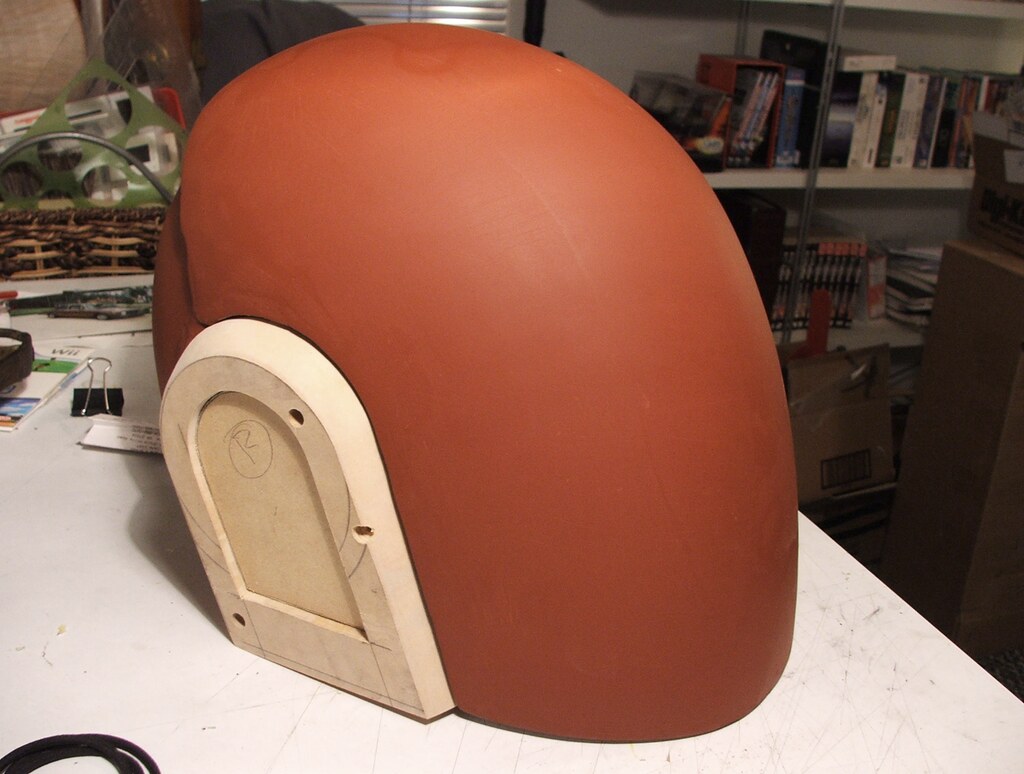
Ear pucks were carved out of MDF screwed together to make sure I kept the same shape.
and were shaved down on a router
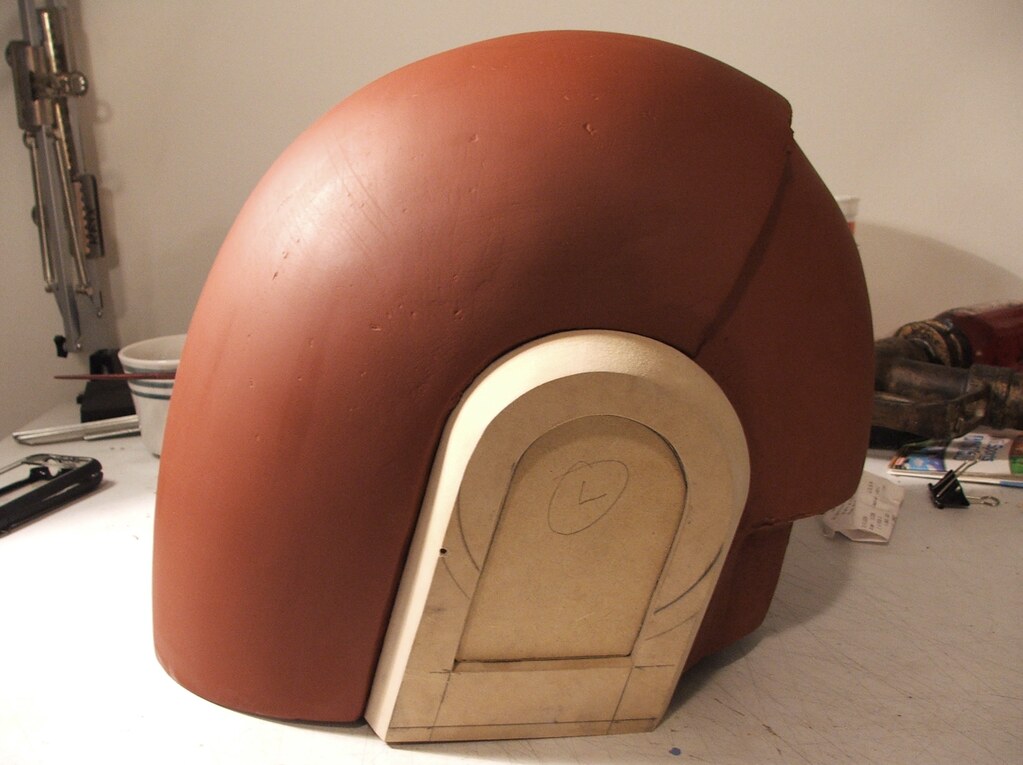
A couple of test fits
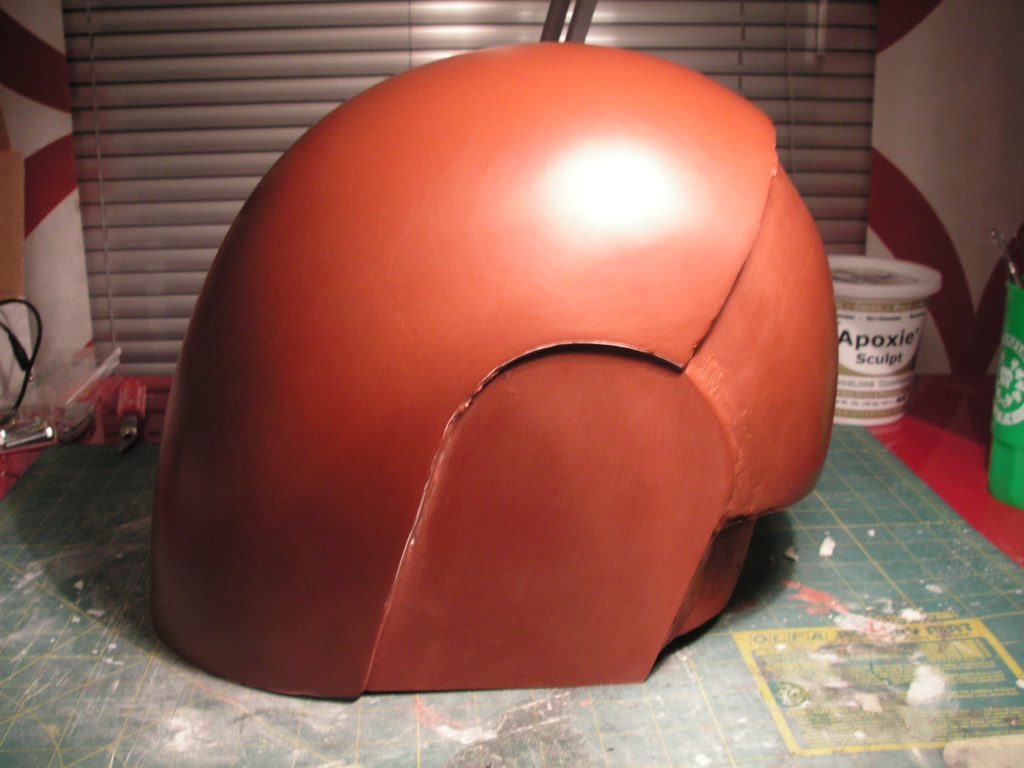
And after anchoring the baseplates for the ear pucks (am I just making up words here?) and sanding down the first coat of bondo.
THE QUESTION I GET ASKED MOST OFTEN: How are you going to see out of it / How are you going to make the visor?
The master is 1/8" deeper in the area where the visor will go. Once I pull a finished mold, I'll cut that part out and make a vacuum-form mold from the resin piece. This will be used to vac-form the visor out of tinted PETG or Acrylic.
I have more progress, but need to run to a meeting, so I'll be updating this again later today.
Edit: I know my pics are huge, so if they need to be taken down in size a bit, just let me know.
Last edited: