CLMayfield's v2 Han in Carbonite

clmayfield

Member
Hey all,

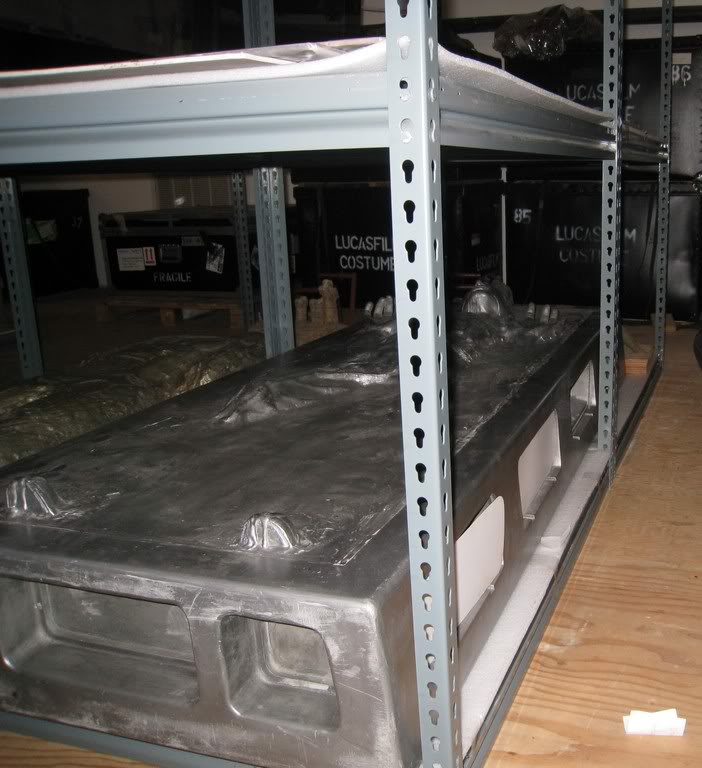
I put together a Han in Carbonite box that I just finished in early May for the Solo release date. I posted that build thread at the Dented Helmet Forum here:
https://www.thedentedhelmet.com/forums/threads/clmayfield-making-my-hic.31013/

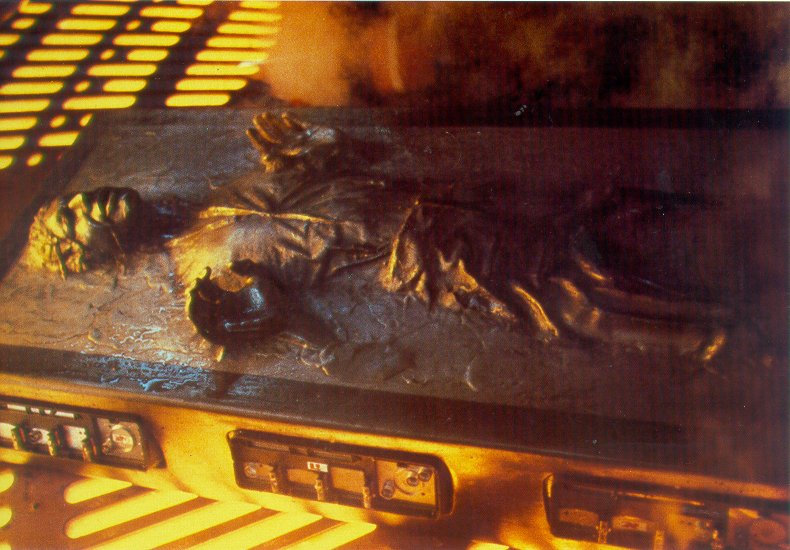
I decided that there were enough things that I did not like about that box that I would be redoing it (the most cardinal sin was mounting Han upside down, which meant I would have to refinish the box anyway). My chief objective will be to reduce weight so that I could suspend it in air and make it "hover." Further, it was supposed to be an "ESB" styled box and I wanted to make it more ESB, specifically with the top and back panels.

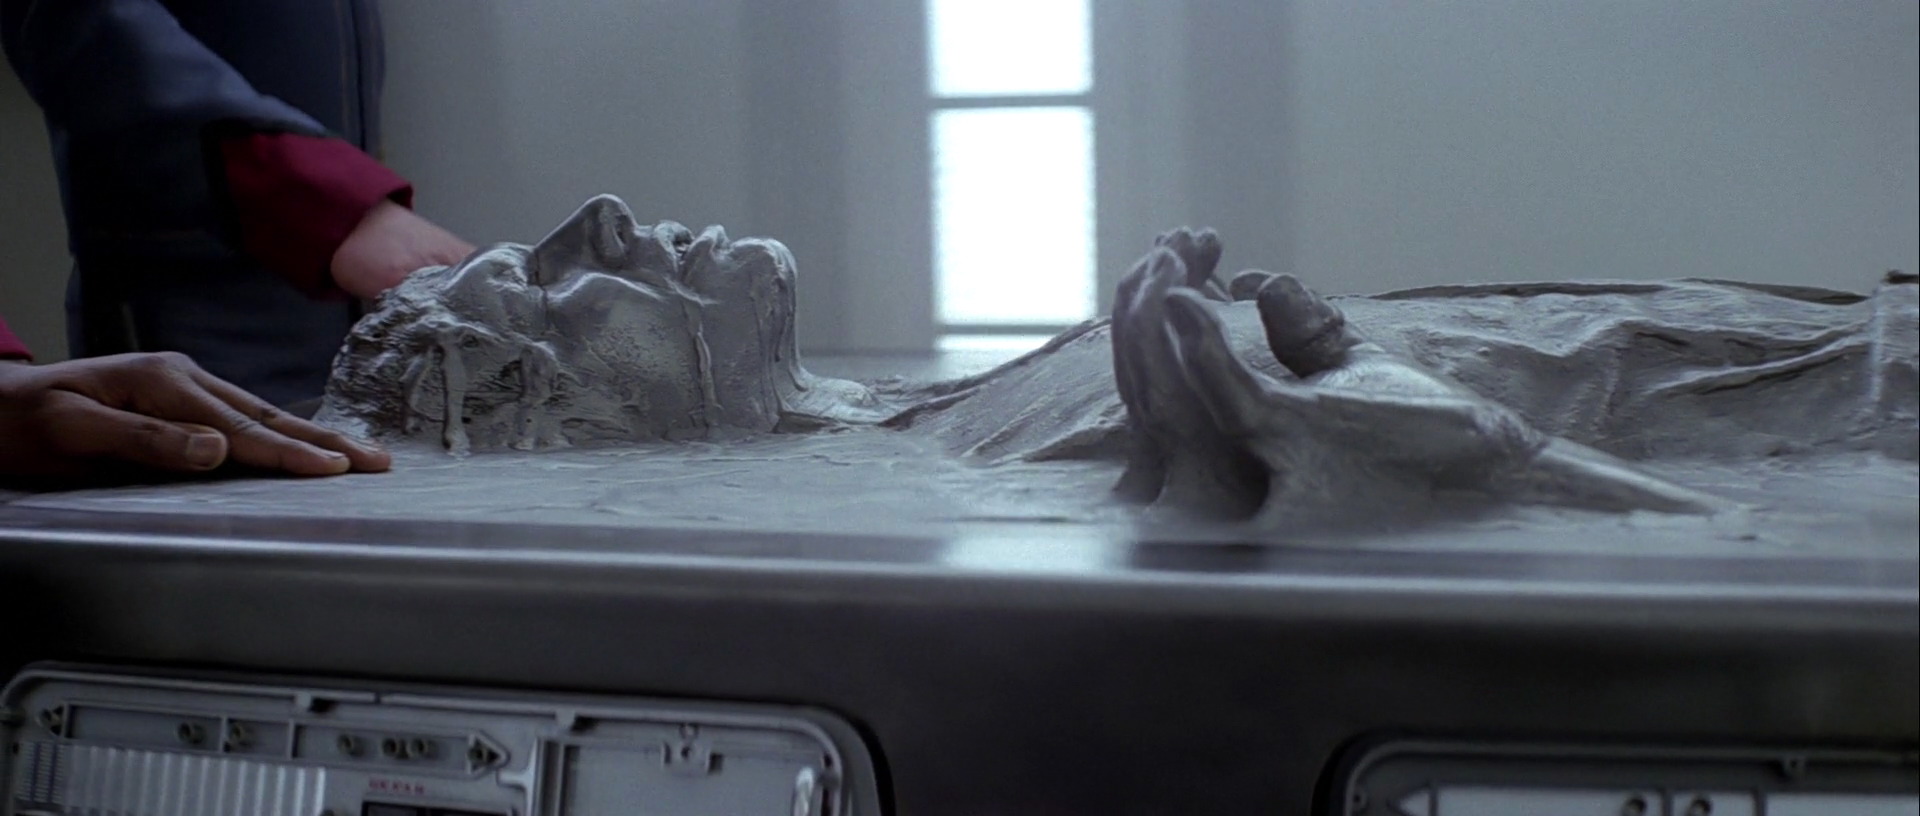
During the process of building my first box, I bought a router. This is an incredibly powerful woodworking tool that changed my approach completely. I actually started the process by building the frame around Han. I could then trace out the frame outline and cut out a mounting board (the board that Han mounts to) and fit it to the frame. The mounting board needs to have a half inch around the edges for the box to fit outside of the frame and mounting board.

You can see my pencil marks here. I basically traced the frame in pencil:
attachment.php


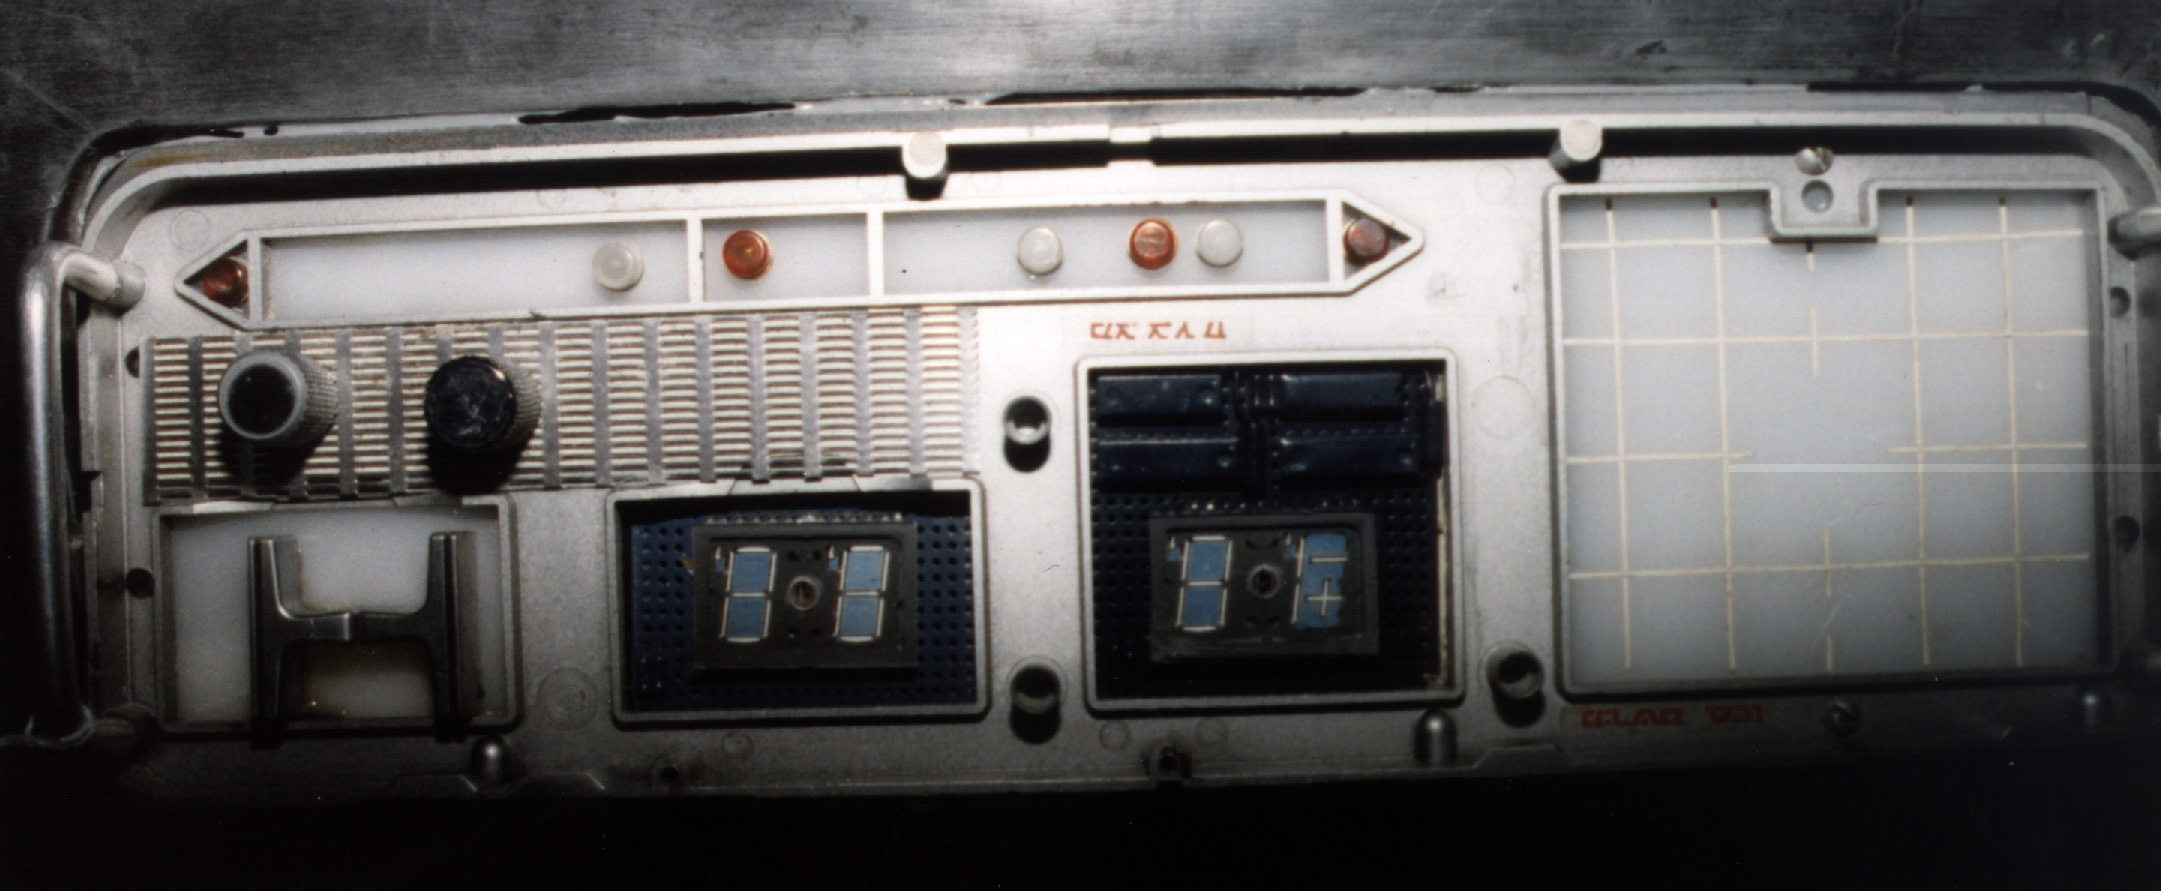
After cutting out the board, I also routed out a 1/4" recess around the edges for the frame. This is because I am using Stormrider's full front mount, which is a little under 1/4". The frame is about a half inch thick and I want the HiC from to sit almost flush with the frame. I previously solved this by cutting out pieces of quarter inch plywood and gluing and screwing it to the backer. This method is much cleaner. My backing board is 3/4". I probably could have gotten away with 1/2" and saved a lot of weight, but I didn't want to chance it. I used birch plywood, which is stronger, harder, and lighter than MDF. I used Zenix's HiC box kit, which is all MDF.

Here is what it looks like routed out (frame on top):
attachment.php


And here is it being glued:
attachment.php


And ultimately mounted together:
attachment.php
 
One of the peskier details of the box that most people don't bother with is the fact that the panel backers actually come in at an angle relative to the box. Based on the plans that I have seen, you need a 3/4" thick backer brace to support the backer. Previously, I didn't make the brace, which meant I didn't get enough depth and my panel wasn't recessed enough. Again, this is a TINY detail, but it is noticeable in the overall feel of the prop. To make the baker brace, I glued 3/4" plywood rectangles to the insides of the panel recesses:
attachment.php


Then I used a very handy router bit called a "Flush Trim" bit that has a bushing that rides the edge of whatever you are cutting. By clamping together (or gluing together) two pieces of wood, you can actually trace out the shape on the bottom (obviously, you have to adjust the bit depth correctly to make this work). Here is it in process:
attachment.php


And here is it completed. You can see the bit in the picture:
attachment.php


I don't have any pictures of it, but I used this same concept to create a number of panel backers based on one master by clamping together 3 1/4" pieces of MDF with the master and using the router to trace the outline. The final pieces were a bit rough and still required some fitting with a file, but it was a lot easier than individually cutting out 8 panel backers.

Previously for the HiC ends (top and bottom if you are oriented to Han), I used Blue Realm Studio's cavities, which are vacuum formed pieces. These are perfect for an ROTJ box, but too deep and with not enough room for the greeblies in the ESB HiC cavities. So I opted to use the same approach and mount 2 X 3/4" pieces of ply wood to the 1/2" MDF to give me an overall depth of 2". Here it is being cut out:
attachment.php


And here is it glued with some greeblies put in the cavities to see if they look right:
attachment.php


Now back to the panel pockets. In my original HiC, the panel backers didn't quite fit into the pockets exactly right. To remedy this situation, I used wood glue and Bondo to fill the gap from behind the pocket. That was pretty good, but didn't quite look right. You have to Bondo the visual side of the surface. I know you are thinking "duh," but, I thought I could take the easy way out and it didn't work.

Here is the pocket glued and Bondo'd:


And here it is smoothed out:
attachment.php


I will probably do another layer of Bondo to get it smoother. But importantly, you can see no gaps. If you are wondering, Walgreen's makes some wide emery boards at the time of this publication that make this task go well. I have bad experience trying to abrade Bondo with power tools. By hand just works better for me. YMMV.

This is what I used:
https://www.walgreens.com/store/c/walgreens-beauty-wide-board-grinder/ID=prod6163367-product

This is the reverse side of the Bondo's pockets. You can see the cracks from poor fitment. You can also see how Bondoing the reverse side wasn't going to be very effective at filling these cracks. Plus Bonding the exposed surface results in a slightly rounded edge that looks better.
attachment.php
 
Last edited:
And a little more progress. On to the HiC top and bottom (which is to say above Han's head and below his feet). This being an ESB HiC, I am putting greeblies in the top and bottom cavities. To purists, this is blasphemy as we don't have a surviving Carbonite block with such features. However, if you look closely, you can see these things in the Bespin Hallway scene. A promo shot also shows greeblies in the bottom. I will be copying those as precisely as I can get them.

It is generally believed that there is a louvered grate in the middle cavity of the top and bottom. I honestly can't see them as well as the "jets," but I am going to go with the louvers. Ideally, I would have a single louver going all the way across, but I have to buy what I can find, so I found this:
attachment.php


Or at least that is what it looked like after I cut it... I found that this size worked best. YMMV. It actually worked pretty well as I was able to bend the center "beam" back and make it fit the cavity pretty well. Here is the view from the rear:
attachment.php


I drilled in a few wood screws for extra support.

As you can see, the outside cuts look a little rough when fitted in:
attachment.php


To make it a smooth transition for the louvered grate as well as for the pockets, I opted to use bondo. Here are the bondo'd pieces:
attachment.php


The bondoing process left a little dirtiness on the face of the louvers. It is really hard to hit this area effectively with sand paper. I am hoping that when it is painted over, it will clean up a little. I think it will.
 
For the "jets," I am using some HIFROM mushroom shaped air filters. I looked everywhere for a greeblie of appropriate size and shape in model kits and even 3D printed parts, but these were the least expensive option that also looked really cool. Is this the original "found" part? No, but I am going to chalk up the "found" part to a "lost" part... or maybe "found and lost?"

Anyway, the air filters are made of carbon fiber. I plan to paint them metallic and because I don't really want to mask off the entire air filter / jet when painting the HiC block, I opted to making them removable by putting holes of appropriate diameter in 1/4" MDF. I used some routing attachments for my dremel to cut out holes, but they were not perfectly rounded:
attachment.php


And here is a picture of the whole assembly (with rough cuts):
attachment.php


That is too rough for my taste. I tried sanding to get it round, but that didn't work so well, so I decided to use my good friend Bondo again. I hit the "jets" with Pam, fit them into the hole, and Bondo'd the area to try to make it fit the "jet" perfectly. It was actually pretty hard to unseat, but I was able to make perfectly round holes that allowed the jets to come in and out:
attachment.php


And this is what the whole assembly will look like more or less:
attachment.php


I am gluing the 1/4" MDF to the assembly as we speak. I will again try to hit the corners with bondo to round them out after gluing. Otherwise, a visible seam will be present where the pockets bottom out. If I am doing all of this work, I would hate for there to be a seam.
 
Wait... the esb and rotj Carbonite blocks are different? Did I read that right?

Yes. In a couple of ways... the panels are different, the coloring is different (in ESB, there is a clear color contrast, in ROTJ, the box and Han are pretty close in coloring). The biggest difference is the cavities in the top and bottom.

Check it out:

Cavities

ROTJ
full


ESB
full


and

full


Look at the color contrast:
ROTJ
full


ESB
full


Now, is it possible, that over time, the box was polished to the point that the metallic color was rubbed off giving the whole prop a more uniform color? Yes. But the greeblies in the top and bottom? Perhaps there was an insert that came in and out, but I doubt that. There are no visible way for an insert to attach to the box. The panels were obviously switched out. There are actually two Hero panels (not to be confused with Hero Panel #2, which was in ROTJ). One of the Hero Panel has lights in the turn signal indicator bar, one does not:

full


vs

full


They actually switch the panels throughout ESB. You will not find them consistently in the same position.

Because there is not surviving prop from ESB, people generally use the panel positions of the prop that travels around to different museum displays. The main hero panel (on Han's left side) was in both movies. I believe there was another panel or two that was in both movies, albeit in different positions.
 
Been a while since I posted. Here is some new progress...

Here is the whole box glued together. I basically had to glue all of the sides, top and bottom first, and put the Han surface over the square to make sure everything was aligned. Then I glued the Han surface in. I put a 2X2 supporting the middle seam in the sides, screwing it in with wood screws while also using wood glue... it ain't going nowhere. I also did this to all of the corners. This is harder than it sounds as the corners are not all square. I had to use the cant (angled) feature on my circular saw and mind which way the cuts went. I offset the ends by a quarter inch just in case I want to lay a panel in the reverse side of the "Han surface" (the "bottom" if the HiC were horizontal). I actually screwed up one of the corners, but once it was glued and screwed, I couldn't really go back.

I tried to square all of the corners and edges of the box with a random orbital sander using rough 60 grit sandpaper. I used a rough grit because the goal here really is to shape. Once you take the surface off of the MDF, it is highly permeable and water will ruin it, so you have to be careful. I cover up with plastic sheets when I am not at work with clamps holding them on. I have to do this outside on account of all of the sawdust and it takes two people to move, so I can't always move it back inside when I am done.

The corners aren't 100% square when I am done, but that is OK. There is work left to do and I will fix a lot of the surfaces with coats of Bondo.
attachment.php


And here it is with the top edges radiused to the appropriate dimensions with my router. You can also see the screw holes where I screwed in my 2X2 supports:
attachment.php
 
Now here, you can see what the seams look like prior to Bondo. Obviously, if you paint over this, the seams will be highly evident. In my first box, I applied a minimal amount of Bondo and sanded it all the way down so that the Bondo only filled the seams. I could not feel the seams with my finger, but it was visible without paint. I reasoned that once everything was painted, if I couldn't feel the seam, I wouldn't be able to see the seam. Unfortunately, this is not true. If you can see the seam before painting, it will be faintly visible after painting. You live. You learn.

attachment.php


This is after the first layer of Bondo. As you can see, that layer is thick and rough. I could have done a little bit of a neater job had I used a cleaner disposable putty knife to spread the Bondo like I was icing a cake. The rougher job you do, the more touching up, but the first layer is never going to end up perfect anyway. The key is to cover every seam on the box that you don't want visible, which is a lot of seams.

I sand this down with 80 grit using a hand sander. I made the mistake of using the random orbital sander to work on the Bondo layer, and it just cuts too quickly. It is too easy to eat right through the Bondo to the wood. Best to let the grit do the work as opposed to the power of the sander. Yeah, it is a lot of work and it sucks, but this is the toughest and most rewarding part of the project.

attachment.php


In the end, I decided to coat the whole box in Bondo. This will cost a little more and add a whole bunch of work, but I believe it will make the whole box look more uniform in the end. I enjoy the fact that some people have a difficult time figuring out which medium you are working with. With a uniform surface of Bondo over MDF, it should look very much like a block of ice, which is what it is supposed to look like. There will also be surface deformities that will make it look more "natural."

Here is one side after the first 3 layers of Bondo and before the final "rough sanding." After the Bondo is completely applied, I will rough sand everything with 80 grit, round all of the edges again with a router (excess Bondo builds up in the radiused edges), then I will sand down to 180 grit and finally 400 grit before applying sanding sealer. The edges will have bare wood, so the sealer is still necessary.

attachment.php
 
Well, I was hoping the Bondo would hide the seams... but not when it cracks. AAAAARRRRGGGGGHHHH. I am guessing that supporting it by the bed put too much pressure at the seams. I hope it settles down. For now, I will fill in the cracks with Bondo glazing and spotting putty.
attachment.php


And so I hand sand the whole thing down with 400 grit sand paper and hit it with a coat of Minwax Sanding Sealer. And then I sand it down with 400 grit again. At this point, any surface defects are pretty apparent, so I fill those in with Bondo professional glazing and spotting putty. Ironically, there is nothing putty-like about this stuff. It is very creamy and sets very quickly, especially in the Summer Texas sun. The creaminess actually makes it spread very well. At this point, I am using very thin layers just to work out surface imperfections, pinholes, and the like.

You can see the putty... it is the lighter spots. Before further layers of sanding sealer...
attachment.php


And I will coat these touch ups with more coats of sanding sealer. 4 more coats, actually. I used to sand with 400 grit between coats, but the directions say that isn't necessary. So I don't. If you are trying this at home, it takes about a pack of 6 X 400 grit 1/4 sheets to hit the whole box. That can get expensive real fast.

attachment.php


It is hard to depict how glossy and reflective the surface is from that picture, so I thought I would show another angle. The box really looks like pure glass. The paint should lay over really nicely. My only debate is that I still have a few areas of pinhole imperfections. Do I want to try and get those before painting? Given the fact that I coated the entire box with Bondo, I think you probably know the answer. Looking good.

attachment.php
 
This thread is more than 5 years old.

Your message may be considered spam for the following reasons:

  1. This thread hasn't been active in some time. A new post in this thread might not contribute constructively to this discussion after so long.
If you wish to reply despite these issues, check the box below before replying.
Be aware that malicious compliance may result in more severe penalties.
Back
Top