Hi all,
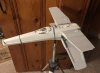
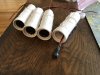
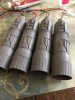
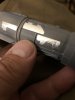
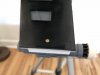
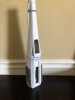
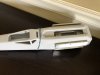
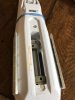
Over the long holiday weekend, I found myself with a few spare hours, so I started playing with one of my Salzo V5’s. In all honesty, I really didn’t start out to build anything...I was playing with the armature, and decided to see how it fit into the fuselage. Hours later, I wound up with what looks like the start of a build. Funny how that happens.
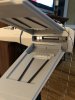
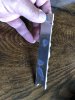
I took a spare belt from my tabletop belt sander, cut it so I had a long, continuous strip of sandpaper, and adhesed it to a piece of flat, thick glass. I sanded the mating surfaces of the fuse, so that the upper and lower halves fit almost perfectly. Only took a few strokes on the paper for each half. There is one small area right below the cockpit that will need a thin bead of filler for it to be a perfect fit.
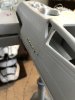
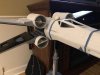
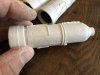
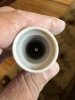
Then, the cavity for the armature. Again, only a little sanding here to make the armature fit perfectly, and open/close fully without interference.
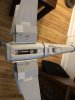
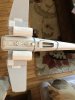
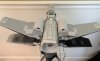
Had to mill out a slot underneath the droid strip, so that the armature tension screws, and engine light wiring can be accessed. While I was at it, I drilled some holes for some rare earth magnets, to hold the droid strip in place. I ‘recycled’ an old metal cigar tin, cut it in strips, and glued it to the bottom of the droid strip. Something for the magnets to grab onto. The rear hole for the magnet needs a little cleanup, but a spot of putty should make it look presentable.
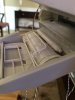
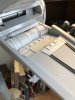
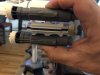
Next thing i knew, I was sanding the inside of the fuse to fit the cockpit. It needs a little more work to get it to fit just right, but I’m getting close. It needs to sit up a little higher in the fuse, but a little more work should get it to fit all the way forward and a little higher.
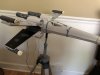
Although I’m a long way from gluing anything together yet (other than the metal underneath the droid strip), the fusealage is starting to look a little like an X-wing. If the weather cooperates next weekend, I’ll take the wing parts outside and begin sanding and cleaning them up.
- - - Updated - - -
The last 2 images failed to attach.
Over the long holiday weekend, I found myself with a few spare hours, so I started playing with one of my Salzo V5’s. In all honesty, I really didn’t start out to build anything...I was playing with the armature, and decided to see how it fit into the fuselage. Hours later, I wound up with what looks like the start of a build. Funny how that happens.
I took a spare belt from my tabletop belt sander, cut it so I had a long, continuous strip of sandpaper, and adhesed it to a piece of flat, thick glass. I sanded the mating surfaces of the fuse, so that the upper and lower halves fit almost perfectly. Only took a few strokes on the paper for each half. There is one small area right below the cockpit that will need a thin bead of filler for it to be a perfect fit.
Then, the cavity for the armature. Again, only a little sanding here to make the armature fit perfectly, and open/close fully without interference.
Had to mill out a slot underneath the droid strip, so that the armature tension screws, and engine light wiring can be accessed. While I was at it, I drilled some holes for some rare earth magnets, to hold the droid strip in place. I ‘recycled’ an old metal cigar tin, cut it in strips, and glued it to the bottom of the droid strip. Something for the magnets to grab onto. The rear hole for the magnet needs a little cleanup, but a spot of putty should make it look presentable.
Next thing i knew, I was sanding the inside of the fuse to fit the cockpit. It needs a little more work to get it to fit just right, but I’m getting close. It needs to sit up a little higher in the fuse, but a little more work should get it to fit all the way forward and a little higher.
Although I’m a long way from gluing anything together yet (other than the metal underneath the droid strip), the fusealage is starting to look a little like an X-wing. If the weather cooperates next weekend, I’ll take the wing parts outside and begin sanding and cleaning them up.
- - - Updated - - -
The last 2 images failed to attach.
Attachments
-
 DEC6C641-CF92-4F53-9A38-D2633A04C7A2.jpeg1 MB · Views: 521
 -
 C424A331-5443-4AD4-A028-CFC58782F423.jpeg2.5 MB · Views: 499
 -
 BA7BE233-F5EE-4F6D-87A0-7AD6BA1FCB05.jpeg1.4 MB · Views: 496
 -
 542F64E3-5C35-4B56-8C9D-DD61BCBDEA3E.jpeg1.1 MB · Views: 508
 -
 03DECBBE-2E0C-4BFA-B488-15AF3B83E458.jpeg1.9 MB · Views: 460
Last edited: