Dabboy
Active Member
Hello everyone!
Direct link to the complete costume video here:
Update 2021:
The Archon at Blizzcon X video
Just recapping,
Three years ago I cosplayed a Ghost (Terran race)

Photo by Bobby (Cute World Photography)
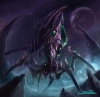
Last year I made the Hydralisk (Zerg race)

Photo by John Jiao Photography
This year, I'm wrapping it up with the last race of the Starcraft saga: the Protoss.
Sample images:


The Protoss are an ancient humanoid race which developed sophisticated technology and gifted with enhanced psionic power.
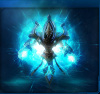
I initially wanted to build the Stalker (a 4-legged mecha controlled by the essence of a dark templar).

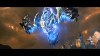
However, when Blizzard featured the Archon in the latest expansion trailer, I could not resist.

So here it is!
THE ARCHON THREAD
---------------------------------
Back in Starcraft I, the Archon had little substantial media to work with. It was simply a naked protoss in a ball of luminous energy.

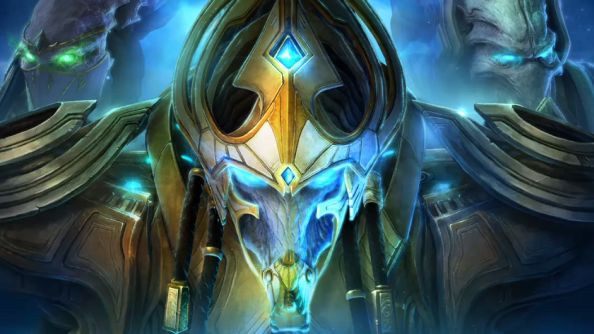
With Starcraft II new design, the Archon looks more like an energy soul entrapped in a templar outfit which I find looks definitely more majestic than the original form.

However, it's really the cinematic version that hit me the most.

The armor got seriously revamped and look so much stronger. Goosebumps when we hear the glorious "POWER OVERWHELMING". Despite the big difference between the designs, I find the huge almost spherical torso armor still kept a feel with the old "ball" design.
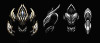
Anyways, Let's start with my main visual sources for my cosplay:
Concept Art by Anthony Jones

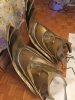
And there is the 3d model featured in the cinematic behind the scene:

The quality is much better in the blue-ray version
Ok let's with the head!
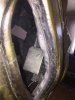
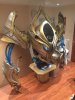
I modelled my Archon head out of clay then made a plaster mold out of it. Scraped the clay out of the mold, cleaned as much as possible then poor latex in it. It was my first mold so I could have done a better job. Should have made a two-piece mold instead of just one. Once the latex cured, I pulled the mask out, then trimmed the imperfections. Painted with acrylic mixed with latex.


Overall pretty happy with the way it came out. With practice I believe they can be even smoother and avoid air pockets.
The body was a puzzle. How should the piece fit together. What's an appropriate and realistically wearable size? Where do we start? =O
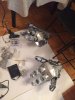
I decided to make a miniature paper version of the main body.


That would give me an idea of the form it would take. Once it sort of looked okay, I simply projected the size of all the pieces onto EVA foam. Scale was 1:5. And this is what you get: a big fat Archon


Now the important question is how was I going to wear that.
At the time, I got inspired by WIRED's Giant Robot featured at San Diego ComicCon 2013. The actor wears a football shoulder pad to which is affixed the skeleton of the robot.


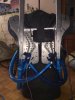
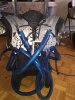
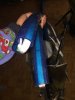
I decided to do the same thing. Got myself an used shoulderpad, screw 2 standing rods to it with a cross bar to hold them tight. Then I trimmed the bulky torso and added more details and this is what it looked like:


That's my cousin helping be a model XD
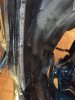
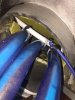
The arches went through trials and errors until they had the right curve.Tried to grind evertyhing as smoothly as I can but there is WAAAAAY more room for improvement.
At that stage I figured the cosplay would be about 8 feet tall and about 6 feet wide. My arms would come out free right under the armor.
That's it for now. I hope the content was interesting enough to tap your curiosity!
The project is currently almost near completion. It just takes lot of time to write about it so stay tuned to see the rest! =)
But if you can't wait for the latest update, check out my facebook page!")
En Taro Adun!
Direct link to the complete costume video here:
Update 2021:
The Archon at Blizzcon X video
Just recapping,
Three years ago I cosplayed a Ghost (Terran race)
Photo by Bobby (Cute World Photography)
Last year I made the Hydralisk (Zerg race)
Photo by John Jiao Photography
This year, I'm wrapping it up with the last race of the Starcraft saga: the Protoss.
Sample images:
The Protoss are an ancient humanoid race which developed sophisticated technology and gifted with enhanced psionic power.
I initially wanted to build the Stalker (a 4-legged mecha controlled by the essence of a dark templar).
However, when Blizzard featured the Archon in the latest expansion trailer, I could not resist.
So here it is!
THE ARCHON THREAD
---------------------------------
Back in Starcraft I, the Archon had little substantial media to work with. It was simply a naked protoss in a ball of luminous energy.
With Starcraft II new design, the Archon looks more like an energy soul entrapped in a templar outfit which I find looks definitely more majestic than the original form.
However, it's really the cinematic version that hit me the most.
The armor got seriously revamped and look so much stronger. Goosebumps when we hear the glorious "POWER OVERWHELMING". Despite the big difference between the designs, I find the huge almost spherical torso armor still kept a feel with the old "ball" design.
Anyways, Let's start with my main visual sources for my cosplay:
Concept Art by Anthony Jones
And there is the 3d model featured in the cinematic behind the scene:
The quality is much better in the blue-ray version
Ok let's with the head!
I modelled my Archon head out of clay then made a plaster mold out of it. Scraped the clay out of the mold, cleaned as much as possible then poor latex in it. It was my first mold so I could have done a better job. Should have made a two-piece mold instead of just one. Once the latex cured, I pulled the mask out, then trimmed the imperfections. Painted with acrylic mixed with latex.
Overall pretty happy with the way it came out. With practice I believe they can be even smoother and avoid air pockets.
The body was a puzzle. How should the piece fit together. What's an appropriate and realistically wearable size? Where do we start? =O
I decided to make a miniature paper version of the main body.
That would give me an idea of the form it would take. Once it sort of looked okay, I simply projected the size of all the pieces onto EVA foam. Scale was 1:5. And this is what you get: a big fat Archon
Now the important question is how was I going to wear that.
At the time, I got inspired by WIRED's Giant Robot featured at San Diego ComicCon 2013. The actor wears a football shoulder pad to which is affixed the skeleton of the robot.
I decided to do the same thing. Got myself an used shoulderpad, screw 2 standing rods to it with a cross bar to hold them tight. Then I trimmed the bulky torso and added more details and this is what it looked like:
That's my cousin helping be a model XD
The arches went through trials and errors until they had the right curve.Tried to grind evertyhing as smoothly as I can but there is WAAAAAY more room for improvement.
At that stage I figured the cosplay would be about 8 feet tall and about 6 feet wide. My arms would come out free right under the armor.
That's it for now. I hope the content was interesting enough to tap your curiosity!
The project is currently almost near completion. It just takes lot of time to write about it so stay tuned to see the rest! =)
But if you can't wait for the latest update, check out my facebook page!
En Taro Adun!
Attachments
-
 maxresdefault.jpg136.1 KB · Views: 181
 -
 maxresdefault.jpg136.1 KB · Views: 190
 -
 836882448.jpg149.8 KB · Views: 209
 -
 836882448.jpg149.8 KB · Views: 144
 -
 maxresdefault.jpg86 KB · Views: 197
 -
 bliq1zz.jpg771.8 KB · Views: 165
 -
 full_732361842.jpg11.3 KB · Views: 203
 -
 archon.jpg77.9 KB · Views: 200
 -
 archon.jpg77.9 KB · Views: 193
 -
 bliq1zz.jpg771.8 KB · Views: 137
 -
 maxresdefault.jpg86 KB · Views: 132
 -
 full_732361842.jpg11.3 KB · Views: 155
 -
 anthony-jones-archon-orthos-v4a.jpg232.1 KB · Views: 200
 -
 maxresdefault.jpg62.7 KB · Views: 174
 -
 anthony-jones-archon-orthos-v4a.jpg232.1 KB · Views: 147
 -
 maxresdefault.jpg62.7 KB · Views: 161
Last edited: