EFX DARTH VADER ANH PCR HELMETS (SPECIAL and STANDARD EDITIONS)

The putty would be overkill in this case. I don't think I would mess with it because you're gonna have to get matching paint, etc... Mine had spots on the dome as well. I think they all do. It was almost like a grease on mine. I just polished them away with a microfiber cloth. I don't believe the helmet is painted. If cloth alone doesn't work, try some Novus #2.

thanks! think i'll give the plastic polish a shot, just cloth doesn't help
 
So...I did it...I really hate this ugly boys on the side of the facemask...:D

26481323re.jpg


26481331qy.jpg


26481336bu.jpg


Now I can rework them or add some new casts of an other Vadermask I have.:)


@nate96:That is a bad crack at this area.If you wanna repair that that you cannot see it again,you must repair it and repaint the complete gunmetal areas.Or you find the right gray and spray it fine with a airbrush.But to find the 100% correct paint is really difficult.Remove the sidetube like I did so you can repair it without scratching other areas of the mask.
You can also glue it only and repaint the complete mask with the original brushed look.The ANH Vader has lots of dents and scratches so it should look good.;)

The dome you can easy polish with Novus 2 .I also had some very small defects on the dome that I removed with that magic stuff.
 

Attachments

  • 26481323re.jpg
    26481323re.jpg
    39.2 KB · Views: 114
  • 26481331qy.jpg
    26481331qy.jpg
    43.4 KB · Views: 144
  • 26481336bu.jpg
    26481336bu.jpg
    45.1 KB · Views: 1,135
Last edited by a moderator:
I managed to bump the edge of a ceiling fan with my EFX Vader PCR :(:cry

The edge of the shelf was closer to the fan than I realized.

Two medium scratches on the side of the dome.

Other than sanding and painting does anyone have any ideas of some type of polish type fix????

Thanks
 
So...I did it...I really hate this ugly boys on the side of the facemask...:D

http://up.picr.de/26481323re.jpg

http://up.picr.de/26481331qy.jpg

http://up.picr.de/26481336bu.jpg

Now I can rework them or add some new casts of an other Vadermask I have.:)


@nate96:That is a bad crack at this area.If you wanna repair that that you cannot see it again,you must repair it and repaint the complete gunmetal areas.Or you find the right gray and spray it fine with a airbrush.But to find the 100% correct paint is really difficult.Remove the sidetube like I did so you can repair it without scratching other areas of the mask.
You can also glue it only and repaint the complete mask with the original brushed look.The ANH Vader has lots of dents and scratches so it should look good.;)

The dome you can easy polish with Novus 2 .I also had some very small defects on the dome that I removed with that magic stuff.

Wow, are you saying the rivets just pull out? How hard was it?
 
Wow, are you saying the rivets just pull out? How hard was it?

If you have the first out you know how it works.You must turn them when you pull them out.
They are very hard in the holes...but not clued I would say.


Be careful that you don´t press the facemask too hard...the plastic on the neck is very thin.
 
They just prise out quite easily with a screwdriver.
I thought I was going to have to cut loads just to get started but it's going to be fine. Hurrah.

image.jpg


So exciting.
 
It will get filled with car filler after the tubes are finally glued back on.

I could try and do all this neatly and....
A. Just repaint the adjusted parts or,
B. Repaint the whole thing.

The answers always B.
 
Yeah looks great spacebob.But its a big gap on the right side now.Lots of putty you need!;)

And yes a complete repaint is a must do after the work with the tubes.I also will repaint mine after the upgrades.
 
When I first looked at this picture when I logged in I thought it was a strange spoon filled with aluminum dust that was about to be melted under a flame.... Then I went back and page are read from the beginning and it all makes sense now :$


image.jpg
 
What and how did you do to the side tubes?
Looks better.
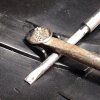
Well the stock side tubes are a hollow u shape so grinding and sanding them into a round is all thats needed. Because they no longer touch where they should after trimming, some gap filling adhesive or polyester filler is going to be used to glue them back on. After that the same old drill, fill, sand, fill, sand....
 
This thread is more than 4 years old.

Your message may be considered spam for the following reasons:

  1. This thread hasn't been active in some time. A new post in this thread might not contribute constructively to this discussion after so long.
If you wish to reply despite these issues, check the box below before replying.
Be aware that malicious compliance may result in more severe penalties.
Back
Top