so I started scratch building models.......(pic heavy)

RvanAken

Well-Known Member
I thought i could give it a try. I've been working with xps foam for some time now and always wanted to make a model castle so why not give it a try.

I've started my build a few days ago and it's, surprisingly, NOT a castle.

it is going to be a traditional Dutch sheep shed from the Island of Texel. I grew up on that island and those sheds both simple in shape and diverse in materials used.

i did a small test piece of a wall and a boardwalk made from xps foam to see how the technique I'm using gives realistic results.
http://www.therpf.com/showthread.php?t=245474

First some pics of the original shed which is called a schapenboet in the dialect spoken on Texel

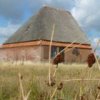
Schapenboet1 (1).jpg75064_429725693778806_132285541_n.jpgnationalebeeldbank_2009-7-319984-2_schapenboet.jpegSchapenboet.jpg

This will also be the first model I build using pictures as a base and getting all my measurements from them. A good practice for future projects using movie screenshots.

And this is what i've done so far

cutting the xps foam for the walls;
01.jpg

marking the stones on the foam:
02.jpg

Cutting and beveling the stone lines:
03.jpg

pushing in some stones to create a less smooth surface:
04.jpg

Black acrylic basecoat:
05.JPG

next will be painting the wall with a "wet"dry-brush to give the wall his final color and the weathering to make it realistic looking.

I'll try to make regular updates with pics as i go along.

thanks for reading.

-R-
 
That's pretty cool man. I was just checking out some Hirst arts moulds tonight for something like this. Great idea!
 
Next update.

first a thin coat of red. i didn't use the "wet dry-brush" technique I first planned. I used a spray can. that was really nerve wrecking because the paint cant dissolve the foam. but by using really light coats and trying to stay on the already painted, thus protected, foam it turned out great. The picture doesn't show it because op the flash but by spaying on a constant angel there is a nice shadow effect.
06.JPG

next step was a liberal dry-brush with pink. Again the flash makes the picture to light, got to start taking pictures in the day time i think.
07.JPG

Next thing I did tonight was a dry-brush with a light brownish yellow. I'm really getting near the right color for the wall. again, sorry for the flash
08.JPG

The flash makes this pictures really to bright to see the real color, but they do show what effect a few layers of dry-brushing can do.

Looking at the pictures I'm working from i still need some brown in the wall. I'm thinking of doing some local brown washes on different parts of the wall but i'm not sure yet. Maybe I should have picked out some stones in brown before the dry-brush. But hey, its my first "full sized" project and I like learning by doing.

-R-


p.s. Chaank, those Hirst arts moulds look really great. I wouldn't mind having a few, but I really don't have the spare money to get a them. That's why i'm going scratch build using stuff I've got lying around
 
Last edited by a moderator:
So, i gave the walls a light brown wash giving them a bit more depth. I tried to give the stonework a bit more colored stones but it didn't work so i gave the whole wall this wash. Next time i should give the stones the different colors in the basecoat as iI did my testpiece
09.JPG

I also started the woodwork. I used popsicle sticks for this so the real wood would show after a layer of green lacquer. I had some leftover lacquer from a restoration of a real schapenboet/sheep shed from a few years ago that was still good so I could call it "screen used" :D. i forgot to take pictures of making the wooden parts but here are two from the painting. Its still the first coat and not dry yet, not sure if i'll give them a second coat

11.JPG10.JPG

Till next time.

-R-
 
Again a little update. The lacquer dried pretty quick so I glued the woodwork on just before I went to bed and it's starting to look as a real building. Here are some pics made with a better camera.
13.JPG15.JPG16.JPG

I also cut the windows from some leftover 1mm thick plastic and gave them a basecoat of white. I've just painted them blue with some Humbrol enamel nr 14. I had a small unopened can i bought probably 15, possibly 20, years ago when I build simple model planes. i'l be highlighting them using a technique I read about a few years ago in the White Dwarf.
17.JPG

And i even remembered to number the windows so the four semi circle ones will have a perfect fit.

i'm getting there.

-R-
 
I've just finished the windows for this build. they came out a bit cartoony but that makes them recognisable as windows from a distance.
17.JPG

Still need to mount them and make the roof. I've got the roof tiles but still need to figure out how to make the thatched roof., any ideas how i can do that. I'm thinking of using fake fur and coating it with PVA glue to get the texture.

I hope to show some further progress soon.

-R-
 
This thread is more than 8 years old.

Your message may be considered spam for the following reasons:

  1. This thread hasn't been active in some time. A new post in this thread might not contribute constructively to this discussion after so long.
If you wish to reply despite these issues, check the box below before replying.
Be aware that malicious compliance may result in more severe penalties.
Back
Top