You are using an out of date browser. It may not display this or other websites correctly.
You should upgrade or use an alternative browser.
You should upgrade or use an alternative browser.
Molding the Entex Porsche
- Thread starter sjanish
- Start date
Bigturc
Sr Member
Brush some resin into the tight spots, assemble the mold and then pour. What pot-life you using?
Joe
Smooth cast has a 7 minutes pot life! That resin has no viscosity at all, almost water like!
Does anybody have a better way?
Maybe not a better way, but an alternative way, 2 actually. You could use hot glue instead of contact cement or CA, and again get it off with alcohol. The other method I've used when I can't glue directly to the part is to glue from above. It's kind of a pain, but if you run a piece of wood or plastic across the top of the mold near where you want the vents, then press your vent tubes/rods against the part and glue the top of the tube to the stick you won't harm the original part. I only use the second method when necessary because it's hard to get a good seal against the part and inevitably you have to trim away some silicone from where it got under the tube/rod. Not ideal but...
Al,
What model # you referring to? I need a thinner resin right about now!
Joe, it is Smooth Cast 305 from Smooth-On. It has a 7 minute pot life and low viscosity, pours nice. I tried Task 2 as well. Loved the toughness/strength, but it was about twice the viscosity and I just could not get a good enough flow into these molds,
hot glue and alcohol
I actually use hot glue quite a bit in this project, but I didn't know about the alcohol trick. I will definitely be trying that.
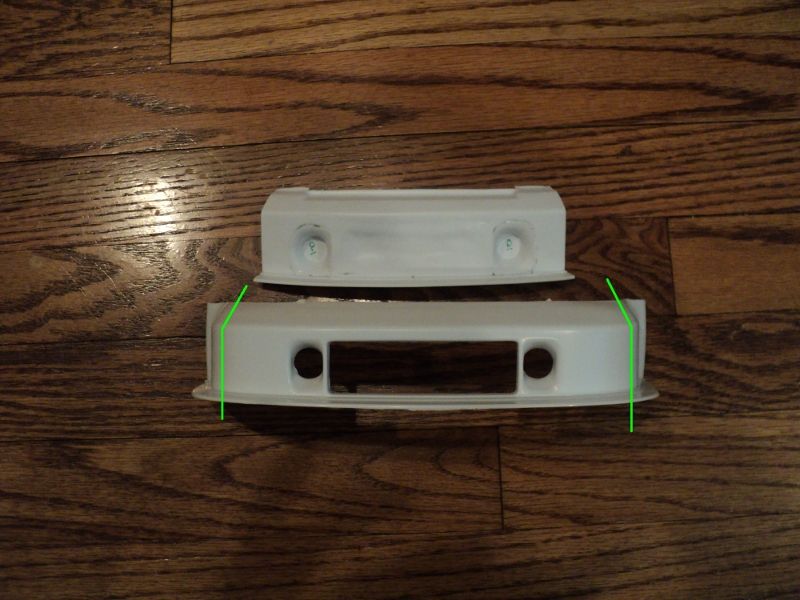
The front fenders created a whole new set of challenges. It was hard for me to get my mind around the negative space. I originally intended to do cavity pours like the rear fenders but the geometry of the part would require some fancy claying. Then I had a “duh” moment. I’m not making Entex front fenders, I making Slave I parts. The red line shows the approximate trim for Slave, the green is where I wanted my castings to go to ensure enough meat to trim down and align to the curve of the hull.

Sometime ago beaz posted a method for molding the Saturn V cans and F-4 Phantom engines for the X-wing. He used a brace system to support the silicone in the negative space. This creates natural pour space, great venting, and allows the second part of the mold to use much less RTV. Winner!
Here is what I came up with. If you look closely you will notice some mold features that show these did not turn out quite like I thought they would.
Clayed up master with styrene rod where support posts will go.

First part poured and clay removed.

It turns out one of my support posts was in a location that would not work (oops). Luckily I had intended to use three supports, I can make due with two. Here are the molds with supports.


Second part poured.

Here is what you do when your math goes bad and you mix up way too much silicone. Panic! :wacko Grab something, anything you can pour silicone over. Preferably something you want to make castings of. I grabbed the AMT C600 rails for the AT-ST. The pour time on the RTV after vac degassing and pouring the fenders was quickly running out. I didn’t even had time to figure out which was the correct rail needed for the AT-ST. Create a quick clay dam and stick in some styrene rod for keys. To be continued…

Back to the Entex fenders, master part removed. The support structure keeps the second part of the mold where it should be.

Castings.


Sometime ago beaz posted a method for molding the Saturn V cans and F-4 Phantom engines for the X-wing. He used a brace system to support the silicone in the negative space. This creates natural pour space, great venting, and allows the second part of the mold to use much less RTV. Winner!
Here is what I came up with. If you look closely you will notice some mold features that show these did not turn out quite like I thought they would.
Clayed up master with styrene rod where support posts will go.
First part poured and clay removed.
It turns out one of my support posts was in a location that would not work (oops). Luckily I had intended to use three supports, I can make due with two. Here are the molds with supports.
Second part poured.
Here is what you do when your math goes bad and you mix up way too much silicone. Panic! :wacko Grab something, anything you can pour silicone over. Preferably something you want to make castings of. I grabbed the AMT C600 rails for the AT-ST. The pour time on the RTV after vac degassing and pouring the fenders was quickly running out. I didn’t even had time to figure out which was the correct rail needed for the AT-ST. Create a quick clay dam and stick in some styrene rod for keys. To be continued…
Back to the Entex fenders, master part removed. The support structure keeps the second part of the mold where it should be.
Castings.
Last edited:
MonsieurTox
Master Member
Here is what you do when your math goes bad and you mix up way too much silicone. Panic! :wacko Grab something, anything you can pour silicone over. Preferably something you want to make castings of. I grabbed the AMT C600 rails for the AT-ST. The pour time on the RTV after vac degassing and pouring the fenders was quickly running out. I didn’t even had time to figure out which was the correct rail needed for the AT-ST. Create a quick clay dam and stick in some styrene rod for keys. To be continued…
http://i1059.photobucket.com/albums/t430/silentj1/Slave I/Mold Porsche/DSC05326_zpsjky0ridn.jpg
Haha love that !
") It happens everytime to me !
It happens everytime to me ! Great castings.
Great to see your takes! Nice idea with the supports for the last mold.
Maybe now replace the top mold part with a new rubber pull?
Cut down the support piles and you get a mor traditionel mold with less fuzz while casting (if you arre after more at least...)
Thanks.
I don't know that I understand what you mean about doing another top rubber part. Fuzz? Like the flashing that leaks between the two mold parts? I do wish it that wouldn't happen, but doing another rubber pour means I would have to order more rubber.
Why cut down the support piles? I don't understand how that would affect things. I am intrigued with your feedback, but I can't cut them down. I super glued the nut on the underside to make sure it wouldn't move so I could always get the placement correct.
struschie
Active Member
No native speaker and thinking too complucated doesn't help again, I think ;D
My idea was to use a cleaned up cast instead of the original part. Pit it in mold part one and pour a second, than closed mold lid.
But if there's no rubber in spare, the finished solution is best and cheapest
My idea was to use a cleaned up cast instead of the original part. Pit it in mold part one and pour a second, than closed mold lid.
But if there's no rubber in spare, the finished solution is best and cheapest
Thanks. I normally try to mix a bit extra rtv. With resin I normally have an overflow mold ready for any extra. I never did figure out how I went wrong and had that much extra. I rechecked my math and it was good at 10:1. I must have misread the measuring cup of plastic beads.
No native speaker and thinking too complucated doesn't help again, I think ;D
My idea was to use a cleaned up cast instead of the original part. Pit it in mold part one and pour a second, than closed mold lid.
But if there's no rubber in spare, the finished solution is best and cheapest
Your English is better than my German! The front fender molds work really good as is, I'm not going to mess with a good thing.
The bumper… At this point in the project I am running into several problems. I have a deadline of sorts, I am getting sick of the project, and I am running low on RTV. Curse that waste on the front fenders.
Big parts of the ends get chopped away for the Slave part, but I don’t want to do that to the master.
I used clay to “chop” off the extra parts of the bumper in order to conserve silicone.
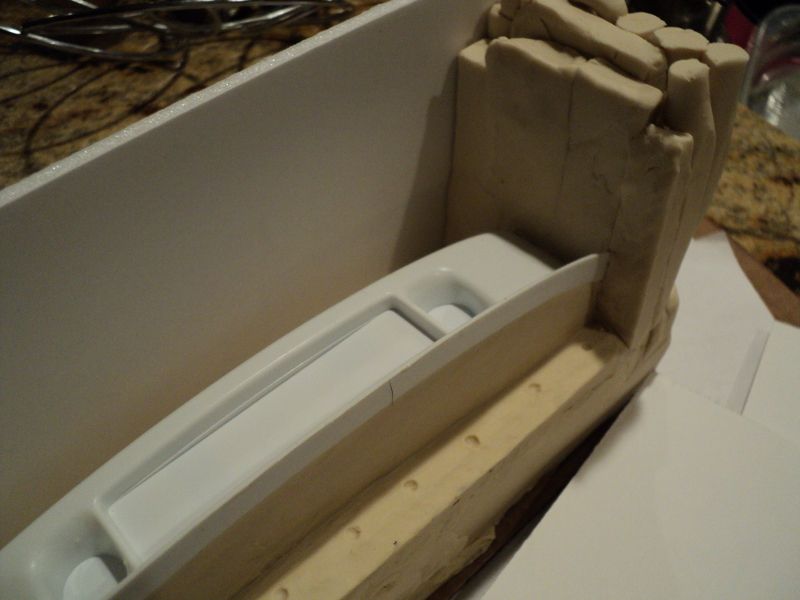
Here is the finished mold.
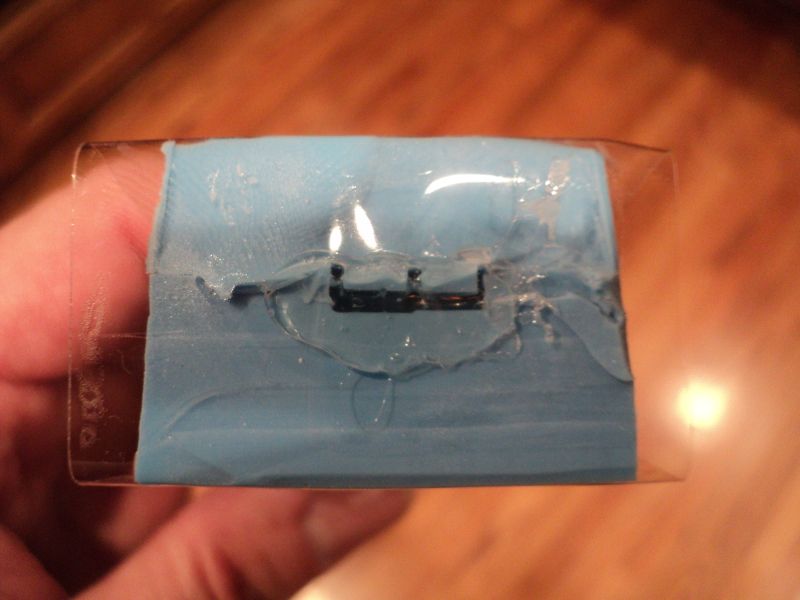
The edges need to be plugged up. I use a combination of hot glue and packing tape to plug up the sides. The hot glue make a pretty good seal if I glob it on thick and then press the tape into the still hot glue. Then I smear another layer of glue over the bottom edge of the tape.
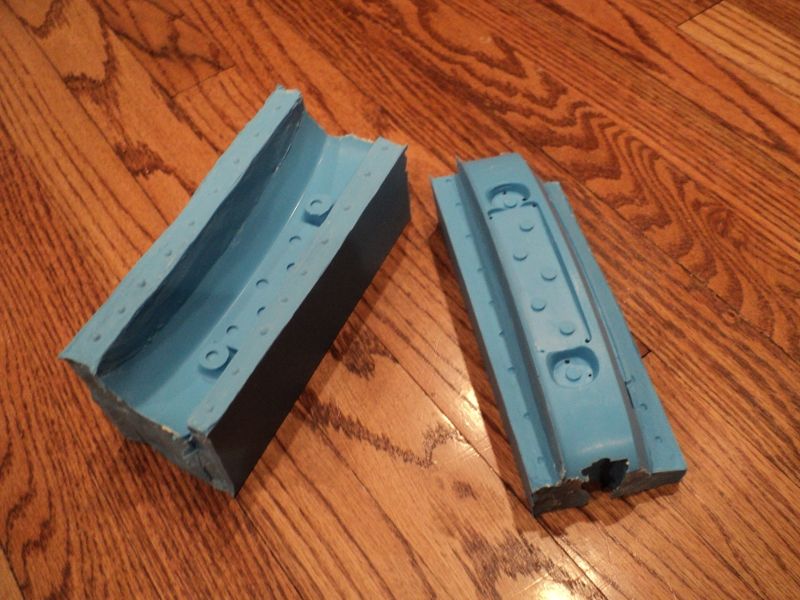
This is the mold that is going to wear out the quickest. I made a mistake in my “negative” thinking and have a thin flap of rtv that is not going to hold up well. The castings will require some attention to remove extra resin.
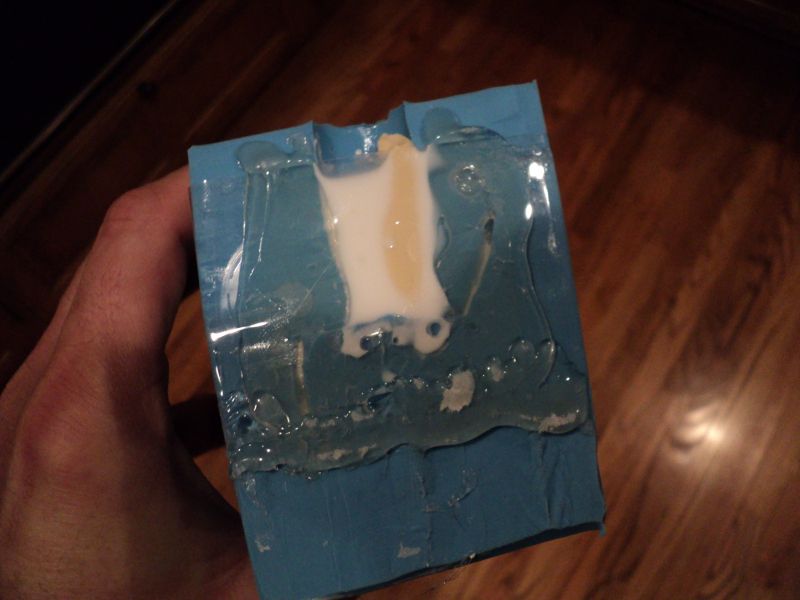
Castings.

Big parts of the ends get chopped away for the Slave part, but I don’t want to do that to the master.
I used clay to “chop” off the extra parts of the bumper in order to conserve silicone.
Here is the finished mold.
The edges need to be plugged up. I use a combination of hot glue and packing tape to plug up the sides. The hot glue make a pretty good seal if I glob it on thick and then press the tape into the still hot glue. Then I smear another layer of glue over the bottom edge of the tape.
This is the mold that is going to wear out the quickest. I made a mistake in my “negative” thinking and have a thin flap of rtv that is not going to hold up well. The castings will require some attention to remove extra resin.
Castings.
Interesting !
I always thought too much heat isn't good for the rubber. But again: You could make another mold from the shortend cast if you needed more and had unlimited rubber - lol
I think the rubber can take the heat. The instructions recommend a post cure in the oven at 200 degrees to "improve" performance...or something. I did it to one of my first molds and there was very noticeable shrinkage. Still, the glue doesn't seem to damage the mold at all.
After I finished with all of the body parts I still had enough RTV to finish up the C600 rail. After figuring out which rail I really need I cut away the other. The attempt at placing the styrene rod for keys was a waste so I cut some keys into the silicone.
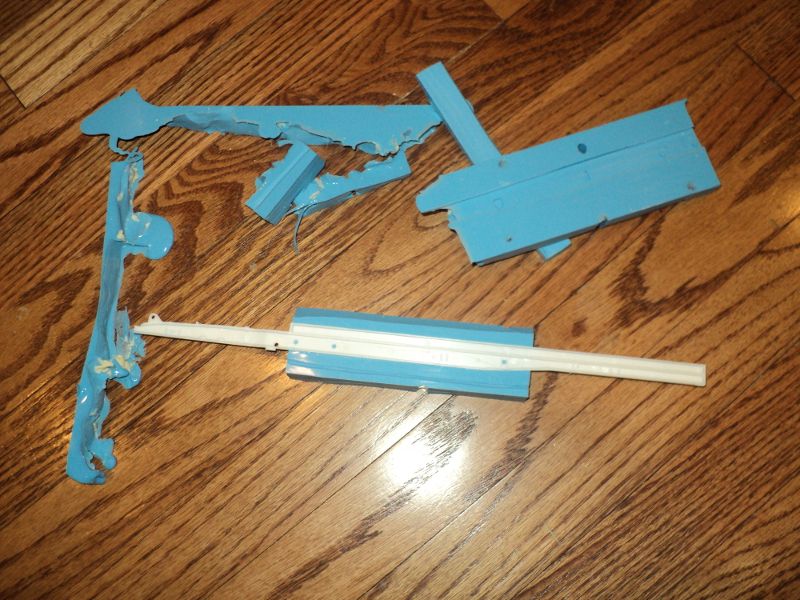
Mold box of foam core and clay.

Plug up the bottom with hot glue and tape.
The castings come out good. Yeah, no need to buy another C600!

Mold box of foam core and clay.
Plug up the bottom with hot glue and tape.
The castings come out good. Yeah, no need to buy another C600!
Contec
Master Member
sjanish I don't know if you do this already, but save all of the silicone you cut away, and any old mold that you not going to use anymore and get yourself a old Cast iron meat grinder , Its importent that it is a cast iron because the newer ones will break. Then you just cut the silicone into smaller pieces and put them into the meat grinder. What you get is small pieces of silicone that you can use to fill up the mold with a smaller batch of new silicone. Just make a Beauty coat on the thing you are molding first so you don't get bubbles.
The new/old mold will be a little harder to bend but will work perfecly fine.
The new/old mold will be a little harder to bend but will work perfecly fine.
Last edited by a moderator:
@sjanish I don't know if you do this already, but save all of the silicone you cut away, and any old mold that you not going to use anymore and get yourself a old Cast iron meat grinder , Its importent that it is a cast iron because the newer ones will break. Then you just cut the silicone into smaller pieces and put them into the meat grinder. What you get is small pieces of silicone that you can use to fill up the mold with a smaller batch of new silicone. Just make a Beauty coat on the thing you are molding first so you don't get bubbles.
The new/old mold will be a little harder to bend but will work perfecly fine.
I keep meaning to try this. I have also heard you can use a coffee grinder to chop up the silicone. I currently have an old blender that I plan on trying.
And make sure any and all release or you end up with a mess like I did! Bad mistake! It did cure but a week later! Lol!
??
I think you left out some words Joe.