DmsdyMachn
New Member
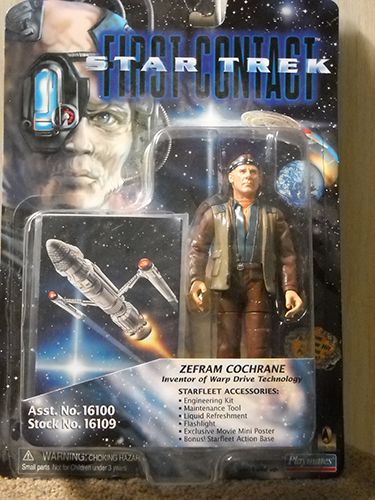
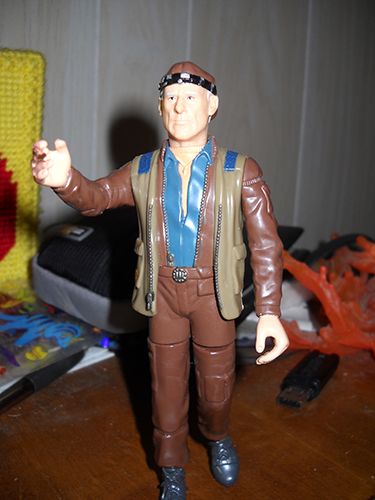
So my wife and I decided to go through and watch Enterprise again. Always being on the lookout for a simple prop to build, Captain Archer's Zefram Cochrane statue caught my eye. My first thought was using the 9" action figure, but there was only 2 problems with that: that figure has fabric clothing (and I've never sculpted anything before), and I don't know where the hell it is. But I had a good idea where to find my old 6" figure. A little digging through storage, and boom.
First order of business after opening him up was getting the basic stance down. The real thing looks like this-

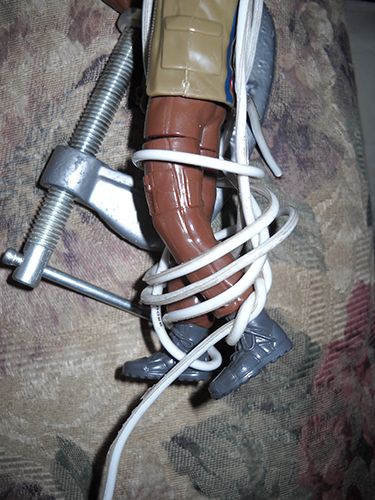
and the action figure is straight-legged with some really stupid articulation points (my wife K jokingly commented that a 360° rotation mid-thigh was completely new to her). Not wanting to jump in hacking and slashing, I took the old heat gun to the left leg and right arm. I bent the leg back to what looked right, then held it in place using a piece of wire I had lying around tied to his foot and looping it around his body. For the right arm, I heated it up and stuck it in a small c-clamp. I let the whole deal sit in the fridge overnight to rush the cooling process.
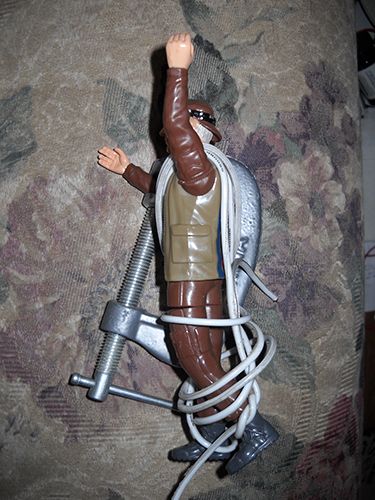
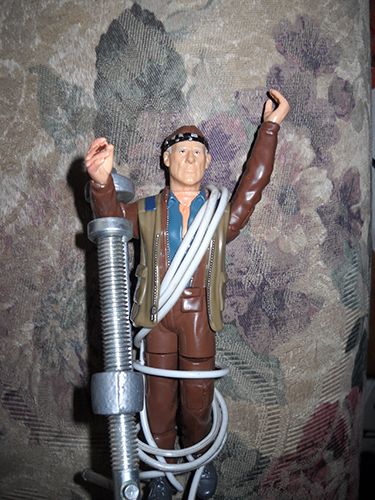
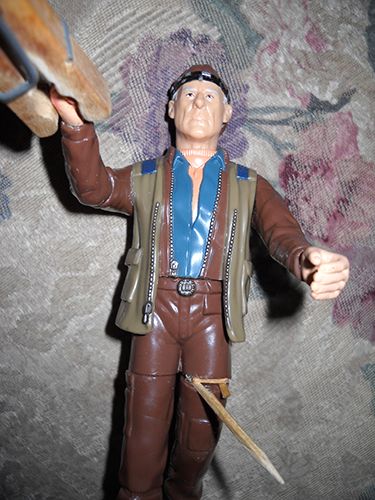
The next day, after taking off the inadvertant torture gear, this is what I had--

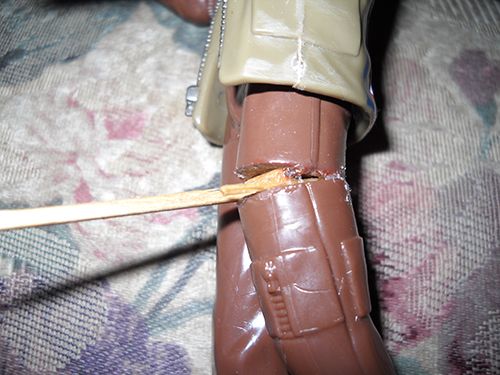
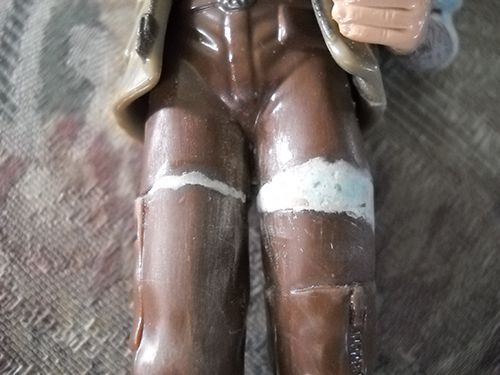
To make sure the leg stayed in position, I used some some toothpick pieces as makeshift shims in the gap left by the awesome rotator joint.
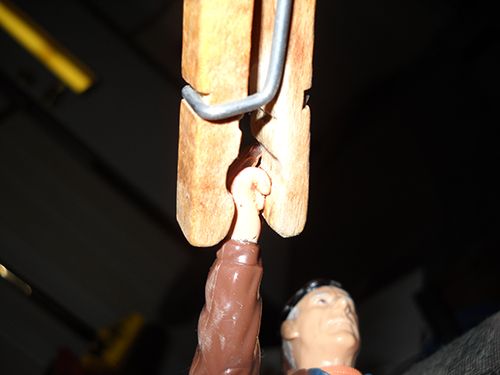
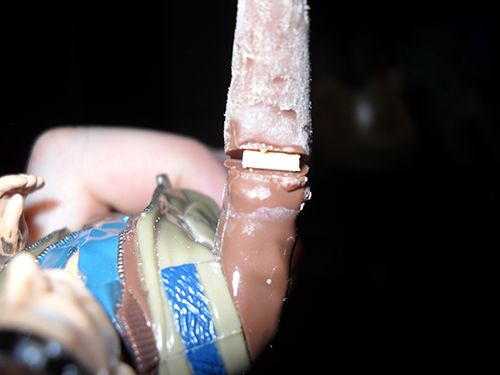
For the right hand "reaching out to the future," I split the fingers with an X-acto blade, super-glued the ring and pinky down, using a clothespin to hold 'em down until the glue dried.
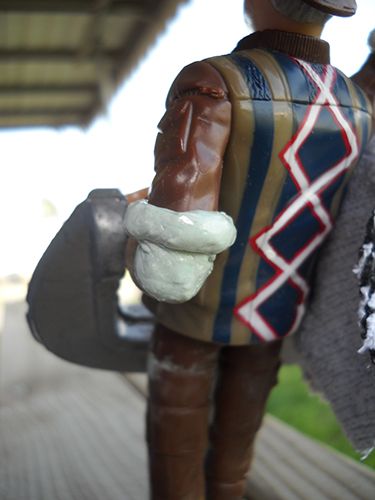
I filled in the gaps with some two-part epoxyish stuff I had laying around from an Ecto-Goggle project. I forgot to take pictures of that step until about 5 minutes ago (and after I had 'em sanded), but this is what it looks like now-
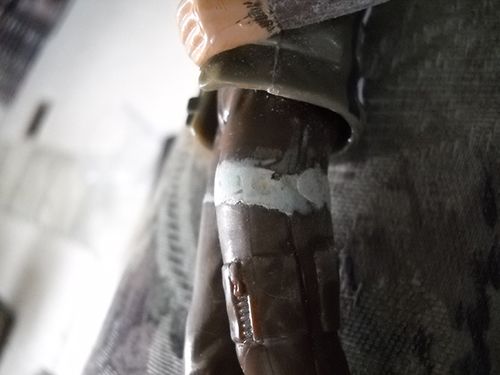
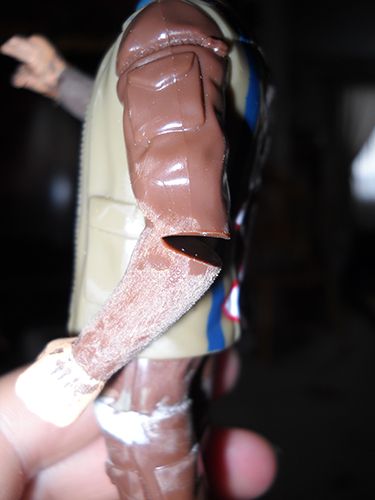
Unfortunately, I went a little overboard on the shimming and though it looks good, he won't stand on his own at this point. Nothing a little heat gun time won't fix. Also unfortunately, the bend job on the right arm didn't take, and it went back to the almost 90° angle it was. So I sliced it at the elbow about 2/3rds of the way through, opened it to what looked to me to be the correct position, and toothpick-shimmed it.
For the left arm, I also sliced it at the elbow. For the extreme angle it needed, I had to make a bigger shim. I just cut a board at the corner, glued it in, then hit it with a dremel so none of it would stick out past the epoxy.
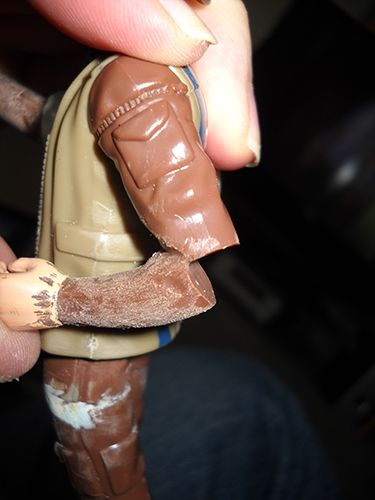
I filled in the gaps on both arms with the epoxy, sanded down the sleeves that were molded on the figure, and used the epoxy to make rolled-up cuffs like are on the original.
On mine, the left arm sleeve is rolled right above the elbow, where the original's is right below the elbow. I think it'll look alright though.
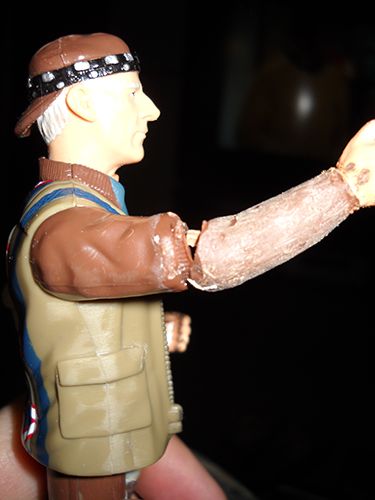
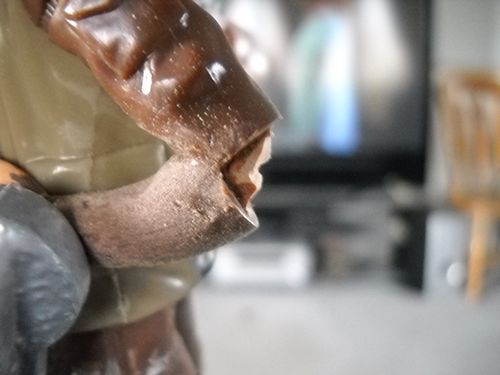
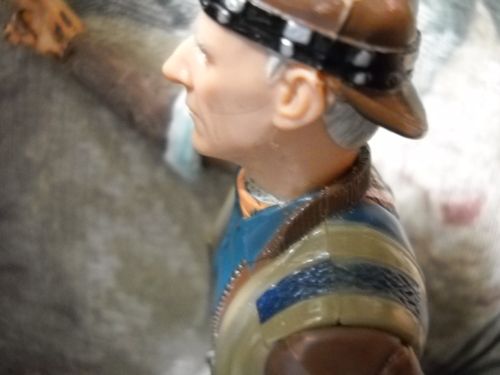
The real statue also had the head positioned slightly up, looking along his right arm. So I shimmed his head up just a hair. More toothpicks, but I trimmed 'em down to half their thickness, or a little under. Unfortunately, it was just enough that you could see the gap between the neck and the body. So I mixed a small amount of the epoxy putty and used another toothpick to push it in. It was just enough to fill the gap, and the paint should cover it perfectly.
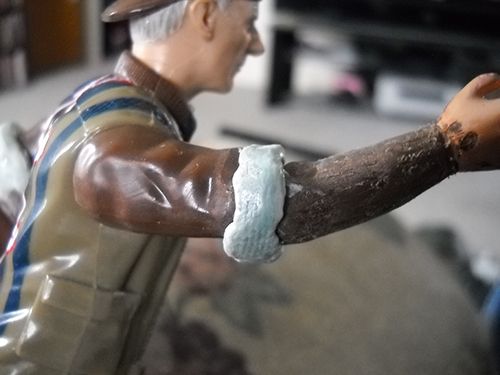
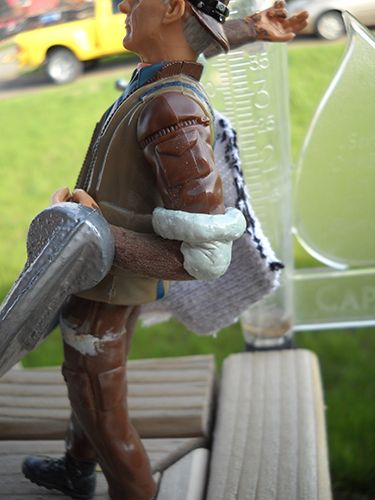
This is where I'm at at the moment-
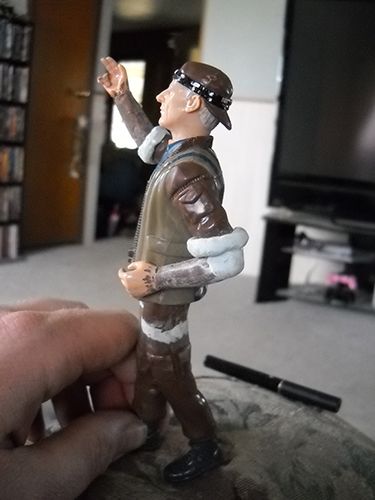
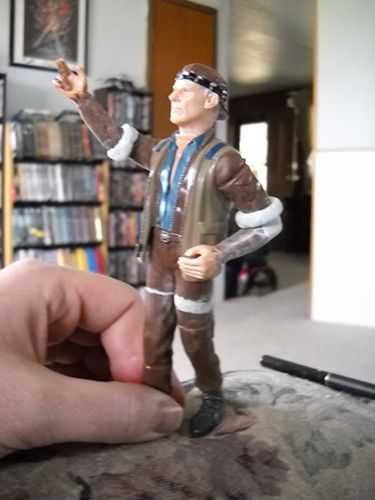
So far so good, I think. And I'll update it as I finish, which should be this week. All I have to do is massage his left leg back a hair more so he'll stand, close up his left fist, make some scrolls, figure out a base, and paint.
I know it's nothing terribly exciting, but it'll be my first finished prop, and it's been done totally with stuff I've had already.
Let me know what you guys think.")

First order of business after opening him up was getting the basic stance down. The real thing looks like this-

and the action figure is straight-legged with some really stupid articulation points (my wife K jokingly commented that a 360° rotation mid-thigh was completely new to her). Not wanting to jump in hacking and slashing, I took the old heat gun to the left leg and right arm. I bent the leg back to what looked right, then held it in place using a piece of wire I had lying around tied to his foot and looping it around his body. For the right arm, I heated it up and stuck it in a small c-clamp. I let the whole deal sit in the fridge overnight to rush the cooling process.


The next day, after taking off the inadvertant torture gear, this is what I had--


To make sure the leg stayed in position, I used some some toothpick pieces as makeshift shims in the gap left by the awesome rotator joint.

For the right hand "reaching out to the future," I split the fingers with an X-acto blade, super-glued the ring and pinky down, using a clothespin to hold 'em down until the glue dried.


I filled in the gaps with some two-part epoxyish stuff I had laying around from an Ecto-Goggle project. I forgot to take pictures of that step until about 5 minutes ago (and after I had 'em sanded), but this is what it looks like now-


Unfortunately, I went a little overboard on the shimming and though it looks good, he won't stand on his own at this point. Nothing a little heat gun time won't fix. Also unfortunately, the bend job on the right arm didn't take, and it went back to the almost 90° angle it was. So I sliced it at the elbow about 2/3rds of the way through, opened it to what looked to me to be the correct position, and toothpick-shimmed it.


For the left arm, I also sliced it at the elbow. For the extreme angle it needed, I had to make a bigger shim. I just cut a board at the corner, glued it in, then hit it with a dremel so none of it would stick out past the epoxy.


I filled in the gaps on both arms with the epoxy, sanded down the sleeves that were molded on the figure, and used the epoxy to make rolled-up cuffs like are on the original.


On mine, the left arm sleeve is rolled right above the elbow, where the original's is right below the elbow. I think it'll look alright though.
The real statue also had the head positioned slightly up, looking along his right arm. So I shimmed his head up just a hair. More toothpicks, but I trimmed 'em down to half their thickness, or a little under. Unfortunately, it was just enough that you could see the gap between the neck and the body. So I mixed a small amount of the epoxy putty and used another toothpick to push it in. It was just enough to fill the gap, and the paint should cover it perfectly.

This is where I'm at at the moment-


So far so good, I think. And I'll update it as I finish, which should be this week. All I have to do is massage his left leg back a hair more so he'll stand, close up his left fist, make some scrolls, figure out a base, and paint.
I know it's nothing terribly exciting, but it'll be my first finished prop, and it's been done totally with stuff I've had already.
Let me know what you guys think.