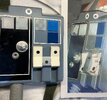
While going through my attic, I came across my old X-Wing Chest box which has been in need of repair for at least the last 10 years, so I decided to take it out of storage and add it to my long list of personal projects. I'm hopeful that this will be a quick repair job, only needing to replace a few missing squares. As usual, it turns out to become more involved.
One thing interesting to note about this particular chest box is that it's seen some action. It's survived numerous trips to San Diego's Comicon and Star Wars Celebrations. A one day shoot for the film, Fan Boys. I even wore it to a commercial shoot for T-Mobile at Culver City Studios. After that event, I swore I'd try to make my new X-Wing costume as accurate as possible, so I wouldn't disappoint the fans.
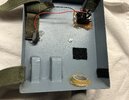
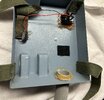
While examining the box, I noticed my bad wiring job in the flip side:
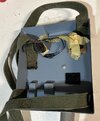
I did this during my early days of soldering, having had far more experience sewing and designing costume patterns. After seeing someone light up an entire chest box (All of the squares were cut out and lit from behind as one piece), my original thought was to install push button light switches for each square, having found some nice, square switches at a local surplus store. Unfortunately, after installing the first switch, I realized that the amount of time involved just wasn't worth it, so I settled on just the one switch. After trooping a few events, it became apparent that the switch wasn't necessary, any way.
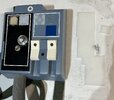
The biggest problem with the old, push button switch setup is that the electrical tape used left a sticky residue all over the wires. It would be too much work to clean them up, so I simply removed the entire wire assembly and replaced it with a new, 9 volt wire attachment. The masking tape was removed from the switch, along with the foil attached to one side of the switch. The foil was replaced with a single piece of wire, attaching both connectors. The other two connectors were soldered to the 9 volt battery wire. Two, large pieces of heat wrap were added for heating later:
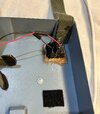
The switch was tested with a new battery to make sure that the connections were good.
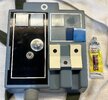
Two more large pieces of heat wrap were added to the other two connectors or terminals for some added protection to the wearer. I used a heat gun to shrink the wrap. The velcro near the bottom was starting to come off, so I used a small piece of 220 gritt to lightly sand the inside of the chest box and the inside of the velcro before applying a little connect cement and a clamp to hold the velcro in place:
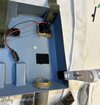
I leave it to dry overnight.
Up next, installing the new squares.

