Tony Stark Costume: Lab Outfit

Got me a pair of fly kicks!

3e908f55-0268-4bd0-a289-da415e78685c.jpg


On to the thighs!

Those look SICK. Congrats. And I'm in agreement on the gold-y color. I immediately thought of Lexus/Mercedes.

Can I see what you did with the soles on the side? Can't really tell if u covered them with foam or...?
 
You can kinda see in the first pic of my first shoe. I'll take better photos later. The foam armor just fits on top of the shoe, it doesn't go underneath the sole. THough i'll probably run a velcro strap under the instep to keep it secure in place for walking. don't want em flopping around!

Got a question for everyone out there...has anybody every built armor onto an existing pair of boots? Like just glue the pepped pieces to a pair of rain boots? It would be great if you could just slip them on and off and not have to worry about the armor moving around.
 
That's what I did for my clone trooper boots back in the day, and its what I'll do here. I used Foamies for the clone boots, with some extra greeblies. They looked OK.
I'll put more work into these.
 
So i haven't had alot of time lately to work on my costume. I've outsourced the shirt, the gloves, and the arc reactor.

But on the calves and forearms, i'm kinda lost. How are people building costumes to take on and off? I realized that I want the legs and forearms to fit kinda snug so they don't look oversized on me, but I also have to make room to fit my foot through the calf piece, and my hand through the wrist piece.

The only thing i can think of is to build them and then some how separate them into modular pieces that can be locked together around my body. Anybody got any advice or solutions for fitment?
 
Here's what ive been doing. Rather than build out like most people, i wanted to make sure the costume would fit ME. So, i took some duct tape and had my girlfriend wrap my calf and foot. Cut it off my leg, filled it with newspaper and closed it back up, giving me a good representation of my actual leg.

57AD5C47-1381-41D3-9F08-48FDC4C06E2F-2741-00000183F84C735B.jpg


Then i've been modifiying the pieces of the pep by hand, measuring to fit my leg, and trimming until it's a snug but comfortable fit. it's easier than trying to slip it over my own leg over and over.

91780E96-875A-48E4-9C09-BC7BCC334E82-2741-000001840C403255.jpg


Here you can see one part of the leg. I want to slide this part around the widest part of my calf. I need to attach the silver piece that's inset between the front and back of the calf.

5D3E2313-0BA1-438C-8595-A1E5CC08697C-2741-0000018413041E55.jpg


My idea is that the front of the leg and the silver inset piece will be a single shin-guard sized piece, and the back half of the calf can attach to the back, thus locking snugly around my leg. I can't do it all as one piece because my heel would not be able to fit through the hole at the ankle.

135992D7-83E9-47F9-A230-3AE8FD66EC7A-2741-000001841A496504.jpg


Anybody got any helpful ideas on how the fit their costumes?
 
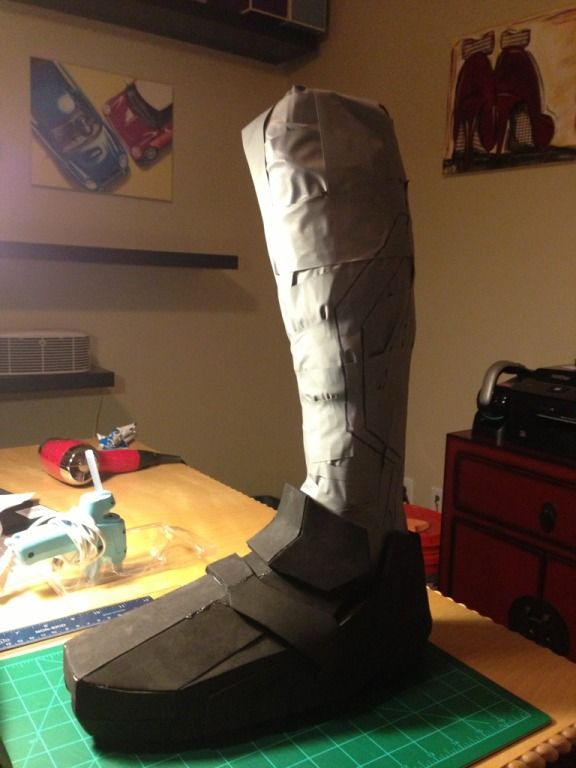
So i've taken a break from foam to work on lights. My gloves from docholiday will be here soon, so i need to figure out how to light the palms. Tight budget for this project, so I went to dollar general and found this:

0C1172B8-EA9E-4991-A512-7C0E37E3923F-10728-000005E1BFAC8D1A.jpg


Just cost $1 so no worries if I screw it up. And i bought a pair of them.

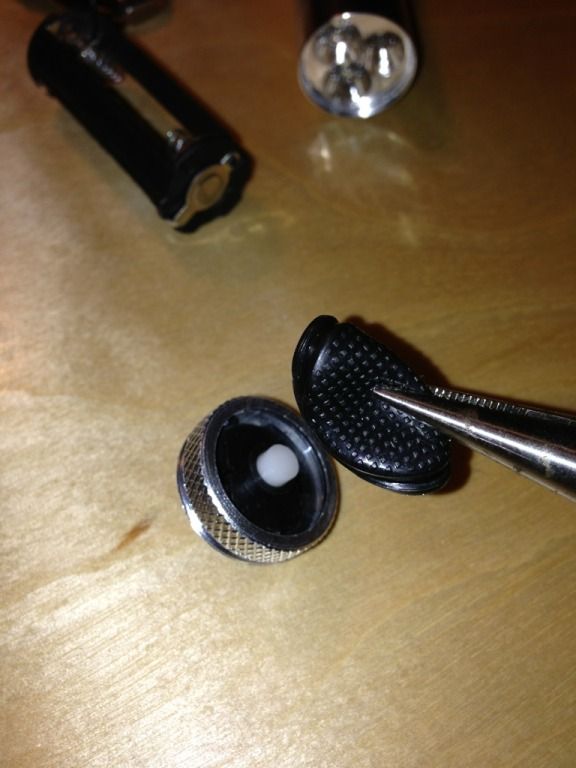
Next i started disassembly. It takes 3 AAA batteries, but they fit in a compact little housing, which will be easy to conceal. There was also a push button switch that I'll use because it's very small.

The switch is under a rubber cover:

3CFD25CE-18A1-4C26-B6FC-9BD923415AC2-10728-000005E1CBCE93C2.jpg


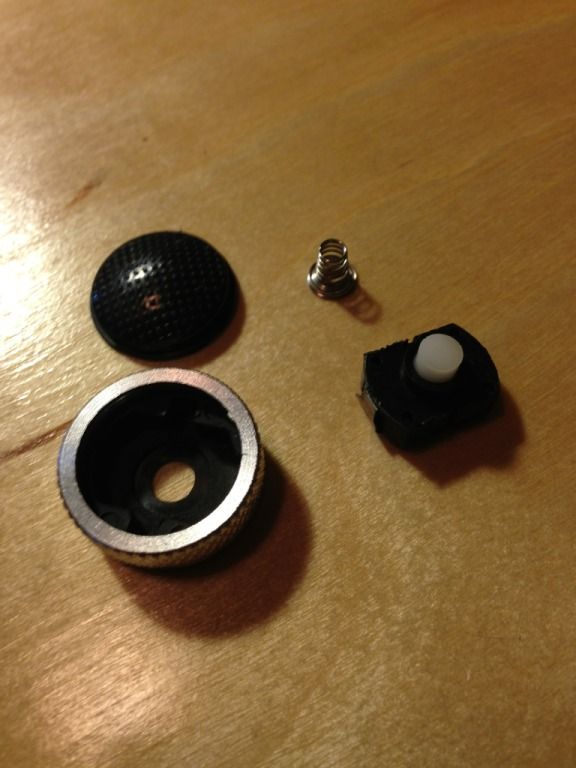
Disassembled further, the switch is very tiny:

C45EDAD5-B6CF-4423-B049-41AEFF3BC271-10728-000005E1D8A8CB41.jpg


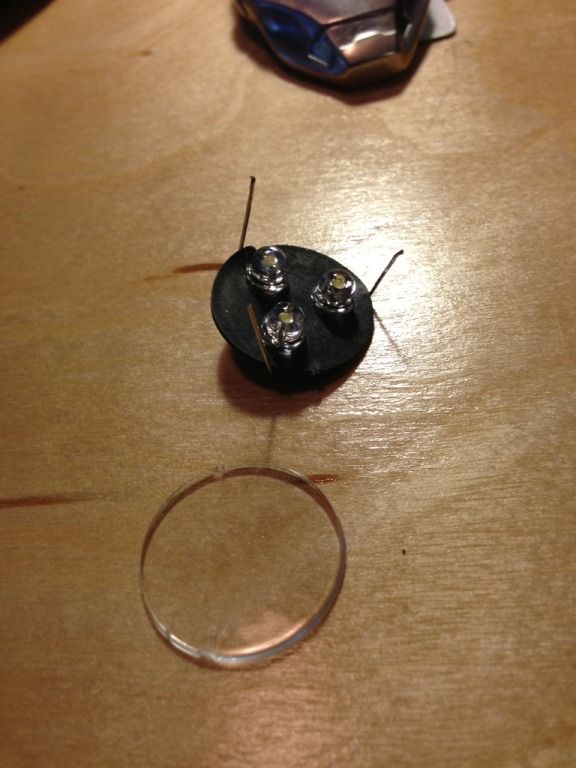
Now for the light. The flashlight is just a thin metal tube, with a clear plastic disc over the light housing. I took a pair of plyers and pried back enough of the housing lip to get the plastic out of the way:

AF49C7B7-AB50-45A4-B735-88513498D394-10728-000005E1E469A959.jpg


Then i just pushed the light housing until it fell out of the tube:

DF4DAC1C-E924-4AAD-A864-512AFDC15240-10728-000005E1EA4D242B.jpg


And the LEDs are actually not attched to the reflector, which is great because it's very compact.

2A3C3CEE-FE6A-40F8-AA2F-56D27D1EDC3D-10728-000005E1F065F09D.jpg


The wires sticking up are the negative terminals of the leds, so i'll need to wire those together to light all 3. My plan is to learn how to solder, then wire the positive leads to one end of the battery pack, the negative leads to the push button switch, then the switch to the negative end of the battery pack. This should allow me to place the switch wherever I want, and the battery in my gauntlet.
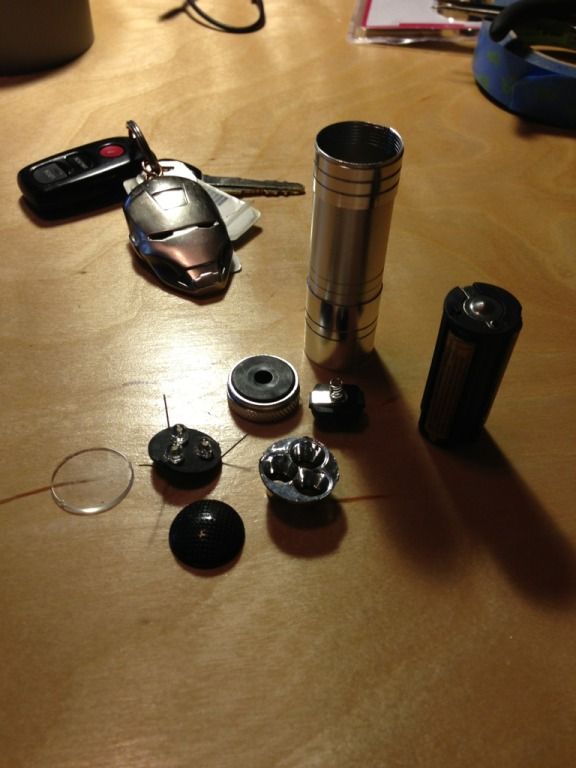
Fully disassembled.

B1915AAE-D7D5-40AB-BAC6-DF344A58CAA0-10728-000005E1F5D0EC88.jpg


Hopefully this works out! Best part is, if i screw up, a new light is just a dollar away!
 
Did my first gauntlet last night. I'm ok with the results. I'm going to work on the right arm tonight and try to be slower with my seam gluing. The round gauntlet really wants to come apart as you're working on it, so I think i just need to have more patience in order to get tighter seams. If i get a much better right arm, i'll probably re-do this one.

0CB2B00E-D79F-460C-84A5-A863EA2E8B47-14222-00000815E6E317C2.jpg
 
Looking good so far sir! Following this thread closely, as I'm working on the same outfit. Question for you, what foam are you using? It doesn't appear to be the same EVA rolls of foam that I usually see.

Aeric
 
01401405-AA60-41DA-AC0F-61B9B088776F-14222-00000821357B0868.jpg


It's a 6mm foam from Michael's craft store. it comes in 9x12 sheets you buy individually for about $1 each. The brand is Creatology, you'll find it with the sheets of their craft felt and foamie craft stuff. They have it in a bunch of colors, and they also have 12x18 sheets of 3mm foam if you want to go thinner. I bought a ton of it, and this gauntlet only took about 2 1/2 sheets to build. It's good stuff to work with.
 
Wow, perfect! Really appreciate the info. One more question if you don't mind. Which foam templates are you using, gaiatron's or ironmaided's? Tryingto figure out which one would be easier to tackle.

Aeric
 
Gaiatron's. This forearm is actually a pretty simple design, there's really only about 12 pieces to put together.

I actually don't own a PC, so i had to use my girlfriends work laptop to get the Pep designer and convert the files to PDF so i could view them on my mac. I brought the pdf into my design program and sized them down to 90% of the original size (i've got skinny arms) and this forearm is a good fit for me.
 
That's the same foam I used for my Mk VI. I love them, I got a few looks/comments from the cashiers at Michaels when I walked up with like 20+ sheets at a time though lol
 
My fiance' created the White Power Ranger Chest piece with those foam sheets.
Its amazing how versatile those foamy sheets are!

Feet are coming out nicely. How will you end up doing the glasses piece?
 
I'm debating whether or not to do the headpiece. It's cool, but it will get in the way of me watching the movie...this is a premiere night costume.

If I have time between now and the movie, i may tackle that project, but between the shirt, the arc, the gloves, gauntlets and boots, i think it will be a pretty complete look. I guess I could hack up a hand's free headset, or headphones as a base?
 
85B73F68-49C4-41AC-8024-F2D04ADA3618-14849-00000851B08B37FB.jpg


Gauntlets are built. The right one came out much better than my first attempt with the left. I took my time and did the longer lines of glue in smaller sections, rather than one long bead. That led to much better, tighter join lines. So I actually may go back and redo the left one. Better seams now will just mean less filling and sanding later, and it only takes a few hours to construct.

I'm not sure if the upper sleeve part is supposed to be glued to the gauntlet or not. It sort of inserts inside the main body of the gauntlet, and if they're not glued together, it allows the gauntlet to move with my hand, while the upper piece stays in place. I think it looks kind of cool in motion, like sections of real armor. So i'll decide what to do about it later.

Guess I'll go back to my boots now.
 
I think the upper part is connected to the bicep so that the lower part can swivel with your wrist.
 
That makes sense, thanks. right now that upper part is pretty snug against my forearm, and like you said, it lets the lower part swivel with the wrist.

I'm thinking i'm going to remake the shoes. Looking at photos and other peoples builds, I think i built them incorrectly. I think they should have a much steeper incline on the top of the foot to meet the calf piece in a more continuous, graceful line. Mine just look like boat shoes or something.
 
Last edited:
Back
Top